- Kivy - Home
- Kivy Basics
- Kivy - Getting Started
- Kivy - Installation
- Kivy - Architecture
- Kivy - File Syntax
- Kivy - Applications
- Kivy - Hello World
- Kivy - App Life Cycle
- Kivy - Events
- Kivy - Properties
- Kivy - Inputs
- Kivy - Behaviors
- Kivy Buttons
- Kivy - Buttons
- Kivy - Button Events
- Kivy - Button Colors
- Kivy - Button Size
- Kivy - Button Position
- Kivy - Round Buttons
- Kivy - Disabled Buttons
- Kivy - Image Button
- Kivy Widgets
- Kivy - Widgets
- Kivy - Label
- Kivy - Text Input
- Kivy - Canvas
- Kivy - Line
- Kivy - Checkbox
- Kivy - Dropdown List
- Kivy - Windows
- Kivy - ScrollView
- Kivy - Carousel
- Kivy - Slider
- Kivy - Images
- Kivy - Popup
- Kivy - Switch
- Kivy - Spinner
- Kivy - Splitter
- Kivy - Progress Bar
- Kivy - Bubble
- Kivy - Tabbed Panel
- Kivy - Scatter
- Kivy - Accordion
- Kivy - File Chooser
- Kivy - Color Picker
- Kivy - Code Input
- Kivy - Modal View
- Kivy - Toggle Button
- Kivy - Camera
- Kivy - Tree View
- Kivy - reStructuredText
- Kivy - Action Bar
- Kivy - Video Player
- Kivy - Stencil View
- Kivy - VKeyboard
- Kivy - Touch Ripple
- Kivy - Audio
- Kivy - Videos
- Kivy - Spelling
- Kivy - Effects
- Kivy - Input Recorder
- Kivy - OpenGL
- Kivy - Text
- Kivy - Text Markup
- Kivy - Settings
- Kivy Layouts
- Kivy - Layouts
- Kivy - Float Layout
- Kivy - Grid Layouts
- Kivy - Box Layouts
- Kivy - Stack Layout
- Kivy - Anchor Layout
- Kivy - Relative Layout
- Kivy - Page Layout
- Kivy - Recycle Layout
- Kivy - Layouts in Layouts
- Kivy Advanced Concepts
- Kivy - Configuration Object
- Kivy - Atlas
- Kivy - Data Loader
- Kivy - Cache Manager
- Kivy - Console
- Kivy - Animation
- Kivy - Multistroke
- Kivy - Clock
- Kivy - SVGs
- Kivy - UrlRequest
- Kivy - Clipboard
- Kivy - Factory
- Kivy - Gesture
- Kivy - Language
- Kivy - Graphics
- Kivy - Drawing
- Kivy - Packaging
- Kivy - Garden
- Kivy - Storage
- Kivy - Vector
- Kivy - Utils
- Kivy - Inspector
- Kivy - Tools
- Kivy - Logger
- Kivy - Framebuffer
- Kivy Applications and Projects
- Kivy - Drawing App
- Kivy - Calculator App
- Kivy - Stopwatch App
- Kivy - Camera Handling
- Kivy - Image Viewer
- Kivy - Bezier
- Kivy - Canvas Stress
- Kivy - Circle Drawing
- Kivy - Widget Animation
- Kivy - Miscellaneous
- Kivy Useful Resources
- Kivy - Quick Guide
- Kivy - Useful Resources
- Kivy - Discussion
Kivy - Anchor Layout
When this layout is used, we can arrange a widget inside it in such a way that it is anchored to a certain position of the layout's dimensions. The AnchorLayout class is defined in the "kivy.uix.anchorlayout" module.
from kivy.uix.anchorlayout import AnchorLayout
lo = AnchorLayout(**kwargs)
Keyword Parameters
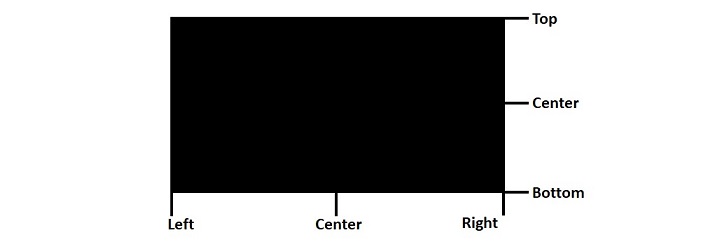
anchor_x − Defines the horizontal anchor for the widget to be placed. It is an OptionProperty, whose value must be from 'left', 'center' or 'right'. Default is 'center'.
anchor_y − Defines the vertical anchor for the widget to be placed. It is an OptionProperty, whose value must be from 'top', 'center' or 'bottom'. Default is 'center'.
padding − Padding between the widget box and its children, in pixels: [padding_left, padding_top, padding_right, padding_bottom]. It also accepts a two-argument form [padding_horizontal, padding_vertical] and a one argument form [padding]. padding is a VariableListProperty and defaults to [0, 0, 0, 0].
The AnchorLayout class inherits the two methods "add_widget()" and "remove_widget()" which we have already covered in the earlier chapters.
Example 1
The following example shows a typical use of AnchorLayout −
from kivy.app import App
from kivy.uix.label import Label
from kivy.uix.anchorlayout import AnchorLayout
from kivy.core.window import Window

Window.size = (720, 400)

class DemoApp(App):
   def build(self):
      lo = AnchorLayout(
         anchor_x='left', anchor_y='bottom'
      )
      self.l1 = Label(
         text='Hello World', font_size=20,
         size_hint=(None, None), size=(200, 75)
      )
      lo.add_widget(self.l1)
      return lo

if __name__ == '__main__':
   DemoApp().run()
Output
It can be seen that the label has been anchored to the left-bottom corner of the layout.

The Kivy application with AnchorLayout can also be built with the "kv" language script −
AnchorLayout:
   anchor_x : 'left'
   anchor_y : 'bottom'
   Label:
      id:l1
      text: 'Hello World'
      font_size: '20pt'
      size_hint : (None, None)
      size : (200, 75)
Example 2
In the example below, the application window has a top level GridLayout with widgets to be arranged in 3 rows. In each row, we put three AnchorLayouts such that the window contains nine anchor layouts with lefttop, left-center, left-bottom, center-top, center-center, center-bottom, right-top, right-center and right-bottom anchor-x and anchor-y properties.
In each layout, a button widget is placed as per the anchor configuration.
from kivy.app import App
from kivy.uix.button import Button
from kivy.config import Config
from kivy.uix.anchorlayout import AnchorLayout
from kivy.uix.gridlayout import GridLayout

Config.set('graphics', 'width', '720')
Config.set('graphics', 'height', '400')
Config.set('graphics', 'resizable', '1')

class AnchorApp(App):
   def build(self):
      lo = GridLayout(rows=3)
      ax = ['left', 'center', 'right']
      ay = ['top', 'center', 'bottom']
      c = 0

      # 3X3 grid with anchor layout in each
      for i in range(3):
         for j in range(3):
            print(ax[i], ay[j])
            anchrlo = AnchorLayout(
               anchor_x=ax[i], anchor_y=ay[j]
         )
         b = Button(
            text=ax[i] + "-" + ay[j],
            size_hint=(None, None),
            size=(200, 75), halign=ax[i]
         )

         # red text color for top row,
         # green for middle row,
         # blue for bottom row
         if i == 0: b.color = [1, 0, 0, 1]
         if i == 1: b.color = [0, 1, 0, 1]
         if i == 2: b.color = [0, 0, 1, 1]

         anchrlo.add_widget(b)
         lo.add_widget(anchrlo)
      return lo
AnchorApp().run()
Output
When you run this code, it will produce the following output window −
