- Python Pillow - Home
- Python Pillow - Overview
- Python Pillow - Environment Setup
- Basic Image Operations
- Python Pillow - Working with Images
- Python Pillow - Resizing an Image
- Python Pillow - Flip and Rotate Images
- Python Pillow - Cropping an Image
- Python Pillow - Adding Borders to Images
- Python Pillow - Identifying Image Files
- Python Pillow - Merging Images
- Python Pillow - Cutting and Pasting Images
- Python Pillow - Rolling an Image
- Python Pillow - Writing text on image
- Python Pillow - ImageDraw Module
- Python Pillow - Concatenating two Images
- Python Pillow - Creating Thumbnails
- Python Pillow - Creating a Watermark
- Python Pillow - Image Sequences
- Python Pillow Color Conversions
- Python Pillow - Colors on an Image
- Python Pillow - Creating Images With Colors
- Python Pillow - Converting Color String to RGB Color Values
- Python Pillow - Converting Color String to Grayscale Values
- Python Pillow - Change the Color by Changing the Pixel Values
- Image Manipulation
- Python Pillow - Reducing Noise
- Python Pillow - Changing Image Modes
- Python Pillow - Compositing Images
- Python Pillow - Working with Alpha Channels
- Python Pillow - Applying Perspective Transforms
- Image Filtering
- Python Pillow - Adding Filters to an Image
- Python Pillow - Convolution Filters
- Python Pillow - Blur an Image
- Python Pillow - Edge Detection
- Python Pillow - Embossing Images
- Python Pillow - Enhancing Edges
- Python Pillow - Unsharp Mask Filter
- Image Enhancement and Correction
- Python Pillow - Enhancing Contrast
- Python Pillow - Enhancing Sharpness
- Python Pillow - Enhancing Color
- Python Pillow - Correcting Color Balance
- Python Pillow - Removing Noise
- Image Analysis
- Python Pillow - Extracting Image Metadata
- Python Pillow - Identifying Colors
- Advanced Topics
- Python Pillow - Creating Animated GIFs
- Python Pillow - Batch Processing Images
- Python Pillow - Converting Image File Formats
- Python Pillow - Adding Padding to an Image
- Python Pillow - Color Inversion
- Python Pillow - M L with Numpy
- Python Pillow with Tkinter BitmapImage and PhotoImage objects
- Image Module
- Python Pillow - Image Blending
- Python Pillow Useful Resources
- Python Pillow - Quick Guide
- Python Pillow - Function Reference
- Python Pillow - Useful Resources
- Python Pillow - Discussion
Python Pillow - ImageChops.subtract() Function
The PIL.ImageChops.subtract() function is used to subtract one image (image2) from another image (image1). After the subtraction, the result is divided by a specified scale and then an offset is added. The mathematical representation of this operation is given by the formula −
$$\mathrm{out\:=\:((image1\:-\:image2)/scale\:+\:offset)}$$
Similar to ImageChops.add, this operation is not reversible due to the data type being uint8. When using ImageChops.subtract, if the resulting value is negative, it is clipped to zero. This clipping to the range [0, 255] leads to data loss, and the original image cannot be accurately reconstructed from the result.
Syntax
Following is the syntax of the function −
PIL.ImageChops.subtract(image1, image2, scale=1.0, offset=0)
Parameters
Here are the details of this function parameters −
image1 − This is the first input image.
image2 − This is the second input image.
scale (optional, default value: 1.0) − Scale is a factor by which the result of subtracting image1 and image2 is divided. If you omit this parameter, it defaults to 1.0.
offset (optional, default value: 0.0) − Offset is a value that is added to the result after the division by the scale. If you don't provide an offset value, it defaults to 0.0.
Return Value
This Function returns the Image object.
Examples
Example 1
In this example, two random RGB images (image1 and image2) are created using NumPy arrays. Then the ImageChops.subtract function is applied to see how the pixel values of the two images are represented in the output image after performing the subtraction.
from PIL import Image, ImageChops
import numpy as np

# Create two random RGB images
image1 = Image.fromarray(np.array([(235, 64, 3), (255, 0, 0), (255, 255, 0), (255, 255, 255), (164, 0, 3)]), mode="RGB")
print("Pixel values of image1 at (0, 0):", image1.getpixel((0, 0)))

image2 = Image.fromarray(np.array([(255, 14, 3), (25, 222, 0), (255, 155, 0), (255, 55, 100), (180, 0, 78)]), mode="RGB")
print("Pixel values of image2 at (0, 0):", image2.getpixel((0, 0)))

# Subtract the two images
result = ImageChops.subtract(image1, image2)
print("Pixel values of the result at (0, 0) after subtraction:", result.getpixel((0, 0)))
Output
Pixel values of image1 at (0, 0): (235, 0, 0)
Pixel values of image2 at (0, 0): (255, 0, 0)
Pixel values of the result at (0, 0) after subtraction: (0, 0, 0)
We can observe the output, the pixel at (0, 0) is (0, 0, 0), as the subtraction (235 - 255) is clipped to 0.
Example 2
The following example subtract the second image from the first with default parameters (scale=1.0, offset=0.0).
from PIL import Image, ImageChops

# Open two image files
image1 = Image.open('Images/TP logo.jpg')
image2 = Image.open('Images/Rose_.jpg')

# Subtract the second image from the first with default parameters (scale=1.0, offset=0.0)
result = ImageChops.subtract(image1, image2)

# Display the input and resulting images
image1.show()
image2.show()
result.show()
Output
Input Image 1
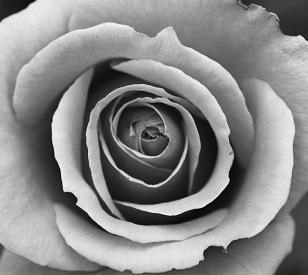
Input Image 2
Output Image

Example 3
Here is an example that subtracts the second image from the first with specific scale and offset values.
from PIL import Image, ImageChops

# Open two image files
image1 = Image.open('Images/Rose_.jpg')
image2 = Image.open('Images/TP logo.jpg')

# Subtract the second image from the first with specific scale and offset values
result = ImageChops.subtract(image1, image2, scale=5.0, offset=100)

# Display the input and resulting images
image1.show()
image2.show()
result.show()
Output
Input Image 1
Input Image 2
Output Image