- Python Pillow - Home
- Python Pillow - Overview
- Python Pillow - Environment Setup
- Basic Image Operations
- Python Pillow - Working with Images
- Python Pillow - Resizing an Image
- Python Pillow - Flip and Rotate Images
- Python Pillow - Cropping an Image
- Python Pillow - Adding Borders to Images
- Python Pillow - Identifying Image Files
- Python Pillow - Merging Images
- Python Pillow - Cutting and Pasting Images
- Python Pillow - Rolling an Image
- Python Pillow - Writing text on image
- Python Pillow - ImageDraw Module
- Python Pillow - Concatenating two Images
- Python Pillow - Creating Thumbnails
- Python Pillow - Creating a Watermark
- Python Pillow - Image Sequences
- Python Pillow Color Conversions
- Python Pillow - Colors on an Image
- Python Pillow - Creating Images With Colors
- Python Pillow - Converting Color String to RGB Color Values
- Python Pillow - Converting Color String to Grayscale Values
- Python Pillow - Change the Color by Changing the Pixel Values
- Image Manipulation
- Python Pillow - Reducing Noise
- Python Pillow - Changing Image Modes
- Python Pillow - Compositing Images
- Python Pillow - Working with Alpha Channels
- Python Pillow - Applying Perspective Transforms
- Image Filtering
- Python Pillow - Adding Filters to an Image
- Python Pillow - Convolution Filters
- Python Pillow - Blur an Image
- Python Pillow - Edge Detection
- Python Pillow - Embossing Images
- Python Pillow - Enhancing Edges
- Python Pillow - Unsharp Mask Filter
- Image Enhancement and Correction
- Python Pillow - Enhancing Contrast
- Python Pillow - Enhancing Sharpness
- Python Pillow - Enhancing Color
- Python Pillow - Correcting Color Balance
- Python Pillow - Removing Noise
- Image Analysis
- Python Pillow - Extracting Image Metadata
- Python Pillow - Identifying Colors
- Advanced Topics
- Python Pillow - Creating Animated GIFs
- Python Pillow - Batch Processing Images
- Python Pillow - Converting Image File Formats
- Python Pillow - Adding Padding to an Image
- Python Pillow - Color Inversion
- Python Pillow - M L with Numpy
- Python Pillow with Tkinter BitmapImage and PhotoImage objects
- Image Module
- Python Pillow - Image Blending
- Python Pillow Useful Resources
- Python Pillow - Quick Guide
- Python Pillow - Function Reference
- Python Pillow - Useful Resources
- Python Pillow - Discussion
Python Pillow - Quick Guide
Python Pillow - Overview
In todays digital world, we come across lots of digital images. In case, we are working with Python programming language, it provides lot of image processing libraries to add image processing capabilities to digital images.
Some of the most common image processing libraries are: OpenCV, Python Imaging Library (PIL), Scikit-image, Pillow. However, in this tutorial, we are only focusing on Pillow module and will try to explore various capabilities of this module.
Pillow is built on top of PIL (Python Image Library). PIL is one of the important modules for image processing in Python. However, the PIL module is not supported since 2011 and doesnt support python 3.
Pillow module gives more functionalities, runs on all major operating system and support for python 3. It supports wide variety of images such as jpeg, png, bmp, gif, ppm, tiff. You can do almost anything on digital images using pillow module. Apart from basic image processing functionality, including point operations, filtering images using built-in convolution kernels, and color space conversions.
Image Archives
The Python Imaging Library is best suited for image archival and batch processing applications. Python pillow package can be used for creating thumbnails, converting from one format to another and print images, etc.
Image Display
You can display images using Tk PhotoImage, BitmapImage and Windows DIB interface, which can be used with PythonWin and other Windows-based toolkits and many other Graphical User Interface (GUI) toolkits.
For debugging purposes, there is a show () method to save the image to disk which calls the external display utility.
Image Processing
The Pillow library contains all the basic image processing functionality. You can do image resizing, rotation and transformation.
Pillow module allows you to pull some statistics data out of image using histogram method, which later can be used for statistical analysis and automatic contrast enhancement.
Python Pillow - Environment Setup
This chapter discusses how to install pillow package in your computer.
Installing pillow package is very easy, especially if youre installing it using pip.
Installing Pillow using pip
To install pillow using pip, just run the below command in your command prompt −
python -m pip install pip
python -m pip install pillow
In case, if pip and pillow are already installed in your computer, above commands will simply mention the requirement already satisfiedas shown below −

Python Pillow - Using Image Module
To display the image, pillow library is using an image class within it. The image module inside pillow package contains some important inbuilt functions like, load images or create new images, etc.
Opening, rotating and displaying an image
To load the image, we simply import the image module from the pillow and call the Image.open(), passing the image filename.
Instead of calling the Pillow module, we will call the PIL module as to make it backward compatible with an older module called Python Imaging Library (PIL). Thats why our code starts with from PIL import Image instead of from Pillow import Image.
Next, were going to load the image by calling the Image.open() function, which returns a value of the Image object data type. Any modification we make to the image object can be saved to an image file with the save() method. The image object we received using Image.open(), later can be used to resize, crop, draw or other image manipulation method calls on this Image object.
Example
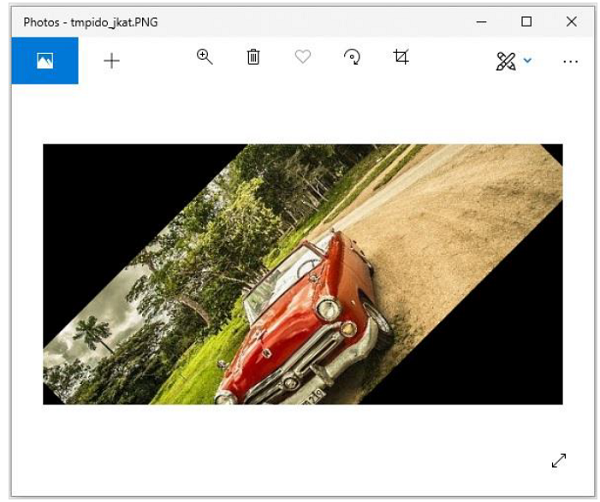
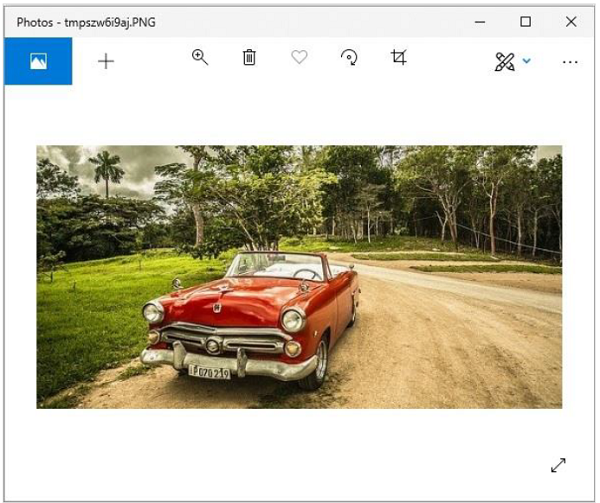
Following example demonstrates the rotation of an image using python pillow −
from PIL import Image
#Open image using Image module
im = Image.open("images/cuba.jpg")
#Show actual Image
im.show()
#Show rotated Image
im = im.rotate(45)
im.show()
Output
If you save the above program as Example.py and execute, it displays the original and rotated images using standard PNG display utility, as follows −
Actual image

Rotated image (45 degrees)
Attributes of Image Module
The instance of the Image class has some attributes. Lets try to understand few of them by example −
Image.filename
This function is used to get the file name or the path of the image.
>>>image = Image.open('beach1.jpg')
>>> image.filename
'beach1.jpg'
Image.format
This function returns file format of the image file like JPEG, BMP, PNG, etc.
>>> image = Image.open('beach1.jpg')
>>>
>>> image.format
'JPEG'
Image.mode
It is used to get the pixel format used by the image. Typical values are 1, L, RGB or CMYK.
>>> image.mode
'RGB'
Image.size
It returns the tuple consist of height & weight of the image.
>>> image.size
(1280, 721)
Image.width
It returns only the width of the image.
>>> image.width
1280
Image.height
It returns only the height of the image.
>>> image.height
721
Image.info
It returns a dictionary holding data associated with the image.
>>> image.info
{'jfif': 257, 'jfif_version': (1, 1), 'dpi': (300, 300), 'jfif_unit': 1, 'jfif_density': (300, 300), 'exif': b"Exif\x00\x00MM\x00*\x00\x00\x00
....
....
\xeb\x00\x00'\x10\x00\x00\xd7\xb3\x00\x00\x03\xe8"}
Image.palette
It returns the colour palette table, if any.
>>> image.palette
Output above − None
Python Pillow - Working with Images
This chapter elaborates on topics including how to read and save an image in Pillow.
Reading an Image
Reading and writing images using pillow library is very simple, with the help of PIL.Image module function.
Syntax
Image.open(fp, mode=r)
Where
fp − A filename (string), pathlib.Path object or a file object. The file object must implement read(), seek() and tell() methods and be opened in binary mode.
mode − Its an optional argument, if given, must be r.
Return value − An Image object.
Error − If the file cannot be found, or the image cannot be opened and identified.
Example
Following is a very simple example, where we are going to open an image of any format (We are using .jpg), display it in a window and then save it (default location) with another file format (.png).
from PIL import Image
image = Image.open('beach1.jpg')
image.show()
image.save('beach1.bmp')
image1 = Image.open('beach1.bmp')
image1.show()
In the above example, we import the Image module from PIL library and then, call the Image.open() function to read an image from disk, which returns an image object data type. It will automatically determine the type of file by looking at the file content. For reading, the open() function accepts a filename(string), a path object or an image(file) object.
So, by using the open() function, we are actually reading the image. Image.open() will read the image and get all the relevant information from the image.
Output
If you save the above program as Example.py and execute, it displays the original (.jpg) and resaved (.bmp) images using standard PNG display utility, as follows −
Actual image
Resaved image (.bmp)
Saving an Image
The save() function writes an image to file. Like for reading (open() function), the save() function accepts a filename, a path object or a file object that has been opened to write.
Syntax
Image.save(fp, format=None, **params)
Where,
fp − A filename (string), pathlib.Path object or file object.
format − Optional format override. If omitted, the format to use is determined from the filename extension. If a file object was used instead of a filename, this parameter should always to used.
options − Extra parameters to the image writer.
Return value − None
KeyError − If the output format could not be determined from the file name, use the format option to solve this.
IOError − If the file could not be written, the file may have been created, and may contain partial data.
In short, the above syntax will save the image under the given filename. If no format is specified, then it is based on current filename extension. To provide the additional instructions to the writer, we use keyword options.
image.save('beach1.bmp')
In the above example, it saves the file based on the file extension to determine the type of image, for example the above will create a bmp file in our current working directory.
You can also explicitly specify the file type as a second parameter −
image.save('beach1.gif', 'GIF')
Python Pillow - Creating Thumbnails
Sometimes, it is required to have all images of equal height and width. One way to achieve this, is by creating a thumbnail of all images using the thumbnail() function from pillow library.
This method modifies the image to contain a thumbnail version of itself and the size of the image will be no larger than the given size.
The method calculates an appropriate thumbnail size to preserve the aspect of the image, calls the draft () method to configure the file reader (where applicable) and finally, resizes the image.
Syntax
Image.thumbnail(size, resample=3)
Where,
Size − Required size
Resample − Optional resampling filter. It can be one of these PIL.Image.NEAREST, PIL.Image.BILINEAR, PIL.Image.BICUBIC, or PIL.Image.LANCZOS. If omitted, it defaults to PIL.Image.BICUBIC.
Returns − None
Example
Following example demonstrates the creation of a thumbnail using python pillow −
from PIL import Image
def tnails():
   try:
      image = Image.open('images/cat.jpg')
      image.thumbnail((90,90))
      image.save('images/thumbnail.jpg')
      image1 = Image.open('images/thumbnail.jpg')
      image1.show()
   except IOError:
      pass
tnails()
Output
If you save the above program as Example.py and execute, it displays the created thumbnail using the default PNG display utility, as follows −
Original image

Output image
Python Pillow - Merging Images
Pillow package allows you to paste an image onto another one. The merge() function accepts a mode and a tuple of images as parameters, and combines them into a single image.
Syntax
Image.merge(mode, bands)
Where,
mode − The mode to use for the output image.
bands − A sequence containing one single-band image for each band in the output image. All bands must have the same size.
Return value − An Image objects.
Using the merge() function, you can merge the RGB bands of an image as −
from PIL import Image
image = Image.open("beach1.jpg")
r, g, b = image.split()
image.show()
image = Image.merge("RGB", (b, g, r))
image.show()
On executing the above piece of code, you can see the original image and the image with merge the RGB bands as shown below −
Input image
Output image
Merging two images
In the same way, to merge two different images, you need to −
Create image object for the required images using the open() function.
While merging two images, you need to make sure that both images are of same size. Therefore, get each sizes of both images and if required, resize them accordingly.
Create an empty image using the Image.new() function.
Paste the images using the paste() function.
Save and display the resultant image using the save() and show() functions.
Example
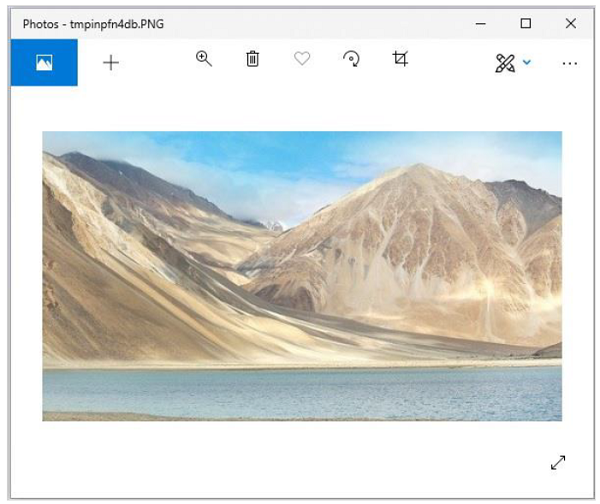
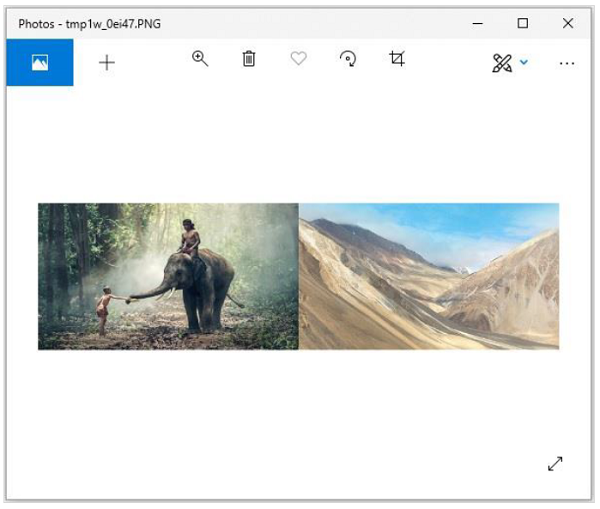
Following example demonstrates the merging of two images using python pillow −
from PIL import Image
#Read the two images
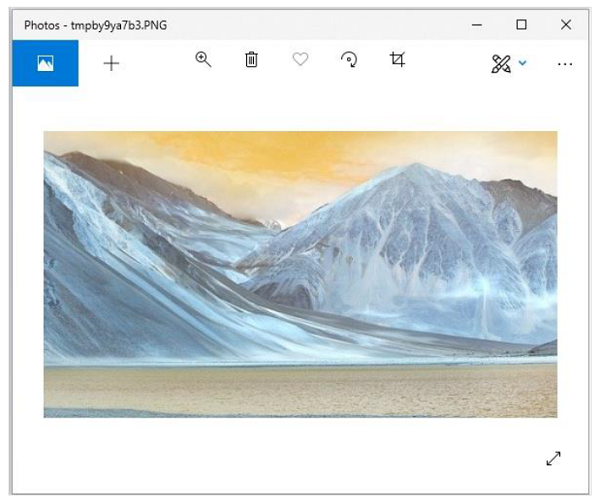
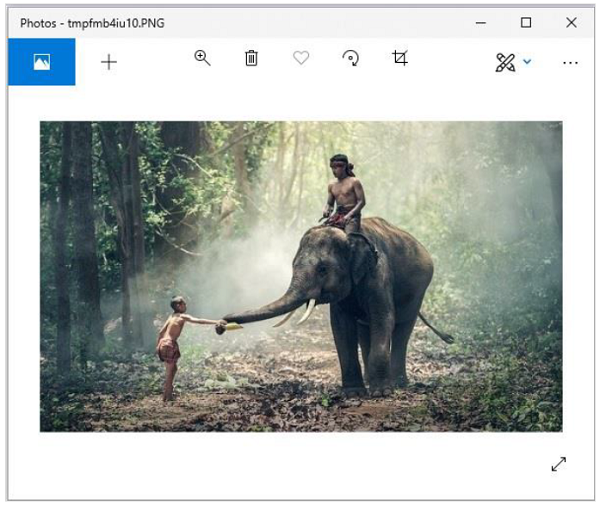
image1 = Image.open('images/elephant.jpg')
image1.show()
image2 = Image.open('images/ladakh.jpg')
image2.show()
#resize, first image
image1 = image1.resize((426, 240))
image1_size = image1.size
image2_size = image2.size
new_image = Image.new('RGB',(2*image1_size[0], image1_size[1]), (250,250,250))
new_image.paste(image1,(0,0))
new_image.paste(image2,(image1_size[0],0))
new_image.save("images/merged_image.jpg","JPEG")
new_image.show()
Output
If you save the above program as Example.py and execute, it displays the two input images and the merged image using standard PNG display utility, as follows −
Input image1
Input image2
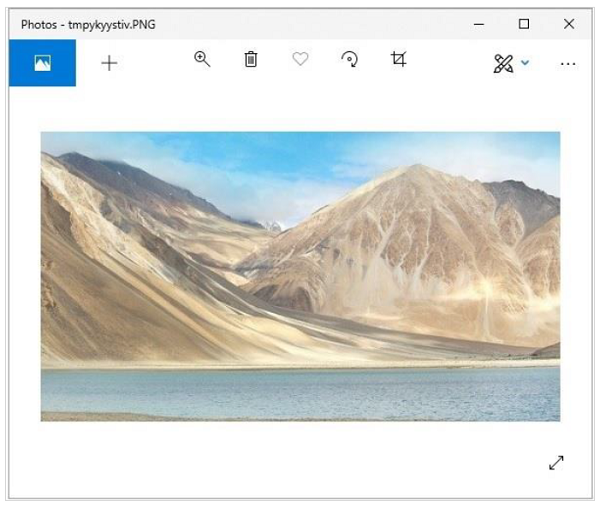
Merged image
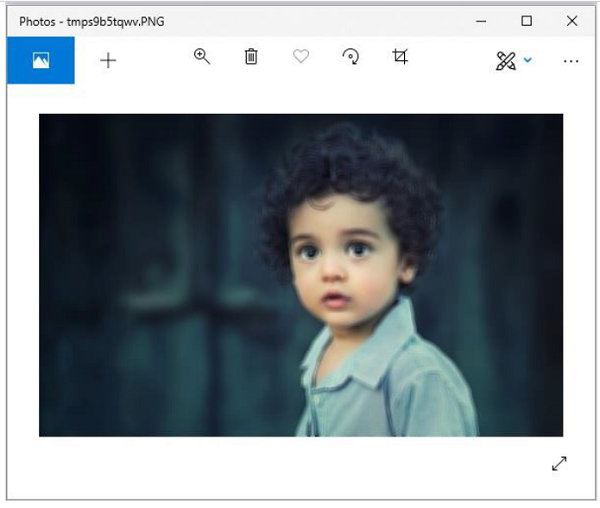
Python Pillow - Blur an Image
Blurring an image can be done by reducing the level of noise in the image by applying a filter to an image. Image blurring is one of the important aspects of image processing.
The ImageFilter class in the Pillow library provides several standard image filters. Image filters can be applied to an image by calling the filter() method of Image object with required filter type as defined in the ImageFilter class.
There are various techniques used to blur images and we are going to discuss the below mentioned techniques.
Simple blur
Box blur
Gaussian blur
All these three techniques are going to use Image.filter() method for applying the filter to images.
Simple blur
It applies a blurring effect on to the image as specified through a specific kernel or a convolution matrix.
Syntax
filter(ImageFilter.BLUR)
Example
#Import required Image library
from PIL import Image, ImageFilter

#Open existing image
OriImage = Image.open('images/boy.jpg')
OriImage.show()

blurImage = OriImage.filter(ImageFilter.BLUR)
blurImage.show()
#Save blurImage
blurImage.save('images/simBlurImage.jpg')
On executing, the above example generates the two standard PNG display utility windows (in this case windows Photos app).
Original image

Blurred image
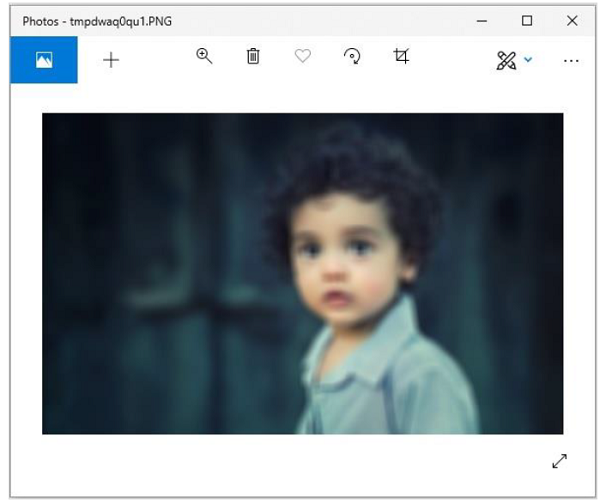
Box blur
In this filter, we use radius as parameter. Radius is directly proportional to the blur value.
Syntax
ImageFilter.BoxBlur(radius)
Where,
Radius − Size of the box in one direction.
Radius 0 − means no blurring & returns the same image.
RRadius 1 &minnus; takes 1 pixel in each direction, i.e. 9 pixels in total.
Example
#Import required Image library
from PIL import Image,

#Open existing image
OriImage = Image.open('images/boy.jpg')
OriImage.show()

#Applying BoxBlur filter
boxImage = OriImage.filter(ImageFilter.BoxBlur(5))
boxImage.show()

#Save Boxblur image
boxImage.save('images/boxblur.jpg')
Output
On executing, the above example generates the two standard PNG display utility windows (in this case windows Photos app).
Original image

Blurred image
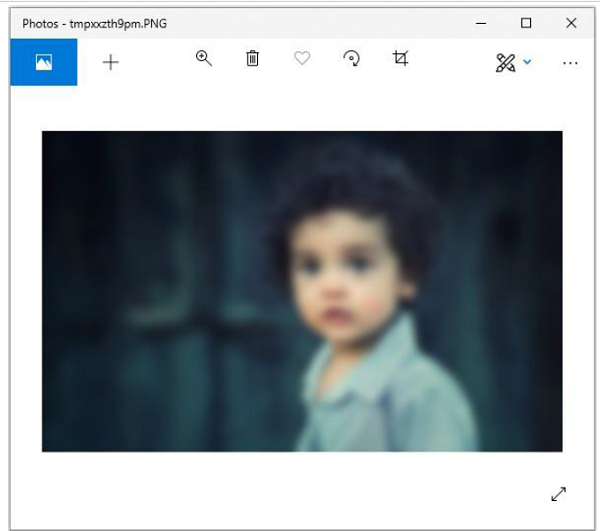
Gaussian Blur
This filter also uses parameter radius and does the same work as box blur with some algorithmic changes. In short, changing the radius value, will generate different intensity of Gaussianblur images.
Syntax
ImageFilter.GaussianBlur(radius=2)
Where,
Radius Blur radius
Example
#Import required Image library
from PIL import Image, ImageFilter

#Open existing image
OriImage = Image.open('images/boy.jpg')
OriImage.show()

#Applying GaussianBlur filter
gaussImage = OriImage.filter(ImageFilter.GaussianBlur(5))
gaussImage.show()

#Save Gaussian Blur Image
gaussImage.save('images/gaussian_blur.jpg')
Output
On executing, the above example generates the two standard PNG display utility windows (in this case windows Photos app).
Original image

Blurred image
Python Pillow - Cropping an Image
Cropping is one of the important operations of the image processing to remove unwanted portions of an image as well as to add required features to an image. It is widely used process in web applications, for uploading an image.
The crop() function of the image class in Pillow requires the portion to be cropped as rectangle. The rectangle portion to be cropped from an image is specified as a four-element tuple and returns the rectangle portion of the image that has been cropped as an image Object.
Example
Following example demonstrates how to rotate an image using python pillow −
#Import required Image library
from PIL import Image

#Create an Image Object from an Image
im = Image.open('images/elephant.jpg')

#Display actual image
im.show()

#left, upper, right, lowe
#Crop
cropped = im.crop((1,2,300,300))

#Display the cropped portion
cropped.show()

#Save the cropped image
cropped.save('images/croppedBeach1.jpg')
Output
If you save the above program as Example.py and execute, it displays the original and cropped images using standard PNG display utility, as follows −
Original image

Cropped image

Python Pillow - Flip and Rotate Images
While working on images using python image processing library, there are instances where you need to flip an existing image to get some more insights out of it, to enhance its visibility or because of your requirement.
Image module of the pillow library allows us to flip an image very easily. We are going to use the transpose (method) function from the Image module for flipping the images. Some of the mostly commonly used methods supported by transpose() are −
Image.FLIP_LEFT_RIGHT − For flipping the image horizontally
Image.FLIP_TOP_BOTTOM − For flipping the image vertically
Image.ROTATE_90 − For rotating the image by specifying degree
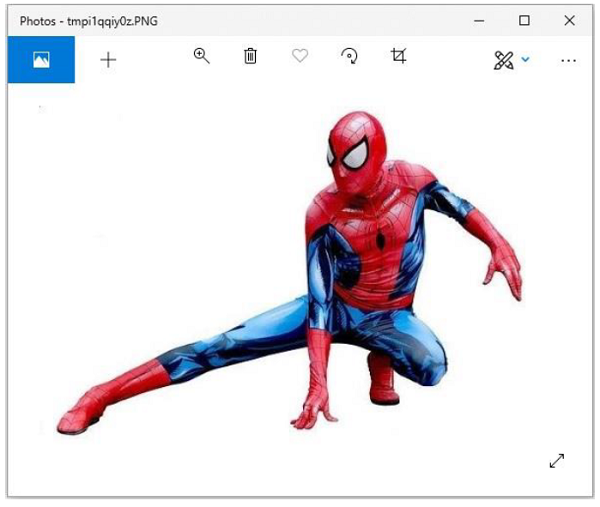
Example 1: Horizontally flipped Image
Following Python example reads an image, flips it horizontally, and displays the original and flipped image using standard PNG display utility −
# import required image module
from PIL import Image
# Open an already existing image
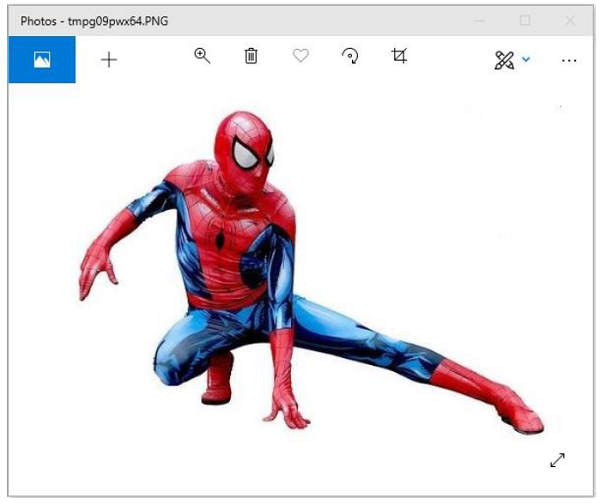
imageObject = Image.open("images/spiderman.jpg")
# Do a flip of left and right
hori_flippedImage = imageObject.transpose(Image.FLIP_LEFT_RIGHT)
# Show the original image
imageObject.show()
# Show the horizontal flipped image
hori_flippedImage.show()
Output
Original image
Flipped image
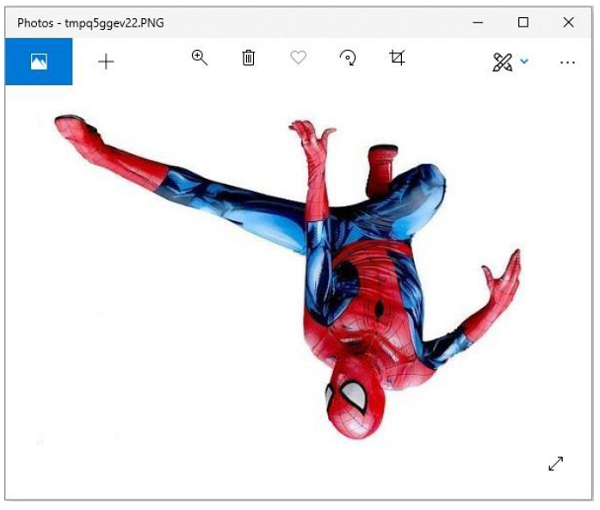
Example 2: Vertically Flipped Image
Following Python example reads an image, flips it vertically, and displays the original and flipped image using standard PNG display utility −
# import required image module
from PIL import Image

# Open an already existing image
imageObject = Image.open("images/spiderman.jpg")

# Do a flip of left and right
hori_flippedImage = imageObject.transpose(Image.FLIP_LEFT_RIGHT)

# Show the original image
imageObject.show()

# Show vertically flipped image
Vert_flippedImage = imageObject.transpose(Image.FLIP_TOP_BOTTOM)
Vert_flippedImage.show()
Output
Original Image
Flipped Image
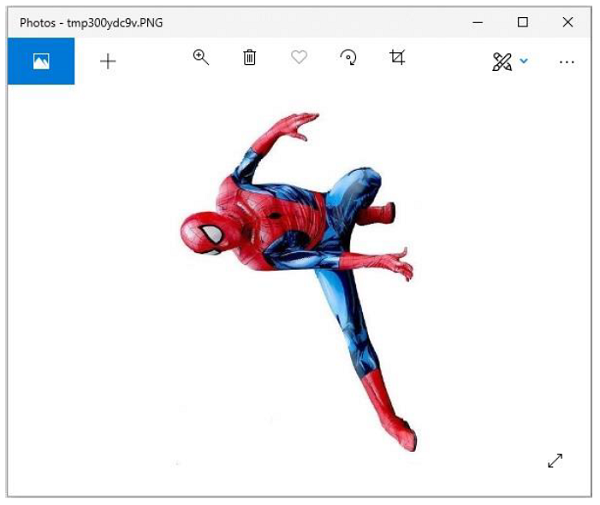
Example 3: Rotate Image to a specific degree
Following Python example reads an image, rotates to a specified degree, and displays the original and rotated image using standard PNG display utility −
# import required image module
from PIL import Image

# Open an already existing image
imageObject = Image.open("images/spiderman.jpg")

# Do a flip of left and right
hori_flippedImage = imageObject.transpose(Image.FLIP_LEFT_RIGHT)

# Show the original image
imageObject.show()

#show 90 degree flipped image
degree_flippedImage = imageObject.transpose(Image.ROTATE_90)
degree_flippedImage.show()
Output
Original Image
Rotated Image
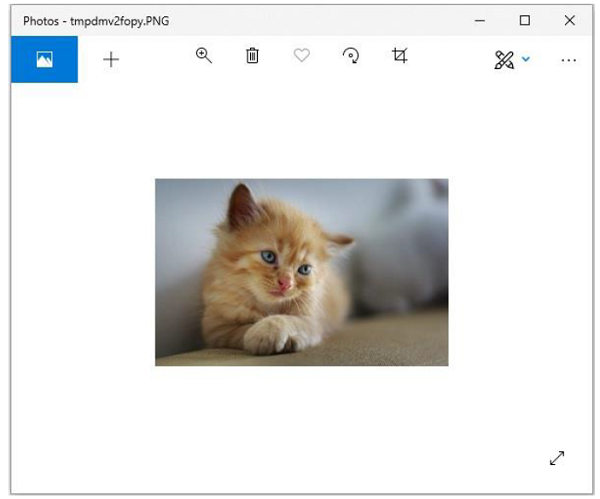
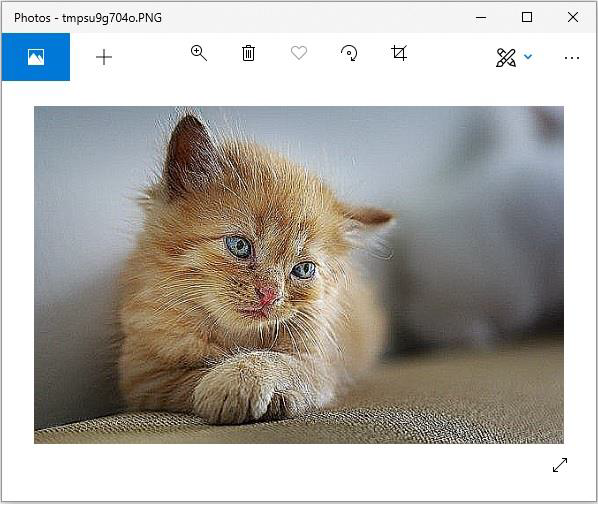
Python Pillow - Resizing an Image
Most of the digital image is a two-dimensional plane of pixels and it has a width and height. The Image module from pillow library has an attribute size. This tuple consists of width and height of the image as its elements. To resize an image, you call the resize() method of pillows image class by giving width and height.
Resize and save the resized image
The program for resizing and saving the resized image is given below −
#Import required Image library
from PIL import Image

#Create an Image Object from an Image
im = Image.open("images/cat.jpg")

#Display actual image
im.show()

#Make the new image half the width and half the height of the original image
resized_im = im.resize((round(im.size[0]*0.5), round(im.size[1]*0.5)))

#Display the resized imaged
resized_im.show()

#Save the cropped image
resized_im.save('resizedBeach1.jpg')
Output
If you save the above program as Example.py and execute, it displays the original and resized images using standard PNG display utility, as follows −
Original Image
Resized Image
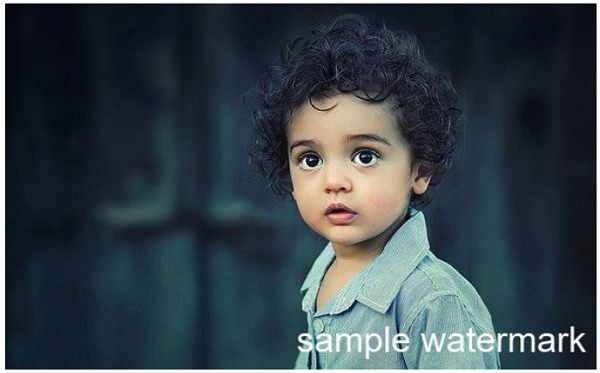
Python Pillow - Creating a Watermark
You have noticed that, some of the online photos are watermarked. Watermark is definitely one of the better ways to protect your images from misuse. Also, it is recommended to add watermark to your creative photos, before sharing them on social media to prevent it from being misused.
Watermark is generally some text or logo overlaid on the photo that identifies who took the photo or who owns the rights to the photo.
Pillow package allows us to add watermarks to your images. For adding watermark to our image, we need Image, ImageDraw and ImageFont modules from pillow package.
The ImageDraw module adds functionality to draw 2D graphics onto new or existing images. The ImageFont module is employed for loading bitmap, TrueType and OpenType font files.
Example
Following python program demonstrates how to add watermark to an image using python pillow −
#Import required Image library
from PIL import Image, ImageDraw, ImageFont

#Create an Image Object from an Image
im = Image.open('images/boy.jpg')
width, height = im.size

draw = ImageDraw.Draw(im)
text = "sample watermark"

font = ImageFont.truetype('arial.ttf', 36)
textwidth, textheight = draw.textsize(text, font)

# calculate the x,y coordinates of the text
margin = 10
x = width - textwidth - margin
y = height - textheight - margin

# draw watermark in the bottom right corner
draw.text((x, y), text, font=font)
im.show()

#Save watermarked image
im.save('images/watermark.jpg')
Output
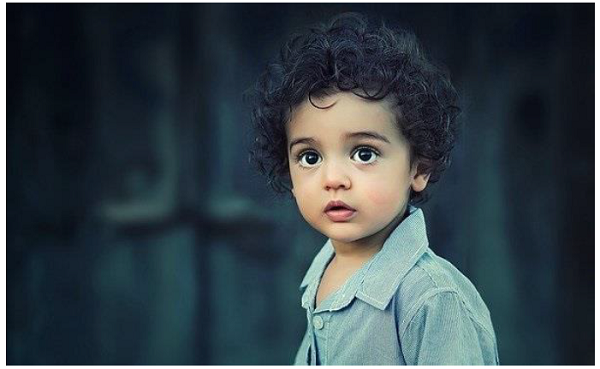
Suppose, following is the input image boy.jpg located in the folder image.
After executing the above program, if you observe the output folder you can see the resultant watermark.jpg file with watermark on it as shown below −
Python Pillow - Adding Filters to an Image
The ImageFilter module contains definitions for a pre-defined set of filters, which we used with Image.filter() method. These filters are used to change the looks and feel of the image.
Example
Below example is Filtering an image −
from PIL import Image, ImageFilter

im = Image.open('jungleSaf2.jpg')

im1 = im.filter(ImageFilter.BLUR)
im1.show()

im2 = im.filter(ImageFilter.MinFilter(3))
im2.show()

im3 = im.filter(ImageFilter.MinFilter) # same as MinFilter(3)
im3.show()
In above program, we have used the MinFilter() method, which is used to create a minimum filter. It picks the lowest pixel value in a window with the given size.
ImageFilter.MinFilter(size=3)
Where,
size − The kernel size, in pixels.
Output
If you save the above program and execute, it shows the original image, blurred image and, the blurred image with MinFilter using standard PNG display utility, as follows −
Original Image
Blurred Image
Image blurred with mini filter

Filters
The current version of pillow library provides below mentioned set of predefined image enhancement filters.
BLUR
CONTOUR
DETAIL
EDGE_ENHANCE
EDGE_ENHANCE_MORE
EMBOSS
FIND_EDGES
SHARPEN
SMOOTH
SMOOTH_MORE
Example
Following python example applies the blur filter on an image saves it and, displays it using standard PNG display utility −
#Import required image modules
from PIL import Image, ImageFilter

#Import all the enhancement filter from pillow

from PIL.ImageFilter import (
   BLUR, CONTOUR, DETAIL, EDGE_ENHANCE, EDGE_ENHANCE_MORE,
   EMBOSS, FIND_EDGES, SMOOTH, SMOOTH_MORE, SHARPEN
)

#Create image object
img = Image.open('images/cat.jpg')
#Applying the blur filter
img1 = img.filter(BLUR)
img1.save('images/ImageFilter_blur.jpg')
img1.show()
Output

In the same way, to the image.filter() method you can pass any of the following parameters to get respective outputs −
CONTOUR
DETAIL
EDGE_ENHANCE
EDGE_ENHANCE_MORE
EMBOSS
FIND_EDGES
SMOOTH
SMOOTH_MORE
SHARPEN
Python img.filter(CONTOUR) method
Following python example applies CONTOUR filter to the given image.
Example
#Import required image modules
from PIL import Image, ImageFilter

#Import all the enhancement filter from pillow
from PIL.ImageFilter import (
   BLUR, CONTOUR, DETAIL, EDGE_ENHANCE, EDGE_ENHANCE_MORE,
   EMBOSS, FIND_EDGES, SMOOTH, SMOOTH_MORE, SHARPEN
)
#Create image object
img = Image.open('images/cat.jpg')
#Applying the blur filter
img1 = img.filter(CONTOUR)
img1.save('images/ImageFilter_blur.jpg')
img1.show()
Output
If you save the above program and execute, it shows the original image and, the filtered image using standard PNG display utility, as follows −
Original image
Filtered image
Python img.filter(DETAIL) method
Following python example applies DETAIL filter to the given image.
Example
#Import required image modules
from PIL import Image, ImageFilter

#Import all the enhancement filter from pillow
from PIL.ImageFilter import (
   BLUR, CONTOUR, DETAIL, EDGE_ENHANCE, EDGE_ENHANCE_MORE,
   EMBOSS, FIND_EDGES, SMOOTH, SMOOTH_MORE, SHARPEN
)
#Create image object
img = Image.open('images/cat.jpg')
#Applying the blur filter
img1 = img.filter(DETAIL)
img1.save('images/ImageFilter_blur.jpg')
img1.show()
Output
If you save the above program and execute, it shows the original image, and the filtered image using standard PNG display utility, as follows −
Original image
Filtered image

Python img.filter(EDGE_ENHANCE) method
Following python example applies EDGE_ENHANCE filter to the given image −
Example
#Import required image modules
from PIL import Image, ImageFilter

#Import all the enhancement filter from pillow
from PIL.ImageFilter import (
   BLUR, CONTOUR, DETAIL, EDGE_ENHANCE, EDGE_ENHANCE_MORE,
   EMBOSS, FIND_EDGES, SMOOTH, SMOOTH_MORE, SHARPEN
)
#Create image object
img = Image.open('images/cat.jpg')
#Applying the blur filter
img1 = img.filter(EDGE_ENHANCE)
img1.save('images/ImageFilter_blur.jpg')
img1.show()
Output
If you save the above program and execute, it shows the original image, and the filtered image using standard PNG display utility, as follows −
Original image
Filtered image

Python img.filter(EDGE_ENHANCE_MORE) method
Following python example applies EDGE_ENHANCE_MORE filter to the given image.
Example
#Import required image modules
from PIL import Image, ImageFilter

#Import all the enhancement filter from pillow
from PIL.ImageFilter import (
   BLUR, CONTOUR, DETAIL, EDGE_ENHANCE, EDGE_ENHANCE_MORE,
   EMBOSS, FIND_EDGES, SMOOTH, SMOOTH_MORE, SHARPEN
)
#Create image object
img = Image.open('images/cat.jpg')
#Applying the blur filter
img1 = img.filter(EDGE_ENHANCE_MORE)
img1.save('images/ImageFilter_blur.jpg')
img1.show()
Output
If you save the above program and execute, it shows the original image, and the filtered image using standard PNG display utility, as follows −
Original image
Filtered image
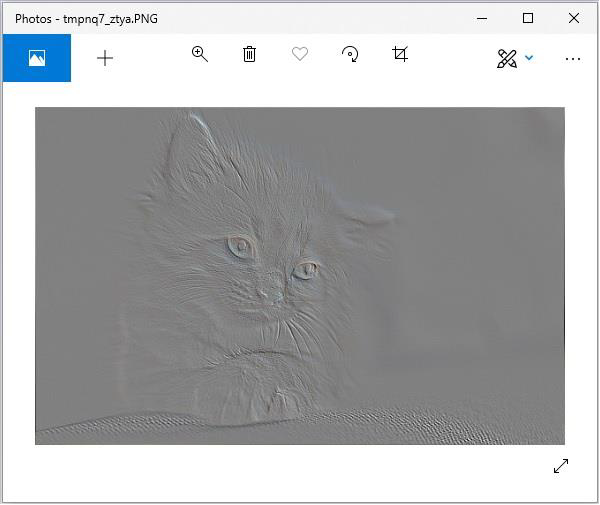
Python img.filter(EMBOSS) method
Following python example applies EMBOSS filter to the given image.
Example
#Import required image modules
from PIL import Image, ImageFilter

#Import all the enhancement filter from pillow
from PIL.ImageFilter import (
   BLUR, CONTOUR, DETAIL, EDGE_ENHANCE, EDGE_ENHANCE_MORE,
   EMBOSS, FIND_EDGES, SMOOTH, SMOOTH_MORE, SHARPEN
)
#Create image object
img = Image.open('images/cat.jpg')
#Applying the blur filter
img1 = img.filter(EMBOSS)
img1.save('images/ImageFilter_blur.jpg')
img1.show()
Output
If you save the above program and execute, it shows the original image and, the filtered image using standard PNG display utility, as follows −
Original image
Filtered image
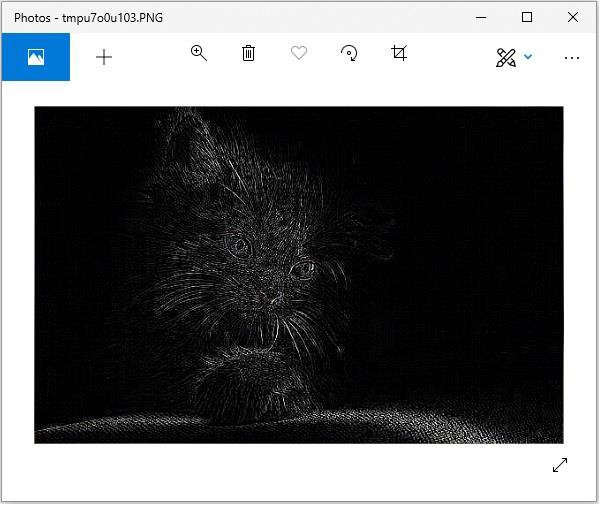
Python img.filter(FIND_EDGES) method
Following python example applies FIND_EDGES filter to the given image.
Example
#Import required image modules
from PIL import Image, ImageFilter

#Import all the enhancement filter from pillow
from PIL.ImageFilter import (
   BLUR, CONTOUR, DETAIL, EDGE_ENHANCE, EDGE_ENHANCE_MORE,
   EMBOSS, FIND_EDGES, SMOOTH, SMOOTH_MORE, SHARPEN
)
#Create image object
img = Image.open('images/cat.jpg')
#Applying the blur filter
img1 = img.filter(FIND_EDGES)
img1.save('images/ImageFilter_blur.jpg')
img1.show()
Output
If you save the above program and execute, it shows the original image and, the filtered image using standard PNG display utility, as follows −
Original image
Filtered image
Python img.filter(SMOOTH) method
Following python example applies SMOOTH filter to the given image.
Example
#Import required image modules
from PIL import Image, ImageFilter

#Import all the enhancement filter from pillow
from PIL.ImageFilter import (
   BLUR, CONTOUR, DETAIL, EDGE_ENHANCE, EDGE_ENHANCE_MORE,
   EMBOSS, FIND_EDGES, SMOOTH, SMOOTH_MORE, SHARPEN
)
#Create image object
img = Image.open('images/cat.jpg')
#Applying the blur filter
img1 = img.filter(SMOOTH)
img1.save('images/ImageFilter_blur.jpg')
img1.show()
Output
If you save the above program and execute, it shows the original image and, the filtered image using standard PNG display utility, as follows −
Original image
Filtered image

Python img.filter(SHARPEN) method
Following python example applies SHARPEN filter to the given image.
Example
#Import required image modules
from PIL import Image, ImageFilter

#Import all the enhancement filter from pillow
from PIL.ImageFilter import (
   BLUR, CONTOUR, DETAIL, EDGE_ENHANCE, EDGE_ENHANCE_MORE,
   EMBOSS, FIND_EDGES, SMOOTH, SMOOTH_MORE, SHARPEN
)
#Create image object
img = Image.open('images/cat.jpg')
#Applying the blur filter
img1 = img.filter(SHARPEN)
img1.save('images/ImageFilter_blur.jpg')
img1.show()
Output
If you save the above program and execute, it shows the original image and, the filtered image using standard PNG display utility, as follows −
Original image
Filtered image

Following python example applies SHARPEN filter to the given image.
Example
#Import required image modules
from PIL import Image, ImageFilter
#Import all the enhancement filter from pillow
from PIL.ImageFilter import (
   BLUR, CONTOUR, DETAIL, EDGE_ENHANCE, EDGE_ENHANCE_MORE,
   EMBOSS, FIND_EDGES, SMOOTH, SMOOTH_MORE, SHARPEN
)
#Create image object
img = Image.open('images/cat.jpg')
#Applying the blur filter
img1 = img.filter(SHARPEN)
img1.save('images/ImageFilter_blur.jpg')
img1.show()
Output
If you save the above program and execute, it shows the original image and, the filtered image using standard PNG display utility, as follows −
Original image
Filtered image

Python Pillow - Colors on an Image
The ImageColor module contains colors in different format arranged in tables and it also contains converters from CSS3-style color specifiers to RGB tuples.
Color Names
The ImageColor module supports the following strings formats −
Hexadecimal color specifiers, given as #rgb or #rrggbb. For example, #00ff00 represents pure green.
#00ff00 hex color, red value is 0 (0% red), green value is 255(100% green) and the blue value of its RGB is 0 (0% blue).
Cylindrical coordinate representations (also referred to as HSL) of color #00ff00 hue: 0.33, saturation: 1.00 and also the lightness value of 00ff00 is 0.50.
The Image Color module provides around 140 standard color names, based on the colors supported by the X Window system and most web browsers. Color names are case insensitive.
ImageColor.getrgb() Method
Convert a color string to an RGB tuple. If the string cannot be parsed, a ValueError exception is raised by this function.
Syntax
PIL.ImageColor.getrgb(color)
Where,
Arguments: color A color string
Return Value: (red, green, blue[, alpha])
Example 1
from PIL import ImageColor

# using getrgb
img = ImageColor.getrgb("blue")
print(img)

img1 = ImageColor.getrgb("purple")
print(img1)
Output
(0, 0, 255)
(128, 0, 128)
Example 2
#Import required image modules
from PIL import Image,ImageColor

# Create new image & get color RGB tuple.
img = Image.new("RGB", (256, 256), ImageColor.getrgb("#add8e6"))

#Show image
img.show()
Output

ImageColor. getcolor() Method
This method is same as getrgb(), however, converts the RGB value to a greyscale value, if the mode isnt The graphics commands support shape drawing and text annotation color or a palette image. If the string cannot be parsed, this function raises a ValueError exception.
Syntax
PIL.ImageColor.getcolor(color, mode)
Where,
Arguments - A color string
Return Value - (graylevel[, alpha]) or (red, green, blue[, alpha])
Example
#Import required image modules
from PIL import Image,ImageColor

# using getrgb

img = ImageColor.getrgb("skyblue")
print(img)

img1 = ImageColor.getrgb("purple")
print(img1)
Output
(135, 206, 235)
(128, 0, 128)
Python Pillow - ImageDraw Module
The ImageDraw module provides simple 2D graphics support for Image Object. Generally, we use this module to create new images, annotate or retouch existing images and to generate graphics on the fly for web use.
The graphics commands support the drawing of shapes and annotation of text.
An image can be well-thought-out to be a two-dimensional array of pixels (picture elements). A pixel is the smallest dot of color being supported.
The origin of the two-dimensional co-ordinate system used by ImageDraw, is in the upper left corner of the image.
The pillow color schemes we use is RGB. The color RGB representation and support is provided by the module ImageColor.
bitmap, OpenType or TrueType are the acceptable fonts for text annotations.
Most of the drawing commands may require a bounding box parameter that specifies the area on the image to which the command is to be applied.
A sequence of co-ordinates can be represented as [ (x0, y0), (x1, y1),(xn, yn)].
For some drawing commands, we require angle values.
Example
Following python example draws a line across the given image −
#Import required libraries
import sys
from PIL import Image, ImageDraw

#Create Image object
im = Image.open("images/logo.jpg")

#Draw line
draw = ImageDraw.Draw(im)
draw.line((0, 0) + im.size, fill=128)
draw.line((0, im.size[1], im.size[0], 0), fill=128)

#Show image
im.show()
Output
If you save the above program as Example.py and execute, it draws a line across the image and displays it using standard PNG display utility, as follows −
Canvas
An ImageDraw is a Pillow drawable surface (i.e., a canvas) of an Image.
ImageDraw.Draw(img) returns a drawable canvas representation of Image parameter img. The background of the canvas is the "img" image.
Example
Following python example draws text on the given image −
#Import required modules from Pillow package
from PIL import Image, ImageDraw, ImageFont
# get an image
base = Image.open('images/boy.jpg').convert('RGBA')
# make a blank image for the text, initialized to transparent text color
txt = Image.new('RGBA', base.size, (255,255,255,0))
# get a font
fnt = ImageFont.truetype('E:/PythonPillow/Fonts/Pacifico.ttf', 40)
# get a drawing context
d = ImageDraw.Draw(txt)
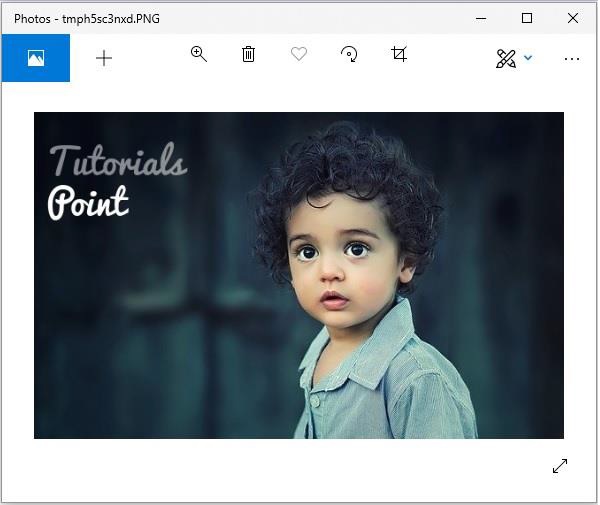
# draw text, half opacity
d.text((14,14), "Tutorials", font=fnt, fill=(255,255,255,128))
# draw text, full opacity
d.text((14,60), "Point", font=fnt, fill=(255,255,255,255))
out = Image.alpha_composite(base, txt)
#Show image
out.show()
Output
Drawing Shapes using ImageDraw module
ImageDraw module allows us to create different shapes by first creating a drawing object with the image you want to work with and then apply it. Some of the common shapes we can draw using ImageDraw module are as follows −
Line
Following is, the syntax to draw a line using python pillow −
draw.line(xy, fill=None, width=0)
The line() method draws a line from the upper left to lower right corners of bounding box xy and canvas. The line is filled using color fill. Default values of None and 0 respectively are for the parameters fill and width which are optional.
Example
from PIL import Image, ImageDraw

img = Image.new('RGB', (500, 300), (125, 125, 125))
draw = ImageDraw.Draw(img)
draw.line((200, 100, 300, 200), fill=(0, 0, 0), width=10)

img.show()
Output

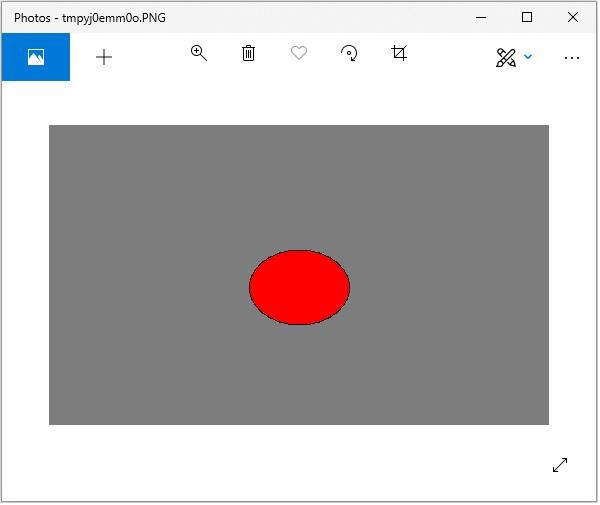
Eclipse
Following is, the syntax to draw an ellipse using python pillow −
draw.ellipse(xy, fill=None, outline=None)
The ellipse() method draws the ellipse surrounded by bounding box xy on draw. The shape is filled using color fill and the perimeter in color outline. Default values of None are for the parameters fill and width which are optional.
Example
from PIL import Image, ImageDraw

img = Image.new('RGB', (500, 300), (125, 125, 125))
draw = ImageDraw.Draw(img)

draw.ellipse((200, 125, 300, 200), fill=(255, 0, 0), outline=(0, 0, 0))
img.show()
Output
Rectangle
Following is, the syntax to draw a rectangle using python pillow −
draw.rectangle(xy, fill=None, outline=None)
The rectangle() method draws the rectangle given bounding box xy on draw. The shape is filled using color fill and the perimeter in color outline. Default values of None are for the parameters fill and width which are optional.
from PIL import Image, ImageDraw

img = Image.new('RGB', (500, 300), (125, 125, 125))
draw = ImageDraw.Draw(img)

draw.rectangle(
   (200, 125, 300, 200),
   fill=(255, 0, 0),
   outline=(0, 0, 0))
img.show()
Output

Polygon
Following is, the syntax to draw a rectangle using python pillow −
draw.polygon(seq, fill=None, outline=None)
The polygon() method draws a polygon connecting with straight lines the co-ordinate sequence locations seq on draw. The first and last co-ordinates in seq are also connected by a straight-line. The shape is filled using color fill and the perimeter in color outline. Parameters fill and outline are optional with default values None.
from PIL import Image, ImageDraw

img = Image.new('RGB', (500, 300), (125, 125, 125))
draw = ImageDraw.Draw(img)

draw.polygon(
   ((200, 200), (300, 100), (250, 50)),
   fill=(255, 0, 0),
   outline=(0, 0, 0))
img.show()
Output
Python Pillow - Image Sequences
The Python Imaging Library (PIL) contains some basic support for Image sequences (animation formats). FLI/FLC, GIF and a few experimental formats are the supported sequence formats. TIFF files can contain more than one frame as well.
Opening a sequence file, PIL automatically loads the first frame in the sequence. To move between different frames, you can use the seek and tell methods.
from PIL import Image
img = Image.open('bird.jpg')
#Skip to the second frame
img.seek(1)
try:
   while 1:
      img.seek(img.tell() + 1)
      #do_something to img
except EOFError:
   #End of sequence
   pass
Output
raise EOFError
EOFError
As we can see above, youll get an EOFError exception when the sequence ends.
Most drivers in the latest version of library only allow you to seek to the next frame (as in above example), to rewind the file, you may have to reopen it.
A sequence iterator class
class ImageSequence:
   def __init__(self, img):
      self.img = img
   def __getitem__(self, ix):
      try:
         if ix:
            self.img.seek(ix)
         return self.img
      except EOFError:
         raise IndexError # end of sequence
for frame in ImageSequence(img):
   # ...do something to frame...
Python Pillow - Writing Text on Image
You can write text on images by passing the location of the text, the text itself and the color of the text. We can pass multiple other parameters to this method.
Example
from PIL import Image, ImageDraw

img = Image.open(beach1.jpg')
d1 = ImageDraw.Draw(img)
d1.text((28, 36), "Hello, TutorialsPoint!", fill=(255, 0, 0))
img.show()
img.save("images/image_text.jpg")
Input

Output
If you save the above program as Example.py and execute, it will add the given text on it, and displays it using the standard PNG display utility, as follows −
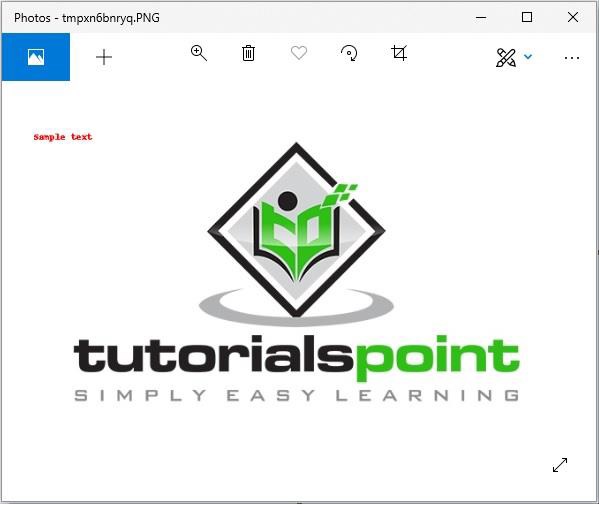
Selecting the font
There are numerous ways to select the font used for writing on the image. We can either load fonts directly from the system by passing the full path to the function, or we can use the ImageFont to load a TrueType font.
Example
from PIL import Image, ImageDraw, ImageFont

img = Image.open('images/logo.jpg')
d1 = ImageDraw.Draw(img)
myFont = ImageFont.truetype('E:/PythonPillow/Fonts/FreeMono.ttf', 40)
d1.text((0, 0), "Sample text", font=myFont, fill =(255, 0, 0))
img.show()
img.save("images/image_text.jpg")
Output
Python Pillow - M L with Numpy
In this chapter, we use numpy to store and manipulate image data using python imaging library pillow.
Before proceeding with this chapter open command prompt in administrator mode and execute the following command in it to install numpy −
pip install numpy
Note − This works only if you have PIP installed and updated.
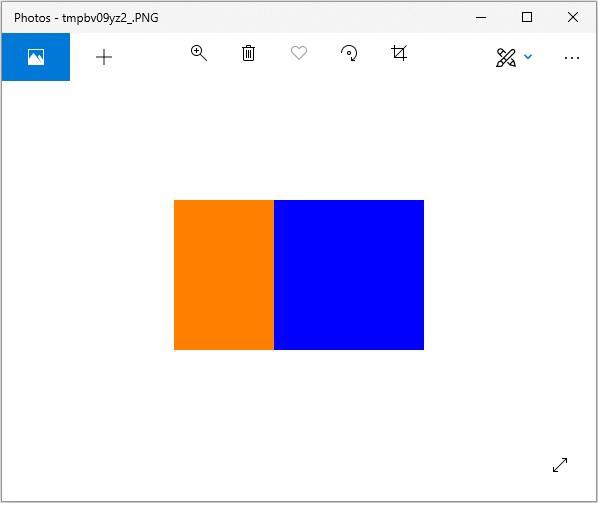
Creating image from Numpy Array
Creating an RGB image using PIL and save it as a jpg file. In the following example we will −
Create a 150 by 250-pixel array.
Fill left half of the array with orange.
Fill right half of the array with blue.
from PIL import Image
import numpy as np

arr = np.zeros([150, 250, 3], dtype=np.uint8)

arr[:,:100] = [255, 128, 0]

arr[:,100:] = [0, 0, 255]

img = Image.fromarray(arr)

img.show()

img.save("RGB_image.jpg")
Output
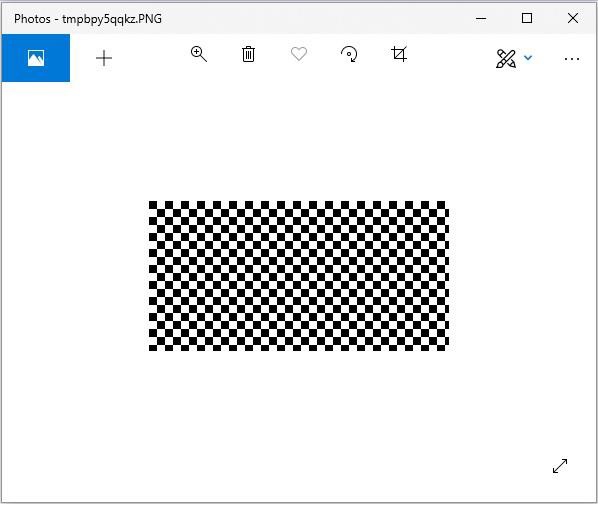
Creating greyscale images
Creating greyscale images is slightly different from creating an RGB image. We can use the 2-dimensional array to create a greyscale image.
from PIL import Image
import numpy as np

arr = np.zeros([150,300], dtype=np.uint8)

#Set grey value to black or white depending on x position
   for x in range(300):
      for y in range(150):
         if (x % 16) // 8 == (y % 16)//8:
            arr[y, x] = 0
         else:
            arr[y, x] = 255
img = Image.fromarray(arr)

img.show()

img.save('greyscale.jpg')
Output
Creating numpy array from an Image
You can convert PIL image to numpy array and vice versa. A small program to demonstrate the same is stated below.
Example
#Import required libraries
from PIL import Image
from numpy import array

#Open Image & create image object
img = Image.open('beach1.jpg')

#Show actual image
img.show()

#Convert an image to numpy array
img2arr = array(img)

#Print the array
print(img2arr)

#Convert numpy array back to image
arr2im = Image.fromarray(img2arr)

#Display image
arr2im.show()

#Save the image generated from an array
arr2im.save("array2Image.jpg")
Output
If you save the above program as Example.py and execute −
It displays the original image.
Displays the array retrieved from it.
Converts the array back into image and displays it.
Since we have used show() method the images are displayed using the default PNG display utility, as follows.
[[[ 0 101 120]
[ 3 108 127]
[ 1 107 123]
...
...
[[ 38 59 60]
[ 37 58 59]
[ 36 57 58]
...
[ 74 65 60]
[ 59 48 42]
[ 66 53 47]]
[[ 40 61 62]
[ 38 59 60]
[ 37 58 59]
...
[ 75 66 61]
[ 72 61 55]
[ 61 48 42]]
[[ 40 61 62]
[ 34 55 56]
[ 38 59 60]
...
[ 82 73 68]
[ 72 61 55]
[ 63 52 46]]]
Original Image
Image constructed from the array
