- Python Pillow - Home
- Python Pillow - Overview
- Python Pillow - Environment Setup
- Basic Image Operations
- Python Pillow - Working with Images
- Python Pillow - Resizing an Image
- Python Pillow - Flip and Rotate Images
- Python Pillow - Cropping an Image
- Python Pillow - Adding Borders to Images
- Python Pillow - Identifying Image Files
- Python Pillow - Merging Images
- Python Pillow - Cutting and Pasting Images
- Python Pillow - Rolling an Image
- Python Pillow - Writing text on image
- Python Pillow - ImageDraw Module
- Python Pillow - Concatenating two Images
- Python Pillow - Creating Thumbnails
- Python Pillow - Creating a Watermark
- Python Pillow - Image Sequences
- Python Pillow Color Conversions
- Python Pillow - Colors on an Image
- Python Pillow - Creating Images With Colors
- Python Pillow - Converting Color String to RGB Color Values
- Python Pillow - Converting Color String to Grayscale Values
- Python Pillow - Change the Color by Changing the Pixel Values
- Image Manipulation
- Python Pillow - Reducing Noise
- Python Pillow - Changing Image Modes
- Python Pillow - Compositing Images
- Python Pillow - Working with Alpha Channels
- Python Pillow - Applying Perspective Transforms
- Image Filtering
- Python Pillow - Adding Filters to an Image
- Python Pillow - Convolution Filters
- Python Pillow - Blur an Image
- Python Pillow - Edge Detection
- Python Pillow - Embossing Images
- Python Pillow - Enhancing Edges
- Python Pillow - Unsharp Mask Filter
- Image Enhancement and Correction
- Python Pillow - Enhancing Contrast
- Python Pillow - Enhancing Sharpness
- Python Pillow - Enhancing Color
- Python Pillow - Correcting Color Balance
- Python Pillow - Removing Noise
- Image Analysis
- Python Pillow - Extracting Image Metadata
- Python Pillow - Identifying Colors
- Advanced Topics
- Python Pillow - Creating Animated GIFs
- Python Pillow - Batch Processing Images
- Python Pillow - Converting Image File Formats
- Python Pillow - Adding Padding to an Image
- Python Pillow - Color Inversion
- Python Pillow - M L with Numpy
- Python Pillow with Tkinter BitmapImage and PhotoImage objects
- Image Module
- Python Pillow - Image Blending
- Python Pillow Useful Resources
- Python Pillow - Quick Guide
- Python Pillow - Function Reference
- Python Pillow - Useful Resources
- Python Pillow - Discussion
Python Pillow - Convolution Filters
In the context of image processing, Convolution involves applying a small matrix (known as convolution kernel) of values to an image. This process results in various filtering effects such as blurring, sharpening, embossing, and edge detection. Each value in the kernel represents a weight or coefficient. This kernel is applied to a corresponding neighborhood of pixels in the image to produce the output pixel value at the corresponding position in the output image.
Python's Pillow library provides a specific class known as "kernel" within its ImageFilter module. This class is used to create convolution kernels of sizes that extend beyond the conventional 5x5 matrices.
Creating the Convolution kernel
To create a convolution kernel you can use the Kernel() class from the ImageFilter module.
It's important to note that the current version of Pillow supports 33 and 55 integer and floating-point kernels. And these kernels apply exclusively to images in "L" and "RGB" modes.
Following is the syntax of this ImageFilter.Kernel() class −
class PIL.ImageFilter.Kernel(size, kernel, scale=None, offset=0)
Here are the details of the class parameters −
size − Represents the kernel size, specified as (width, height). In the current version, the valid sizes are (3,3) or (5,5).
kernel − A sequence containing the kernel weights. The kernel is vertically flipped before applying it to the image.
scale − Denotes the scale factor. If provided, the result for each pixel is divided by this value. The default value is the sum of the kernel weights.
offset − Signifies an offset value. If provided, this value is added to the result after being divided by the scale factor.
Example
This example demonstrates how to apply a convolution kernel filter to an image using the Image.filter() method.
from PIL import Image, ImageFilter
# Create an image object
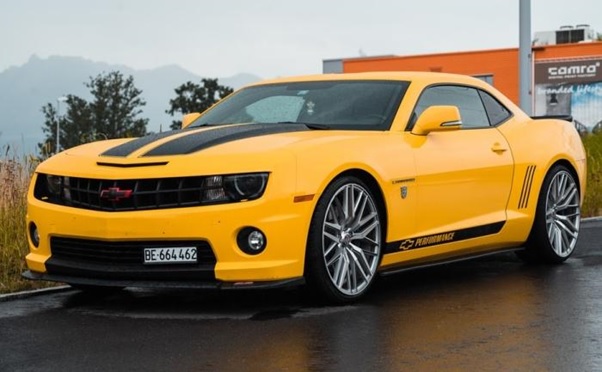
original_image = Image.open('Images/Car_2.jpg')
# Apply the Kernel filter
filtered_image = original_image.filter(ImageFilter.Kernel((3, 3), (0, -1, 0, -1, 5, -1, 0, -1, 0)))
# Display the original image
original_image.show()
# Display the filtered image
filtered_image.show()
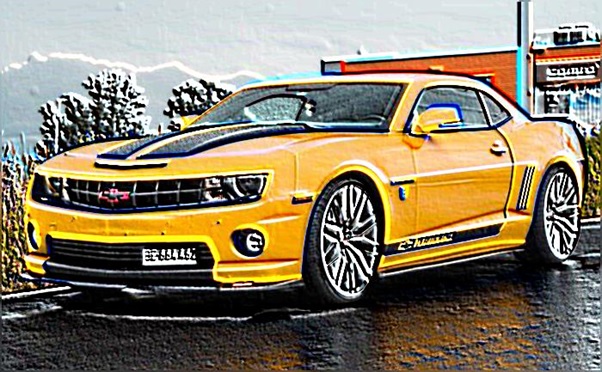
Input Image
Output
Output of the convolution kernel filter −
Example
Here's an example of applying a 5x5 emboss convolution kernel filter to an image.
from PIL import Image, ImageFilter

# Create an image object
original_image = Image.open('Images/Car_2.jpg')

# Define a 5x5 convolution kernel
kernel_5x5 = [-2,  0, -1,  0,  0,
   0, -2, -1,  0,  0,
   -1, -1,  1,  1,  1,
   0,  0,  1,  2,  0,
   0,  0,  1,  0,  2]

# Apply the 5x5 convolution kernel filter
filtered_image = original_image.filter(ImageFilter.Kernel((5, 5), kernel_5x5, 1, 0))

# Display the original image
original_image.show()

# Display the filtered image
filtered_image.show()
Input Image
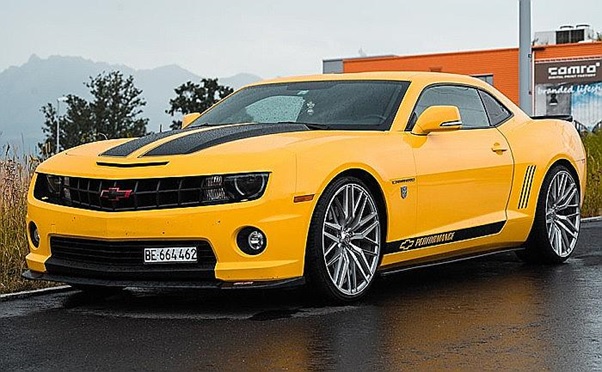
Output Image
Output of the convolution kernel filter of size 5X5 −