- Python Pillow - Home
- Python Pillow - Overview
- Python Pillow - Environment Setup
- Basic Image Operations
- Python Pillow - Working with Images
- Python Pillow - Resizing an Image
- Python Pillow - Flip and Rotate Images
- Python Pillow - Cropping an Image
- Python Pillow - Adding Borders to Images
- Python Pillow - Identifying Image Files
- Python Pillow - Merging Images
- Python Pillow - Cutting and Pasting Images
- Python Pillow - Rolling an Image
- Python Pillow - Writing text on image
- Python Pillow - ImageDraw Module
- Python Pillow - Concatenating two Images
- Python Pillow - Creating Thumbnails
- Python Pillow - Creating a Watermark
- Python Pillow - Image Sequences
- Python Pillow Color Conversions
- Python Pillow - Colors on an Image
- Python Pillow - Creating Images With Colors
- Python Pillow - Converting Color String to RGB Color Values
- Python Pillow - Converting Color String to Grayscale Values
- Python Pillow - Change the Color by Changing the Pixel Values
- Image Manipulation
- Python Pillow - Reducing Noise
- Python Pillow - Changing Image Modes
- Python Pillow - Compositing Images
- Python Pillow - Working with Alpha Channels
- Python Pillow - Applying Perspective Transforms
- Image Filtering
- Python Pillow - Adding Filters to an Image
- Python Pillow - Convolution Filters
- Python Pillow - Blur an Image
- Python Pillow - Edge Detection
- Python Pillow - Embossing Images
- Python Pillow - Enhancing Edges
- Python Pillow - Unsharp Mask Filter
- Image Enhancement and Correction
- Python Pillow - Enhancing Contrast
- Python Pillow - Enhancing Sharpness
- Python Pillow - Enhancing Color
- Python Pillow - Correcting Color Balance
- Python Pillow - Removing Noise
- Image Analysis
- Python Pillow - Extracting Image Metadata
- Python Pillow - Identifying Colors
- Advanced Topics
- Python Pillow - Creating Animated GIFs
- Python Pillow - Batch Processing Images
- Python Pillow - Converting Image File Formats
- Python Pillow - Adding Padding to an Image
- Python Pillow - Color Inversion
- Python Pillow - M L with Numpy
- Python Pillow with Tkinter BitmapImage and PhotoImage objects
- Image Module
- Python Pillow - Image Blending
- Python Pillow Useful Resources
- Python Pillow - Quick Guide
- Python Pillow - Function Reference
- Python Pillow - Useful Resources
- Python Pillow - Discussion
Python Pillow - Creating Images with Colors
What is creating Images with colors?
Creating images with color in Pillow (Python Imaging Library, now known as Pillow) involves creating new images filled with specific colors. Creating images with color in Pillow involves generating an image of a specific size and filling it with a desired color. This process allows us to generate solid-colored images which can be useful for various purposes such as creating backgrounds, placeholders or simple graphics.
In pillow we have the method namely new() which is used to create the images with colors. At the beginning we have seen the syntax and parameters of the new() method available in the Image module.
There are few steps to be followed to create the image with the defined color. Let's see them one by one.
Import the necessary modules
To use Pillow we need to import the required modules typically Image and ImageDraw. The Image module provides functions for creating and manipulating images and ImageDraw is useful for drawing shapes and text on the images.
Define the image size and color
Determine the dimensions i.e. width and height of the image we want to create and specify the color we want to use. Colors can be defined in various ways such as RGB tuples or color names.
Create a new image with the specified size and color
Use the Image.new() method to create a new image. We can specify the image mode which can be "RGB," "RGBA," "L" (grayscale) and others depending on our needs. We can also provide the size and color for the image.
Optionally draw on the image
If we want to add shapes, text or other elements to the image then we can use the ImageDraw module. This allows us to draw on the image using various methods like draw.text(), draw.rectangle() and so on.
Save or display the image
We can save the created image to a file in a specific format (e.g., PNG, JPEG) using the save() method. Alternatively we can display the image using the show() method which opens the image in the default image viewer.
Example
Here in this example we are creating the solid red color image by using the new() method of the Image module.
from PIL import Image, ImageDraw

#Define image size (width and height)
width, height = 400, 300

#Define the color in RGB format (e.g., red)
color = (255, 0, 0)

#Red
#Create a new image with the specified size and color
image = Image.new("RGB", (width, height), color)

#Save the image to a file
image.save("output Image/colored_image.png")

#Show the image (opens the default image viewer)
image.show()
Output

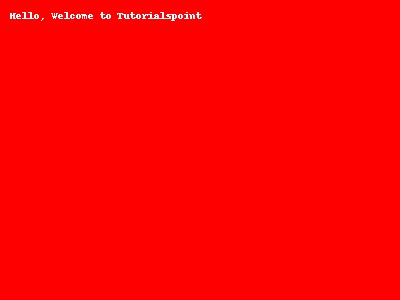
Example
In this example we are using the optional feature i.e adding the text by using the ImageDraw module Draw() method.
from PIL import Image, ImageDraw

#Define image size (width and height)
width, height = 400, 300

#Define the color in RGB format (e.g., red)
color = (255, 0, 0)

#Red
#Create a new image with the specified size and color
image = Image.new("RGB", (width, height), color)

#Optional: If you want to draw on the image, use ImageDraw
draw = ImageDraw.Draw(image)
draw.text((10, 10), "Hello, Welcome to Tutorialspoint", fill=(255, 255, 255))

#Draw white text at position (10, 10)
#Save the image to a file
image.save("output Image/colored_image.png")

#Show the image (opens the default image viewer)
image.show()
Output