- Python Pillow - Home
- Python Pillow - Overview
- Python Pillow - Environment Setup
- Basic Image Operations
- Python Pillow - Working with Images
- Python Pillow - Resizing an Image
- Python Pillow - Flip and Rotate Images
- Python Pillow - Cropping an Image
- Python Pillow - Adding Borders to Images
- Python Pillow - Identifying Image Files
- Python Pillow - Merging Images
- Python Pillow - Cutting and Pasting Images
- Python Pillow - Rolling an Image
- Python Pillow - Writing text on image
- Python Pillow - ImageDraw Module
- Python Pillow - Concatenating two Images
- Python Pillow - Creating Thumbnails
- Python Pillow - Creating a Watermark
- Python Pillow - Image Sequences
- Python Pillow Color Conversions
- Python Pillow - Colors on an Image
- Python Pillow - Creating Images With Colors
- Python Pillow - Converting Color String to RGB Color Values
- Python Pillow - Converting Color String to Grayscale Values
- Python Pillow - Change the Color by Changing the Pixel Values
- Image Manipulation
- Python Pillow - Reducing Noise
- Python Pillow - Changing Image Modes
- Python Pillow - Compositing Images
- Python Pillow - Working with Alpha Channels
- Python Pillow - Applying Perspective Transforms
- Image Filtering
- Python Pillow - Adding Filters to an Image
- Python Pillow - Convolution Filters
- Python Pillow - Blur an Image
- Python Pillow - Edge Detection
- Python Pillow - Embossing Images
- Python Pillow - Enhancing Edges
- Python Pillow - Unsharp Mask Filter
- Image Enhancement and Correction
- Python Pillow - Enhancing Contrast
- Python Pillow - Enhancing Sharpness
- Python Pillow - Enhancing Color
- Python Pillow - Correcting Color Balance
- Python Pillow - Removing Noise
- Image Analysis
- Python Pillow - Extracting Image Metadata
- Python Pillow - Identifying Colors
- Advanced Topics
- Python Pillow - Creating Animated GIFs
- Python Pillow - Batch Processing Images
- Python Pillow - Converting Image File Formats
- Python Pillow - Adding Padding to an Image
- Python Pillow - Color Inversion
- Python Pillow - M L with Numpy
- Python Pillow with Tkinter BitmapImage and PhotoImage objects
- Image Module
- Python Pillow - Image Blending
- Python Pillow Useful Resources
- Python Pillow - Quick Guide
- Python Pillow - Function Reference
- Python Pillow - Useful Resources
- Python Pillow - Discussion
Python Pillow - ImageChops.multiply() Function
The PIL.ImageChops.multiply() function superimposes two images on top of each other. If you multiply an image with a solid black image, the result is black. If you multiply it with a solid white image, the original image is unaffected.
It is useful for scenarios where you want to perform a logical AND operation on an image with a mode other than "1". This can be achieved by providing a black-and-white mask as the second image to the `multiply()` function.
The operation is defined as follows −
$$\mathrm{out\:=\:image1\:*\:image2\:/\:MAX}$$
Syntax
Following is the syntax of the function −
PIL.ImageChops.multiply(image1, image2)
Parameters
Here are the details of this function parameters −
image1 − The first input image.
image2 − The second input image.
Return Value
The return type of this function is an Image.
Examples
Example 1
Here is an example that demonstrates the working of the ImageChops.multiple() function.
from PIL import Image, ImageChops
import numpy as np

# Create two binary images with mode "1"
array1 = np.array([(154, 64, 3), (255, 0, 0), (255, 255, 0), (255, 255, 255), (164, 0, 3)], dtype=np.uint8)
array2 = np.array([(200, 14, 3), (20, 222, 0), (255, 155, 0), (255, 55, 100), (180, 0, 78)], dtype=np.uint8)

image1 = Image.fromarray(array1)
image2 = Image.fromarray(array2)

# Display the pixel values of the two input images
print("Pixel values of image1 at (0, 0):", image1.getpixel((0, 0)))
print("Pixel values of image2 at (0, 0):", image2.getpixel((0, 0)))

# Superimpose the two images using multiply
result = ImageChops.multiply(image1, image2)

# Display the pixel values of the resulting image at (0, 0)
print("Pixel values of the result at (0, 0) after multiply:", result.getpixel((0, 0)))
Output
Pixel values of image1 at (0, 0): 154
Pixel values of image2 at (0, 0): 200
Pixel values of the result at (0, 0) after multiply: 120
Example 2
In this example, the PIL.ImageChops.multiply() function is used to superimpose an image with another image.
from PIL import Image, ImageChops

# Open two image files
image1 = Image.open('Images/Tajmahal_2.jpg')
image2 = Image.open('Images/black-doted-butterflies.jpg')

# Superimpose the image with another using the multiply function
result = ImageChops.multiply(image1, image2)

# Display the input and resulting images
image1.show()
image2.show()
result.show()
Output
Input Image 1
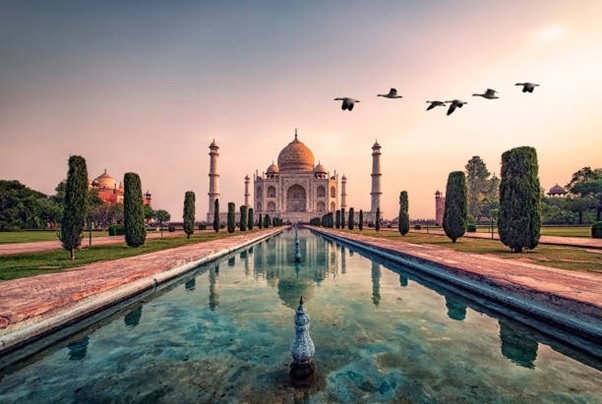
Input Image 2
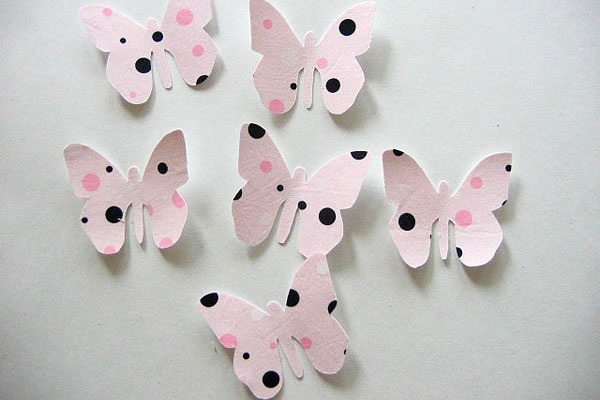
Output Image

Example 3
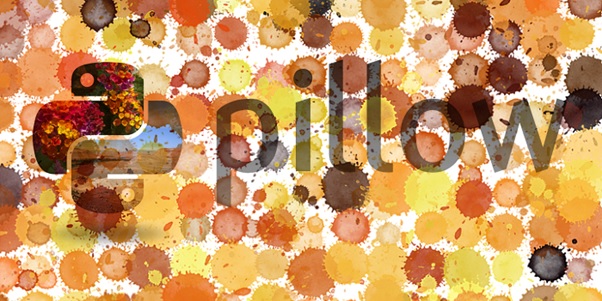
In this example, the PIL.ImageChops.multiply() function is used to superimpose two PNG images.
from PIL import Image, ImageChops

# Open an image file
image1 = Image.open('Images/pillow-logo-w.png')

# Create a black-and-white mask
image2 = Image.open('Images/ColorDots.png')

# Superimpose the image with the mask
result = ImageChops.multiply(image1, image2)

# Display the input and resulting images
image1.show()
image2.show()
result.show()
Output
Input Image 1
Input Image 2
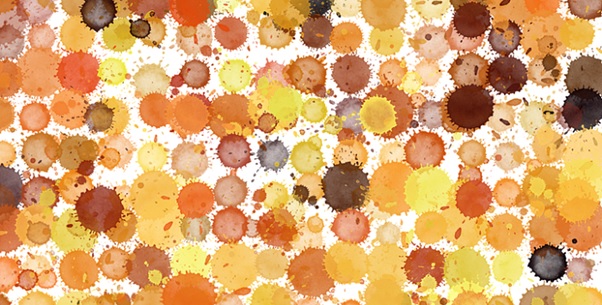
Output Image