- Swift - Home
- Swift - Overview
- Swift - Environment
- Swift - Basic Syntax
- Swift - Variables
- Swift - Constants
- Swift - Literals
- Swift - Comments
- Swift Operators
- Swift - Operators
- Swift - Arithmetic Operators
- Swift - Comparison Operators
- Swift - Logical Operators
- Swift - Assignment Operators
- Swift - Bitwise Operators
- Swift - Misc Operators
- Swift Advanced Operators
- Swift - Operator Overloading
- Swift - Arithmetic Overflow Operators
- Swift - Identity Operators
- Swift - Range Operators
- Swift Data Types
- Swift - Data Types
- Swift - Integers
- Swift - Floating-Point Numbers
- Swift - Double
- Swift - Boolean
- Swift - Strings
- Swift - Characters
- Swift - Type Aliases
- Swift - Optionals
- Swift - Tuples
- Swift - Assertions and Precondition
- Swift Control Flow
- Swift - Decision Making
- Swift - if statement
- Swift - if...else if...else Statement
- Swift - if-else Statement
- Swift - nested if statements
- Swift - switch statement
- Swift - Loops
- Swift - for in loop
- Swift - While loop
- Swift - repeat...while loop
- Swift - continue statement
- Swift - break statement
- Swift - fall through statement
- Swift Collections
- Swift - Arrays
- Swift - Sets
- Swift - Dictionaries
- Swift Functions
- Swift - Functions
- Swift - Nested Functions
- Swift - Function Overloading
- Swift - Recursion
- Swift - Higher-Order Functions
- Swift Closures
- Swift - Closures
- Swift-Escaping and Non-escaping closure
- Swift - Auto Closures
- Swift OOps
- Swift - Enumerations
- Swift - Structures
- Swift - Classes
- Swift - Properties
- Swift - Methods
- Swift - Subscripts
- Swift - Inheritance
- Swift-Overriding
- Swift - Initialization
- Swift - Deinitialization
- Swift Advanced
- Swift - ARC Overview
- Swift - Optional Chaining
- Swift - Error handling
- Swift - Concurrency
- Swift - Type Casting
- Swift - Nested Types
- Swift - Extensions
- Swift - Protocols
- Swift - Generics
- Swift - Access Control
- Swift - Function vs Method
- Swift - SwiftyJSON
- Swift - Singleton class
- Swift Random Numbers
- Swift Opaque and Boxed Type
- Swift - Compile Online
- Swift - Quick Guide
- Swift - Cheatsheet
- Swift - Useful Resources
- Swift - Discussion
Swift Environment Setup
Swift is a new generation language developed by Apple to create applications and software for the Apple ecosystem. Due to its speed, safety and modern syntax, it quickly emerged as a preferred language among the developers. Originally Siwft was designed to create applications for iOS and macOS.
However, with the increase in its popularity, developers expanded its versatility. Now Swift is available not only for macOS but for Windows and Linux also and provides cross-platform solutions to the developers. Now let us see how we can install Swift on macOS and Windows step by step.
Installing Swift on macOS
To install Swift on macOS we required Xcode. Xcode is Apples integrated development environment(IDE) for all Apples platforms. It provides various tools to create apps and support the source code for various programming languages like Swift, Objective-C, Java, Python, C++, C, etc.
So follow the following steps to download Xcode in macOS −
Step 1 − Go to the App Store or you can go to the following link to download the latest version of Xcode:www.swift.org/install/.
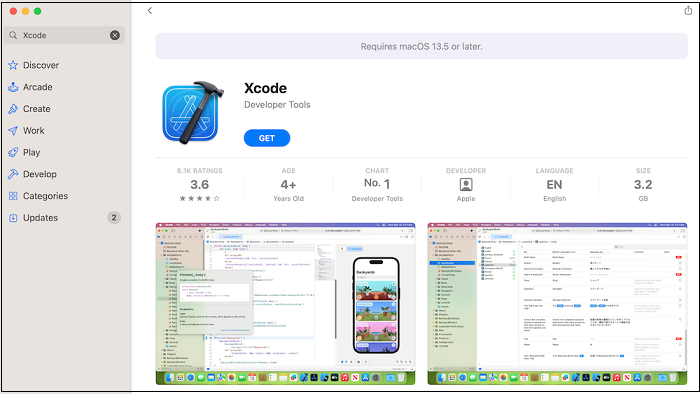
Step 2 − It will automatically install Xcode on your macOS
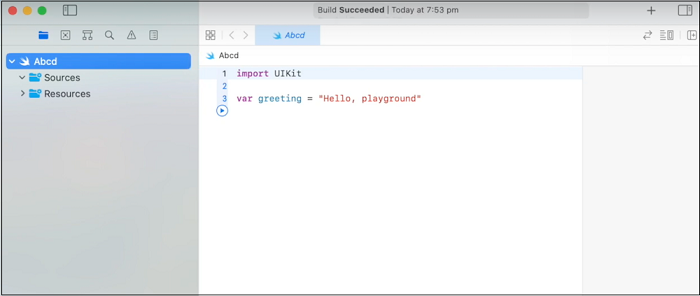
Step 3 − Now open Xcode and go to file >> New >> Playground.
Step 4 − Now select a blank option and then give the name and then click on the Create button.

Step 5 − Now you are ready to write and run your first Swift program.
Installing Swift on Windows
To install Swift on Windows, follow the following steps −
Step 1 − Go to the following link to download the latest version of Swift for your Windows www.swift.org/download/.
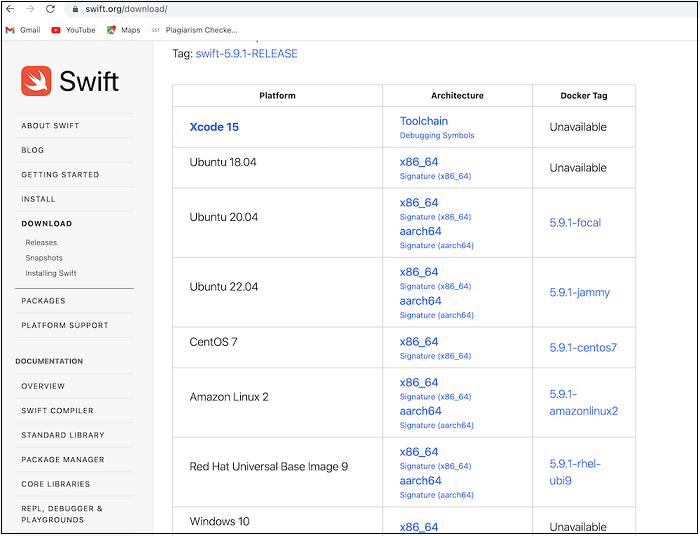
Step 2 − Click on Windows x86_64 and it starts downloading.
Step 3 − Go to the download folder and open the downloaded .exe file.
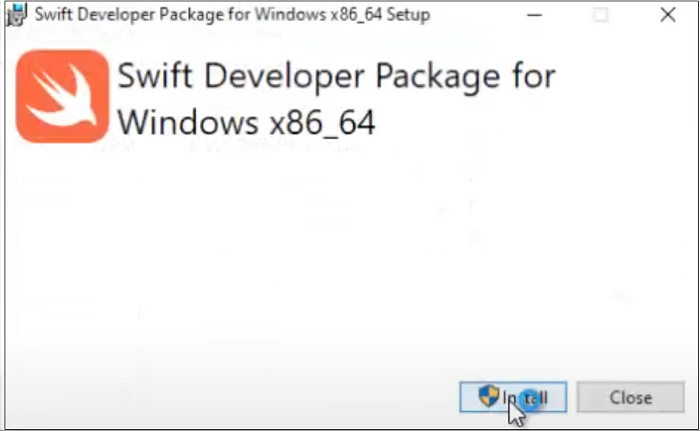
Step 4 − Click on the install button and the installation process will start.
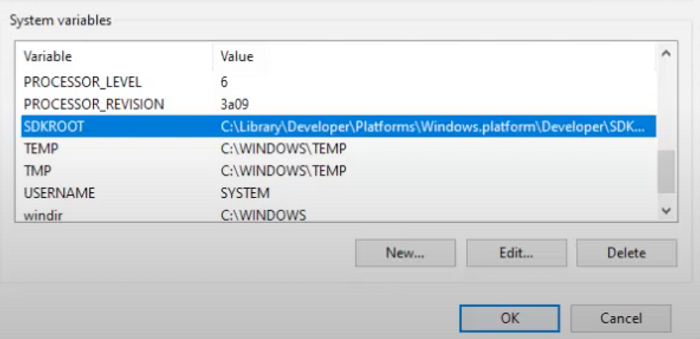
Step 5 − After completing the installation go to the environment variable and check for SDKRoot.
Step 6 − Now go to the command prompt and type the following command −
Swift version
Installing Swift on Linux (Ubuntu/Debian)
Popular Linux distributions, including Ubuntu support Swift. To install Swift on Ubuntu/Debian, follow the following steps:
Step 1 − First of all, you need to update system packages using the following commands:
sudo apt update
sudo apt upgrade -y
Step 2 − After updating the system packages, you need to Install the required dependencies using the following command:
sudo apt install -y clang libicu-dev
Step 3 − Now, download the latest Swift release from Swift's official website https://swift.org/download/. To do this, select the latest toolchain for Ubuntu and download it using the wget command. Follow the following command:
wget https://download.swift.org/swift-5.9-release/ubuntu2204/swift-5.9-RELEASE-ubuntu22.04.tar.gz
Step 4 − After downloading, extract the files and setup Swift using the following commands:
tar -xvzf swift-5.9-RELEASE-ubuntu22.04.tar.gz
sudo mv swift-5.9-RELEASE-ubuntu22.04 /opt/swift
Step 5 − After this, you need to add Swift to your environment path. Following the following commands:
tar -xvzf swift-5.9-RELEASE-ubuntu22.04.tar.gz
sudo mv swift-5.9-RELEASE-ubuntu22.04 /opt/swift
Step 6 − After all these steps, check the version of Swift to verify installation whether Swift is installed correctly or not. Use the following command:
swift --version
After executing this command. The output will be something like this:
Swift version 5.9 (swift-5.9-RELEASE)
Target: x86_64-unknown-linux-gnu
Run Swift Program on Linux
After completing the installation steps. It's time to write a Swift program and execute it on Linux environment.
Step 1 − Create a Swift code file by using the nano command. Follow the following command structure to create a file having extension .swift:
nano hello.swift
Step 2 − Now, write the Swift code.
print("Hello, World!")
Step 3 − Compile and run the Swift code by using the following commands:
swiftc hello.swift -o hello
./hello
The following will be the output after executing these commands:
Hello, World!
