- Python XlsxWriter - Home
- Python XlsxWriter - Overview
- Python XlsxWriter - Environment Setup
- Python XlsxWriter - Hello World
- Python XlsxWriter - Important classes
- Python XlsxWriter - Cell Notation & Ranges
- Python XlsxWriter - Defined Names
- Python XlsxWriter - Formula & Function
- Python XlsxWriter - Date and Time
- Python XlsxWriter - Tables
- Python XlsxWriter - Applying Filter
- Python XlsxWriter - Fonts & Colors
- Python XlsxWriter - Number Formats
- Python XlsxWriter - Border
- Python XlsxWriter - Hyperlinks
- Python XlsxWriter - Conditional Formatting
- Python XlsxWriter - Adding Charts
- Python XlsxWriter - Chart Formatting
- Python XlsxWriter - Chart Legends
- Python XlsxWriter - Bar Chart
- Python XlsxWriter - Line Chart
- Python XlsxWriter - Pie Chart
- Python XlsxWriter - Sparklines
- Python XlsxWriter - Data Validation
- Python XlsxWriter - Outlines & Grouping
- Python XlsxWriter - Freeze & Split Panes
- Python XlsxWriter - Hide/Protect Worksheet
- Python XlsxWriter - Textbox
- Python XlsxWriter - Insert Image
- Python XlsxWriter - Page Setup
- Python XlsxWriter - Header & Footer
- Python XlsxWriter - Cell Comments
- Python XlsxWriter - Working with Pandas
- Python XlsxWriter - VBA Macro
Python XlsxWriter - Border
This section describes how to apply and format the appearance of cell border as well as a border around text box.
Working with Cell Border
The properties in the add_format() method that control the appearance of cell border are as shown in the following table −
| Description | Property | method |
|---|---|---|
| Cell border | 'border' | set_border() |
| Bottom border | 'bottom' | set_bottom() |
| Top border | 'top' | set_top() |
| Left border | 'left' | set_left() |
| Right border | 'right' | set_right() |
| Border color | 'border_color' | set_border_color() |
| Bottom color | 'bottom_color' | set_bottom_color() |
| Top color | 'top_color' | set_top_color() |
| Left color | 'left_color' | set_left_color() |
| Right color | 'right_color' | set_right_color() |
Note that for each property of add_format() method, there is a corresponding format class method starting with the set_propertyname() method.
For example, to set a border around a cell, we can use border property in add_format() method as follows −
f1= wb.add_format({ 'border':2})
The same action can also be done by calling the set_border() method −
f1 = workbook.add_format()
f1.set_border(2)
Individual border elements can be configured by the properties or format methods as follows −
- set_bottom()
- set_top()
- set_left()
- set_right()
These border methods/properties have an integer value corresponding to the predefined styles as in the following table −
| Index | Name | Weight | Style |
|---|---|---|---|
| 0 | None | 0 | |
| 1 | Continuous | 1 | ----------- |
| 2 | Continuous | 2 | ----------- |
| 3 | Dash | 1 | - - - - - - |
| 4 | Dot | 1 | . . . . . . |
| 5 | Continuous | 3 | ----------- |
| 6 | Double | 3 | =========== |
| 7 | Continuous | 0 | ----------- |
| 8 | Dash | 2 | - - - - - - |
| 9 | Dash Dot | 1 | - . - . - . |
| 10 | Dash Dot | 2 | - . - . - . |
| 11 | Dash Dot Dot | 1 | - . . - . . |
| 12 | Dash Dot Dot | 2 | - . . - . . |
| 13 | SlantDash Dot | 2 | / - . / - . |
Example
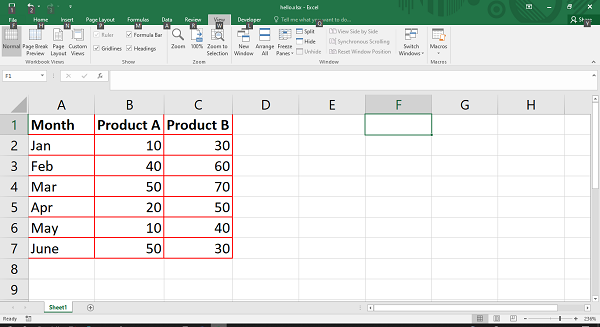
Following code shows how the border property is used. Here, each row is having a border style 2 corresponding to continuous bold.
import xlsxwriter

wb = xlsxwriter.Workbook('hello.xlsx')
ws = wb.add_worksheet()

f1=wb.add_format({'bold':True, 'border':2, 'border_color':'red'})
f2=wb.add_format({'border':2, 'border_color':'red'})

headings = ['Month', 'Product A', 'Product B']

data = [
   ['Jan', 'Feb', 'Mar', 'Apr', 'May', 'June'],
   [10, 40, 50, 20, 10, 50],
   [30, 60, 70, 50, 40, 30],
]

ws.write_row('A1', headings, f1)
ws.write_column('A2', data[0], f2)
ws.write_column('B2', data[1],f2)
ws.write_column('C2', data[2],f2)

wb.close()
Output
The worksheet shows a bold border around the cells.
Working with Textbox Border
The border property is also available for the text box object. The text box also has a line property which is similar to border, so that they can be used interchangeably. The border itself can further be formatted by none, color, width and dash_type parameters.
Line or border set to none means that the text box will not have any border. The dash_type parameter can be any of the following values −
- solid
- round_dot
- square_dot
- dash
- dash_dot
- long_dash
- long_dash_dot
- long_dash_dot_dot
Example
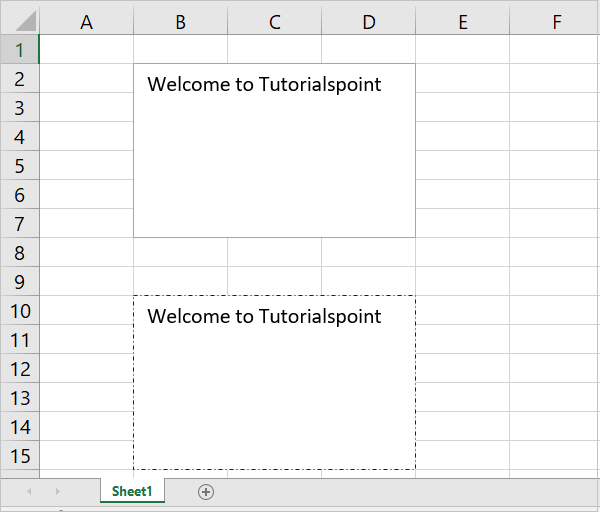
Here is a program that displays two text boxes, one with a solid border, red in color; and the second box has dash_dot type border in blue color.
import xlsxwriter

wb = xlsxwriter.Workbook('hello.xlsx')
ws = wb.add_worksheet()

ws.insert_textbox('B2', 'Welcome to Tutorialspoint',
{'border': {'color': '#FF9900'}})

ws.insert_textbox('B10', 'Welcome to Tutorialspoint', {
   'line':
   {'color': 'blue', 'dash_type': 'dash_dot'}
})
wb.close()
Output
The output worksheet shows the textbox borders.