- Google Tag Manager Tutorial
- Google Tag Manager - Home
- Overview
- Set Up
- Getting Started
- Track Tags
- Organize the Interface
- Publish a Tag
- The Data Layer
- Advanced Tracking
- Google Tag Manager Resources
- Quick Guide
- Useful Resources
- Discussion
Google Tag Manager - Publish a Tag
We have been creating, modifying, and debugging the tags in our debugger environment. Till now, we haven’t seen the tags live on our blog.
To have the tags live on the blog, we need to Publish the tags. We will want to have the tags Published than to have Preview mode always.
Publishing the tags is fairly simple.
Step 1 − Click the SUBMIT button at the top right corner of the screen.
It will show the following screen.
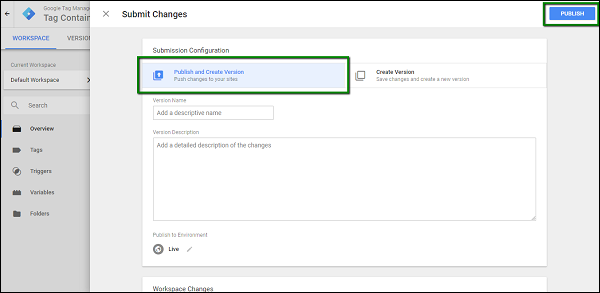
Step 2 − Enter an identifiable Version name so that it can be easily understood for the changes made.
With the version description, you can be as elaborate as possible on the changes/additions of the tag in that particular version.
Step 3 − Scroll down to the Workspace Changes, you will see all the changes made in the tags, which are unpublished or in the PREVIEW mode.
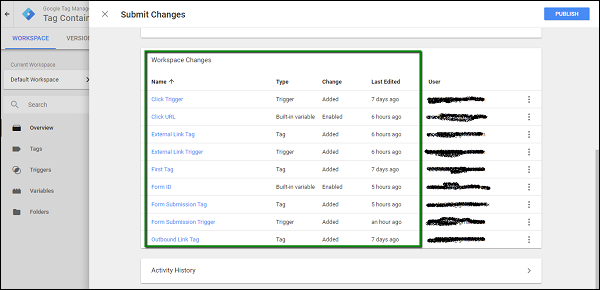
Similarly, under Activity History, you can get an exact understanding of the changes/updates that were done in the account since the beginning of time.
Step 4 − Provide a version name, description. You might want to provide the version name as First Version and you can provide the description as First Google Tag Manager Update.
For the moment, we will leave Publish to Environment as Live. This is because we don’t have any other environment apart from Live yet.
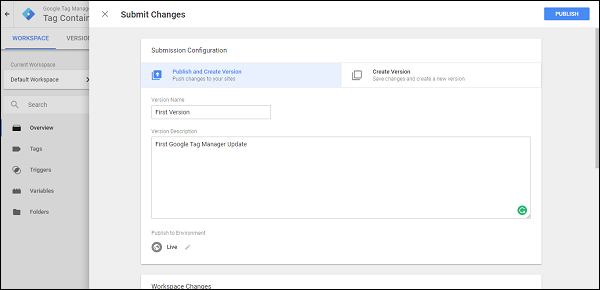
Step 5 − Click PUBLISH and you will be presented with a summary for this particular version.
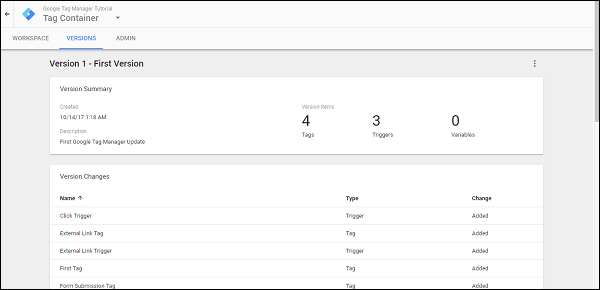
This is how you can publish the changes done in the workspace for Google Tag Manager.
You can use a Google Chrome plugin – Google Tag Assistant to see the tags getting fired without the preview mode on.
Creating Environments in Google Tag Manager
There are different ways in which we can configure an environment to be used with Google Tag Manager.
Usually, in the software world, the word Environment is used in the context of where the particular feature is being tested/reviewed.
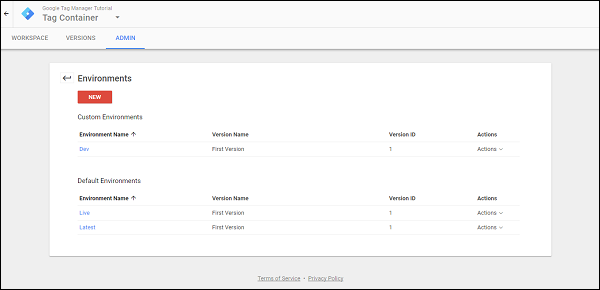
Step 1 − To view the available environments in Google Tag Manager, click ADMIN.
Step 2 − Under Container section, click Environments.

You will be able to see the screen as shown above.
Typically, large software companies have their website divided in different environments to ease the process of releasing a feature. Developers work on their development website, then the feature changes are pushed to the staging site. Finally, when the changes are verified in the staging site, the changes are pushed to Live environment.
In the context of Google Tag Manager, there is a flexibility to add different environments, which will allow you to validate your tag completely before they are on the Live website. For this tutorial, we will create an environment, called Dev environment. Following are the steps.
Step 3 − Click the NEW button in red. You will be able to see the following dialog box.
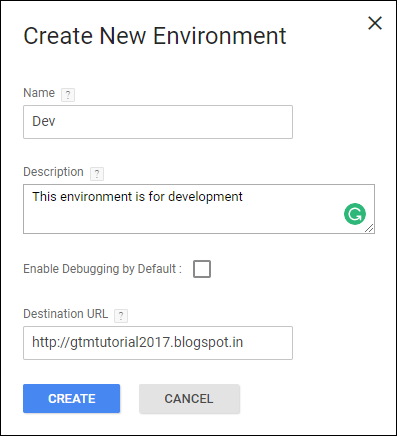
Step 4 − Fill up the details as shown in the above figure. We will pretend that our dev site is the same site where we are working right now, in order to push the changes accordingly.
Step 5 − Click CREATE and you will see a prompt as the following.
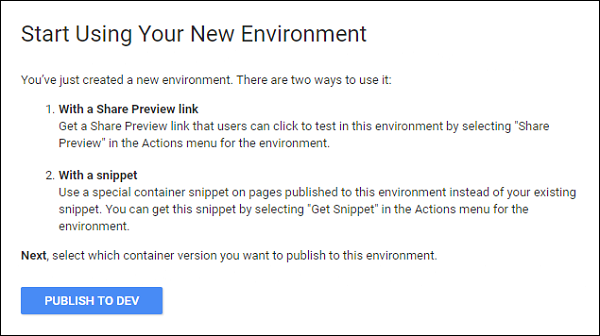
As shown in the above figure, the prompt shows two ways to use the environment.
Using a Share Preview Link − This link comes handy when you want to circulate the changes in your tags to your team members, when there are larger teams.
With a snippet − If you are clear that a particular site is going to work as your development/staging environment, then you can use this snippet option. A snippet for this environment is available, so that you can reach the website to see any changes that have been done lately.
Step 6 − Click PUBLISH TO DEV to see these in action. The next screen will ask for the available changes to push in the newly created environment.
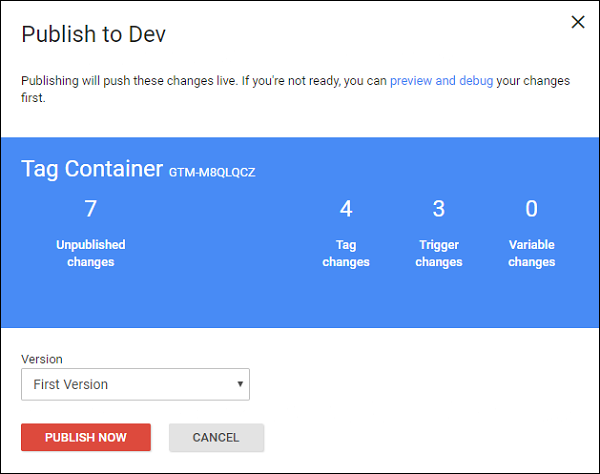
The changes that are not yet sent to the respective environment will be shown. Also, the version name is shown, so that the user is clear which version is being published to the respective environment.
Step 7 − Click PUBLISH NOW to see the changes available on your newly created environment. It will show the success message with a date and time stamp.
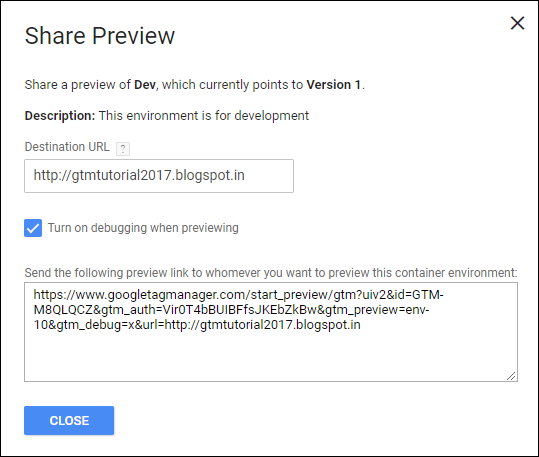
From the available list of environments, click the name of the new environment, in our case – Dev.
The available options to share the environment link will be displayed, as shown below.
Using any of the above approaches, you will be able to see the changes in your tag on your development (Dev) environment.