- Ubuntu - Home
- Ubuntu - Overview
- Ubuntu - Flavors
- Ubuntu - Environment
- Ubuntu - Device Drivers
- Ubuntu - Software Center
- Ubuntu - Browsers
- Ubuntu - Email
- Ubuntu - Messaging
- Ubuntu - Media Players
- Ubuntu - User Management
- Ubuntu - Files & Folders
- Ubuntu - Word Writer
- Ubuntu - Spreadsheets
- Ubuntu - LibreOffice
- Ubuntu - Command Line
- Ubuntu - Scripting
- Ubuntu - Networking
- Ubuntu - Server Installation
- Ubuntu - Secure Shell
- Ubuntu - Development
- Ubuntu - Nginx
- Ubuntu - Virtual Machines
- Ubuntu - Installing MySQL & Python
- Ubuntu - Node.js
- Ubuntu - Docker
- Ubuntu - On the Cloud
Ubuntu - On the Cloud
We can also install Ubuntu on various cloud environments such as Google Cloud, Amazon web services, and Azure web services. In this chapter, we will see how to get Ubuntu up and running on Amazon web services. Following are the steps to get this in place.
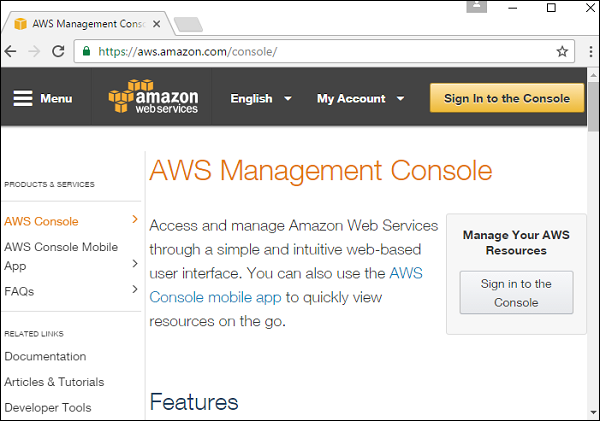
Step 1 − One can get a free account with Amazon web services. All we need to do is register with AWS on the following url − https://aws.amazon.com/
Step 2 − Click the Sign in to the Console and it presents the following dialog box.
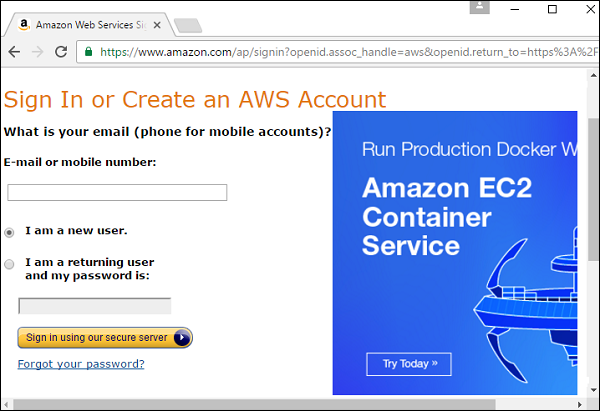
Step 3 − Click the option I am a new user and enter the required email id of an existing Gmail account. Then click the Sign in using our secure server button. We will then need to give some information in the subsequent screen to create an account.
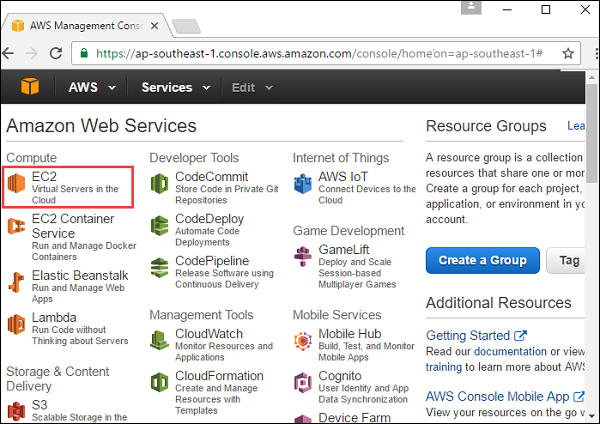
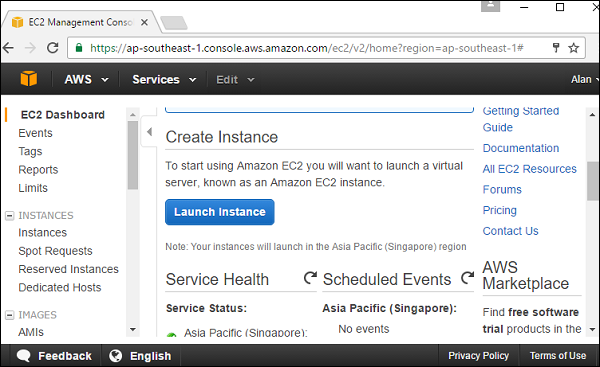
Step 4 − Once an account has been created, we can log into the console. Once logged in, click the EC2 option. This option is used for creating virtual machines on the cloud.
Step 5 − In the following screenshot, click the Launch Instance button.
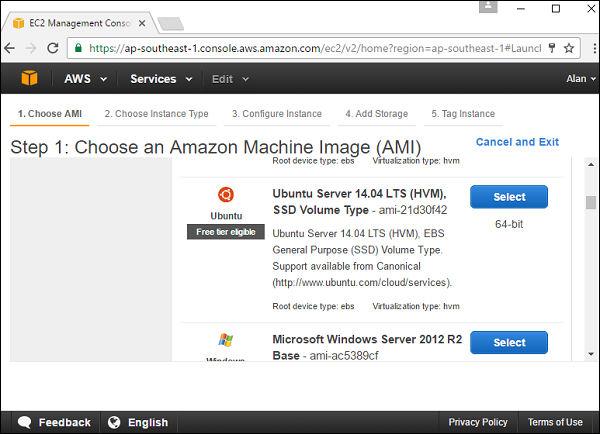
Step 6 − The next screen prompts to select an appropriate AMI. An AMI is a pre-built image for an operating system in Amazon. Scroll down until to the Ubuntu option and click the Select button.
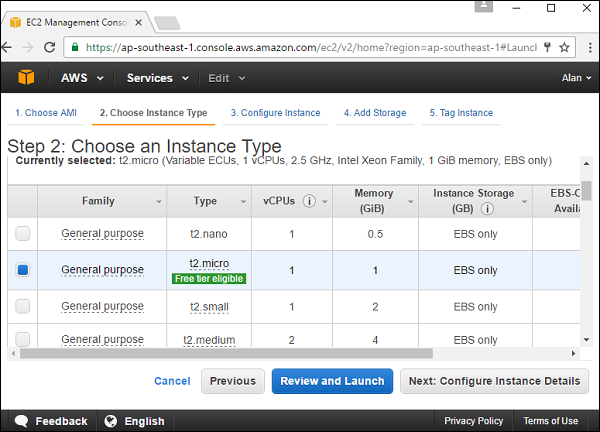
Step 7 − In the next screen, choose the configuration of the machine. Choose the General purpose t2.micro option and then click the Next: Configure Instance Details button.
Step 8 − In the next screen, enter the following details as shown in the screenshot.

The number of instances to launch Keep 1 as the default.
VPC If there is no existing VPC, choose the option to create a new one.
Now, if we choose the option to create a new subnet, we need to perform the following sub steps.
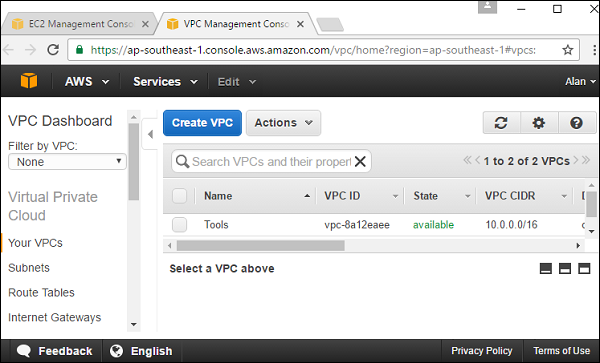
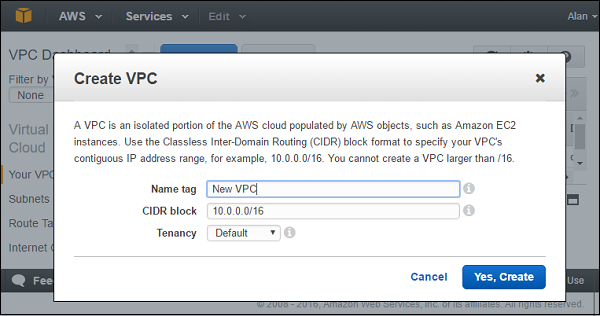
Click the Create VPC button. (Note: The VPC is known as a virtual private network which is used to store all AWS objects in an isolated environment.)
In the Create VPC dialog box, enter the following details and click the Yes Create button.
- For the subnet, keep the default setting as it is.
- For the Auto-assign Public IP option, choose use subnet setting(Enable).
- Keep the IAM Role as none.
- Keep the Shutdown behavior as none.
- The remaining settings can remain as by default.
Click the Next: Add Storage button.
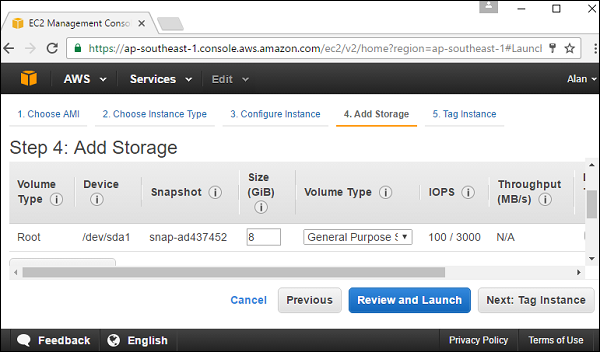
Step 9 − In the next screen, keep the default storage as is and click the Review and Launch button.
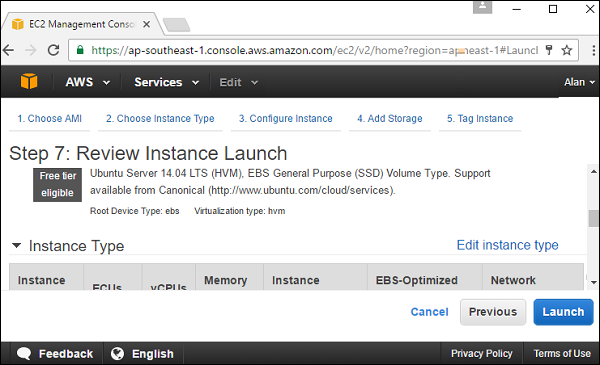
Step 10 − The review screen will pop up. Click the Launch button.
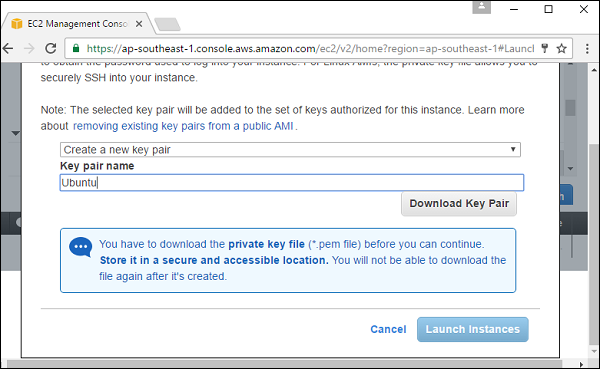
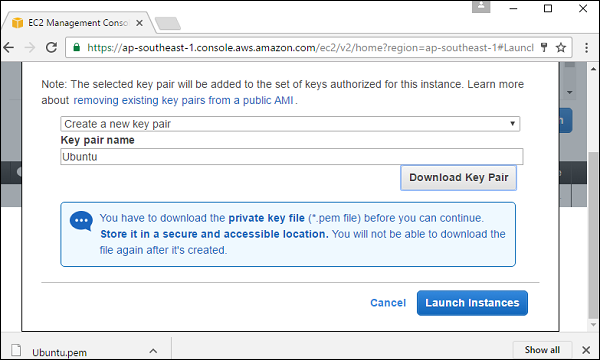
Step 11 − The next screen prompts to create a new key pair. This is required to log into the instance when it is created. Enter a key name and click the download Key pair button.
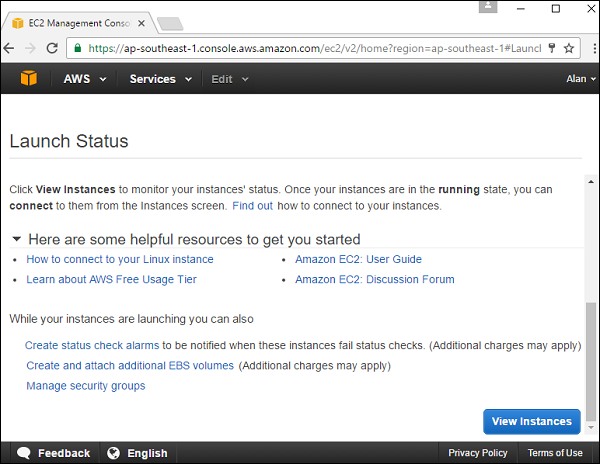
Step 12 − Once download is complete, click the Launch Instances button.
Step 13 − Click the View Instances button.
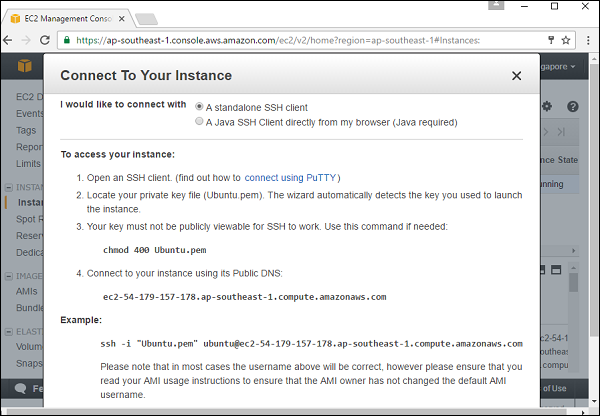
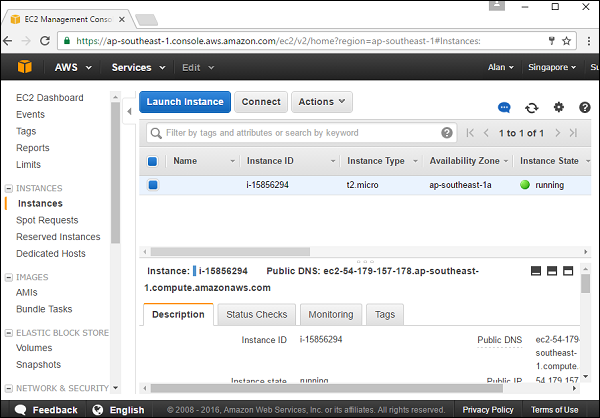
Step 14 − Once the state of the instance is running, click the Connect button.
The next dialog box presents the steps to log into the Ubuntu server machine.
Step 15 − Perform the steps as we would normally do, using a SSH client to log into the machine.