- Silverlight - Home
- Silverlight - Overview
- Silverlight - Environment Setup
- Silverlight - Getting Started
- Silverlight - XAML Overview
- Silverlight - Project Types
- Silverlight - Fixed Layouts
- Silverlight - Dynamic Layout
- Constrained vs. Unconstrained
- Silverlight - CSS
- Silverlight - Controls
- Silverlight - Buttons
- Silverlight - Content Model
- Silverlight - ListBox
- Silverlight - Templates
- Silverlight - Visual State
- Silverlight - Data Binding
- Silverlight - Browser Integration
- Silverlight - Out-of-Browser
- Silverlight - Applications, Resources
- Silverlight - File Access
- Silverlight - View Model
- Silverlight - Input Handling
- Silverlight - Isolated Storage
- Silverlight - Text
- Silverlight - Animation
- Silverlight - Video and Audio
- Silverlight - Printing
Applications, Resources & Deployment
In this chapter, we are going to look at common issues around creating and deploying applications and the resources they need.
Loading the Plug-in
The minimum requirements for running a Silverlight application are hosting web page containing an object tag to load the Silverlight plug-in, and the compiled Silverlight content itself.
As you saw, we used param tags in the object tag to point to the content.
HTML <Object> tag
There are other parameters we can pass in to control features such as the user interface to be shown while the content is downloaded, the JavaScript code to run in the event of an error, and fallback content to be shown if Silverlight is not installed.
<Object> in HTML
Here is an example object tag that loads some Silverlight content. You have seen this before, but we are going to look at a few things in a bit more detail, starting with the attributes on the object tag itself.
Type Attribute
The type attribute contains a MIME type identifying this as a Silverlight element. This is how the browser knows what sort of embedded content we are using. The object tag is surprisingly flexible. It is not just for plug-ins. You can use it to host embedded images, or HTML, as well as plug-in-based content, such as Silverlight, or Flash.
If the Silverlight plug-in is installed, this will load it. If not, the standard format behavior is for the browser to render any HTML content inside the object tag as though the object and param tags were not there.
<object data = "data:application/x-silverlight-2," type =  "application/x-silverlight-2"
   width = "100%" height = "100%">

   <param name = "source" value = "ClientBin/DataBinding.xap"/>
   <param name = "onError" value = "onSilverlightError" />
   <param name = "background" value = "white" />
   <param name = "minRuntimeVersion" value = "5.0.61118.0" />
   <param name = "autoUpgrade" value = "true" />

   <a href = "http://go.microsoft.com/fwlink/?LinkID=149156&v=5.0.61118.0"
      style = "textdecoration:none">

      <img src = "http://go.microsoft.com/fwlink/?LinkId=161376"
         alt = "Get Microsoft Silverlight" style = "border-style:none"/>
   </a>

</object>
Data Attribute
The next attribute, data, is a little less obvious. The comma at the end is meant to be there. Some important features are −
This attribute is not technically necessary, but Microsoft recommends you add it because some web browsers have a rather surprising behavior when loading plugins.
The object tag is designed to host embedded content, so browsers expect a binary string to be involved, a bitmap file, or a video, or audio stream, or something.
You would normally expect to put a URL in the data attribute, and the browser to download that data, and pass it to the plug-in.
The data attribute takes a URI, and usually it will be pointed at some data, such as a JPEG file, but here, we are using a slightly unusual URI scheme.
<param> Tags
We have various param tags inside the object, starting with the source param.
<param name = "source" value = "ClientBin/DataBinding.xap"/>
It gives the plug-in from where to download the Silverlight content.
You should provide a JavaScript error handler. This will be called if the download process fails. It will also be called if an unhandled exception is thrown, once the Silverlight code is up and running.
<param name = "onError" value = "onSilverlightError" />
So it's not just for load failures. You should also specify the minimum version of Silverlight required by your code.
Microsoft encourages the users to keep up to date, so once a machine has the Silverlight plug-in installed, new versions will be offered via Windows update, but it is always possible that a user will be running an older version than the one you require.
<param name = "minRuntimeVersion" value = "5.0.61118.0" />
<param name = "autoUpgrade" value = "true" />
This minRuntimeVersion parameter lets you say which version you need. If the installed version is older, the onError handler will be invoked.
Silverlight passes numeric error codes to the error handling JavaScript function, and there is a distinct error code, 8001 as it happens, to indicate that the plug-in is out of date.
You can write JavaScript code to respond to the problem, or you can just ask the plug-in to attempt to upgrade for you.
Here, the autoUpgrade parameter is set to True, which means that if the installed plugin is out of date, Silverlight will automatically show a message telling the user that a more recent version is required, offering to install it for them.
Fallback HTML Content
After the param tags, comes the fallback HTML content to be used if Silverlight is not installed.
The standard browser behavior for object tags whose MIME type is unknown is to act as though the object and param tags were not there at all. So, this a tag and its contents will be shown in systems that do not have the Silverlight plug-in.
<a href = "http://go.microsoft.com/fwlink/?LinkID=149156&v=5.0.61118.0"
   style = "text-decoration:none">
   <img src = "http://go.microsoft.com/fwlink/?LinkId=161376"
      alt = "Get Microsoft Silverlight" style = "border-style:none"/>
</a>
Notice the two URLs to the go.microsoft.com site, a hyperlink, and an image.
The image link resolves to a bitmap with some Silverlight branding, and some text offering to install Silverlight. The endpoint for the hyperlink is moderately smart. The server inspects the user agent to decide where to redirect.
It may serve back the Silverlight Install executable, or if the user is on an unsupported platform, it will direct the browser to a page containing information about Silverlight.
Silverlight.js
There is an alternative to the HTML object tag for loading Silverlight content. Microsoft provides a JavaScript file called Silverlight.js that allows the loading process to be managed from the browser script.
Visual Studio adds a copy when you create a web project to host a newly created Silverlight project. The Silverlight SDK also contains a copy of this file.
The main benefit of Silverlight.js is that it allows more flexibility when Silverlight is not installed.
XAML Resources
Silverlight also offers a mechanism for creating object resources in XAML. There are certain kinds of objects usually corrected through XAML that you might want to be able to use in multiple places in your application. It is very common to want to use templates in more than one place.
If you have defined a custom look for a button, you might want to apply it to multiple buttons, or maybe even all the buttons in your application. The XAML resource system provides a way to do this. You can define a named resource, and then use it elsewhere in the XAML.
Besides templates, it is also common to want to do this for graphical resources, such as brushes and shapes. If you have a particular color scheme in use in your application, you might define the colors and brushes for that scheme as resources.
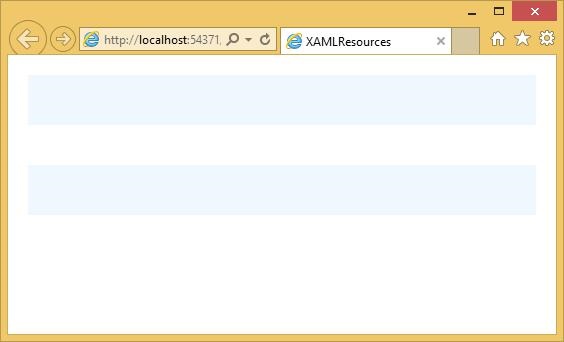
Here is a simple application for the SolidColorBrush resource.
<UserControl x:Class = "XAMLResources.MainPage"
   xmlns = "http://schemas.microsoft.com/winfx/2006/xaml/presentation"
   xmlns:x = "http://schemas.microsoft.com/winfx/2006/xaml"
   xmlns:d = "http://schemas.microsoft.com/expression/blend/2008"
   xmlns:mc = "http://schemas.openxmlformats.org/markup-compatibility/2006"
   mc:Ignorable = "d"
   d:DesignHeight = "300" d:DesignWidth = "400">

   <UserControl.Resources>
      <SolidColorBrush x:Key = "brushResource" Color = "AliceBlue" />
   </UserControl.Resources>

   <Grid x:Name = "LayoutRoot" Background = "White">
      <StackPanel>
         <Rectangle Height = "50" Margin = "20" Fill = "{StaticResource brushResource}" />
         <Rectangle Height = "50" Margin = "20" Fill = "{StaticResource brushResource}"/>
      </StackPanel>
   </Grid>

</UserControl>
In the above XAML code, you can see that both rectangles have StaticResource The color of brushResource is AliceBlue.
When the above code is compiled and executed, you will see the following output.
App.xaml
All Silverlight applications have a file called App.xaml. It contains application-wide information. For example, it has a Resources property just like user interface elements do.
Resources that you define in the App.xaml file are available across all XAML files in the project. So rather than cluttering up my MainPage.xaml with these sorts of resources, we can move them out to application scope.
<Application
   xmlns = "http://schemas.microsoft.com/winfx/2006/xaml/presentation"
   xmlns:x = "http://schemas.microsoft.com/winfx/2006/xaml"
   x:Class = "XAMLResources.App" >

   <Application.Resources>
      <SolidColorBrush x:Key = "brushResource" Color = "AliceBlue" />
   </Application.Resources>

</Application>
Application Class
Like most XAML files, the App.xaml file and its corresponding code behind file define a class. This Application class is the entry point to the Silverlight application. The App.xaml typically deals with application scope resources; its code behind file contains startup and shutdown handling code.
Shortly after creating an instance of your Application class, Silverlight raises its Application.Startup event.
Here we create the user interface. We are expected to create a user interface element and assign it to the application objects RootVisual property in the Startup event, and that will become the user interface displayed by the Silverlight plug-in.
public partial class App : Application {

   public App() {
      this.Startup += this.Application_Startup;
      this.Exit += this.Application_Exit;
      this.UnhandledException += this.Application_UnhandledException;
      InitializeComponent();
   }

   private void Application_Startup(object sender, StartupEventArgs e) {
      this.RootVisual = new MainPage();
   }

   private void Application_Exit(object sender, EventArgs e) {}

   private void Application_UnhandledException(object sender,
      ApplicationUnhandledExceptionEventArgs e) {

      if (!System.Diagnostics.Debugger.IsAttached) {
         e.Handled = true;
         Deployment.Current.Dispatcher.BeginInvoke(delegate { ReportErrorToDOM(e); });
      }

   }

   private void ReportErrorToDOM(ApplicationUnhandledExceptionEventArgs e) {
      try {
         string errorMsg = e.ExceptionObject.Message + e.ExceptionObject.StackTrace;
         errorMsg = errorMsg.Replace('"', '\'').Replace("\r\n", @"\n");
         System.Windows.Browser.HtmlPage.Window.Eval("throw new Error
            (\"Unhandled Error in Silverlight Application " + errorMsg + "\");");
      } catch (Exception) {}
   }
}
Points to Note
Note that you cannot change the RootVisual. You have to set it exactly once. If you want to change the user interface while your application is running, you must do it by changing the content of your MainPage, rather than trying to replace the MainPage with a different one.
The other application events are Exit, which is your last minute chance to run the shutdown code when the user interface is about to go away, and UnhandledException, which is raised if your code throws an unhandled exception.
If you do not provide a handler for the UnhandledException event, or if that handler does not mark the event as being handled, UnhandledExceptions will effectively shut down your Silverlight application.
The plug-ins area on screen will go blank, and a scripting error will be reported to the browser.