qTest - Test Execution
In this chapter, we will learn about Test Execution in qTest.
To execute a test Run, you should have the Execute Test Runs Permission. You can execute a single or multiple Test Runs and Test Suites. You can also do a quick run to mark an overall status to all selected test cases.
Default Mode
qTest has three default modes to execute −
- Execute without session recording
- Execute with Explorer Integrated Edition
- Execute with Web Explorer
Following are the steps to set the default mode −
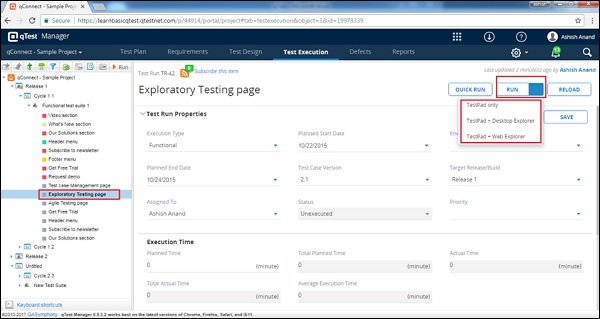
On the Test Runs Grid or individual Test Run main page, select the drop-down arrow next to the Run button.
Select one of the three options.
Click Save to set the default execution mode.
The following screenshot displays how to set the default option.
Execute a Single/Multiple Test Run
In this section, we will discuss how to execute single/multiple test run. Following are the steps for execution −
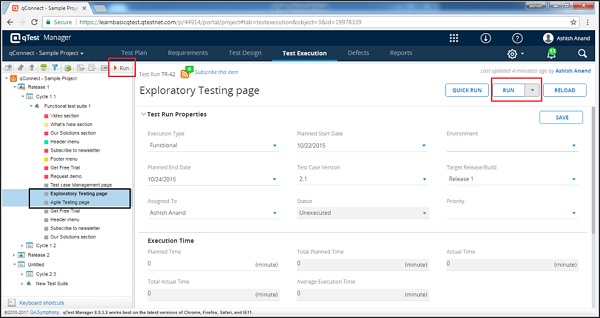
Step 1 − Select a single/multiple test run using shift + click.
Step 2 − Click the Run button either on the Execution toolbar or Test Run detail screen as shown in the following screenshot.
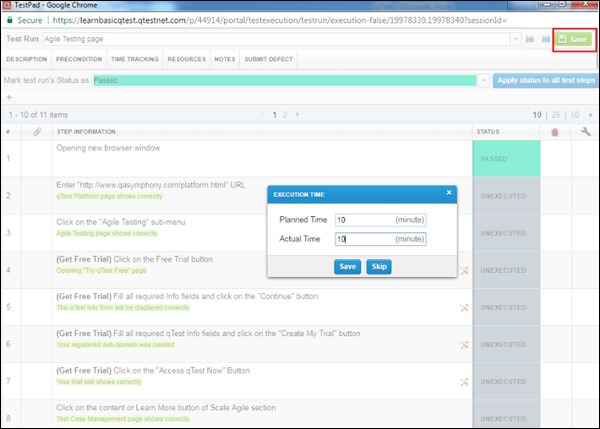
Step 3 − Test Run will open in a dialog box with detailed Test steps and the description will be loaded. You can update the test result here. Following screenshot will help you understand this step.
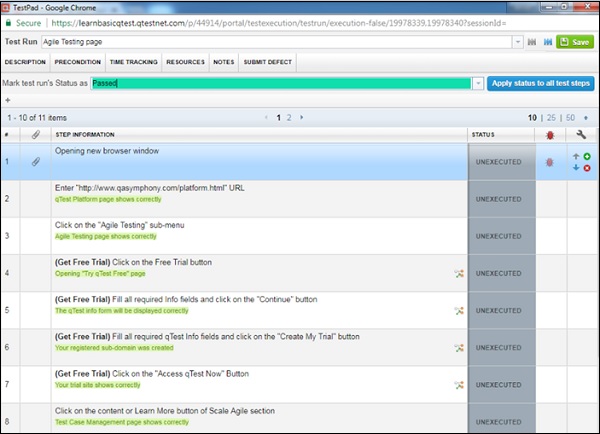
Step 4 − Bring the cursor at the status of each step. It displays a list of status that can be selected to mark the test step execution status.

Step 5 − Click the Save button. It displays a dialog box where the planned and actual time are entered. After entering the details, click the Save button again.
Similarly, you can execute a single or multiple Test Suites at a time. Each test case will appear one by one.
Test Pad Features
After clicking the Run button, Test Pad loads the selected Test Runs for execution. Test Pad has a few important features. We will understand these features by performing the following steps −
Step 1 − Select Test Runs in the drop-down list to execute a specific test case.
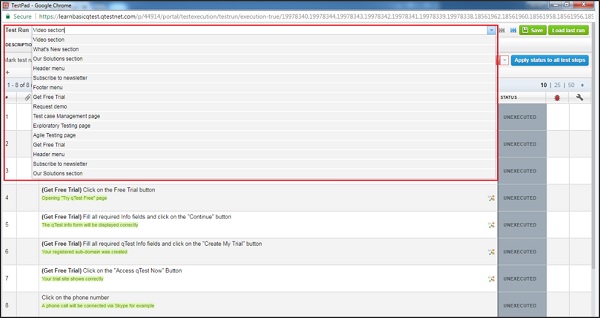
Click Forward or Backward icons to execute Test Runs in order as shown in the above screenshot.
Click the Load Last Run button to view the last result of the Test Run.
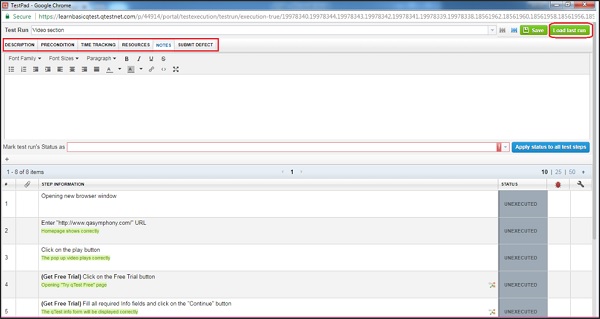
View Test Case's Description, Precondition, Notes, and Attachments in Test Run Information section.
Description and Precondition loads from its associated Test Case's Properties.
Notes will display in the Test Run Log.
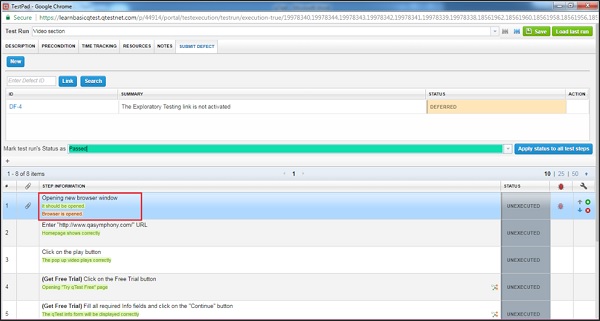
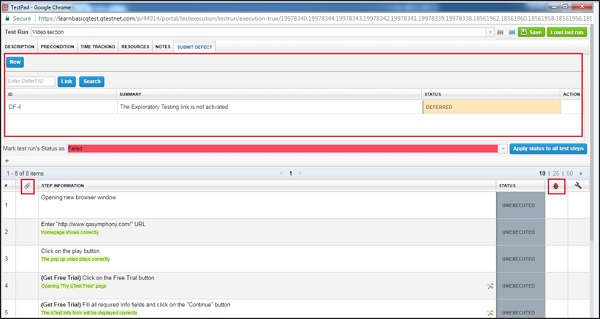
Submit/Link Defect to Test Log.
The following screenshot shows the above functionalities.
The following screenshot displays where to Link defect.
Add Attachments for Test Case and Test Log separately in the Resources
Select Overall Status for the Test Run. You can also apply the overall Test Run Status to all Test Run's steps.
Select Status for Individual Test Steps.
Click the Bug icon to submit defect(s) for individual Test Steps as shown in the above screenshot.
Click the Clip icon to add Attachments for Individual Test Steps as shown in the above screenshot.
Step 2 − Click individual steps to edit Test Step's Description, Expected Results, and add Actual Results during the execution as shown in the following screenshot.
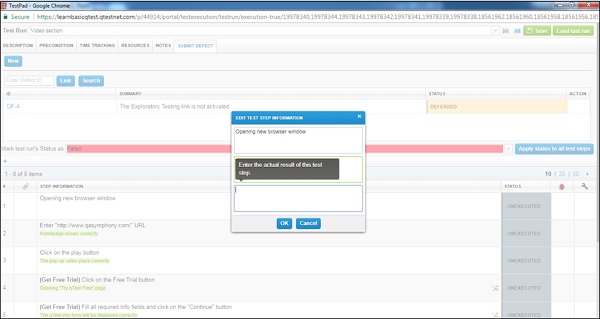
The Expected Result is displayed in Green color while the Actual Result is displayed in light red/pink color.