- Python Data Persistence - Home
- Python Data Persistence - Introduction
- Python Data Persistence - File API
- File Handling with os Module
- Python Data Persistence - Object Serialization
- Python Data Persistence - Pickle Module
- Python Data Persistence - Marshal Module
- Python Data Persistence - Shelve Module
- Python Data Persistence - dbm Package
- Python Data Persistence - CSV Module
- Python Data Persistence - JSON Module
- Python Data Persistence - XML Parsers
- Python Data Persistence - Plistlib Module
- Python Data Persistence - Sqlite3 Module
- Python Data Persistence - SQLAlchemy
- Python Data Persistence - PyMongo module
- Python Data Persistence - Cassandra Driver
- Data Persistence - ZODB
- Data Persistence - Openpyxl Module
Python Data Persistence Resources
Python Data Persistence - Openpyxl Module
Microsofts Excel is the most popular spreadsheet application. It has been in use since last more than 25 years. Later versions of Excel use Office Open XML (OOXML) file format. Hence, it has been possible to access spreadsheet files through other programming environments.
OOXML is an ECMA standard file format. Pythons openpyxl package provides functionality to read/write Excel files with .xlsx extension.
The openpyxl package uses class nomenclature that is similar to Microsoft Excel terminology. An Excel document is called as workbook and is saved with .xlsx extension in the file system. A workbook may have multiple worksheets. A worksheet presents a large grid of cells, each one of them can store either value or formula. Rows and columns that form the grid are numbered. Columns are identified by alphabets, A, B, C, ., Z, AA, AB, and so on. Rows are numbered starting from 1.
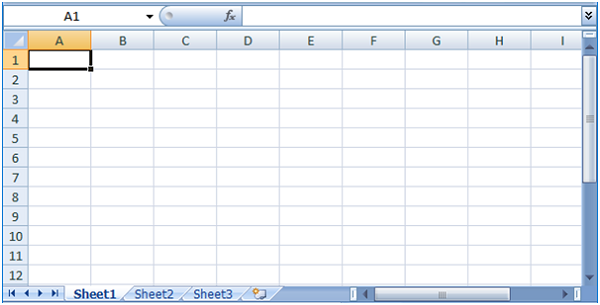
A typical Excel worksheet appears as follows −
The pip utility is good enough to install openpyxl package.
pip install openpyxl
The Workbook class represents an empty workbook with one blank worksheet. We need to activate it so that some data can be added to the worksheet.
from openpyxl import Workbook
wb=Workbook()
sheet1=wb.active
sheet1.title='StudentList'
As we know, a cell in worksheet is named as ColumnNameRownumber format. Accordingly, top left cell is A1. We assign a string to this cell as −
sheet1['A1']= 'Student List'
Alternately, use worksheets cell() method which uses row and column number to identify a cell. Call value property to cell object to assign a value.
cell1=sheet1.cell(row=1, column=1)
cell1.value='Student List'
After populating worksheet with data, the workbook is saved by calling save() method of workbook object.
wb.save('Student.xlsx')
This workbook file is created in current working directory.
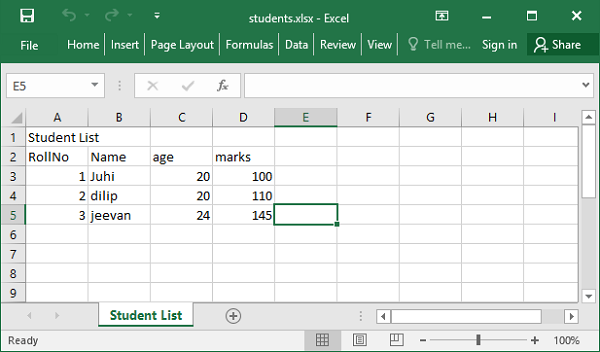
Following Python script writes a list of tuples into a workbook document. Each tuple stores roll number, age and marks of student.
from openpyxl import Workbook
wb = Workbook()
sheet1 = wb.active
sheet1.title='Student List'
sheet1.cell(column=1, row=1).value='Student List'
studentlist=[('RollNo','Name', 'age', 'marks'),(1,'Juhi',20,100),
   (2,'dilip',20, 110) , (3,'jeevan',24,145)]
for col in range(1,5):
   for row in range(1,5):
      sheet1.cell(column=col, row=1+row).value=studentlist[row-1][col-1]
wb.save('students.xlsx')
The workbook students.xlsx is saved in current working directory. If opened using Excel application, it appears as below −
The openpyxl module offers load_workbook() function that helps in reading back data in the workbook document.
from openpyxl import load_workbook
wb=load_workbook('students.xlsx')
You can now access value of any cell specified by row and column number.
cell1=sheet1.cell(row=1, column=1)
print (cell1.value)
Student List
Example - Populating work sheet
Following code populates a list with work sheet data.
main.py
from openpyxl import load_workbook
wb=load_workbook('students.xlsx')
sheet1 = wb['Student List']
studentlist=[]
for row in range(1,5):
   stud=[]
for col in range(1,5):
   val=sheet1.cell(column=col, row=1+row).value
stud.append(val)
studentlist.append(tuple(stud))
print (studentlist)
Output
[('RollNo', 'Name', 'age', 'marks'), (1, 'Juhi', 20, 100), (2, 'dilip', 20, 110), (3, 'jeevan', 24, 145)]
One very important feature of Excel application is the formula. To assign formula to a cell, assign it to a string containing Excels formula syntax. Assign AVERAGE function to c6 cell having age.
sheet1['C6']= 'AVERAGE(C3:C5)'
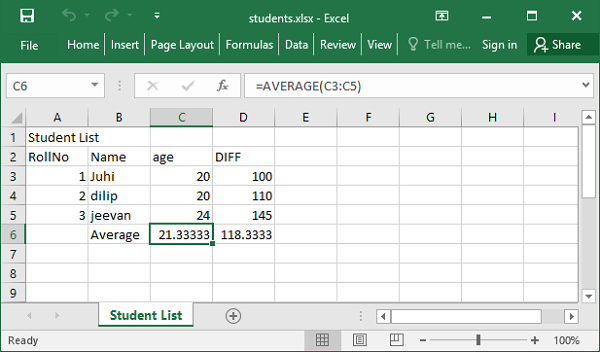
Openpyxl module has Translate_formula() function to copy the formula across a range. Following program defines AVERAGE function in C6 and copies it to C7 that calculates average of marks.
main.py
from openpyxl import load_workbook
wb=load_workbook('students.xlsx')

sheet1 = wb['Student List']
from openpyxl.formula.translate import Translator#copy formula
sheet1['B6']='Average'
sheet1['C6']='=AVERAGE(C3:C5)'
sheet1['D6'] = Translator('=AVERAGE(C3:C5)', origin="C6").translate_formula("D6")
wb.save('students.xlsx')
Output
The changed worksheet now appears as follows −