- GitLab - Introduction
- GitLab - Installation
- GitLab - Git Commands
- GitLab - SSH Key Setup
- GitLab - Create Project
- GitLab - Fork a Project
- GitLab - Create a Branch
- GitLab - Add a File
- GitLab - Rebase Operation
- GitLab - Squashing Commits
- GitLab Users and Groups
- GitLab - Adding Users
- GitLab - Create Groups
- GitLab - Remove Users
- GitLab - User Permissions
- GitLab Issue Tracker
- GitLab - Create Issue
- GitLab - Merge Requests
- GitLab - Referencing Issues
- GitLab - Milestones
- GitLab - Wiki Pages
- GitLab Instance Management
- GitLab - Create Backup
- GitLab - Restore Backup
- GitLab - Import Repository
GitLab - Installation
You can install the GitLab runner on different operating systems, by installing Git versioning system and creating user account in the GitLab site.
Git is a version control system used for −
- Handling the source code history of projects
- Tracking changes made to files
- Handling small and large projects with speed and efficiency
- To collaborate with other developers on different projects
GitLab is a Git-based platform provides remote access to Git repositories and helpful for software development cycle by creating private and public repositories for managing the code.
GitLab supports different types of operating systems such as Windows, Ubuntu, Debian, CentOS, open SUSE and Raspberry Pi 2. In this chapter, we will discuss about how to install GitLab on Windows and Ubuntu operating systems −
Installation of GitLab on Windows:
Step 1 − First create a folder called 'GitLab-Runner' in your system. For instance, you can create in C drive as C:\GitLab-Runner.
Step 2 − Now download the binary for x86 or amd64 and copy it in the folder created by you. Rename the downloaded binary to gitlab-runner.exe.
Step 3 − Open the command prompt and navigate to your created folder. Now type the below command and press enter.
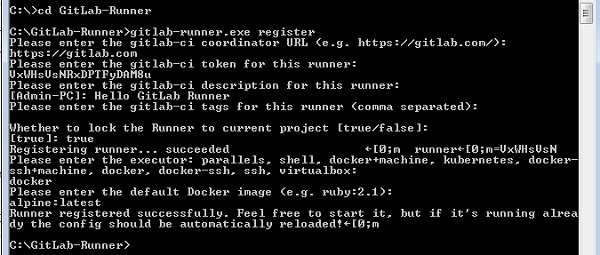
C:\GitLab-Runner>gitlab-runner.exe register
Step 4 − After running the above command, it will ask to enter the gitlab-ci coordinator URL.
Please enter the gitlab-ci coordinator URL (e.g. https://gitlab.com/):
https://gitlab.com
Step 5 − Enter the gitlab-ci token for the runner.
Please enter the gitlab-ci token for this runner:
xxxxx
-
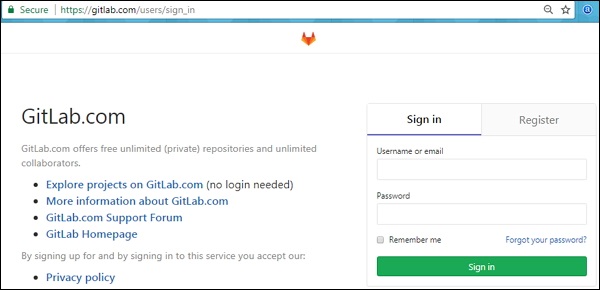
To get the token, login to your GitLab account −
-
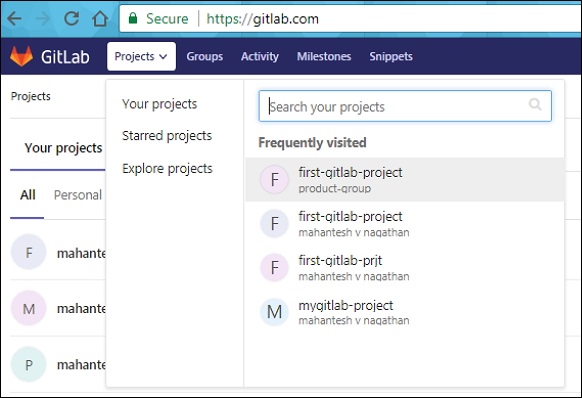
Now go to your project −
-
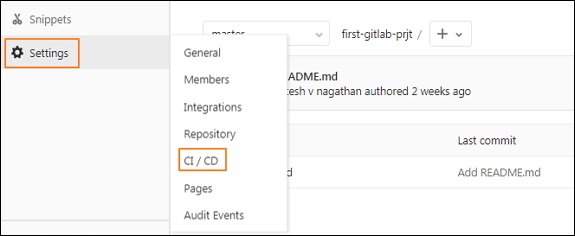
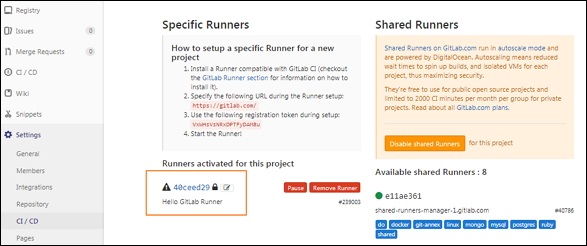
Click on the CI/CD option under Settings tab and expand the Runners Settings option.
-
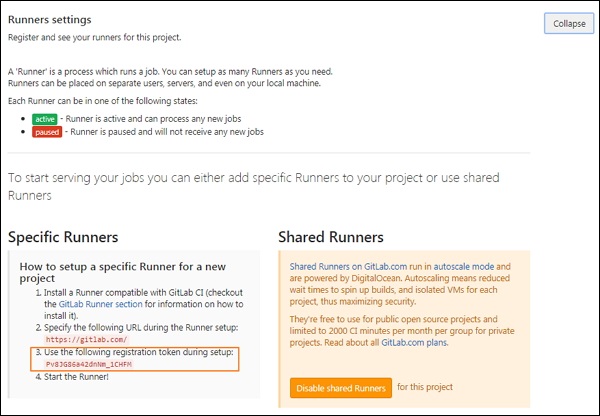
Under Runners Settings section, you will get the token as shown in the image below −
Step 6 − Enter the gitlab-ci description for the runner.
Please enter the gitlab-ci description for this runner:
[Admin-PC]: Hello GitLab Runner
Step 7 − It will ask to enter the gitlab-ci tags for the runner.
Please enter the gitlab-ci tags for this runner (comma separated):
tag1, tag2
You can change these tags in the GitLab's user interface later.
Step 8 − You can lock the Runner to current project by setting it to true value.
Whether to lock the Runner to current project [true/false]:
[true]: true
After completing above steps, you will get the successful message as 'Registering runner... succeeded'.
Step 9 − Now enter the Runner executor for building the project.
Please enter the executor: parallels, shell, docker+machine, kubernetes, docker-
ssh+machine, docker, docker-ssh, ssh, virtualbox:
docker
We have used the selector as 'docker' which creates build environment and manages the dependencies easily for developing the project.
Step 10 − Next it will ask for default image to be set for docker selector.
Please enter the default Docker image (e.g. ruby:2.1):
alpine:latest
Step 11 − After completing the above steps, it will display the message as 'Runner registered successfully'. The below image will describe the working flow of above commands −
Step 12 − Now go to your project, click on the CI/CD option under Settings section and you will see the activated Runners for the project.
You can see the GitLab Runner configuration in the config.toml file under the GitLab-Runner folder as shown below −
concurrent = 1
check_interval = 0
[[runners]]
  name = "Hello GitLab Runner"
  url = "https://gitlab.com"
  token = "40ceed29eec231fa9e306629cae4d7"
  executor = "docker"
  [runners.docker]
      tls_verify = false
      image = "alpine:latest"
      privileged = false
      disable_cache = false
      volumes = ["/cache"]
      shm_size = 0
  [runners.cache]
Installation of GitLab on Ubuntu
The GitLab can be installed on Ubuntu system by using Omnibus package which provides different services to run GitLab. The Omnibus package provides necessary components of GitLab, establishes the configurations and project metadata which can be used in user's system.
The following steps describe installation of GitLab on Ubuntu −
Step 1 − First, login to your GitLab server using SSH (Secure Shell).
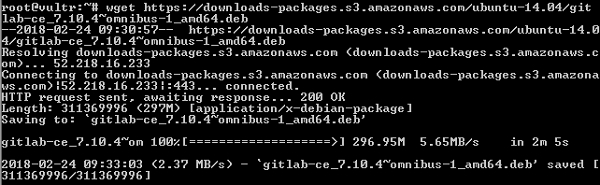
Step 2 − Next, download the Omnibus package −
wget https://downloads-packages.s3.amazonaws.com/ubuntu-14.04/gitlab-ce_7.10.4~omnibus-1_amd64.deb
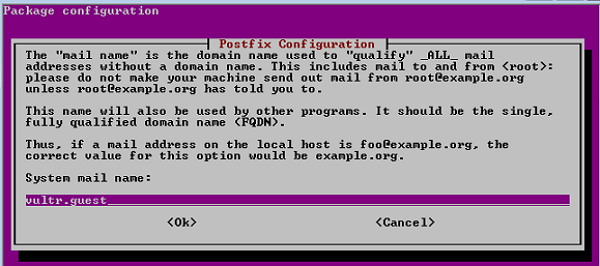
Step 3 − Install the postfix −
sudo apt-get install postfix
Postfix is a open source mail transfer agent used to deliver the email notifications.
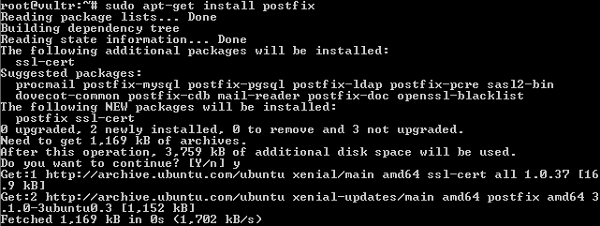
Step 4 − While installing Postfix, it will ask type of installation; then select the Internet Site option. Next, it will show Postfix configuration along with the system mail name as shown in the image −
Step 5 − Install the dpkg (package manager for debian system) for managing the installed packages −
sudo dpkg -i gitlab-ce_7.10.4~omnibus-1_amd64.deb

Step 6 − To have the changes take effect, you need to reconfigure the GitLab by using the below command −
sudo gitlab-ctl reconfigure
Step 7 − Check the status of the GitLab services by using below command −
sudo gitlab-ctl status
If you want to install GitLab from the source, then install some dependencies on the server and need to setup the database by using the PostgreSQL. It is described in the Environment setup chapter. You can install the coordinator to build a web interface and control build instances. For more information, you can check the Installation of Coordinator chapter.