- Home
- Brief Overview of IoT
- Introduction to ESP32
- Installing the ESP32 Board in Arduino IDE
- Setting up RTOS for dual-core and multi-threaded operation
- Interfacing ESP32 with MPU6050
- Interfacing ESP32 with Analog sensors
- ESP32 Preferences
- ESP32 SPIFFS storage (A mini-SD Card in the chip itself)
- Interfacing OLED Display with ESP32
- WiFi on ESP32
- Transmitting data over WiFi using HTTP
- Transmitting data over WiFi using HTTPS
- Transmitting data over WiFi using MQTT
- Transmitting data over Bluetooth
- Getting current time using NTP Client
- Performing the (OTA) update of ESP32 firmware
- Applications of ESP32
- Next steps for you as a developer
- ESP32 for IoT Useful Resources
- Quick Guide
- Useful Resources
- Discussion
Transmitting data over Bluetooth Classic
This chapter gives you an introduction to transmitting data over Bluetooth using ESP32. Arduino has a dedicated BluetoothSerial library for ESP32 that makes transmitting data over Bluetooth as simple as transmitting data to the Serial monitor. We will look at how to create a Bluetooth field around the ESP32, connect our smartphone to that field, and communicate with the ESP32.
Code Walkthrough
We will be using an example code for this chapter. You can find it in File −> Examples −> BluetoothSerial −>SerialToSerialBT. It can also be found on GitHub.
We begin with the inclusion of the BluetoothSerial library.
#include <BluetoothSerial.h>
The next few lines of code are a bit irrelevant if you haven't messed around with your ESP32. They check if Bluetooth is configured enabled, and throw up a warning if it is not. Bluetooth config is enabled by default on your ESP32, so you may as well comment out these lines if you have used your ESP32 strictly with the Arduino IDE. The make menuconfig which the error message refers to is actually accessed through ESP−IDF and not through Arduino IDE. So, the bottom line is, don't worry about these lines.
#if !defined(CONFIG_BT_ENABLED) || !defined(CONFIG_BLUEDROID_ENABLED)
#error Bluetooth is not enabled! Please run `make menuconfig` to and enable it
#endif
Next, we define the BluetoothSerial object.
BluetoothSerial SerialBT;
Within setup, we will begin the Bluetooth field around our ESP32 using the SerialBT.begin() function. This function takes an argument, the name of your Bluetooth device (ESP32 in this case). This is the name that will be shown when you scan for Bluetooth networks on your cell phone.
void setup() {
   Serial.begin(115200);
   SerialBT.begin("ESP32test"); //Bluetooth device name
   Serial.println("The device started, now you can pair it with bluetooth!");
}
Now, the loop is quite straightforward here. If you have any text coming in on Serial (i.e. text entered by you on the Serial Monitor), send it to over SerialBT. If you have any text coming in from the SerialBT, send it over Serial, or, in other words, print it on the Serial Monitor.
void loop() {
   if (Serial.available()) {
      SerialBT.write(Serial.read());
   }
   if (SerialBT.available()) {
      Serial.write(SerialBT.read());
   }
   delay(20);
}
Testing the code
To test this code, it is recommended that you download a Serial Bluetooth Terminal app (either the one shown below or any equivalent app) on your smartphone. It will help you pair with your ESP32, show you the messages received from ESP32, and also help you send messages to your ESP32.
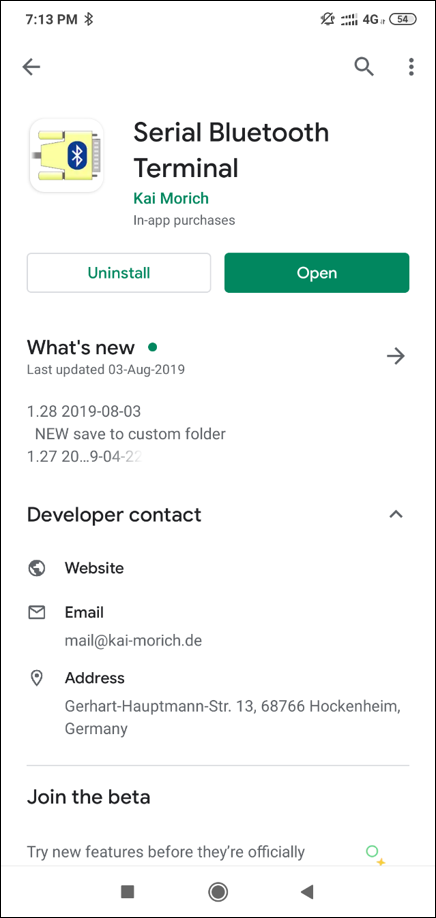
To install it on an Android device, click here. An equivalent app for iOS could be BluTerm.
You can find the screenshots of the tests performed with the Serial Bluetooth Terminal App below. I had changed the Bluetooth name of ESP32 to 'ESP32test345', because I had already paired my mobile phone with another ESP32 whose Bluetooth name was 'ESP32test'. Once the pairing is done, the device can be added in the Serial Bluetooth Terminal app, and you can then communicate with your device as if communicating with another user on a messaging app.
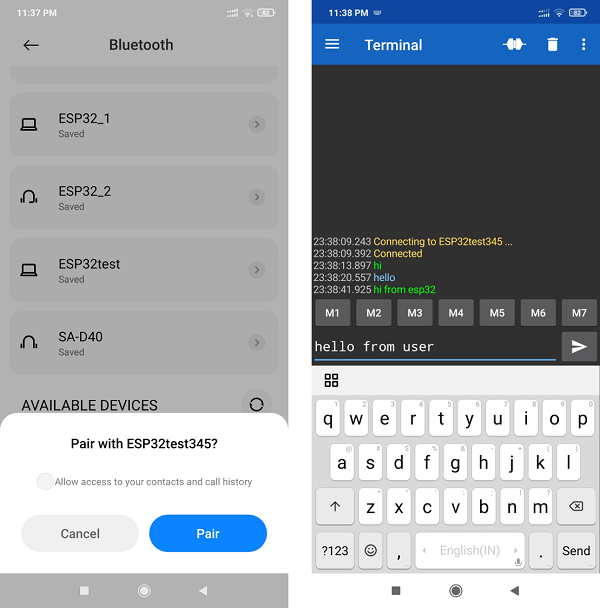
Pairing and Communication

Corresponding view of Arduino Serial Terminal
Congratulations. You've communicated with your ESP32 using BlueTooth. Go ahead and explore the other examples that come along with the BluetoothSerial library.
Note − You may be tempted to use WiFi and Bluetooth simultaneously on ESP32. This is not recommended. While ESP32 has separate stacks for WiFi and Bluetooth, they share a common radio antenna. Therefore, the behavior of the module when both the stacks are trying to access the antenna becomes unpredictable. It is recommended that only one stack accesses the antenna at a time.