- Tcl - Home
- Tcl - Overview
- Tcl - Environment Setup
- Tcl - Special Variables
- Tcl - Basic Syntax
- Tcl - Commands
- Tcl - Data Types
- Tcl - Variables
- Tcl - Operators
- Tcl - Decisions
- Tcl - Loops
- Tcl - Arrays
- Tcl - Strings
- Tcl - Lists
- Tcl - Dictionary
- Tcl - Procedures
- Tcl - Packages
- Tcl - Namespaces
- Tcl - File I/O
- Tcl - Error Handling
- Tcl - Built-in Functions
- Tcl - Regular Expressions
- Tk - Overview
- Tk - Environment
- Tk - Special Variables
- Tk - Widgets Overview
- Tk - Basic Widgets
- Tk - Layout Widgets
- Tk - Selection Widgets
- Tk - Canvas Widgets
- Tk - Mega Widgets
- Tk - Fonts
- Tk - Images
- Tk - Events
- Tk - Windows Manager
- Tk - Geometry Manager
- Tcl/Tk Useful Resources
- Tcl/Tk - Quick Guide
- Tcl/Tk - Useful Resources
- Tcl/Tk - Discussion
Tcl-Tk - Quick Guide
Tcl - Overview
Tcl is shortened form of Tool Command Language. John Ousterhout of the University of California, Berkeley, designed it. It is a combination of a scripting language and its own interpreter that gets embedded to the application, we develop with it.
Tcl was developed initially for Unix. It was then ported to Windows, DOS, OS/2, and Mac OSX. Tcl is much similar to other unix shell languages like Bourne Shell (Sh), the C Shell (csh), the Korn Shell (sh), and Perl.
It aims at providing ability for programs to interact with other programs and also for acting as an embeddable interpreter. Even though, the original aim was to enable programs to interact, you can find full-fledged applications written in Tcl/Tk.
Features of Tcl
The features of Tcl are as follows −
Reduced development time.
Powerful and simple user interface kit with integration of TK.
Write once, run anywhere. It runs on Windows, Mac OS X, and almost on every Unix platform.
Quite easy to get started for experienced programmers; since, the language is so simple that they can learn Tcl in a few hours or days.
You can easily extend existing applications with Tcl. Also, it is possible to include Tcl in C, C++, or Java to Tcl or vice versa.
Have a powerful set of networking functions.
Finally, it's an open source, free, and can be used for commercial applications without any limit.
Applications
Tcl is a general-purpose language and you can find Tcl everywhere. It includes,
- Scalable websites that are often backed by databases.
- High performance web servers build with TclHttpd.
- Tcl with CGI based websites.
- Desktop GUI applications.
- Embedded applications.
Tcl - Environment Setup
Local Environment Setup
If you are willing to set up your environment for Tcl, you need the following two software applications available on your computer −
- Text Editor
- Tcl Interpreter.
Text Editor
This will be used to type your program. Examples of a few text editors include Windows Notepad, OS Edit command, Brief, Epsilon, EMACS, and vim or vi.
Name and version of a text editor can vary on different operating systems. For example, Notepad will be used on Windows, and vim or vi can be used on windows as well as Linux or UNIX.
The files you create with your text editor are called source files and contain program source code. The source files for Tcl programs are named with the extension ".tcl".
Before starting your programming, make sure you have one text editor in place and you have enough experience to write a computer program, save it in a file, build it, and finally execute it.
The Tcl Interpreter
It is just a small program that enables you to type Tcl commands and have them executed line by line. It stops execution of a tcl file, in case, it encounters an error unlike a compiler that executes fully.
Let's have a helloWorld.tcl file as follows. We will use this as a first program, we run on a platform you choose.
#!/usr/bin/tclsh

puts "Hello World!"
Installation on Windows
Download the latest version for windows installer from the list of Active Tcl binaries available. The active Tcl community edition is free for personal use.
Run the downloaded executable to install the Tcl, which can be done by following the on screen instructions.
Now, we can build and run a Tcl file say helloWorld.tcl by switching to folder containing the file using 'cd' command and then execute the program using the following steps
C:\Tcl> tclsh helloWorld.tcl
We can see the following output.
C:\Tcl> helloWorld
C:\Tcl is the folder, I am using to save my samples. You can change it to the folder in which you have saved Tcl programs.
Installation on Linux
Most of the Linux operating systems come with Tcl inbuilt and you can get started right away in those systems. In case, it's not available, you can use the following command to download and install Tcl-Tk.
$ yum install tcl tk
Now, we can build and run a Tcl file say helloWorld.tcl by switching to folder containing the file using 'cd' command and then execute the program using the following steps −
$ tclsh helloWorld.tcl
We can see the following output −
$ hello world
Installation on Debian based Systems
In case, it's not available in your OS, you can use the following command to download and install Tcl-Tk −
$ sudo apt-get install tcl tk
Now, we can build and run a Tcl file say helloWorld.tcl by switching to folder containing the file using 'cd' command and then execute the program using the following steps −
$ tclsh helloWorld.tcl
We can see the following output −
$ hello world
Installation on Mac OS X
Download the latest version for Mac OS X package from the list of Active Tcl binaries available. The active Tcl community edition is free for personal use.
Run the downloaded executable to install the Active Tcl, which can be done by following the on screen instructions.
Now, we can build and run a Tcl file say helloWorld.tcl by switching to folder containing the file using 'cd' and then execute the program using the following steps −
$ tclsh helloWorld.tcl
We can see the following output −
$ hello world
Installation from Source Files
You can use the option of installing from source files when a binary package is not available. It is generally preferred to use Tcl binaries for Windows and Mac OS X, so only compilation of sources on unix based system is shown below.
Download the source files.
Now, use the following commands to extract, compile, and build after switching to the downloaded folder.
$ tar zxf tcl8.6.1-src.tar.gz
$ cd tcl8.6.1
$ cd unix
$ ./configure prefix=/opt enable-gcc
$ make
$ sudo make install
Note − Make sure, you change the file name to the version you downloaded on commands 1 and 2 given above.
Tcl - Special Variables
In Tcl, we classify some of the variables as special variables and they have a predefined usage/functionality. The list of specials variables is listed below.
| Sr.No. | Special Variable & Description |
|---|---|
| 1 | argc Refers to a number of command-line arguments. |
| 2 | argv Refers to the list containing the command-line arguments. |
| 3 | argv0 Refers to the file name of the file being interpreted or the name by which we invoke the script. |
| 4 | env Used for representing the array of elements that are environmental variables. |
| 5 | errorCode Provides the error code for last Tcl error. |
| 6 | errorInfo Provides the stack trace for last Tcl error. |
| 7 | tcl_interactive Used to switch between interactive and non-interactive modes by setting this to 1 and 0 respectively. |
| 8 | tcl_library Used for setting the location of standard Tcl libraries. |
| 9 | tcl_pkgPath Provides the list of directories where packages are generally installed. |
| 10 | tcl_patchLevel Refers to the current patch level of the Tcl interpreter. |
| 11 | tcl_platform Used for representing the array of elements with objects including byteOrder, machine, osVersion, platform, and os. |
| 12 | tcl_precision Refers to the precision i.e. number of digits to retain when converting to floating-point numbers to strings. The default value is 12. |
| 13 | tcl_prompt1 Refers to the primary prompt. |
| 14 | tcl_prompt2 Refers to the secondary prompt with invalid commands. |
| 15 | tcl_rcFileName Provides the user specific startup file. |
| 16 | tcl_traceCompile Used for controlling the tracing of bytecode compilation. Use 0 for no output, 1 for summary, and 2 for detailed. |
| 17 | tcl_traceExec Used for controlling the tracing of bytecode execution. Use 0 for no output, 1 for summary, and 2 for detailed. |
| 18 | tcl_version Returns the current version of the Tcl interpreter. |
The above special variables have their special meanings for the Tcl interpreter.
Examples for using Tcl special variables
Let's see some examples for special variables.
Tcl version
#!/usr/bin/tclsh

puts $tcl_version
When you run the program, you will get a similar output as shown below −
8.6
Tcl Environment Path
#!/usr/bin/tclsh

puts $env(PATH)
When you run the program, you will get a similar output as shown below −
/home/cg/root/GNUstep/Tools:/usr/GNUstep/Local/Tools:/usr/GNUstep/
System/Tools:/usr/local/bin:/usr/bin:/usr/local/sbin:/usr/sbin:/home/webmaster/.local/bin:/
home/webmaster/bin:/usr/local/scriba/bin:/usr/local/smlnj/
bin:/usr/local/bin/std:/usr/local/bin/extra:/usr/local/fantom/bin:/usr/
local/dart/bin:/usr/bin:/usr/local/bin:/usr/local/sbin:/usr/sbin:/opt/mono/
bin:/opt/mono/lib/mono/4.5:/usr/local/bin:.:/usr/libexec/sdcc:/usr/local/
icon-v950/bin:/usr/local/mozart/bin:/opt/Pawn/bin:/opt/jdk1.7.0_75/bin:/
opt/jdk1.7.0_75/jre/bin:/opt/pash/Source/PashConsole/bin/Debug/
Tcl Package Path
#!/usr/bin/tclsh

puts $tcl_pkgPath
When you run the program, you will get a similar output as shown below −
/usr/lib64/tcl8.6 /usr/share/tcl8.6 /usr/lib64/tk8.6 /usr/share/tk8.6
Tcl Library
#!/usr/bin/tclsh

puts $tcl_library
When you run the program, you will get a similar output as shown below −
/usr/share/tcl8.6
Tcl Patch Level
#!/usr/bin/tclsh

puts $tcl_patchLevel
When you run the program, you will get a similar output as shown below −
8.6.6
Tcl Precision
#!/usr/bin/tclsh

puts $tcl_precision
When you run the program, you will get a similar output as shown below −
0
Tcl Startup File
#!/usr/bin/tclsh

puts $tcl_rcFileName
When you run the program, you will get a similar output as shown below −
~/.tclshrc
Tcl - Basic Syntax
Tcl is quite simple to learn and let's start creating our first Tcl program!
First Tcl Program
Let us write a simple Tcl program. All Tcl files will have an extension, i.e., .tcl. So, put the following source code in a test.tcl file.
#!/usr/bin/tclsh

puts "Hello, World!"
Assuming, Tcl environment is setup correctly; let's run the program after switching to file's directory and then execute the program using −
$ tclsh test.tcl
We will get the following output −
Hello, World!
Let us now see the basic structure of Tcl program, so that it will be easy for you to understand basic building blocks of the Tcl language. In Tcl, we use new line or semicolon to terminate the previous line of code. But semicolon is not necessary, if you are using newline for each command.
Comments
Comments are like helping text in your Tcl program and the interpreter ignores them. Comments can be written using a hash_(#) sign in the beginning.
#!/usr/bin/tclsh

# my first program in Tcl
puts "Hello World!"
When the above code is executed, it produces the following result −
Hello World!
Multiline or block comment is written using 'if' with condition '0'. An example is shown below.
#!/usr/bin/tclsh

if 0 {
   my first program in Tcl program
   Its very simple
}
puts "Hello World!"
When the above code is executed, it produces the following result −
Hello World!
Inline comments use ;#. An example is given below.
#!/usr/bin/tclsh

puts "Hello World!" ;# my first print in Tcl program
When the above code is executed, it produces the following result −
Hello World!
Identifiers
A Tcl identifier is a name used to identify a variable, function, or any other user-defined item. An identifier starts with a letter A to Z or a to z or an underscore (_) followed by zero or more letters, underscores, dollars ($) , and digits (0 to 9).
Tcl does not allow punctuation characters such as @, and % within identifiers. Tcl is a case sensitive_ language. Thus Manpower and manpower are two different identifiers in Tcl. Here are some of the examples of acceptable identifiers −
mohd       zara    abc   move_name  a_123
myname50   _temp   j     a23b9      retVal
Whitespace in Tcl
A line containing only whitespace, possibly with a comment, is known as a blank line, and a Tcl interpreter totally ignores it.
Whitespace is the term used in Tcl to describe blanks, tabs, newline characters, and comments. Whitespace separates one part of a statement from another and enables the interpreter to identify where one element in a statement, such as puts, ends and the next element begins. Therefore, in the following statement −
#!/usr/bin/tclsh

puts "Hello World!"
There must be at least one whitespace character (usually a space) between puts and "Hello World!" for the interpreter to be able to distinguish them. On the other hand, in the following statement −
#!/usr/bin/tclsh

puts [expr 3 + 2] ;# print sum of the 3 and 2
When the above code is executed, it produces the following result −
5
No whitespace characters are necessary between 3 and +, or between + and 2; although, you are free to include some if you wish for the readability purpose.
Tcl - Commands
As you know, Tcl is a Tool command language, commands are the most vital part of the language. Tcl commands are built in-to the language with each having its own predefined function. These commands form the reserved words of the language and cannot be used for other variable naming. The advantage with these Tcl commands is that, you can define your own implementation for any of these commands to replace the original built-in functionality.
Each of the Tcl commands validates the input and it reduces the work of the interpreter.
Tcl command is actually a list of words, with the first word representing the command to be executed. The next words represent the arguments. In order to group the words into a single argument, we enclose multiple words with "" or {}.
The syntax of Tcl command is as follows −
commandName argument1 argument2 ... argumentN
Let's see a simple example of Tcl command −
#!/usr/bin/tclsh

puts "Hello, world!"
When the above code is executed, it produces the following result −
Hello, world!
In the above code, puts is the Tcl command and "Hello World" is the argument1. As said before, we have used "" to group two words.
Let's see another example of Tcl command with two arguments −
#!/usr/bin/tclsh

puts stdout "Hello, world!"
When the above code is executed, it produces the following result −
Hello, world!
In the above code, puts is the Tcl command, stdout is argument1, and "Hello World" is argument2. Here, stdout makes the program to print in the standard output device.
Command Substitution
In command substitutions, square brackets are used to evaluate the scripts inside the square brackets. A simple example to add two numbers is shown below −
#!/usr/bin/tclsh

puts [expr 1 + 6 + 9]
When the above code is executed, it produces following result −
16
Variable Substitution
In variable substitutions, $ is used before the variable name and this returns the contents of the variable. A simple example to set a value to a variable and print it is shown below.
#!/usr/bin/tclsh

set a 3
puts $a
When the above code is executed, it produces the following result −
3
Backslash Substitution
These are commonly called escape sequences; with each backslash, followed by a letter having its own meaning. A simple example for newline substitution is shown below −
#!/usr/bin/tclsh

puts "Hello\nWorld"
When the above code is executed, it produces the following result −
Hello
World
Tcl - Data Types
The primitive data-type of Tcl is string and often we can find quotes on Tcl as string only language. These primitive data-types in turn create composite data-types for list and associative array. In Tcl, data-types can represent not only the simple Tcl objects, but also can represent complex objects such as handles, graphic objects (mostly widgets), and I/O channels. Let's look into the details about each of the above.
Simple Tcl Objects
In Tcl, whether it is an integer number, boolean, floating point number, or a string. When you want to use a variable, you can directly assign a value to it, there is no step of declaration in Tcl. There can be internal representations for these different types of objects. It can transform one data-type to another when required. The syntax for assigning value to variable is as follows −
#!/usr/bin/tclsh

set myVariable 18
puts $myVariable
When the above code is executed, it produces the following result −
18
The above statement will create a variable name myVariable and stores it as a string even though, we have not used double quotations. Now, if we try to make an arithmetic on the variable, it is automatically turned to an integer. A simple example is shown below −
#!/usr/bin/tclsh

set myVariable 18
puts [expr $myVariable + 6 + 9]
When the above code is executed, it produces the following result −
33
One important thing to note is that, these variables don't have any default values and must be assigned value before they are used.
If we try to print using puts, the number is transformed into proper string. Having two representations, internal and external, help Tcl to create complex data structures easily compared to other languages. Also, Tcl is more efficient due to its dynamic object nature.
String Representations
Unlike other languages, in Tcl, you need not include double quotes when it's only a single word. An example can be −
#!/usr/bin/tclsh

set myVariable hello
puts $myVariable
When the above code is executed, it produces the following result −
hello
When we want to represent multiple strings, we can use either double quotes or curly braces. It is shown below −
#!/usr/bin/tclsh

set myVariable "hello world"
puts $myVariable
set myVariable {hello world}
puts $myVariable
When the above code is executed, it produces the following result −
hello world
hello world
List
List is nothing but a group of elements. A group of words either using double quotes or curly braces can be used to represent a simple list. A simple list is shown below −
#!/usr/bin/tclsh

set myVariable {red green blue}
puts [lindex $myVariable 2]
set myVariable "red green blue"
puts [lindex $myVariable 1]
When the above code is executed, it produces the following result −
blue
green
Associative Array
Associative arrays have an index (key) that is not necessarily an integer. It is generally a string that acts like key value pairs. A simple example is shown below −
#!/usr/bin/tclsh

set  marks(english) 80
puts $marks(english)
set  marks(mathematics) 90
puts $marks(mathematics)
When the above code is executed, it produces the following result −
80
90
Handles
Tcl handles are commonly used to represent files and graphics objects. These can include handles to network requests and also other channels like serial port communication, sockets, or I/O devices. The following is an example where a file handle is created.
set myfile [open "filename" r]
You will see more detail on files in the Tcl file I/O chapter.
Tcl - Variables
In Tcl, there is no concept of variable declaration. Once, a new variable name is encountered, Tcl will define a new variable.
Variable Naming
The name of variables can contain any characters and length. You can even have white spaces by enclosing the variable in curly braces, but it is not preferred.
The set command is used for assigning value to a variable. The syntax for set command is,
set variableName value
A few examples of variables are shown below −
#!/usr/bin/tclsh

set variableA 10
set {variable B} test
puts $variableA
puts ${variable B}
When the above code is executed, it produces the following result −
10
test
As you can see in the above program, the $variableName is used to get the value of the variable.
Dynamic Typing
Tcl is a dynamically typed language. The value of the variable can be dynamically converted to the required type when required. For example, a number 5 that is stored as string will be converted to number when doing an arithmetic operation. It is shown below −
#!/usr/bin/tclsh

set variableA "10"
puts $variableA
set sum [expr $variableA +20];
puts $sum
When the above code is executed, it produces the following result −
10
30
Mathematical Expressions
As you can see in the above example, expr is used for representing mathematical expression. The default precision of Tcl is 12 digits. In order to get floating point results, we should add at least a single decimal digit. A simple example explains the above.
#!/usr/bin/tclsh

set variableA "10"
set result [expr $variableA / 9];
puts $result
set result [expr $variableA / 9.0];
puts $result
set variableA "10.0"
set result [expr $variableA / 9];
puts $result
When the above code is executed, it produces the following result −
1
1.1111111111111112
1.1111111111111112
In the above example, you can see three cases. In the first case, the dividend and the divisor are whole numbers and we get a whole number as result. In the second case, the divisor alone is a decimal number and in the third case, the dividend is a decimal number. In both second and third cases, we get a decimal number as result.
In the above code, you can change the precision by using tcl_precision special variable. It is shown below −
#!/usr/bin/tclsh

set variableA "10"
set tcl_precision 5
set result [expr $variableA / 9.0];
puts $result
When the above code is executed, it produces the following result −
1.1111
Tcl - Operators
An operator is a symbol that tells the compiler to perform specific mathematical or logical manipulations. Tcl language is rich in built-in operators and provides the following types of operators −
- Arithmetic Operators
- Relational Operators
- Logical Operators
- Bitwise Operators
- Ternary Operator
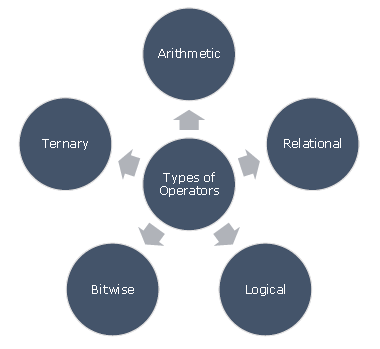
This chapter will explain the arithmetic, relational, logical, bitwise, and ternary operators one by one.
Arithmetic Operators
Following table shows all the arithmetic operators supported by Tcl language. Assume variable A holds 10 and variable B holds 20, then −
| Operator | Description | Example |
|---|---|---|
| + | Adds two operands | A + B will give 30 |
| - | Subtracts second operand from the first | A - B will give -10 |
| * | Multiplies both operands | A * B will give 200 |
| / | Divides numerator by de-numerator | B / A will give 2 |
| % | Modulus Operator and remainder of after an integer division | B % A will give 0 |
Relational Operators
Following table shows all the relational operators supported by Tcl language. Assume variable A holds 10 and variable B holds 20, then −
| Operator | Description | Example |
|---|---|---|
| == | Checks if the values of two operands are equal or not, if yes then condition becomes true. | (A == B) is not true. |
| != | Checks if the values of two operands are equal or not, if values are not equal then condition becomes true. | (A != B) is true. |
| > | Checks if the value of left operand is greater than the value of right operand, if yes then condition becomes true. | (A > B) is not true. |
| < | Checks if the value of left operand is less than the value of right operand, if yes then condition becomes true. | (A < B) is true. |
| >= | Checks if the value of left operand is greater than or equal to the value of right operand, if yes then condition becomes true. | (A >= B) is not true. |
| <= | Checks if the value of left operand is less than or equal to the value of right operand, if yes then condition becomes true. | (A <= B) is true. |
Logical Operators
Following table shows all the logical operators supported by Tcl language. Assume variable A holds 1 and variable B holds 0, then −
| Operator | Description | Example |
|---|---|---|
| && | Called Logical AND operator. If both the operands are non-zero, then condition becomes true. | (A && B) is false. |
| || | Called Logical OR Operator. If any of the two operands is non-zero, then condition becomes true. | (A || B) is true. |
| ! | Called Logical NOT Operator. Use to reverses the logical state of its operand. If a condition is true then Logical NOT operator will make false. | !(A && B) is true. |
Bitwise Operators
Bitwise operator works on bits and perform bit-by-bit operation. The truth tables for &, |, and ^ are as follows −
| p | q | p & q | p | q | p ^ q |
|---|---|---|---|---|
| 0 | 0 | 0 | 0 | 0 |
| 0 | 1 | 0 | 1 | 1 |
| 1 | 1 | 1 | 1 | 0 |
| 1 | 0 | 0 | 1 | 1 |
Assume if A = 60; and B = 13; now in binary format they will be as follows −
A = 0011 1100
B = 0000 1101
----------------------
A&B = 0000 1100
A|B = 0011 1101
A^B = 0011 0001
The Bitwise operators supported by Tcl language are listed in the following table. Assume variable A holds 60 and variable B holds 13, then −
| Operator | Description | Example |
|---|---|---|
| & | Binary AND Operator copies a bit to the result if it exists in both operands. | (A & B) will give 12, which is 0000 1100 |
| | | Binary OR Operator copies a bit if it exists in either operand. | (A | B) will give 61, which is 0011 1101 |
| ^ | Binary XOR Operator copies the bit if it is set in one operand but not both. | (A ^ B) will give 49, which is 0011 0001 |
| << | Binary Left Shift Operator. The left operands value is moved left by the number of bits specified by the right operand. | A << 2 will give 240, which is 1111 0000 |
| >> | Binary Right Shift Operator. The left operands value is moved right by the number of bits specified by the right operand. | A >> 2 will give 15, which is 0000 1111 |
Ternary Operator
| Operator | Description | Example |
|---|---|---|
| ? : | Ternary | If Condition is true? Then value X : Otherwise value Y |
Operators Precedence in Tcl
Operator precedence determines the grouping of terms in an expression. This affects how an expression is evaluated. Certain operators have higher precedence than others; for example, the multiplication operator has higher precedence than the addition operator.
For example : x = 7 + 3 * 2; here, x is assigned 13, not 20 because operator * has higher precedence than +, so it first gets multiplied with 3 * 2 and then adds into 7.
Here, operators with the highest precedence appear at the top of the table, those with the lowest appear at the bottom. Within an expression, higher precedence operators will be evaluated first.
| Category | Operator | Associativity |
|---|---|---|
| Unary | + - | Right to left |
| Multiplicative | * / % | Left to right |
| Additive | + - | Left to right |
| Shift | << >> | Left to right |
| Relational | < <= > >= | Left to right |
| Bitwise AND | & | Left to right |
| Bitwise XOR | ^ | Left to right |
| Bitwise OR | | | Left to right |
| Logical AND | && | Left to right |
| Logical OR | || | Left to right |
| Ternary | ?: | Right to left |
Tcl - Decisions
Decision making structures require that the programmer specifies one or more conditions to be evaluated or tested by the program, along with a statement or statements to be executed if the condition is determined to be true, and optionally, other statements to be executed if the condition is determined to be false.
Following is the general form of a typical decision making structure found in most of the programming languages −
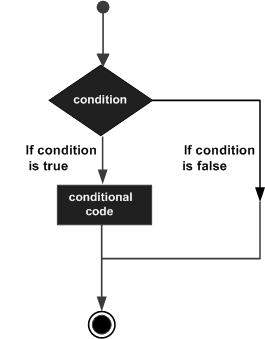
Tcl language uses the expr command internally and hence its not required for us to use expr statement explicitly.
Tcl language provides following types of decision making statements −
| Sr.No. | Statement & Description |
|---|---|
| 1 | if statement
An 'if' statement consists of a Boolean expression followed by one or more statements. |
| 2 | if...else statement
An 'if' statement can be followed by an optional 'else' statement, which executes when the Boolean expression is false. |
| 3 | nested if statements
You can use one 'if' or 'else if' statement inside another 'if' or 'else if' statement(s). |
| 4 | switch statement
A switch statement allows a variable to be tested for equality against a list of values. |
| 5 | nested switch statements
You can use one switch statement inside another switch statement(s). |
The ? : Operator
We have covered conditional operator ? : in previous chapter, which can be used to replace if...else statements. It has the following general form −
Exp1 ? Exp2 : Exp3;
Where Exp1, Exp2, and Exp3 are expressions. Notice the use and placement of the colon.
The value of a '? expression' is determined like this: Exp1 is evaluated. If it is true, then Exp2 is evaluated and becomes the value of the entire '? expression.' If Exp1 is false, then Exp3 is evaluated and its value becomes the value of the expression. An example is shown below.
#!/usr/bin/tclsh

set a 10;
set b [expr $a == 1 ? 20: 30]
puts "Value of b is $b\n"
set b [expr $a == 10 ? 20: 30]
puts "Value of b is $b\n"
When you compile and execute the above program, it produces the following result −
Value of b is 30
Value of b is 20
Tcl - Loops
There may be a situation, where you need to execute a block of code several number of times. In general, statements are executed sequentially: The first statement in a function is executed first, followed by the second, and so on.
Programming languages provide various control structures that allow for more complicated execution paths.
A loop statement allows us to execute a statement or group of statements multiple times and following is the general form of a loop statement in most of the programming languages −
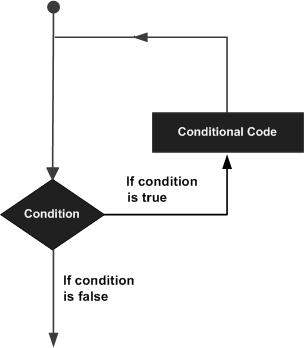
Tcl language provides the following types of loops to handle looping requirements.
| Sr.No. | Loop Type & Description |
|---|---|
| 1 | while loop
Repeats a statement or group of statements while a given condition is true. It tests the condition before executing the loop body. |
| 2 | for loop
Executes a sequence of statements multiple times and abbreviates the code that manages the loop variable. |
| 3 | nested loops
You can use one or more loop inside any another while, for or do..while loop. |
Loop Control Statements
Loop control statements change execution from its normal sequence. When execution leaves a scope, all automatic objects that were created in that scope are destroyed.
Tcl supports the following control statements.
| Sr.No. | Control Statement & Description |
|---|---|
| 1 | break statement
Terminates the loop or switch statement and transfers execution to the statement immediately following the loop or switch. |
| 2 | continue statement
Causes the loop to skip the remainder of its body and immediately retest its condition prior to reiterating. |
The Infinite Loop
A loop becomes infinite loop if a condition never becomes false. The while loop is traditionally used for this purpose. You can make an endless loop by leaving the conditional expression as 1.
while {1} {
   puts "This loop will run forever."
}
When the conditional expression is absent, it is assumed to be true. Tcl programmers more commonly use the while {1} construct to signify an infinite loop.
NOTE − You can terminate an infinite loop by pressing Ctrl + C keys.
Tcl - Arrays
An array is a systematic arrangement of a group of elements using indices. The syntax for the conventional array is shown below.
set ArrayName(Index) value
An example for creating simple array is shown below.
#!/usr/bin/tclsh

set languages(0) Tcl
set languages(1) "C Language"
puts $languages(0)
puts $languages(1)
When the above code is executed, it produces the following result −
Tcl
C Language
Size of Array
The syntax for calculating size array is shown below.
[array size variablename]
An example for printing the size is shown below.
#!/usr/bin/tclsh

set languages(0) Tcl
set languages(1) "C Language"
puts  [array size languages]
When the above code is executed, it produces the following result −
2
Array Iteration
Though, array indices can be non-continuous like values specified for index 1 then index 10 and so on. But, in case they are continuous, we can use array iteration to access elements of the array. A simple array iteration for printing elements of the array is shown below.
#!/usr/bin/tclsh

set languages(0) Tcl
set languages(1) "C Language"
for { set index 0 }  { $index < [array size languages] }  { incr index } {
   puts "languages($index) : $languages($index)"
}
When the above code is executed, it produces the following result −
languages(0) : Tcl
languages(1) : C Language
Associative Arrays
In Tcl, all arrays by nature are associative. Arrays are stored and retrieved without any specific order. Associative arrays have an index that is not necessarily a number, and can be sparsely populated. A simple example for associative array with non-number indices is shown below.
#!/usr/bin/tclsh

set personA(Name) "Dave"
set personA(Age) 14
puts  $personA(Name)
puts  $personA(Age)
When the above code is executed, it produces the following result −
Dave
14
Indices of Array
The syntax for retrieving indices of array is shown below.
[array names variablename]
An example for printing the size is shown below.
#!/usr/bin/tclsh

set personA(Name) "Dave"
set personA(Age) 14
puts [array names personA]
When the above code is executed, it produces the following result −
Age Name
Iteration of Associative Array
You can use the indices of array to iterate through the associative array. An example is shown below.
#!/usr/bin/tclsh

set personA(Name) "Dave"
set personA(Age) 14
foreach index [array names personA] {
   puts "personA($index): $personA($index)"
}
When the above code is executed, it produces the following result −
personA(Age): 14
personA(Name): Dave
Tcl - Strings
The primitive data-type of Tcl is string and often we can find quotes on Tcl as string only language. These strings can contain alphanumeric character, just numbers, Boolean, or even binary data. Tcl uses 16 bit unicode characters and alphanumeric characters can contain letters including non-Latin characters, number or punctuation.
Boolean value can be represented as 1, yes or true for true and 0, no, or false for false.
String Representations
Unlike other languages, in Tcl, you need not include double quotes when it's only a single word. An example can be −
#!/usr/bin/tclsh

set myVariable hello
puts $myVariable
When the above code is executed, it produces the following result −
hello
When we want to represent multiple strings, we can use either double quotes or curly braces. It is shown below −
#!/usr/bin/tclsh

set myVariable "hello world"
puts $myVariable
set myVariable {hello world}
puts $myVariable
When the above code is executed, it produces the following result −
hello world
hello world
String Escape Sequence
A character literal can be a plain character (e.g., 'x'), an escape sequence (e.g., '\t'), or a universal character (e.g., '\u02C0').
There are certain characters in Tcl when they are preceded by a backslash they will have special meaning and they are used to represent like newline (\n) or tab (\t). Here, you have a list of some of such escape sequence codes −
| Escape sequence | Meaning |
|---|---|
| \\ | \ character |
| \' | ' character |
| \" | " character |
| \? | ? character |
| \a | Alert or bell |
| \b | Backspace |
| \f | Form feed |
| \n | Newline |
| \r | Carriage return |
| \t | Horizontal tab |
| \v | Vertical tab |
Following is the example to show a few escape sequence characters −
#!/usr/bin/tclsh

puts "Hello\tWorld\n\nTutorialspoint";
When the above code is compiled and executed, it produces the following result −
Hello   World

Tutorialspoint
String Command
The list of subcommands for string command is listed in the following table −
| Sr.No. | Methods & Description |
|---|---|
| 1 | compare string1 string2 Compares string1 and string2 lexographically. Returns 0 if equal, -1 if string1 comes before string2, else 1. |
| 2 | first string1 string2 Returns the index first occurrence of string1 in string2. If not found, returns -1. |
| 3 | index string index Returns the character at index. |
| 4 | last string1 string2 Returns the index last occurrence of string1 in string2. If not found, returns -1. |
| 5 | length string Returns the length of string. |
| 6 | match pattern string Returns 1 if the string matches the pattern. |
| 7 | range string index1 index2 Return the range of characters in string from index1 to index2. |
| 8 | tolower string Returns the lowercase string. |
| 9 | toupper string Returns the uppercase string. |
| 10 | trim string ?trimcharacters? Removes trimcharacters in both ends of string. The default trimcharacters is whitespace. |
| 11 | trimleft string ?trimcharacters? Removes trimcharacters in left beginning of string. The default trimcharacters is whitespace. |
| 12 | trimright string ?trimcharacters? Removes trimcharacters in left end of string. The default trimcharacters is whitespace. |
| 13 | wordend findstring index Return the index in findstring of the character after the word containing the character at index. |
| 14 | wordstart findstring index Return the index in findstring of the first character in the word containing the character at index. |
Examples of some commonly used Tcl string sub commands are given below.
String Comparison
#!/usr/bin/tclsh

set s1 "Hello"
set s2 "World"
set s3 "World"
puts [string compare $s1 $s2]
if {[string compare $s2 $s3] == 0} {
   puts "String \'s1\' and \'s2\' are same.";
}

if {[string compare $s1 $s2] == -1} {
   puts "String \'s1\' comes before \'s2\'.";
}

if {[string compare $s2 $s1] == 1} {
   puts "String \'s2\' comes after \'s1\'.";
}
When the above code is compiled and executed, it produces the following result −
-1
String 's1' and 's2' are same.
String 's1' comes before 's2'.
String 's2' comes after 's1'.
Index of String
#!/usr/bin/tclsh

set s1 "Hello World"
set s2 "o"
puts "First occurrence of $s2 in s1"
puts [string first $s2 $s1]
puts "Character at index 0 in s1"
puts [string index $s1 0]
puts "Last occurrence of $s2 in s1"
puts [string last $s2 $s1]
puts "Word end index in s1"
puts [string wordend $s1 20]
puts "Word start index in s1"
puts [string wordstart $s1 20]
When the above code is compiled and executed, it produces the following result −
First occurrence of o in s1
4
Character at index 0 in s1
H
Last occurrence of o in s1
7
Word end index in s1
11
Word start index in s1
6
Length of String
#!/usr/bin/tclsh

set s1 "Hello World"
puts "Length of string s1"
puts [string length $s1]
When the above code is compiled and executed, it produces the following result −
Length of string s1
11
Handling Cases
#!/usr/bin/tclsh

set s1 "Hello World"
puts "Uppercase string of s1"
puts [string toupper $s1]
puts "Lowercase string of s1"
puts [string tolower $s1]
When the above code is compiled and executed, it produces the following result −
Uppercase string of s1
HELLO WORLD
Lowercase string of s1
hello world
Trimming Characters
#!/usr/bin/tclsh

set s1 "Hello World"
set s2 "World"
puts "Trim right $s2 in $s1"
puts [string trimright $s1 $s2]

set s2 "Hello"
puts "Trim left $s2 in $s1"
puts [string trimleft $s1 $s2]

set s1 " Hello World "
set s2 " "
puts "Trim characters s1 on both sides of s2"
puts [string trim $s1 $s2]
When the above code is compiled and executed, it produces the following result −
Trim right World in Hello World
Hello
Trim left Hello in Hello World
 World
Trim characters s1 on both sides of s2
Hello World
Matching Strings
#!/usr/bin/tclsh

set s1 "test@test.com"
set s2 "*@*.com"
puts "Matching pattern s2 in s1"
puts [string match "*@*.com" $s1 ]
puts "Matching pattern tcl in s1"
puts [string match {tcl} $s1]
When the above code is compiled and executed, it produces the following result −
Matching pattern s2 in s1
1
Matching pattern tcl in s1
0
Append Command
#!/usr/bin/tclsh

set s1 "Hello"
append s1 " World"
puts $s1
When the above code is compiled and executed, it produces the following result −
Hello World
Format command
The following table shows the list of format specifiers available in Tcl −
| Specifier | Use |
|---|---|
| %s | String representation |
| %d | Integer representation |
| %f | Floating point representation |
| %e | Floating point representation with mantissa-exponent form |
| %x | Hexa decimal representation |
Some simple examples are given below −
#!/usr/bin/tclsh

puts [format "%f" 43.5]
puts [format "%e" 43.5]
puts [format "%d %s" 4 tuts]
puts [format "%s" "Tcl Language"]
puts [format "%x" 40]
When the above code is compiled and executed, it produces the following result −
43.500000
4.350000e+01
4 tuts
Tcl Language
28
Scan command
Scan command is used for parsing a string based to the format specifier. Some examples are shown below.
#!/usr/bin/tclsh

puts [scan "90" {%[0-9]} m]
puts [scan "abc" {%[a-z]} m]
puts [scan "abc" {%[A-Z]} m]
puts [scan "ABC" {%[A-Z]} m]
When the above code is compiled and executed, it produces the following result −
1
1
0
1
Tcl - Lists
List is one of the basic data-type available in Tcl. It is used for representing an ordered collection of items. It can include different types of items in the same list. Further, a list can contain another list.
An important thing that needs to be noted is that these lists are represented as strings completely and processed to form individual items when required. So, avoid large lists and in such cases; use array.
Creating a List
The general syntax for list is given below −
set listName { item1 item2 item3 .. itemn }
# or
set listName [list item1 item2 item3]
# or
set listName [split "items separated by a character" split_character]
Some examples are given below −
#!/usr/bin/tclsh

set colorList1 {red green blue}
set colorList2 [list red green blue]
set colorList3 [split "red_green_blue" _]
puts $colorList1
puts $colorList2
puts $colorList3
When the above code is executed, it produces the following result −
red green blue
red green blue
red green blue
Appending Item to a List
The syntax for appending item to a list is given below −
append listName split_character value
# or
lappend listName value
Some examples are given below −
#!/usr/bin/tclsh

set var orange
append var " " "blue"
lappend var "red"
lappend var "green"
puts $var
When the above code is executed, it produces the following result −
orange blue red green
Length of List
The syntax for length of list is given below −
llength listName
Example for length of list is given below −
#!/usr/bin/tclsh

set var {orange blue red green}
puts [llength $var]
When the above code is executed, it produces the following result −
4
List Item at Index
The syntax for selecting list item at specific index is given below −
lindex listname index
Example for list item at index is given below −
#!/usr/bin/tclsh

set var {orange blue red green}
puts [lindex $var  1]
When the above code is executed, it produces the following result −
blue
Insert Item at Index
The syntax for inserting list items at specific index is given below.
linsert listname index value1 value2..valuen
Example for inserting list item at specific index is given below.
#!/usr/bin/tclsh

set var {orange blue red green}
set var [linsert  $var 3 black white]
puts $var
When the above code is executed, it produces the following result −
orange blue red black white green
Replace Items at Indices
The syntax for replacing list items at specific indices is given below −
lreplace listname firstindex lastindex value1 value2..valuen
Example for replacing list items at specific indices is given below.
#!/usr/bin/tclsh

set var {orange blue red green}
set var [lreplace $var 2 3 black white]
puts $var
When the above code is executed, it produces the following result −
orange blue black white
Set Item at Index
The syntax for setting list item at specific index is given below −
lset listname index value
Example for setting list item at specific index is given below −
#!/usr/bin/tclsh

set var {orange blue red green}
lset var 0 black
puts $var
When the above code is executed, it produces the following result −
black blue red green
Transform List to Variables
The syntax for copying values to variables is given below −
lassign listname variable1 variable2.. variablen
Example for transforming list into variables is given below −
#!/usr/bin/tclsh

set var {orange blue red green}
lassign $var colour1 colour2
puts $colour1
puts $colour2
When the above code is executed, it produces the following result −
orange
blue
Sorting a List
The syntax for sorting a list is given below −
lsort listname
An example for sorting a list is given below −
#!/usr/bin/tclsh

set var {orange blue red green}
set var [lsort $var]
puts $var
When the above code is executed, it produces the following result −
blue green orange red
Tcl - Dictionary
A dictionary is an arrangement for mapping values to keys. The syntax for the conventional dictionary is shown below −
dict set dictname key value
# or
dict create dictname key1 value1 key2 value2 .. keyn valuen
Some examples for creating a dictionary are shown below −
#!/usr/bin/tclsh

dict set colours  colour1 red
puts $colours
dict set colours  colour2 green
puts $colours

set colours [dict create colour1 "black" colour2 "white"]
puts $colours
When the above code is executed, it produces the following result −
colour1 red
colour1 red colour2 green
colour1 black colour2 white
Size of Dict
The syntax for getting size of dict is shown below −
[dict size dictname]
An example for printing the size is shown below −
#!/usr/bin/tclsh

set colours [dict create colour1 "black" colour2 "white"]
puts [dict size $colours]
When the above code is executed, it produces the following result −
2
Dictionary Iteration
A simple dictionary iteration for printing keys and valued of the dictionary is shown below −
#!/usr/bin/tclsh

set colours [dict create colour1 "black" colour2 "white"]
foreach item [dict keys $colours] {
   set value [dict get $colours $item]
   puts $value
}
When the above code is executed, it produces the following result −
black
white
Value for Key in Dict
The syntax for retrieving value for key in dict is shown below −
[dict get $dictname $keyname]
An example for retrieving value for key is given below −
#!/usr/bin/tclsh

set colours [dict create colour1 "black" colour2 "white"]
set value [dict get $colours colour1]
puts $value
When the above code is executed, it produces the following result −
black
All Keys in Dict
The syntax for retrieving all keys in dict is shown below −
[dict keys $dictname]
An example for printing all keys is shown below −
#!/usr/bin/tclsh

set colours [dict create colour1 "black" colour2 "white"]
set keys [dict keys $colours]
puts $keys
When the above code is executed, it produces the following result −
colour1 colour2
All Values in Dict
The syntax for retrieving all values in dict is shown below −
[dict values $dictname]
An example for printing all values is shown below −
#!/usr/bin/tclsh

set colours [dict create colour1 "black" colour2 "white"]
set values [dict values $colours]
puts $values
When the above code is executed, it produces the following result −
black white
Key Exists in Dict
The syntax for checking if a key exists in dict is shown below −
[dict exists $dictname $key]
An example for checking if a key exists in dict is shown below −
#!/usr/bin/tclsh

set colours [dict create colour1 "black" colour2 "white"]
set result [dict exists $colours colour1]
puts $result
When the above code is executed, it produces the following result −
1
Tcl - Procedures
Procedures are nothing but code blocks with series of commands that provide a specific reusable functionality. It is used to avoid same code being repeated in multiple locations. Procedures are equivalent to the functions used in many programming languages and are made available in Tcl with the help of proc command.
The syntax of creating a simple procedure is shown below −
proc procedureName {arguments} {
   body
}
A simple example for procedure is given below −
#!/usr/bin/tclsh

proc helloWorld {} {
   puts "Hello, World!"
}
helloWorld
When the above code is executed, it produces the following result −
Hello, World!
Procedures with Multiple Arguments
An example for procedure with arguments is shown below −
#!/usr/bin/tclsh

proc add {a b} {
   return [expr $a+$b]
}
puts [add 10 30]
When the above code is executed, it produces the following result −
40
Procedures with Variable Arguments
An example for procedure with arguments is shown below −
#!/usr/bin/tclsh

proc avg {numbers} {
   set sum 0
   foreach number $numbers {
      set sum  [expr $sum + $number]
   }
   set average [expr $sum/[llength $numbers]]
   return $average
}
puts [avg {70 80 50 60}]
puts [avg {70 80 50 }]
When the above code is executed, it produces the following result −
65
66
Procedures with Default Arguments
Default arguments are used to provide default values that can be used if no value is provided. An example for procedure with default arguments, which is sometimes referred as implicit arguments is shown below −
#!/usr/bin/tclsh

proc add {a {b 100} } {
   return [expr $a+$b]
}
puts [add 10 30]
puts [add 10]
When the above code is executed, it produces the following result −
40
110
Recursive Procedures
An example for recursive procedures is shown below −
#!/usr/bin/tclsh

proc factorial {number} {
   if {$number <= 1} {
      return 1
   }
   return [expr $number * [factorial [expr $number - 1]]]

}
puts [factorial 3]
puts [factorial 5]
When the above code is executed, it produces the following result −
6
120
Tcl - Packages
Packages are used for creating reusable units of code. A package consists of a collection of files that provide specific functionality. This collection of files is identified by a package name and can have multiple versions of same files. The package can be a collection of Tcl scripts, binary library, or a combination of both.
Package uses the concept of namespace to avoid collision of variable names and procedure names. Check out more in our next 'namespace' tutorial.
Creating Package
A package can be created with the help of minimum two files. One file contains the package code. Other file contains the index package file for declaring your package.
The list of steps for creating and using package is given below.
STEP 1 : Creating Code
Create code for package inside a folder say HelloWorld. Let the file be named HelloWorld.tcl with the code as shown below −
# /Users/rajkumar/Desktop/helloworld/HelloWorld.tcl
# Create the namespace
namespace eval ::HelloWorld {

  # Export MyProcedure
  namespace export MyProcedure

  # My Variables
   set version 1.0
   set MyDescription "HelloWorld"

  # Variable for the path of the script
   variable home [file join [pwd] [file dirname [info script]]]

}

# Definition of the procedure MyProcedure
proc ::HelloWorld::MyProcedure {} {
   puts $HelloWorld::MyDescription
}

package provide HelloWorld $HelloWorld::version
package require Tcl 8.0
STEP 2 : Creating Package Index
Open tclsh. Switch to HelloWorld directory and use the pkg_mkIndex command to create the index file as shown below −
% cd /Users/rajkumar/Desktop/helloworld
% pkg_mkIndex . *.tcl
STEP 3 : Adding Directory to Autopath
Use the lappend command to add the package to the global list as shown below −
% lappend auto_path "/Users/rajkumar/Desktop/helloworld"
STEP 4 : Adding Package
Next add package to program using package require statement as shown below −
% package require HelloWorld 1.0
STEP 5 : Invoking Procedure
Now, everything being setup, we can invoke our procedure as shown below −
% puts [HelloWorld::MyProcedure]
You will get the following result −
HelloWorld
First two steps create the package. Once package is created, you can use it in any Tcl file by adding the last three statements as shown below −
lappend auto_path "/Users/rajkumar/Desktop/helloworld"
package require HelloWorld 1.0
puts [HelloWorld::MyProcedure]
You will get the following result −
HelloWorld
Tcl - Namespaces
Namespace is a container for set of identifiers that is used to group variables and procedures. Namespaces are available from Tcl version 8.0. Before the introduction of the namespaces, there was single global scope. Now with namespaces, we have additional partitions of global scope.
Creating Namespace
Namespaces are created using the namespace command. A simple example for creating namespace is shown below −
#!/usr/bin/tclsh

namespace eval MyMath {
  # Create a variable inside the namespace
  variable myResult
}

# Create procedures inside the namespace
proc MyMath::Add {a b } {
  set ::MyMath::myResult [expr $a + $b]
}
MyMath::Add 10 23

puts $::MyMath::myResult
When the above code is executed, it produces the following result −
33
In the above program, you can see there is a namespace with a variable myResult and a procedure Add. This makes it possible to create variables and procedures with the same names under different namespaces.
Nested Namespaces
Tcl allows nesting of namespaces. A simple example for nesting namespaces is given below −
#!/usr/bin/tclsh

namespace eval MyMath {
   # Create a variable inside the namespace
   variable myResult
}

namespace eval extendedMath {
   # Create a variable inside the namespace
   namespace eval MyMath {
      # Create a variable inside the namespace
      variable myResult
   }
}
set ::MyMath::myResult "test1"
puts $::MyMath::myResult
set ::extendedMath::MyMath::myResult "test2"
puts $::extendedMath::MyMath::myResult
When the above code is executed, it produces the following result −
test1
test2
Importing and Exporting Namespace
You can see in the previous namespace examples, we use a lot of scope resolution operator and it's more complex to use. We can avoid this by importing and exporting namespaces. An example is given below −
#!/usr/bin/tclsh

namespace eval MyMath {
   # Create a variable inside the namespace
   variable myResult
   namespace export Add
}

# Create procedures inside the namespace
proc MyMath::Add {a b } {
   return [expr $a + $b]
}

namespace import MyMath::*
puts [Add 10 30]
When the above code is executed, it produces the following result −
40
Forget Namespace
You can remove an imported namespace by using forget subcommand. A simple example is shown below −
#!/usr/bin/tclsh

namespace eval MyMath {
   # Create a variable inside the namespace
   variable myResult
   namespace export Add
}

# Create procedures inside the namespace
proc MyMath::Add {a b } {
   return [expr $a + $b]
}
namespace import MyMath::*
puts [Add 10 30]
namespace forget MyMath::*
When the above code is executed, it produces the following result −
40
Tcl - File I/O
Tcl supports file handling with the help of the built in commands open, read, puts, gets, and close.
A file represents a sequence of bytes, does not matter if it is a text file or binary file.
Opening Files
Tcl uses the open command to open files in Tcl. The syntax for opening a file is as follows −
open fileName accessMode
Here, filename is string literal, which you will use to name your file and accessMode can have one of the following values −
| Sr.No. | Mode & Description |
|---|---|
| 1 | r Opens an existing text file for reading purpose and the file must exist. This is the default mode used when no accessMode is specified. |
| 2 | w Opens a text file for writing, if it does not exist, then a new file is created else existing file is truncated. |
| 3 | a Opens a text file for writing in appending mode and file must exist. Here, your program will start appending content in the existing file content. |
| 4 | r+ Opens a text file for reading and writing both. File must exist already. |
| 5 | w+ Opens a text file for reading and writing both. It first truncate the file to zero length if it exists otherwise create the file if it does not exist. |
| 6 | a+ Opens a text file for reading and writing both. It creates the file if it does not exist. The reading will start from the beginning, but writing can only be appended. |
Closing a File
To close a file, use the close command. The syntax for close is as follows −
close fileName
Any file that has been opened by a program must be closed when the program finishes using that file. In most cases, the files need not be closed explicitly; they are closed automatically when File objects are terminated automatically.
Writing a File
Puts command is used to write to an open file.
puts $filename "text to write"
A simple example for writing to a file is shown below.
#!/usr/bin/tclsh

set fp [open "input.txt" w+]
puts $fp "test"
close $fp
When the above code is compiled and executed, it creates a new file input.txt in the directory that it has been started under (in the program's working directory).
Reading a File
Following is the simple command to read from a file −
set file_data [read $fp]
A complete example of read and write is shown below −
#!/usr/bin/tclsh

set fp [open "input.txt" w+]
puts $fp "test"
close $fp
set fp [open "input.txt" r]
set file_data [read $fp]
puts $file_data
close $fp
When the above code is compiled and executed, it reads the file created in previous section and produces the following result −
test
Here is another example for reading file till end of file line by line −
#!/usr/bin/tclsh

set fp [open "input.txt" w+]
puts $fp "test\ntest"
close $fp
set fp [open "input.txt" r]

while { [gets $fp data] >= 0 } {
   puts $data
}
close $fp
When the above code is compiled and executed, it reads the file created in previous section and produces the following result −
test
test
Tcl - Error Handling
Error handling in Tcl is provided with the help of error and catch commands. The syntax for each of these commands is shown below.
Error syntax
error message info code
In the above error command syntax, message is the error message, info is set in the global variable errorInfo and code is set in the global variable errorCode.
Catch Syntax
catch script resultVarName
In the above catch command syntax, script is the code to be executed, resultVarName is variable that holds the error or the result. The catch command returns 0 if there is no error, and 1 if there is an error.
An example for simple error handling is shown below −
#!/usr/bin/tclsh

proc Div {a b} {
   if {$b == 0} {
      error "Error generated by error" "Info String for error" 401
   } else {
      return [expr $a/$b]
   }
}

if {[catch {puts "Result = [Div 10 0]"} errmsg]} {
   puts "ErrorMsg: $errmsg"
   puts "ErrorCode: $errorCode"
   puts "ErrorInfo:\n$errorInfo\n"
}

if {[catch {puts "Result = [Div 10 2]"} errmsg]} {
   puts "ErrorMsg: $errmsg"
   puts "ErrorCode: $errorCode"
   puts "ErrorInfo:\n$errorInfo\n"
}
When the above code is executed, it produces the following result −
ErrorMsg: Error generated by error
ErrorCode: 401
ErrorInfo:
Info String for error
   (procedure "Div" line 1)
   invoked from within
"Div 10 0"

Result = 5
As you can see in the above example, we can create our own custom error messages. Similarly, it is possible to catch the error generated by Tcl. An example is shown below −
#!/usr/bin/tclsh

catch {set file [open myNonexistingfile.txt]} result
puts "ErrorMsg: $result"
puts "ErrorCode: $errorCode"
puts "ErrorInfo:\n$errorInfo\n"
When the above code is executed, it produces the following result −
ErrorMsg: couldn't open "myNonexistingfile.txt": no such file or directory
ErrorCode: POSIX ENOENT {no such file or directory}
ErrorInfo:
couldn't open "myNonexistingfile.txt": no such file or directory
   while executing
"open myNonexistingfile.txt"
Tcl - Built-in Functions
Tcl provides a number of built-in functions (procedures) for various operations. This includes −
Functions for list handling.
Functions for string handling.
Functions for array handling.
Functions for dictionary handling.
Functions for File I/O handling.
Functions for creating namespaces and packages.
Functions for Math operations.
Functions for System operations.
Each of the above except for math and system functions are covered in earlier chapters. Math and system built-in functions are explained below.
Math Functions
The math functions available in Tcl are listed in the following table −
| Sr.No. | Method & Description |
|---|---|
| 1 | abs arg Calculates the absolute value of arg. |
| 2 | acos arg Calculates the arccosine of arg. |
| 3 | asin arg Calculates the arcsine of arg. |
| 4 | atan arg Calculates the arctangent of arg. |
| 5 | atan2 y x Calculates the arctangent of the quotient of its arguments(y/x). |
| 6 | ceil arg Calculates the smallest integer greater than or equal to a number. |
| 7 | cos arg Calculates the cosine of arg. |
| 8 | cosh arg Calculates the hyperbolic cosine of arg. |
| 9 | double arg Calculates if arg is a floating-point value, returns arg, otherwise converts arg to floating-point and returns the converted value. |
| 10 | exp arg Calculates an exponential function (e raised to the power of arg). |
| 11 | floor arg Calculates the largest integer less than or equal to arg. |
| 12 | fmod x y Calculates the floating-point remainder of the division of x by y. If y is 0, an error is returned. |
| 13 | hypot x y Calculates the length of the hypotenuse of a right-angled triangle sqrt(x*x+y*y). |
| 14 | int arg Calculates if arg is an integer value of the same width as the machine word, returns arg, otherwise converts arg to an integer. |
| 15 | log arg Calculates the natural logarithm of arg. |
| 16 | log10 arg Calculates the base 10 logarithm of arg. |
| 17 | pow x y Calculates the value of x raised to the power y. If x is negative, y must be an integer value. |
| 18 | rand Calculates a pseudo-random number between 0 and 1. |
| 19 | round arg Calculates the value of arg rounded to the nearest integer. |
| 20 | sin arg Calculates the sine of arg. |
| 21 | sinh arg Calculates the hyperbolic sine of arg. |
| 22 | sqrt arg Calculates the square root of arg. arg must be positive. |
| 23 | srand arg Calculates a pseudo-random number between 0 and 1. The arg, which must be an integer, is used to reset the seed for the random number generator of rand. |
| 24 | tan arg Calculates the tangent of arg. |
| 25 | tanh arg Calculates the hyperbolic tangent of arg. |
| 26 | wide arg Calculates integer value at least 64-bits wide (by sign-extension if arg is a 32-bit number) for arg if it is not one already. |
Some examples using math functions are given below −
#!/usr/bin/tclsh

namespace import ::tcl::mathfunc::*
puts [tan 10]
puts [pow 10 2]
puts [ceil 10.34]
puts [hypot 10 20]
puts [srand 45]
puts [log 10]
puts [srand 45]
When the above code is executed, it produces the following result −
0.6483608274590866
100.0
11.0
22.360679774997898
0.0003521866166741525
2.302585092994046
0.0003521866166741525
System Functions
The important system functions in Tcl includes,
clock − seconds function, which returns current time in seconds.
clock − format function, which formats the seconds into date and time.
clock − scan function, which scans the input string and converts it into seconds.
open − function, which is used to open a file.
exec − function, which is used to execute a system command.
close − function, which is used to close a file.
Some examples for the above functions are listed below −
#!/usr/bin/tclsh

#get seconds
set currentTime [clock seconds]
puts $currentTime
#get format
puts "The time is: [clock format $currentTime -format %H:%M:%S]"
puts "The date is: [clock format $currentTime -format %D]"

set date "Jun 15, 2014"
puts [clock scan $date -format {%b %d, %Y}]

puts [exec ls]
puts [exec dir]

set a  [open input.txt]
puts [read $a];
puts $a
close $a
When the above code is executed, it produces the following result −
1402819756
The time is: 03:09:16
The date is: 06/15/2014
1402808400
input.txt
main.tcl
input.txt  main.tcl
This is the file you can use to provide input to your program and later on open
   it inside your program to process the input.

file3
The following table provides the list strings that can be used to format the date and time.
| Sr.No. | Format & Description |
|---|---|
| 1 | %a Day in short form, eg:Sun. |
| 2 | %A Day in full form eg:Sunday. |
| 3 | %b Month in short form. |
| 4 | %B Month in full form. |
| 5 | %d Day of month. |
| 6 | %j Julian day of year. |
| 7 | %m Month in number. |
| 8 | %y Year in two digits. |
| 9 | %Y Year in four digits. |
| 10 | %H Hour in 24 hour clock. |
| 11 | %I Hour in 12 hour clock. |
| 12 | %M Minutes. |
| 13 | %S Seconds. |
| 14 | %p AM or PM. |
| 15 | %D Date in number, mm /dd/yy. |
| 16 | %r Time in 12 hour clock. |
| 17 | %R Time in 24 hour clock without seconds. |
| 18 | %T Time in 24 hour clock with seconds. |
| 19 | %Z Time Zone Name like GMT, IST, EST and so on. |
Tcl - Regular Expressions
The "regexp" command is used to match a regular expression in Tcl. A regular expression is a sequence of characters that contains a search pattern. It consists of multiple rules and the following table explains these rules and corresponding use.
| Sr.No. | Rule & Description |
|---|---|
| 1 | x Exact match. |
| 2 | [a-z] Any lowercase letter from a-z. |
| 3 | . Any character. |
| 4 | ^ Beginning string should match. |
| 5 | $ Ending string should match. |
| 6 | \^ Backlash sequence to match special character ^.Similarly you can use for other characters. |
| 7 | () Add the above sequences inside parenthesis to make a regular expression. |
| 8 | x* Should match 0 or more occurrences of the preceding x. |
| 9 | x+ Should match 1 or more occurrences of the preceding x. |
| 10 | [a-z]? Should match 0 or 1 occurrence of the preceding x. |
| 11 | {digit} Matches exactly digit occurrences of previous regex expression. Digit that contains 0-9. |
| 12 | {digit,} Matches 3 or more digit occurrences of previous regex expression. Digit that contains 0-9. |
| 13 | {digit1,digit2} Occurrences matches the range between digit1 and digit2 occurrences of previous regex expression. |
Syntax
The syntax for regex is given below −
regexp optionalSwitches patterns searchString fullMatch subMatch1 ... subMatchn
Here, regex is the command. We will see about optional switches later. Patterns are the rules as mentioned earlier. Search string is the actual string on which the regex is performed. Full match is any variable to hold the result of matched regex result. Submatch1 to SubMatchn are optional subMatch variable that holds the result of sub match patterns.
Let's look at some simple examples before diving into complex ones. A simple example for a string with any alphabets. When any other character is encountered the regex, search will be stopped and returned.
#!/usr/bin/tclsh

regexp {([A-Za-z]*)} "Tcl Tutorial" a b
puts "Full Match: $a"
puts "Sub Match1: $b"
When the above code is executed, it produces the following result −
Full Match: Tcl
Sub Match1: Tcl
Multiple Patterns
The following example shows how to search for multiple patterns. This is example pattern for any alphabets followed by any character followed by any alphabets.
#!/usr/bin/tclsh

regexp {([A-Za-z]*).([A-Za-z]*)} "Tcl Tutorial" a b c
puts "Full Match: $a"
puts "Sub Match1: $b"
puts "Sub Match2: $c"
When the above code is executed, it produces the following result −
Full Match: Tcl Tutorial
Sub Match1: Tcl
Sub Match2: Tutorial
A modified version of the above code to show that a sub pattern can contain multiple patterns is shown below −
#!/usr/bin/tclsh

regexp {([A-Za-z]*.([A-Za-z]*))} "Tcl Tutorial" a b c
puts "Full Match: $a"
puts "Sub Match1: $b"
puts "Sub Match2: $c"
When the above code is executed, it produces the following result −
Full Match: Tcl Tutorial
Sub Match1: Tcl Tutorial
Sub Match2: Tutorial
Switches for Regex Command
The list of switches available in Tcl are,
nocase − Used to ignore case.
indices − Store location of matched sub patterns instead of matched characters.
line − New line sensitive matching. Ignores the characters after newline.
start index − Sets the offset of start of search pattern.
Marks the end of switches
In the above examples, I have deliberately used [A-Z, a-z] for all alphabets, you can easily use -nocase instead of as shown below −
#!/usr/bin/tclsh

regexp -nocase {([A-Z]*.([A-Z]*))} "Tcl Tutorial" a b c
puts "Full Match: $a"
puts "Sub Match1: $b"
puts "Sub Match2: $c"
When the above code is executed, it produces the following result −
Full Match: Tcl Tutorial
Sub Match1: Tcl Tutorial
Sub Match2: Tutorial
Another example using switches is shown below −
#!/usr/bin/tclsh

regexp -nocase -line -- {([A-Z]*.([A-Z]*))} "Tcl \nTutorial" a b
puts "Full Match: $a"
puts "Sub Match1: $b"
regexp -nocase -start 4 -line -- {([A-Z]*.([A-Z]*))} "Tcl \nTutorial" a b
puts "Full Match: $a"
puts "Sub Match1: $b"
When the above code is executed, it produces the following result −
Full Match: Tcl
Sub Match1: Tcl
Full Match: Tutorial
Sub Match1: Tutorial
Tk - Overview
Tk refers to Toolkit and it provides cross platform GUI widgets, which helps you in building a Graphical User Interface. It was developed as an extension to Tcl scripting language by John Ousterhout. Tk remained in development independently from Tcl with version being different to each other, before, it was made in sync with Tcl in v8.0.
Features of Tk
It is cross platform with support for Linux, Mac OS, Unix, and Microsoft Windows operating systems.
- It is an open source.
- It provides high level of extendibility.
- It is customizable.
- It is configurable.
- It provides a large number of widgets.
- It can be used with other dynamic languages and not just Tcl.
- GUI looks identical across platforms.
Applications Built in Tk
Large successful applications have been built in Tcl/Tk.
- Dashboard Soft User Interface
- Forms GUI for Relational DB
- Ad Hoc GUI for Relational DB
- Software/Hardware System Design
- Xtask - Task Management
- Musicology with Tcl and Tk
- Calender app
- Tk mail
- Tk Debugger
Tk - Environment
Generally, all Mac and Linux mac come with Tk pre-installed. In case, it's not available or you need the latest version, then you may need to install it. Windows don't come with Tcl/Tk and you may need to use its specific binary to install it.
The Tk Interpreter
It is just a small program that enables you to type Tk commands and have them executed line by line. It stops execution of a tcl file in case, it encounters an error unlike a compiler that executes fully.
Let's have a helloWorld.tcl file as follows. We will use this as first program, we run on the platform you choose.
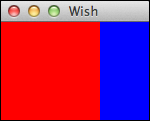
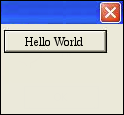
#!/usr/bin/wish

grid [ttk::button .mybutton -text "Hello World"]
The following section explains only how to install Tcl/Tk on each of the available platforms.
Installation on Windows
Download the latest version for windows installer from the list of Active Tcl/Tk binaries available. Active Tcl/Tk community edition is free for personal use.
Run the downloaded executable to install the Tcl and Tk, which can be done by following the on screen instructions.
Now, we can build and run a Tcl file say helloWorld.tcl by switching to folder containing the file using cd and then using the following step −
C:\Tcl> wish helloWorld.tcl
Press enter and we will see an output as shown below −
Installation on Linux
Most Linux operating systems comes with Tk inbuilt and you can get started right away in those systems. In case, it's not available, you can use the following command to download and install Tcl-Tk.
$ yum install tcl tk
Now, we can build and run a Tcl file say helloWorld.tcl by switching to folder containing the file using cd command and then using the following step −
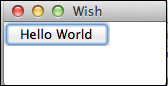
$ wish helloWorld.tcl
Press enter and we will see an output similar to the following −
Installation on Debian Based Systems
In case, it's not available prebuilt in your OS, you can use the following command to download and install Tcl-Tk −
$ sudo apt-get install tcl tk
Now, we can build and run a Tcl file say helloWorld.tcl by switching to folder containing the file using cd command and then using the following steps −
$ wish helloWorld.tcl
Press enter and we will see an output similar to the following −
Installation on Mac OS X
Download the latest version for Mac OS X package from the list of Active Tcl/Tk binaries available. Active Tcl community edition is free for personal use.
Run the downloaded executable to install the Active Tcl, which can be done by following the on screen instructions.
Now, we can build and run a Tcl file say helloWorld.tcl by switching to folder containing the file using cd command and then using the following step −
$ wish helloWorld.tcl
Press enter and we will see an output as shown below −
Installation from Source Files
You can use the option of installing from source files when a binary package is not available. It is generally preferred to use Tk binaries for Windows and Mac OS X, so only compilation of sources on unix based system is shown below −
Download the source files.
Now, use the following commands to extract, compile and build after switching to the downloaded folder.
$ tar zxf tk8.6.1-src.tar.gz
$ cd tcl8.6.1
$ cd unix
$ ./configure with-tcl=../../tcl8.6.1/unix prefix=/opt enable-gcc
$ make
$ sudo make install
Note − Make sure, you change the file name to the version you downloaded on commands 1 and 2 in the above.
Tk - Special Variables
In Tk, we classify some of the variables as special variables and they have a predefined usage/functionality. The list of special variables is listed below.
| Sr.No. | Special Variable & Description |
|---|---|
| 1 | tk_library Used for setting the location of standard Tk libraries. |
| 2 | tk_patchLevel Refers to the current patch level of the Tk interpreter. |
| 3 | tk_strictMotif When non-zero, Tk tries to adhere to Motif look-and-feel as closely as possible. |
| 4 | tk_version Displays the Tk version. |
The above special variables have their special meanings for the Tk interpreter.
Examples for using Tk special variables
Lets see the examples for special variables.
TK VERSION
#!/usr/bin/wish

puts $tk_version
When you run the program, you will get a similar output as shown below.
8.5
TK LIBRARY PATH
#!/usr/bin/wish

puts $tk_library
When you run the program, you will get a similar output as shown below.
/Library/Frameworks/Tk.framework/Versions/8.6/Resources/Scripts
TK PATCH LEVEL
#!/usr/bin/wish

puts $tk_patchLevel
When you run the program, you will get a similar output as shown below.
8.6.1
TK STRICTMOTIF
#!/usr/bin/wish

puts $tk_strictMotif
When you run the program, you will get a similar output as shown below.
0
Tk - Widgets Overview
The basic component of a Tk-based application is called a widget. A component is also sometimes called a window, since, in Tk, "window" and "widget" are often used interchangeably. Tk is a package that provides a rich set of graphical components for creating graphical applications with Tcl.
Tk provides a range of widgets ranging from basic GUI widgets like buttons and menus to data display widgets. The widgets are very configurable as they have default configurations making them easy to use.
Tk applications follow a widget hierarchy where any number of widgets may be placed within another widget, and those widgets within another widget. The main widget in a Tk program is referred to as the root widget and can be created by making a new instance of the TkRoot class.
Creating a Widget
The syntax for creating a widget is given below.
type variableName arguments options
The type here refers to the widget type like button, label, and so on. Arguments can be optional and required based on individual syntax of each widget. The options range from size to formatting of each component.
Widget Naming Convention
Widget uses a structure similar to naming packages. In Tk, the root window is named with a period (.) and an element in window, for example button is named .myButton1. The variable name should start with a lowercase letter, digit, or punctuation mark (except a period). After the first character, other characters may be uppercase or lowercase letters, numbers, or punctuation marks (except periods). It is recommended to use a lowercase letter to start the label.
Color Naming Convention
The colors can be declared using name like red, green, and so on. It can also use hexadecimal representing with #. The number of hexadecimal digits can be 3, 6, 9, or 12.
Dimension Convention
The default unit is pixels and it is used when we specify no dimension. The other dimensions are i for inches, m for millimeters, c for centimeters and p for points.
Common Options
There are so many common options available to all widgets and they are listed below in the following table −
| Sr.No. | Syntax & Description |
|---|---|
| 1 | -background color Used to set background color for widget. |
| 2 | -borderwidth width Used to draw with border in 3D effects. |
| 3 | -font fontDescriptor Used to set font for widget. |
| 4 | -foreground color Used to set foreground color for widget. |
| 5 | -height number Used to set height for widget. |
| 6 | -highlightbackground color Used to set the color rectangle to draw around a widget when the widget does not have input focus. |
| 7 | -highlightcolor color Used to set the color rectangle to draw around a widget when the widget has input focus. |
| 8 | -padx number Sets the padx for the widget. |
| 9 | -pady number Sets the pady for the widget. |
| 10 | -relief condition Sets the 3D relief for this widget. The condition may be raised, sunken, flat, ridge, solid, or groove. |
| 11 | -text text Sets the text for the widget. |
| 12 | -textvariable varName Variable associated with the widget. When the text of widget changes, the variable is set with text of widget. |
| 13 | -width number Sets the width for widget. |
A simple example for options is shown below.
#!/usr/bin/wish

grid [label .myLabel -background red -text "Hello World" -relief ridge -borderwidth 3]
   -padx 100 -pady 100
When we run the above program, we will get the following output.
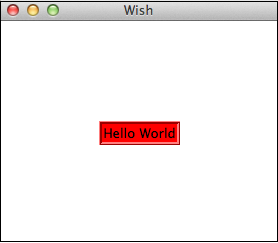
The list of available widgets are categorized below −
Basic widgets
| Sr.No. | Widget & Description |
|---|---|
| 1 | Label Widget for displaying single line of text. |
| 2 | Button Widget that is clickable and triggers an action. |
| 3 | Entry Widget used to accept a single line of text as input. |
| 4 | Message Widget for displaying multiple lines of text. |
| 5 | Text Widget for displaying and optionally edit multiple lines of text. |
| 6 | Toplevel Window with all borders and decorations provided by the Window manager. |
Layout Widgets
| Sr.No. | Widget & Description |
|---|---|
| 1 | Frame Container widget to hold other widgets. |
| 2 | Place Widget to hold other widgets in specific place with coordinates of its origin and an exact size. |
| 3 | Pack Simple widget to organize widgets in blocks before placing them in the parent widget. |
| 4 | Grid Widget to nest widgets packing in different directions. |
Selection Widgets
| Sr.No. | Widget & Description |
|---|---|
| 1 | Radiobutton Widget that has a set of on/off buttons and labels, one of which may be selected. |
| 2 | Checkbutton Widget that has a set of on/off buttons and labels, many of which may be selected.. |
| 3 | Menu Widget that acts as holder for menu items. |
| 4 | Listbox Widget that displays a list of cells, one or more of which may be selected. |
Mega Widgets
| Sr.No. | Widget & Description |
|---|---|
| 1 | Dialog Widget for displaying dialog boxes. |
| 2 | Spinbox Widget that allows users to choose numbers. |
| 3 | Combobox Widget that combines an entry with a list of choices available to the use. |
| 4 | Notebook Tabbed widget that helps to switch between one of several pages, using an index tab. |
| 5 | Progressbar Widget to provide visual feedback to the progress of a long operation like file upload. |
| 6 | Treeview Widget to display and allow browsing through a hierarchy of items more in form of tree. |
| 7 | Scrollbar Scrolling widgets without a text or canvas widgets. |
| 8 | Scale Scale widget to choose a numeric value through sliders. |
Other Widgets
| Sr.No. | Widget & Description |
|---|---|
| 1 | Canvas Drawing widget for displaying graphics and images.. |
We will cover each of these widgets in the upcoming chapters.
Tk - Basic Widgets
Basic widgets are common widgets available in almost all Tk applications. The list of available basic widgets is given below −
| Sr.No. | Widgets & Description |
|---|---|
| 1 | Label
Widget for displaying single line of text. |
| 2 | Button
Widget that is clickable and triggers an action. |
| 3 | Entry
Widget used to accept a single line of text as input. |
| 4 | Message
Widget for displaying multiple lines of text. |
| 5 | Text
Widget for displaying and optionally edit multiple lines of text. |
| 6 | Toplevel
Widget used to create a frame that is a new top level window. |
A simple Tk example is shown below using basic widgets −
#!/usr/bin/wish

grid [label .myLabel -text "Label Widget" -textvariable labelText]
grid [text .myText -width 20 -height 5]
.myText insert 1.0 "Text\nWidget\n"
grid [entry .myEntry -text "Entry Widget"]
grid [message .myMessage -background red -foreground white -text "Message\nWidget"]
grid [button .myButton1  -text "Button" -command "set labelText clicked"]
When we run the above program, we will get the following output −
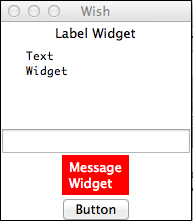
Tk - Layout Widgets
Layout widgets are used to handle layouts for the Tk application. Frame widget is used group other widgets and place, pack, and grid are layout manager to give you total control over your adding to windows. The list of available layout widgets are as shown below −
| Sr.No. | Widgets & Description |
|---|---|
| 1 | Frame
Container widget to hold other widgets. |
| 2 | Place
Widget to hold other widgets in specific place with coordinates of its origin and an exact size. |
| 3 | Pack
Simple widget to organize widgets in blocks before placing them in the parent widget. |
| 4 | Grid
Widget to nest widgets packing in different directions. |
A simple Tk example is shown below for layout widgets −
#!/usr/bin/wish

frame .myFrame1 -background red  -relief ridge -borderwidth 8 -padx 10 -pady 10
   -height 100 -width 100
frame .myFrame2 -background blue  -relief ridge -borderwidth 8 -padx 10 -pady 10
   -height 100 -width 50
pack .myFrame1
pack .myFrame2
When we run the above program, we will get the following output −

Tk - Selection Widgets
Selection widgets are used to select different options in a Tk application. The list of available selection widgets are as shown below.
| Sr.No. | Widgets & Description |
|---|---|
| 1 | Radiobutton
Widget that has a set of on/off buttons and labels, one of which may be selected. |
| 2 | Checkbutton
Widget that has a set of on/off buttons and labels, many of which may be selected. |
| 3 | Menu
Widget that acts as holder for menu items. |
| 4 | Listbox
Widget that displays a list of cells, one or more of which may be selected. |
A simple Tk example is shown below using selection widgets −
#!/usr/bin/wish

grid [frame .gender ]
grid [label .label1  -text "Male" -textvariable myLabel1 ]
grid [radiobutton .gender.maleBtn -text "Male"   -variable gender -value "Male"
   -command "set  myLabel1 Male"] -row 1 -column 2
grid [radiobutton .gender.femaleBtn -text "Female" -variable gender -value "Female"
   -command "set  myLabel1 Female"] -row 1 -column 3
.gender.maleBtn select
grid [label .myLabel2  -text "Range 1 not selected" -textvariable myLabelValue2 ]
grid [checkbutton .chk1 -text "Range 1" -variable occupied1 -command {if {$occupied1 } {
   set myLabelValue2 {Range 1 selected}
} else {
   set myLabelValue2 {Range 1 not selected}
} }]
proc setLabel {text} {
   .label configure -text $text
}
When we run the above program, we will get the following output −
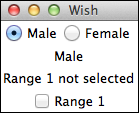
Tk - Canvas Widgets
Canvas is used for providing drawing areas. The syntax for canvas widget is shown below −
canvas canvasName options
Options
The options available for the canvas widget are listed below in the following table −
| Sr.No. | Syntax & Description |
|---|---|
| 1 | -background color Used to set background color for widget. |
| 2 | -closeenough distance Sets the closeness of mouse cursor to a displayable item. The default is 1.0 pixel. This value may be a fraction and must be positive. |
| 3 | -scrollregion boundingBox The bounding box for the total area of this canvas. |
| 4 | -height number Used to set height for widget. |
| 5 | -width number Sets the width for widget. |
| 6 | -xscrollincrement size The amount to scroll horizontally when scrolling is requested. |
| 7 | -yscrollincrement size The amount to scroll vertically when scrolling is requested. |
A simple example for canvas widget is shown below −
#!/usr/bin/wish

canvas .myCanvas -background red -width 100 -height 100
pack .myCanvas
When we run the above program, we will get the following output −

Widgets for Drawing in Canvas
The list of the available widgets for drawing in canvas is listed below −
| Sr.No. | Widget & Description |
|---|---|
| 1 | Line
Draws a line. |
| 2 | Arc
Draws an arc. |
| 3 | Rectangle
Draws a rectangle. |
| 4 | Oval
Draws an oval. |
| 5 | Polygon
Draws a polygon. |
| 6 | Text
Draws a text. |
| 7 | Bitmap
Draws a bitmap. |
| 8 | Image
Draws an image. |
An example using different canvas widgets is shown below −
#!/usr/bin/wish

canvas .myCanvas -background red -width 200 -height 200
pack .myCanvas
.myCanvas create arc 10 10 50 50 -fill yellow
.myCanvas create line 10 30 50 50 100 10 -arrow both -fill yellow -smooth true
   -splinesteps 2
.myCanvas create oval 50 50 100 80 -fill yellow
.myCanvas create polygon 50 150 100 80 120 120 100 190 -fill yellow -outline green
.myCanvas create rectangle 150 150 170 170  -fill yellow
.myCanvas create text 170 20 -fill yellow -text "Hello" -font {Helvetica -18 bold}
.myCanvas create bitmap 180 50 -bitmap info
When we run the above program, we will get the following output −
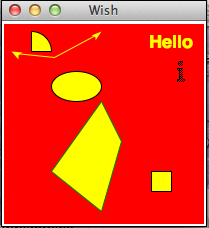
Tk - Mega Widgets
Mega widgets include many complex widgets which is often required in some large scale Tk applications. The list of available mega widgets are as shown below −
| Sr.No. | Widget & Description |
|---|---|
| 1 | Dialog
Widget for displaying dialog boxes. |
| 2 | Spinbox
Widget that allows users to choose numbers. |
| 3 | Combobox
Widget that combines an entry with a list of choices available to the use. |
| 4 | Notebook
Tabbed widget that helps to switch between one of several pages, using an index tab. |
| 5 | Progressbar
Widget to provide visual feedback to the progress of a long operation like file upload. |
| 6 | Treeview
Widget to display and allow browsing through a hierarchy of items more in form of tree. |
| 7 | Scrollbar
Scrolling widgets without a text or canvas widgets. |
| 8 | Scale
Scale widget to choose a numeric value through sliders. |
A simple Tk example is shown below using some mega widgets.
#!/usr/bin/wish

ttk::treeview .tree -columns "Creator Year" -displaycolumns "Year Creator"
.tree heading Creator -text "Creator" -anchor center
.tree heading Year -text "Year" -anchor center
pack .tree
.tree insert {} end -id Languages -text "Languages"
.tree insert Languages end -text C -values [list "Dennis Ritchie" "1990"]
proc scaleMe {mywidget scaleValue} {
	$mywidget configure -length $scaleValue
}
pack [scale .s2  -from 100.0 -to 200.0 -length 100 -background yellow -borderwidth 5
   -font{Helvetica -18 bold} -foreground red -width 40 -relief ridge -orien horizontal
   -variable a -command "scaleMe .s2" ]
pack [ttk::progressbar .p1 -orient horizontal -length 200 -mode indeterminate -value 90]
pack [ttk::progressbar .p2 -orient horizontal -length 200 -mode determinate -variable a
   -maximum 75 -value 20]
When we run the above program, we will get the following output −
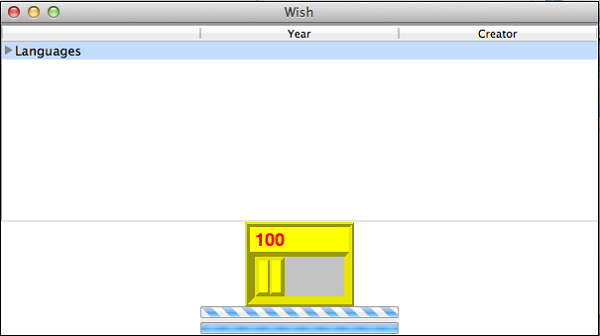
Tk - Fonts
There are a number of widgets that supports displaying text. Most of these provides the option of font attribute. The syntax for creating a font is shown below −
font create fontName options
Options
The options available for the font create are listed below in the following table −
| Sr.No. | Syntax & Description |
|---|---|
| 1 | -family familyName The name of font family. |
| 2 | -size number The size of font. |
| 3 | -weight level The weight for font. |
A simple example for a font creation is shown below −
#!/usr/bin/wish

font create myFont -family Helvetica -size 18 -weight bold
pack [label .myLabel -font myFont -text "Hello World"]
When we run the above program, we will get the following output −

To get all the fonts available, we can use the following command −
#!/usr/bin/wish

puts [font families]
When we run the above command, we will get the following output −
{Abadi MT Condensed Extra Bold} {Abadi MT Condensed Light} {Al Bayan} {Al Nile}
{Al Tarikh} {American Typewriter} {Andale Mono} Arial {Arial Black}
{Arial Hebrew} {Arial Narrow} {Arial Rounded MT Bold} {Arial Unicode MS}
Athelas Avenir {Avenir Next} {Avenir Next Condensed} Ayuthaya Baghdad {Bangla MN}
{Bangla Sangam MN} {Baoli SC} Baskerville {Baskerville Old Face} Batang {Bauhaus 93}
Beirut {Bell MT} {Bernard MT Condensed} BiauKai {Big Caslon} {Book Antiqua}
{Bookman Old Style} {Bookshelf Symbol 7} Braggadocio {Britannic Bold} {Brush Script MT}
Calibri {Calisto MT} Cambria {Cambria Math} Candara Century {Century Gothic}
{Century Schoolbook} Chalkboard {Chalkboard SE} Chalkduster {Charcoal CY} Charter
Cochin {Colonna MT} {Comic Sans MS} Consolas Constantia {Cooper Black} Copperplate
{Copperplate Gothic Bold} {Copperplate Gothic Light} Corbel {Corsiva Hebrew} Courier
{Courier New} {Curlz MT} Damascus {DecoType Naskh} Desdemona {Devanagari MT}
{Devanagari Sangam MN} Didot {DIN Alternate} {DIN Condensed} {Diwan Kufi} {Diwan Thuluth}
{Edwardian Script ITC} {Engravers MT} {Euphemia UCAS} Eurostile Farah Farisi
{Footlight MT Light} {Franklin Gothic Book} {Franklin Gothic Medium}
Futura Gabriola Garamond {GB18030 Bitmap} {Geeza Pro} Geneva {Geneva CY}
Georgia {Gill Sans} {Gill Sans MT} {Gloucester MT Extra Condensed}
{Goudy Old Style} {Gujarati MT} {Gujarati Sangam MN} Gulim GungSeo {Gurmukhi MN}
{Gurmukhi MT} {Gurmukhi Sangam MN} Haettenschweiler {Hannotate SC} {Hannotate TC}
{HanziPen SC} {HanziPen TC} Harrington HeadLineA Hei {Heiti SC} {Heiti TC}
Helvetica {Helvetica CY} {Helvetica Neue} Herculanum {Hiragino Kaku Gothic Pro}
{Hiragino Kaku Gothic ProN} {Hiragino Kaku Gothic Std} {Hiragino Kaku Gothic StdN}
{Hiragino Maru Gothic Pro} {Hiragino Maru Gothic ProN}
{Hiragino Mincho Pro} {Hiragino Mincho ProN} {Hiragino Sans GB}
{Hoefler Text} Impact {Imprint MT Shadow} InaiMathi {Iowan Old Style} Kai Kailasa
{Kaiti SC} {Kaiti TC} {Kannada MN} {Kannada Sangam MN} Kefa {Khmer MN} {Khmer Sangam MN}
{Kino MT} Kokonor Krungthep KufiStandardGK {Lantinghei SC} {Lantinghei TC} {Lao MN}
{Lao Sangam MN} {Libian SC} {LiHei Pro} {LiSong Pro} {Lucida Blackletter} {Lucida Bright}
{Lucida Calligraphy} {Lucida Console} {Lucida Fax} {Lucida Grande} {Lucida Handwriting}
{Lucida Sans} {Lucida Sans Typewriter} {Lucida Sans Unicode} {Malayalam MN}
{Malayalam Sangam MN} Marion {Marker Felt} Marlett {Matura MT Script Capitals}
Meiryo Menlo {Microsoft Sans Serif} Mishafi Mistral {Modern No. 20} Monaco {MS Gothic}
{MS Mincho} {MS PGothic} {MS PMincho} {MS Reference Sans Serif} {MS Reference Specialty}
Mshtakan {MT Extra} Muna {Myanmar MN} {Myanmar Sangam MN} Nadeem {Nanum Brush Script}
{Nanum Gothic} {Nanum Myeongjo} {Nanum Pen Script} {New Peninim MT} {News Gothic MT}
Noteworthy Onyx Optima {Oriya MN} {Oriya Sangam MN} Osaka Palatino {Palatino Linotype}
Papyrus PCMyungjo Perpetua {Perpetua Titling MT} PilGi {Plantagenet Cherokee}
Playbill PMingLiU {PT Mono} {PT Sans} {PT Sans Caption} {PT Sans Narrow} {PT Serif}
{PT Serif Caption} Raanana Rockwell {Rockwell Extra Bold} Sana Sathu {Savoye LET}
Seravek Silom SimSun {Sinhala MN} {Sinhala Sangam MN} Skia {Snell Roundhand} {Songti SC}
{Songti TC} Stencil STFangsong STHeiti STIXGeneral STIXIntegralsD STIXIntegralsSm
STIXIntegralsUp STIXIntegralsUpD STIXIntegralsUpSm STIXNonUnicode STIXSizeFiveSym
STIXSizeFourSym STIXSizeOneSym STIXSizeThreeSym STIXSizeTwoSym STIXVariants STKaiti
STSong Superclarendon Symbol Tahoma {Tamil MN} {Tamil Sangam MN} TeamViewer8 {Telugu MN}
{Telugu Sangam MN} Thonburi Times {Times New Roman} {Trebuchet MS} {Tw Cen MT} Verdana
Waseem {Wawati SC} {Wawati TC} Webdings {Weibei SC} {Weibei TC} {Wide Latin} Wingdings
{Wingdings 2} {Wingdings 3} {Xingkai SC} {Yuanti SC} YuGothic YuMincho {Yuppy SC}
{Yuppy TC} {Zapf Dingbats} Zapfino {Apple Braille} {Apple Chancery} {Apple Color Emoji}
{Apple LiGothic} {Apple LiSung} {Apple SD Gothic Neo} {Apple Symbols}
AppleGothic AppleMyungjo {Monotype Corsiva} {Monotype Sorts}
Tk - Images
The image widget is used to create and manipulate images. The syntax for creating image is as follows −
image create type name options
In the above syntax type is photo or bitmap and name is the image identifier.
Options
The options available for image create are listed below in the following table −
| Sr.No. | Syntax & Description |
|---|---|
| 1 | -file fileName The name of the image file name. |
| 2 | -height number Used to set height for widget. |
| 3 | -width number Sets the width for widget. |
| 4 | -data string Image in base 64 encoded string. |
A simple example for image widget is shown below −
#!/usr/bin/wish

image create photo imgobj -file "/Users/rajkumar/Desktop/F Drive/pictur/vb/Forests/
   680049.png" -width 400 -height 400
pack [label .myLabel]
.myLabel configure -image imgobj
When we run the above program, we will get the following output −
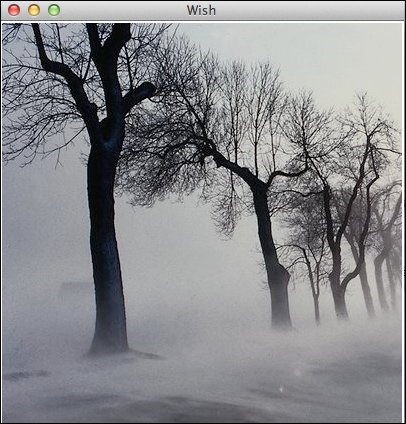
The available function for image are listed below in the following table −
| Sr.No. | Syntax & Description |
|---|---|
| 1 | image delete imageName Deletes the image from memory and related widgets visually. |
| 2 | image height imageName Returns the height for image. |
| 3 | image width imageName Returns the width for image. |
| 4 | image type imageName Returns the type for image. |
| 5 | image names Returns the list of images live in memory. |
A simple example for using the above image widget commands is shown below −
#!/usr/bin/wish

image create photo imgobj -file "/Users/rajkumar/images/680049.png"
   -width 400 -height 400
pack [label .myLabel]
.myLabel configure -image imgobj
puts [image height imgobj]
puts [image width imgobj]
puts [image type imgobj]
puts [image names]
image delete imgobj
The image will be deleted visually and from memory once "image delete imgobj" command executes. In console, the output will be like the following −
400
400
photo
imgobj ::tk::icons::information ::tk::icons::error ::tk::icons::
warning ::tk::icons::question
Tk - Events
Events in its simplest form is handled with the help of commands. A simple example for event handling is event handling with button and is shown below −
#!/usr/bin/wish

proc myEvent { } {
   puts "Event triggered"
}
pack [button .myButton1  -text "Button 1"   -command myEvent]
When we run the above program, we will get the following output −

A simple program to show delay text animation event is shown below −
#!/usr/bin/wish

proc delay {} {
   for {set j 0} {$j < 100000} {incr j} {}
}

label .myLabel -text "Hello................" -width 25
pack .myLabel
set str "Hello................"
for {set i [string length $str]} {$i > -2} {set i [expr $i-1]} {
   .myLabel configure -text [string range $str 0 $i]
   update
   delay
}
When we run the program, we will get the following output in animated way −

Event after delay
The syntax for event after delay is shown below −
after milliseconds number command
A simple program to show after delay event is shown below −
#!/usr/bin/wish

proc addText {} {
   label .myLabel -text "Hello................" -width 25
   pack .myLabel
}
after 1000 addText
When we run the program, we will get the following output after one second −

You can cancel an event using the after cancel command as shown below −
#!/usr/bin/wish

proc addText {} {
   label .myLabel -text "Hello................" -width 25
   pack .myLabel
}
after 1000 addText
after cancel addText
Event Binding
The syntax for event binding is as shown below −
bind arguments
Keyboard Events Example
#!/usr/bin/wish

bind .  {puts "Key Pressed: %K "}
When we run the program and press a letter X, we will get the following output −
Key Pressed: X
Mouse Events Example
#!/usr/bin/wish

bind .  {puts "Button %b Pressed : %x %y "}
When we run the program and press the left mouse button, we will get an output similar to the following −
Button 1 Pressed : 89 90
Linking Events with Button Example
#!/usr/bin/wish

proc myEvent { } {
   puts "Event triggered"
}
pack [button .myButton1  -text "Button 1"   -command myEvent]
bind .  ".myButton1 invoke"
When we run the program and press enter, we will get the following output −
Event triggered
Tk - Windows Manager
Window manager is used to handle the top level window. It helps in controlling the size, position, and other attributes of the window. In Tk, . is used to refer the main window. The syntax for window command is shown below −
wm option window arguments
The list of options available for Tk wm command is shown in the following table −
| Sr.No. | Syntax & Description |
|---|---|
| 1 | aspect windowName a b c d Tries to maintain the ratio of width/height to be between a/b and c/d. |
| 2 | geometry windowName geometryParams Use to set geometry for window. |
| 3 | grid windowName w h dx dy Sets the grid size. |
| 4 | group windowName leaderName leaderName gives the leader of a group of related windows. |
| 5 | deiconify windowName Brings the screen to normal if minimized. |
| 6 | iconify windowName Minimizes the window. |
| 7 | state windowName Returns the current state of window. |
| 8 | withdraw windowName Unmaps the window and removes its details in memory. |
| 9 | iconbitmap windowName image Sets or returns the icon bitmap. |
| 10 | iconPhoto windowName image Sets or returns the icon photo. |
| 11 | command windowName commandString Records the startup command in the WM_COMMAND property. |
| 12 | protocol windowName arguments Register a command to handle the protocol request name, which can be WM_DELETE_WINDOW, WM_SAVE_YOURSELF, WM_TAKE_FOCUS. Eg: wm protocol. WM_DELETE_WINDOW Quit. |
| 13 | minsize windowName size Determines the minimum window size. |
| 14 | maxsize windowName size Determines the maximum window size. |
| 15 | title windowName titleText Determines the title for window. |
| 16 | attributes subOptions There are lots of attributes available like alpha, full screen and so on. |
Some of the above commands are used in the following example −
#!/usr/bin/wish

wm maxsize . 800 800
wm minsize . 300 300
wm title . "Hello"
wm attributes . -alpha ".90"
wm geometry . 300x200+100+100
When we run the above program, we will get the following output −
As you can see alpha is one of the attributes available. The list of commonly used subcommands are listed below −
| Sr.No. | Syntax & Description |
|---|---|
| 1 | -alpha number Sets the alpha for window. |
| 2 | -fullscreen number Number can be 0 for normal screen or 1 for full screen. |
| 3 | -topmost number Sets or returns whether window is topmost.Value can be 0 or 1. |
Creating Window
We can use toplevel command to create window and an example is shown below −
#!/usr/bin/wish

toplevel .t
When we run the above program, we will get the following output −
Destroying Window
We can use destroy command to destroy window and an example is shown below −
#!/usr/bin/wish

destroy .t
The above command will destroy window named .t.
Tk - Geometry Manager
The geometry manager is used to manage the geometry of the window and other frames. We can use it to handle the position and size of the window and frames. The layout widgets are used for this purpose.
Positioning and sizing
The syntax for positioning and sizing window is shown below −
wm geometry . wxh+/-x+/-y
Here, w refers to width and h refers to height. It is followed by a '+' or '-' sign with number next referring to the x position on screen. Similarly the following '+' or '-' sign with number refers to the y position on screen
A simple example is shown below for the above Statement −.
#!/usr/bin/wish

wm geometry . 300x200+100+100
When we run the above program, we will get the following output −
Grid Geometry
The syntax for grid geometry is shown below −
grid gridName -column number -row number -columnspan number -rowspan number
The column, row, columnspan, or rowspan helps in providing the grid geometry.
A simple example is shown below for the above statement −
#!/usr/bin/wish

frame .myFrame1 -background red  -height 100 -width 100
frame .myFrame2 -background blue -height 100 -width 50
grid .myFrame1 -columnspan 10 -rowspan 10 -sticky w
grid .myFrame2 -column 10 -row 2
When we run the above program, we will get the following output −