- Home
- Overview
- Environment
- Interfaces
- Launching Cluster
- Viewing Cluster Details
- Cluster Endpoints
- Accessing Cluster
- Modifying Cluster
- Rebooting Cluster
- Adding Nodes
- Removing Nodes
- Scaling the Clusters
- Delete Cluster
- Redis Shards
- Parameter Group
- Listing Parameters
- Deleting Parameters
- Engine Parameters
- Backup and Restore
- Monitoring Node - Metrics
- Memcached & Redis
- Accessing Memcached Cluster
- Lazy Loading
- Write Through
- Add TTL
- Memcached VPC
- Creating Memcached Cluster
- Connecting to Cluster in VPC
- Delete Memcached Cluster
- IAM policies
- SNS Notifications
- Events
- Managing Tags
- Managing Costs
- AWS ElastiCache - Resources
- Quick Guide
- Useful Resources
- Discussion
AWS ElastiCache - Scaling the Clusters
As the demand for the ElastiCache service increases we eventually reach a point where we need to increase the memory and processing power allocated to Cache configuration. This is known as scaling up the cluster. But as the cache server is already running, we have certain constraints under which the scale up can happen.
All reads from and writes to the cache cluster are stopped.
A new cache cluster with the new node type is created in the same Availability Zone as the existing cache cluster.
The cache data in the existing cache cluster is copied to the new cache cluster. How long this process takes depends upon your node type and how much data is in the cache cluster.
Reads and writes are resumed using the new cache cluster. Because the new cache cluster's endpoints are the same as they were for the old cache cluster, there is no need to update the endpoints in your application.
ElastiCache deletes the old cache cluster.
Below are the two steps we follow to achieve the scaling up of a cluster.
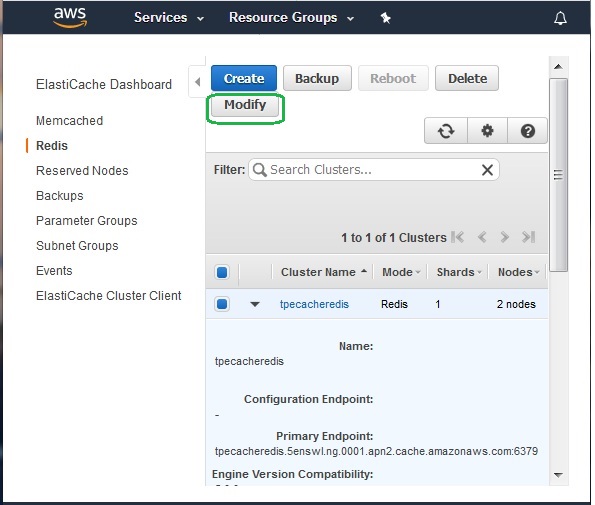
Choosing the Cluster
We login to the AWS console and go to the ElastiCache dashboard. From the dashboard in the left we choose the cluster type as Redis. Then we see the name of the cluster as a hyperlink in the ElastiCache dashboard. We click on the check box to the left of the name of the cluster. This shows the option to modify the cluster along with other options.
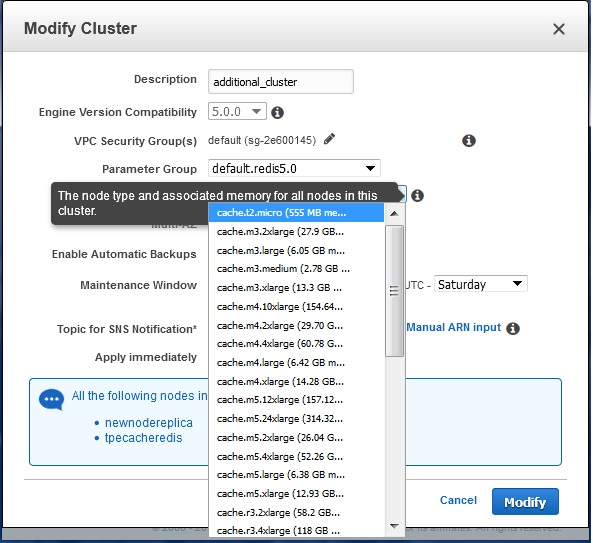
Changing the Node Type
Next, we modify the cluster to choose the required node type of higher configuration. After clicking on the modify button we get the option to change the node type as shown in the below diagram. Clicking on the modify button after finalizing the node type configuration brings in the new cache size to the node.