- Home
- Overview
- Environment
- Interfaces
- Launching Cluster
- Viewing Cluster Details
- Cluster Endpoints
- Accessing Cluster
- Modifying Cluster
- Rebooting Cluster
- Adding Nodes
- Removing Nodes
- Scaling the Clusters
- Delete Cluster
- Redis Shards
- Parameter Group
- Listing Parameters
- Deleting Parameters
- Engine Parameters
- Backup and Restore
- Monitoring Node - Metrics
- Memcached & Redis
- Accessing Memcached Cluster
- Lazy Loading
- Write Through
- Add TTL
- Memcached VPC
- Creating Memcached Cluster
- Connecting to Cluster in VPC
- Delete Memcached Cluster
- IAM policies
- SNS Notifications
- Events
- Managing Tags
- Managing Costs
- AWS ElastiCache - Resources
- Quick Guide
- Useful Resources
- Discussion
AWS ElastiCache - Environment
For using any Aws service, you ned to set up an AWS account. We assume you have set up the AWS account by following the guide lines mentioned in the Amazon Web Services aws home page. Below are the preliminary steps to access the RDS services from the console.
Step-1
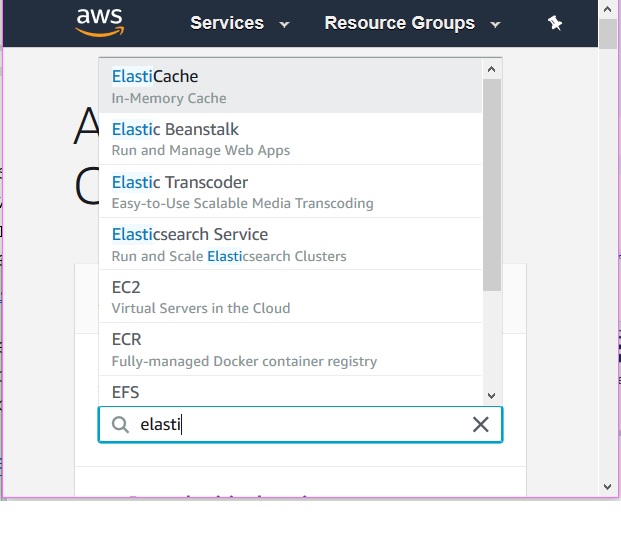
After logging in to the amazon console, to access the ElastiCache services we need to navigate to the Amazon ElastiCache home page by searching for ElastiCache in the search box of under the services tag as shown in the diagram below.
Step-2
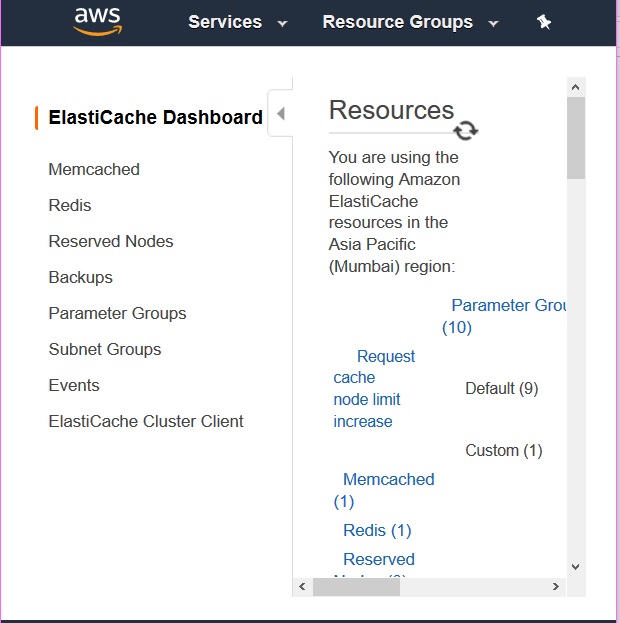
On clicking the link above we get the Amazon ElastiCache home page. If it is the first time ever you are accessing ElastiCache services, then it will show you a screen showing the ElastiCache home page. But in case you have already created some ElastiCache resources a summary of that will be available by scrolling down in the above page. A screen shot is shown below.
Step-3
The next screen gives us an option to select the cache engine we need and that is the start of our configuration steps for the cache service we need.
In the next chapter we will see the details on each of these ElastiCache engines configuration and usage one by one.
Step-4
We also need to assign a appropriate policy to give permission to the user to use ElastiCache service. We need to attach the AWS-managed policy named AmazonElastiCacheFullAccess to the existing user. This role comes pre-provisioned with permission that the service requires to create a service-linked role on your behalf.