- WebdriverIO - Home
- WebdriverIO - Introduction
- WebdriverIO - Prerequisite
- WebdriverIO - Architecture
- WebdriverIO - Getting Started with NodeJS
- WebdriverIO - Installation of NPM
- WebdriverIO - VS Code Installation
- WebdriverIO - Package.json
- WebdriverIO - Mocha Installation
- Selenium Standalone Server Installation
- WebdriverIO - Configuration File generation
- WebdriverIO - VS Code Intellisense
- WebdriverIO - Wdio.conf.js file
- WebdriverIO - Xpath Locator
- WebdriverIO - CSS Locator
- WebdriverIO - Link Text Locator
- WebdriverIO - ID Locator
- WebdriverIO - Tag Name Locator
- WebdriverIO - Class Name Locator
- WebdriverIO - Name Locator
- Expect Statement for Assertions
- WebdriverIO - Happy Path Flow
- WebdriverIO - General Browser Commands
- WebdriverIO - Handling Browser Size
- WebdriverIO - Browser Navigation Commands
- Handling Checkboxes & Dropdowns
- WebdriverIO - Mouse Operations
- Handling Child Windows/Pop ups
- WebdriverIO - Hidden Elements
- WebdriverIO - Frames
- WebdriverIO - Drag & Drop
- WebdriverIO - Double Click
- WebdriverIO - Cookies
- WebdriverIO - Handling Radio Buttons
- Chai Assertions on webelements
- WebdriverIO - Multiple Windows/Tabs
- WebdriverIO - Scrolling Operations
- WebdriverIO - Alerts
- WebdriverIO - Debugging Code
- WebdriverIO - Capturing Screenshots
- WebdriverIO - JavaScript Executor
- WebdriverIO - Waits
- WebdriverIO - Running Tests in Parallel
- WebdriverIO - Data Driven Testing
- Running Tests from command-line parameters
- Execute Tests with Mocha Options
- Generate HTML reports from Allure
- WebdriverIO Useful Resources
- WebdriverIO - Quick Guide
- WebdriverIO - Useful Resources
- WebdriverIO - Discussion
WebdriverIO - Getting Started with NodeJS
WebdriverIO coding is done using JavaScript. For this, NodeJS has to be installed since it is a JavaScript engine. Only after its installation, we can execute WebdriverIO tests. The steps to configure NodeJS are listed below −
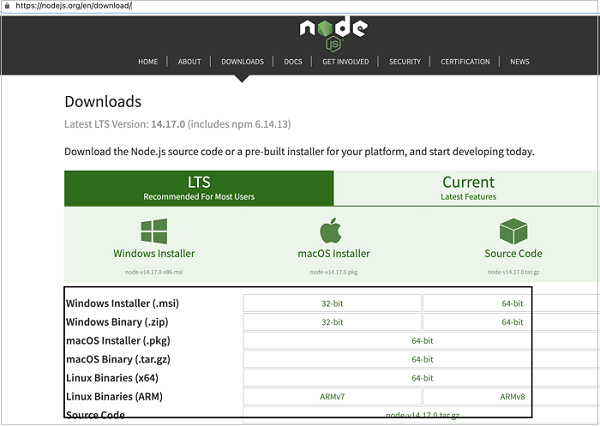
Step 1 − Launch the application using the below link −
https://nodejs.org/en/download/
Step 2 − As per the local operating system (Windows, Mac or Linux) we are using, click on the link to download the Installer. The following screen will appear on your computer −
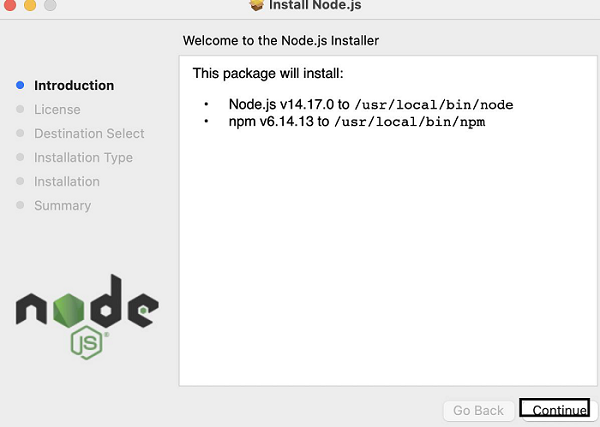
Step 3 − Once the installer is downloaded, click on it. Navigate to the Node.js Installer welcome screen. Click on Continue. The following screen will appear on your computer −
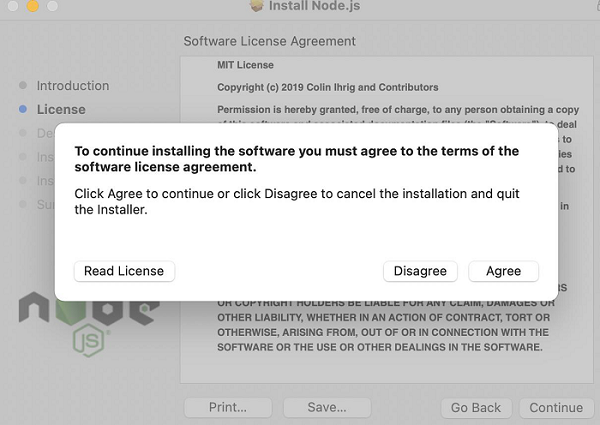
Step 4 − Agree to the terms of agreement of Nodejs. The following screen will appear on your computer −
Step 5 − Click on Install.
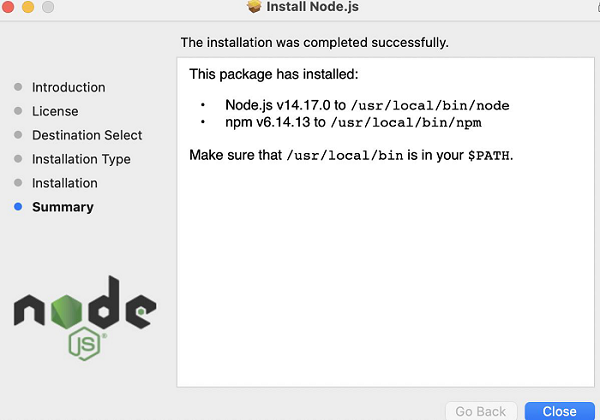
Step 6 − Once the success message of Nodejs installation is displayed, click on Close. The following screen will appear on your computer −
Step 7 − To check if Nodejs is installed successfully, open the terminal and run the command −
node
The following screen will appear on your computer −

The version of the Nodejs installed in the machine should be displayed.