- Eclipse Tutorial
- Eclipse - Home
- Eclipse - Overview
- Eclipse - Installation
- Eclipse - Explore Windows
- Eclipse - Explore Menus
- Eclipse - Explore Views
- Eclipse - Perspectives
- Eclipse - Workspaces
- Eclipse - Create Java Project
- Eclipse - Create Java Package
- Eclipse - Create Java Class
- Eclipse - Create Java Interface
- Eclipse - Create XML File
- Eclipse - Java Build Path
- Eclipse - Run Configuration
- Eclipse - Running Program
- Eclipse - Create Jar Files
- Eclipse - Close Project
- Eclipse - Reopen Project
- Eclipse - Build Project
- Eclipse - Debug Configuration
- Eclipse - Debugging Program
- Eclipse - Preferences
- Eclipse - Content Assist
- Eclipse - Quick Fix
- Eclipse - Hover Help
- Eclipse - Search Menu
- Eclipse - Navigation
- Eclipse - Refactoring
- Eclipse - Add Bookmarks
- Eclipse - Task Management
- Eclipse - Install Plugins
- Eclipse - Code Templates
- Eclipse - Shortcuts
- Eclipse - Restart Option
- Eclipse - Tips & Tricks
- Eclipse - Web Browsers
- Eclipse Useful Resources
- Eclipse - Quick Guide
- Eclipse - Useful Resources
- Eclipse - Discussion
Eclipse - Run Configuration
Creating and Using a Run Configuration
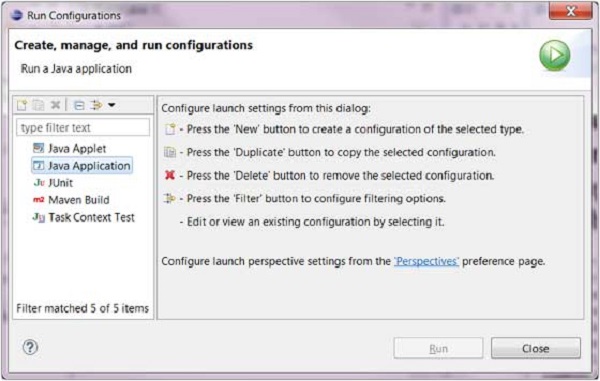
The Run Configurations dialog allows you create multiple run configurations. Each run configuration can start an application. The Run Configuration dialog can be invoked by selecting the Run Configurations menu item from the Run menu.

To create a run configuration for a Java application select Java Application
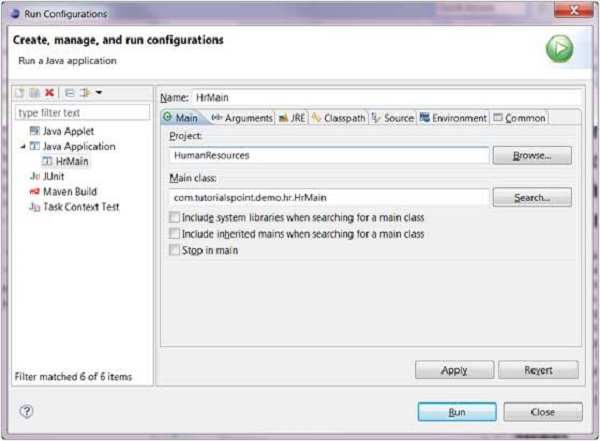
from the list on the left hand side and click on the New button. In the dialog box that comes up in the main tab specify −
A name for the run configuration.
The name of a Project.
The name of the main class.
In the arguments tab specify −
Zero or more program arguments.
Zero or more Virtual Machine arguments.

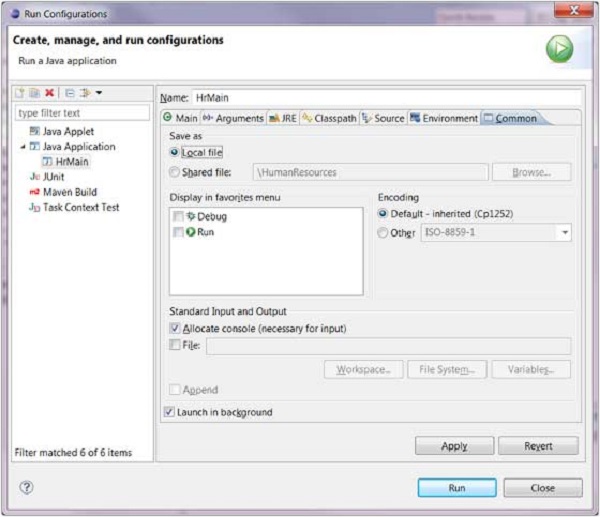
The Commons tab provides common options such as the ability to allocate a console for standard input and output.

To save the run configuration click on the Apply button and to launch the application click on the Run button.
