- TestLink - Home
- TestLink – Introduction
- TestLink – Features
- TestLink – Installation
- TestLink – Login
- TestLink – Add a Project
- TestLink – Dashboard
- TestLink – Projects
- TestLink – Inventory
- TestLink – Test Plan
- TestLink – Build Management
- TestLink – Test Specification
- TestLink – Test Suite
- TestLink – Test Cases
- TestLink – Import Data
- TestLink – Export Data
- TestLink – Test Plan Relation
- TestLink – Search
- TestLink – Keywords
- Test Specification Document
- TestLink – Create Requirement
- TestLink – Requirement Overview
- TestLink – Assign Test Execution
- TestLink – Bulk User Assignment
- TestLink – Platforms
- TestLink – Milestones
- TestLink – Test Execution Setup
- TestLink – Test Execution
- TestLink – Reports & Metrics
- TestLink – Reports
- TestLink – Charts
TestLink - Test Execution
Test execution is the process of executing the code and comparing the expected and actual results.
Test Status
By default, a test case remains in No Run status. Once a status is assigned to a test case, it cannot revert to the no Run status.
A test case can be assigned a result as Passed, Failed or Blocked. TestLink supports to assign a result to individual test steps as well. You can assign Passed, Failed or Blocked status at each individual step of a test case.
Passed − When a test case or step matches the expected result, it is marked as Passed.
Failed − When a test case or step deviates from the expected result, it is marked as Failed.
Blocked − When a test case or step cannot be executed due to an outstanding issue, it is marked as Blocked.
Insert Test Result
Once a test case or test step is executed, the result should be assigned to those.
Following steps should be performed while insering a test result −
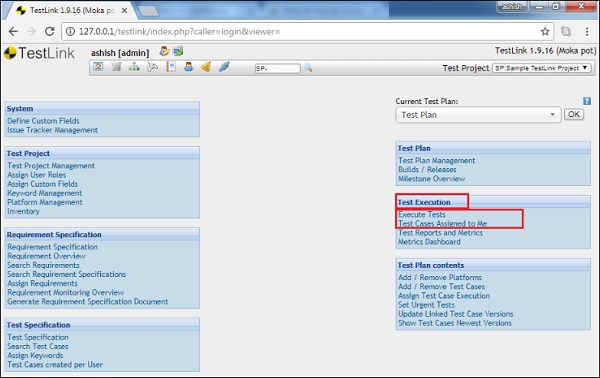
Step 1 − Go to Test Execution → Execution Tests or Test Cases Assigned to Me as shown below.
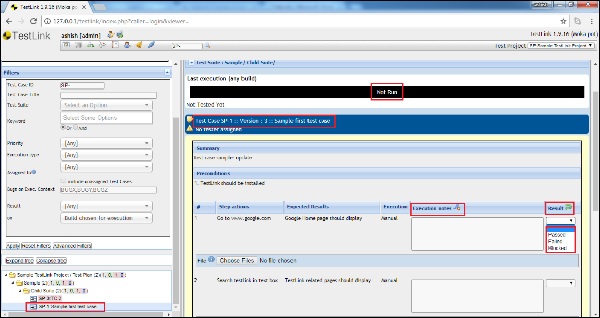
Step 2 − Select the test case from the left panel. It displays all the details and steps of the test cases.
Step 3 − In the test step, there are Execution Notes and Result column. After execution, you can enter comments as Execution Notes.
Step 4 − Select Results as Passed, Failed or Blocked.
You can also attach an image or screenshot file as an artefact in support of result selection.
Step 5 − In the Notes/Description section present below, enter overall comment for the test case execution.
Step 6 − On the right side of Notes/Description, Execution duration (min) is present. Enter the number of minutes spent while executing this test case.
Step 7 − Below the Execution Duration text box, three icons are present to select the overall result status for the test case. Icons are Passed, Failed and Blocked from left to right.
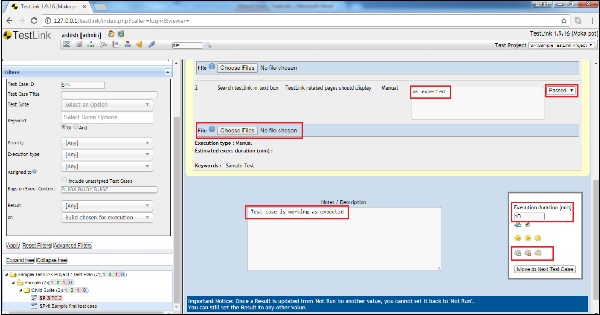
After selection, the overall result gets updated with all execution iterations.
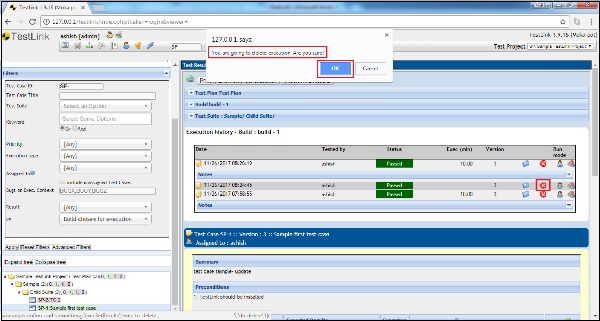
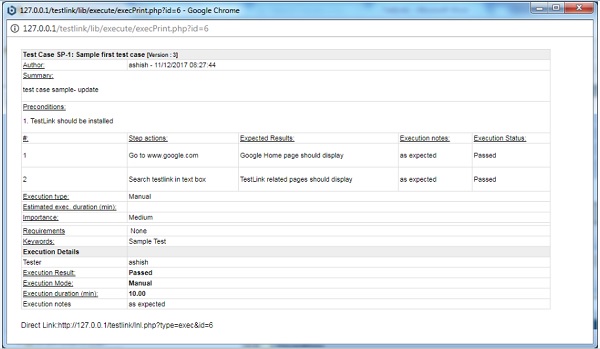
Step 8 − Click the Print icon to view detailed execution result. The symbol is present in Run Mode column at the extreme right as shown below.
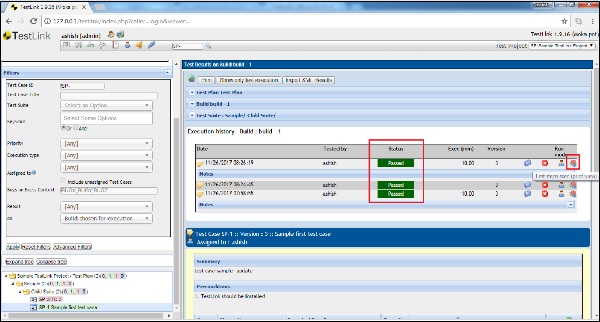
It opens a new window with details of execution and comment step-wise as shown below.
Delete Execution
You can delete the execution result by clicking the delete red symbol as X, present in Run Mode column.
It opens a confirmation pop-up to delete. Click the OK button.