- Sprint Security - Home
- Spring Security - Introduction
- Spring Security - Architecture
- Spring Security - Project Modules
- Spring Security - Environment Setup
- Spring Security - Form Login
- Spring Security - Custom Form Login
- Spring Security - Logout
- Spring Security - Remember Me
- Spring Security - Redirection
- Spring Security - Taglibs
- Spring Security - XML Configuration
- Spring Security - Authentication Provider
- Spring Security - Basic Authentication
- Spring Security - AuthenticationFailureHandler
- Spring Security - JWT
- Spring Security - Retrieve User Information
- Spring Security - Maven
- Spring Security - Default Password Encoder
- Spring Security – Password Encoding
- Spring Security - Methods Level
- Spring Security - Manual Authentication
- Spring Security - Extra Login Fields
- Spring Security - Prevent Brute Force
- Spring Security - Login Page with React
- Spring Security - Security Filter Chain
- Spring Security - Securing Spring Boot API
- Spring Security - Expressions
- Spring Security - Security none, Filters none, access permitAll
- Spring Security - Control the Session
- Spring Security Useful Resources
- Spring Security - Quick Guide
- Spring Security - Useful Resources
- Spring Security - Discussion
Spring Security - Basic Authentication
We've seen form based login so far where an html based form is used for Username/password authentication. We can either create our own custom login form or use spring security provided default login form. There is another way to ask username/password where we can ask user to pass username/password in the url itself using basic authentication.
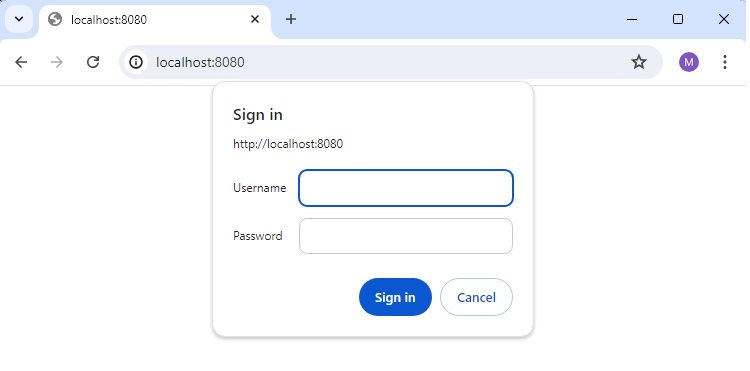
In case of Web browse, whenever a user requests a protected resource, Spring Security checks for the authentication of the request. If the request is not authenticated/authorized, the user will be asked for username/password using default dialog as shown below:
Spring Security provides following configuration to achieve basic authentication −
protected void configure(HttpSecurity http) throws Exception {
http
   // ...
   .authorizeHttpRequests(request -> request.anyRequest().authenticated())
   .httpBasic(Customizer.withDefaults())
   .build();
}
Here we're configuring spring security for every request to be authenticated using basic authentication mechanism.
Let us start actual programming with Spring Security. Before you start writing your first example using Spring framework, you have to make sure that you have set up your Spring environment properly as explained in Spring Security - Environment Setup Chapter. We also assume that you have a bit of working knowledge on Spring Tool Suite IDE.
Now let us proceed to write a Spring MVC based Application managed by Maven, which will ask user to login, authenticate user and then provide option to logout using Spring Security Form Login Feature.
Create Project using Spring Initializr
Spring Initializr is great way to start with Spring Boot project. It provides a easy to use User Interface to create a project, add dependencies, select java runtime etc. It generates a skeleton project structure which once downloaded can be imported in spring tool suite and we can proceed with our readymade project structure.
We're choosing a maven project, naming the project as formlogin, with java version as 21. Following dependencies are added:
Spring Web
Spring Security
Spring Boot DevTools

Thymeleaf is a templating engine for Java. It allows us to quickly develop static or dynamic web pages for rendering in the browser. It is extremely extensible and allows us to define and customize the processing of our templates in fine detail. In addition to this, we can learn more about Thymeleaf by clicking this link.
Let's move on to generate our project and download it. We then extract it to a folder of our choice and use any IDE to open it. I shall be using Spring Tools Suite 4. It is available for free downloading from the https://spring.io/tools website and is optimized for spring applications.
pom.xml with all relevant dependencies
Let's take a look at our pom.xml file. It should look something similar to this −
pom.xml
<?xml version="1.0" encoding="UTF-8"?>
<project xmlns="http://maven.apache.org/POM/4.0.0" xmlns:xsi="http://www.w3.org/2001/XMLSchema-instance"
xsi:schemaLocation="http://maven.apache.org/POM/4.0.0 https://maven.apache.org/xsd/maven-4.0.0.xsd">
   <modelVersion>4.0.0</modelVersion>
   <parent>
      <groupId>org.springframework.boot</groupId>
      <artifactId>spring-boot-starter-parent</artifactId>
      <version>3.5.6</version>
      <relativePath/> <!-- lookup parent from repository -->
   </parent>
   <groupId>com.tutorialspoint.security</groupId>
   <artifactId>formlogin</artifactId>
   <version>0.0.1-SNAPSHOT</version>
   <name>formlogin</name>
   <description>Demo project for Spring Boot</description>
   <url/>
   <licenses>
      <license/>
   </licenses>
   <developers>
      <developer/>
   </developers>
   <scm>
      <connection/>
      <developerConnection/>
      <tag/>
      <url/>
   </scm>
   <properties>
      <java.version>21</java.version>
   </properties>
   <dependencies>
      <dependency>
         <groupId>org.springframework.boot</groupId>
         <artifactId>spring-boot-starter-security</artifactId>
      </dependency>
      <dependency>
         <groupId>org.springframework.boot</groupId>
         <artifactId>spring-boot-starter-thymeleaf</artifactId>
      </dependency>
      <dependency>
         <groupId>org.springframework.boot</groupId>
         <artifactId>spring-boot-starter-web</artifactId>
      </dependency>
      <dependency>
         <groupId>org.thymeleaf.extras</groupId>
         <artifactId>thymeleaf-extras-springsecurity6</artifactId>
      </dependency>
      <dependency>
         <groupId>org.springframework.boot</groupId>
         <artifactId>spring-boot-devtools</artifactId>
         <scope>runtime</scope>
         <optional>true</optional>
      </dependency>
      <dependency>
         <groupId>org.springframework.boot</groupId>
         <artifactId>spring-boot-starter-test</artifactId>
         <scope>test</scope>
      </dependency>
      <dependency>
         <groupId>org.springframework.security</groupId>
         <artifactId>spring-security-test</artifactId>
         <scope>test</scope>
      </dependency>
   </dependencies>
   <build>
      <plugins>
         <plugin>
            <groupId>org.springframework.boot</groupId>
            <artifactId>spring-boot-maven-plugin</artifactId>
         </plugin>
      </plugins>
   </build>
</project>
Spring Security Configuration Class
Inside of our config package, we have created the WebSecurityConfig class. We shall be using this class for our security configurations, so let's annotate it with an @Configuration annotation and @EnableWebSecurity. As a result, Spring Security knows to treat this class a configuration class. As we can see, configuring applications have been made very easy by Spring.
WebSecurityConfig
package com.tutorialspoint.security.formlogin.config;

import org.springframework.context.annotation.Bean;
import org.springframework.context.annotation.Configuration;
import org.springframework.security.config.Customizer;
import org.springframework.security.config.annotation.web.builders.HttpSecurity;
import org.springframework.security.config.annotation.web.configuration.EnableWebSecurity;
import org.springframework.security.config.annotation.web.configurers.AbstractHttpConfigurer;
import org.springframework.security.core.userdetails.User;
import org.springframework.security.core.userdetails.UserDetails;
import org.springframework.security.core.userdetails.UserDetailsService;
import org.springframework.security.crypto.bcrypt.BCryptPasswordEncoder;
import org.springframework.security.crypto.password.PasswordEncoder;
import org.springframework.security.provisioning.InMemoryUserDetailsManager;
import org.springframework.security.web.SecurityFilterChain;

@Configuration
@EnableWebSecurity
public class WebSecurityConfig  {

   @Bean
   protected UserDetailsService userDetailsService() {
      UserDetails user = User.builder()
         .username("user")
         .password(passwordEncoder().encode("user123"))
         .roles("USER")
         .build();
      UserDetails admin = User.builder()
         .username("admin")
         .password(passwordEncoder().encode("admin123"))
         .roles("USER", "ADMIN")
         .build();
      return new InMemoryUserDetailsManager(user, admin);
   }

   @Bean
   protected PasswordEncoder passwordEncoder() {
      return new BCryptPasswordEncoder();
   }

   @Bean
   protected SecurityFilterChain filterChain(HttpSecurity http) throws Exception {
      return http
         .csrf(AbstractHttpConfigurer::disable)
         .authorizeHttpRequests(request -> request.anyRequest().authenticated())
         .httpBasic(Customizer.withDefaults())
         .build();
   }
}
Configuration Class Details
Let's take a look at our configuration class.
First, we shall create a bean of our UserDetailsService class by using the userDetailsService() method. We shall be using this bean for managing our users for this application. Here, to keep things simple, we shall use an InMemoryUserDetailsManager instance to create users. These users, along with our given username and password, are mapped to User and Admin roles respectively.
Password Encoder
-
Now, let's look at our PasswordEncoder. We shall be using a BCryptPasswordEncoder instance for this example. Hence, while creating the user, we used the passwordEncoder to encode our plaintext password like this:
.password(passwordEncoder().encode("user123"))
Http Security Configuration
After the above steps, we move on to our next configuration. Here, we've defined the filterChain method. This method takes HttpSecurity as a parameter. We shall be configuring this to use our form login and logout function.
We can observe that all these functionalities are available in Spring Security. Lets study the below section in detail −
http
   .csrf(AbstractHttpConfigurer::disable)
   .authorizeHttpRequests(request -> request.anyRequest().authenticated())
   .httpBasic(Customizer.withDefaults())
   .build();
There are a few points to note here −
We have disabled csrf or Cross-Site Request Forgery protection As this is a simple application only for demonstration purposes, we can safely disable this for now.
Then we add configuration which requires all requests to be authenticated.
After that, we're using httpBasic() functionality of Spring Security as mentioned above. This makes browser to ask for username/password. In case of rest API, we'can set authetication as Basic Auth as we shall see later in this section.
Controller Class
In this class, we've created a mapping for single "/" endpoint for the index page of this application, for simplicity. This will redirect to index.html.
AuthController
package com.tutorialspoint.security.formlogin.controllers;

import org.springframework.stereotype.Controller;
import org.springframework.web.bind.annotation.GetMapping;

@Controller
public class AuthController {
   @GetMapping("/")
   public String home() {
      return "index";
   }
}
Views
Create index.html in /src/main/resources/templates folder with following content to act as a home page.
index.html
<!DOCTYPE html>
<html xmlns="http://www.w3.org/1999/xhtml"
   xmlns:th="https://www.thymeleaf.org"
   xmlns:sec="https://www.thymeleaf.org/thymeleaf-extras-springsecurity6">
   <head>
      <title>
         Hello World!
      </title>
   </head>
   <body>
      <h1 th:inline="text">Hello World!</h1>
      <a href="/logout" alt="logout">Sign Out</a>
   </body>
<html>
Running the Application
As we've all component ready, let's run the Application. Right Click on the project, select Run As and then Spring Boot App.
It will boot up the application and once application is started, we can run localhost:8080 to check the changes.
Output
Now open localhost:8080, you can see that browser is asking for username/password via system dialog.
Browser's dialog for username/password
Enter Invalid Credential
If we enter invalid credential, then same dialog will popup again.
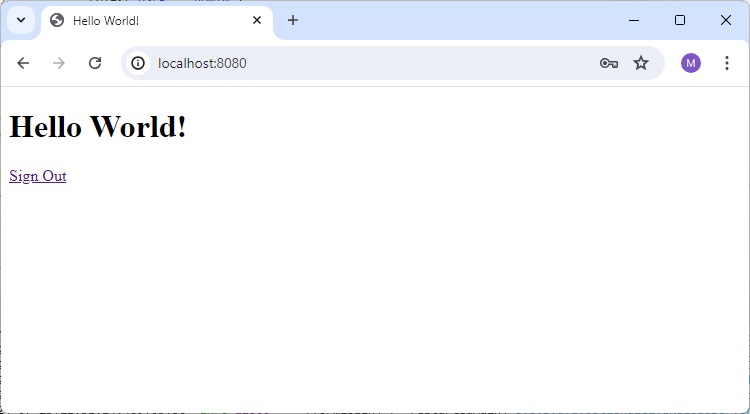
Home Page for User
If we enter valid credential for a User and it will load home page for User
Using Postman
We can use postmant to set authentication as Basic Auth and set username/password and then make the request as shown below:
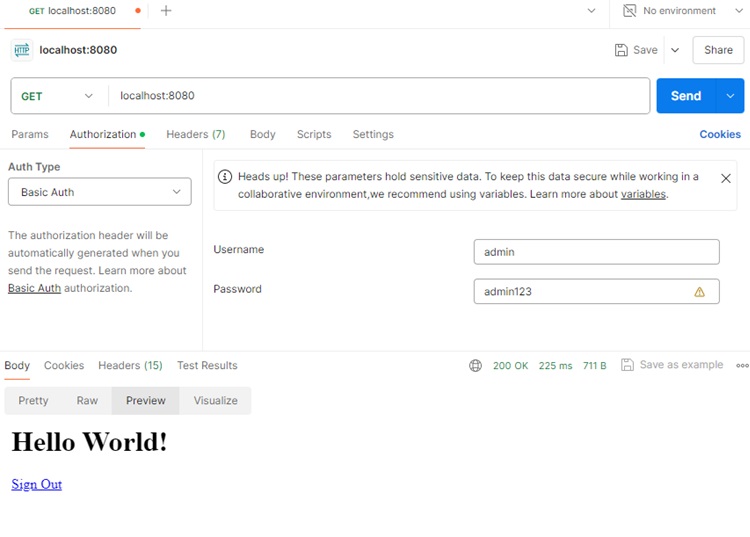
Please explore Postman Tutorial to setup and learn postman.
