- ServiceNow - Home
- ServiceNow - Introduction
- ServiceNow - Fundamentals
- ServiceNow - ITIL
- ServiceNow - Cloud Services
- ServiceNow - Administration
- ServiceNow - Development
- Mastering and Certification
- ServiceNow Useful Resources
- ServiceNow - Quick Guide
- ServiceNow - Useful Resources
- ServiceNow - Discussion
ServiceNow - Fundamentals
Lets move a step ahead and learn some basics of ServiceNow. In this chapter, we will go through users/groups/roles, lists, forms, applications, modules and a few more concepts.
The ServiceNow developer instance has ample of dummy data like users, incidents, groups etc., which we can refer to gain good understanding about the concept. Throughout the remaining chapter, we will take our old example of BookWorm ltd. and try to understand where, ServiceNow fits in the internal functioning of the organisation.
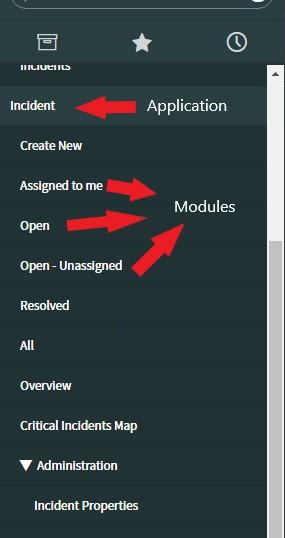
Applications and Modules
ServiceNow defines Application as, a collection of files and data that deliver a service and manage business processes and Modules are, children of application linking to other pages or records in the platform.
For example, we have an Incident application, which has modules like Create new to create a new incident for any department in BookWorm ltd. Open module lists all the open incidents within BookWorm ltd. (This module may only be visible to system administrators).
Similarly, there are other important applications like Problem, Change, Workflows, etc. and its respective modules like Create New, Open, WorkFlow editor, etc.
Lists and Forms
Here, you will understand what are the lists and forms in ServiceNow.
Lists
It displays the set of records (based on certain conditions) from the data table. It could be a list of incidents assigned to a certain group, from the incident table or list of problems not assigned to any group from problem table, etc.
Below is an example, of the Incident list having incidents, which are resolved from the incident table.
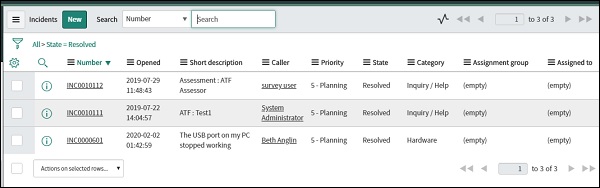
This List is generated via the Resolved module of Incident application. This is a default module provided with ServiceNow. To open this module and explore this list, search Incident in application navigator and inside the Incident application find Resolved module.
Forms
It displays one record from the data table or it can be used to enter/update a record in a data table. For example, an incident form will display details related to a single selected incident or it can also be used to enter details of a new incident in an incident table.
The form which have details of existing incident record and form to enter the details of the new incident record are given below respectively.
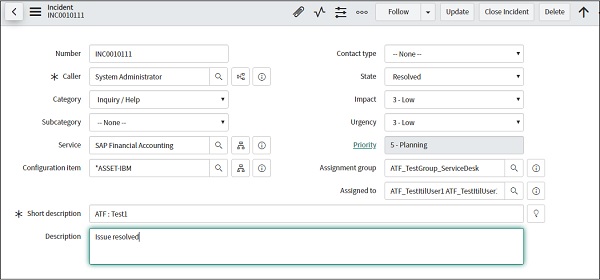
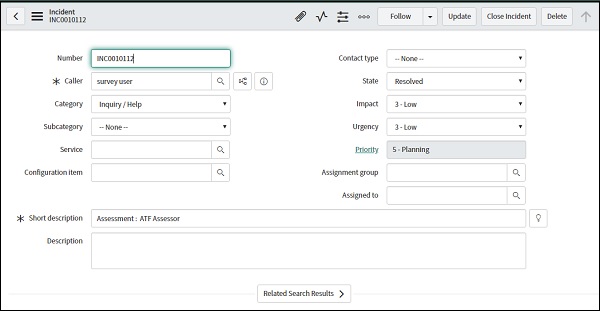
To access the first form in the above example, go to Resolved module inside Incident application. A list of resolved incidents will appear. Click on any incident number, to open the form. The second screen in the above example, having a form to enter new incident details, can be accessed via Create New module of Incident application.
Users, Roles and Groups
The users, roles and groups in ServiceNow are explained below in detail.
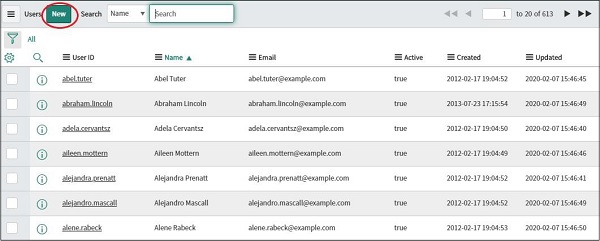
Users
are the individuals who use the ServiceNow within an organisation. The system administrator has the authority to create a new user, browse through the list of existing users, delete a user and impersonate a user.
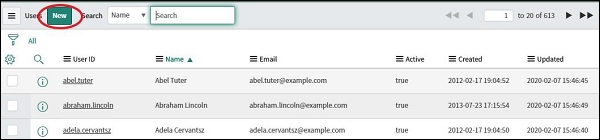
To open the list of existing user, go to Users module inside User administration application.
(Search user in application navigator and click on Users under User Administration)
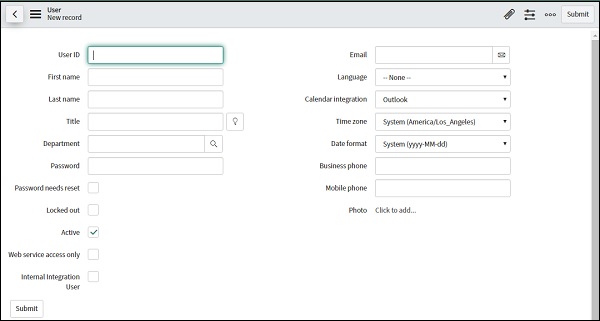
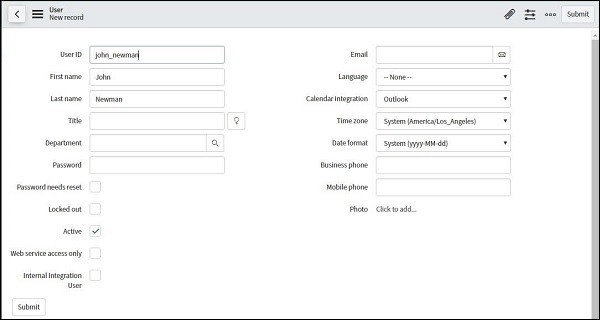
To create a new user, click on the New button in top left of the content frame. Following form will open to enter a new data record for the user table.
A system administrator can also impersonate a user, which means that system administrator can login to ServiceNow as another user. There is an option in the banner frame, to impersonate as any other user.

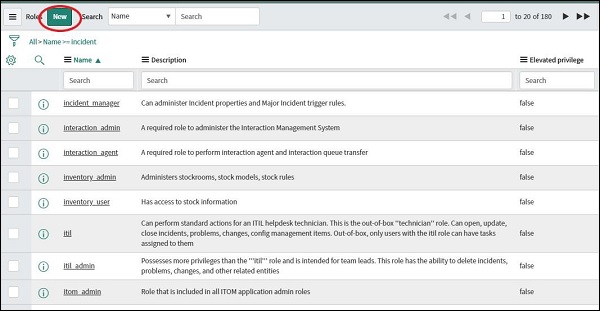
Roles
are associated with the task that a user performs within an organisation. The role is assigned based on the work profile. For example, there can be an incident manager role, application developer role, incident analyst role, etc.
The roles control the access to the features and capabilities in applications and modules. So, a system administrator role may have access to a few applications which incident manager role may not have. The list of roles and form to add a new role can be found in System security application under Users and Groups.
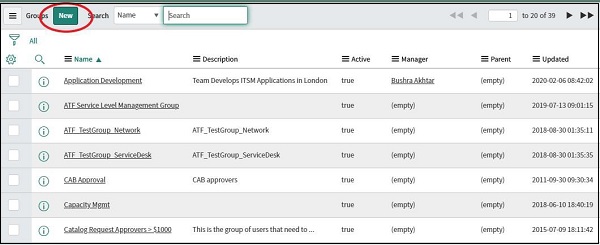
Groups
Groups are the collection of users, which perform a similar task. For example, there can be a group of change managers, who can approve the changes in production, or there can be a procurement group, who have the access to raise the purchase order, etc. The group can be accessed via System security → Users and groups → Groups.
It is always best practise to assign users to groups or vice versa, and further assign roles to groups. Generally, it is not recommended to assign users directly to the roles. The reason is explained using the below example −
Suppose among many groups in BookWorm ltd. (in ServiceNow), there is one group for the IT team and under the IT team there is a child group for Full stack engineers. In addition to this, there are a couple of roles i.e., Backend IT services and Frontend IT services. The Full stack engineers need to be assigned to both the roles so that they have accesses and licence privileges meant for both, Frontend and Backend IT services.
A full stack engineer joined BookWorm ltd. who is expert in both backend technologies and frontend technologies. Therefore, instead of assigning this user to two roles (Backend IT services and Frontend IT services) separately, it would be a good idea to create a group of full stack engineer and assign this group to two roles, i.e., Backend IT services and Frontend IT services.
Now, for all the full stack engineers joining the BookWorm ltd., the administrator only has to assign that full stack engineer user to the full stack engineer group, which is a child group of the IT team.
Lets implement the example mentioned above practically in ServiceNow, to understand this concept better.
Practical
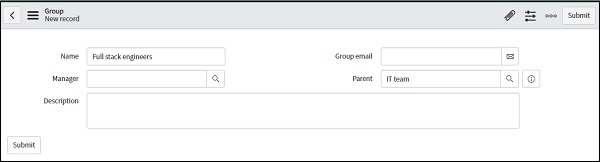
First, we will create a group, i.e. IT team and its child group Full stack engineers. In the navigation filter, search User administration and select Group modules under user administration. The following screen will open in the content frame.
Click on the New button and give the details. Only Name is sufficient to identify the Group. You can also give Group email and select the manager from the list of users. The parent tag is used to create a hierarchical structure in the group, so for the IT team group, we can leave it blank and for Full stack engineers group, we can give IT team group as the parent.
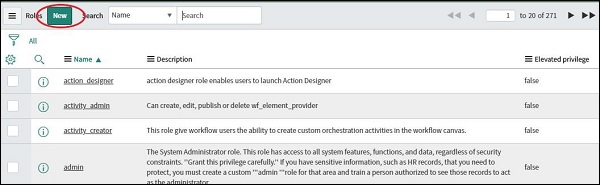
Now that we have created the groups, let's move ahead and create two roles - Backend IT services and Frontend IT services, which will be assigned to the group Full stack engineers. Inside User administration, go to Roles module.
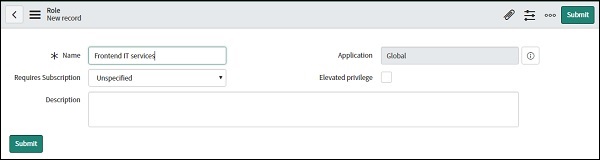
Click on the New button and give the name of the role. Keep the application as Global to allow this role to be implemented for every application in your ServiceNow. Granting elevated privilege means that, the user assigned to this role, will be given accesses/privileges more than a standard user. They may require administering certain functionality.
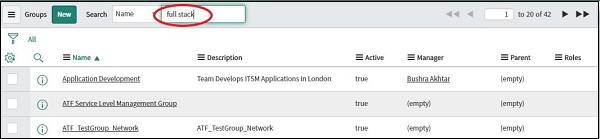
Now, we have to assign these roles to our group. Go to Groups module again and search our group Full stack engineers at the top of content frame beside New button.
Open group Full stack engineers and now you will see, a new section to add roles or Group members. In the roles tab, click edit button and below screen will appear.
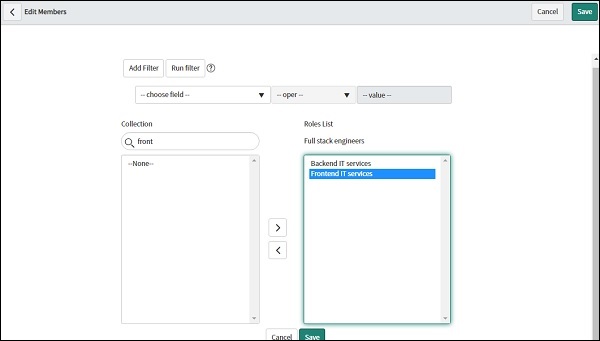
Search the role, we have just created Frontend IT services in the collection box. Select the role and click on the arrow button to add the role in this group. Finally, press the Save button. You will be taken back to the main screen of the Group module. Update the record, using the update button in the top right corner. Similarly, repeat the process for Backend IT team services.
Lets move ahead and add some users in ServiceNow. Navigate to users module in user administration application and click on New button.
Enter the details of the new user and press submit button. Similarly, you can add a few more users. We have added two new users here, John Newman and Cindy Davis.
To assign the group full stack engineer to these users, open the newly created users again and scroll at the bottom of the user. You will see a new section to add roles or groups to this user.
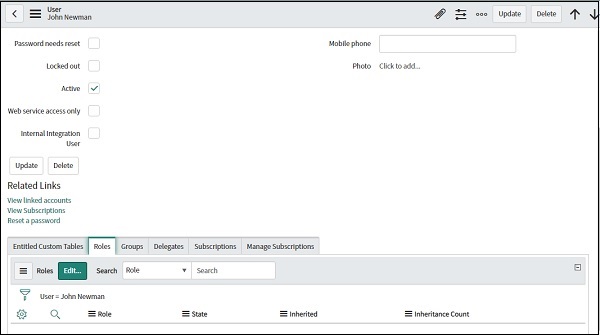
Go to Groups tab and click on edit button. Following screen will appear −
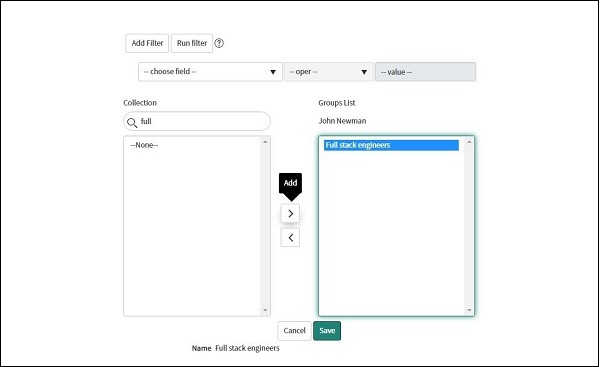
Search the group full stack engineers in the collection box, select the group and click on the arrow button to add this group to the user John Newman. Repeat the similar process for Cindy Davis. So, finally we have created users, groups and roles. We have then added the roles to the group and group to the user.
Tables, Columns and Fields
Let us learn, what are tables, columns and fields in ServiceNow. We will begin by understanding about the tables.
Tables
Tables are the collection of data in ServiceNow. The applications and modules use tables to store, display and process the data. For example, the Incident application has an incident table. Similarly, there is a user table, change request table, etc.
To check the structure or update the structure of any table make use of the Tables module of System Definition application.
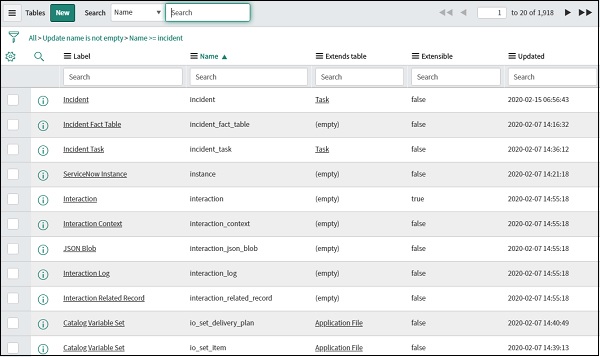
The table name can be searched in the top section of the content screen.
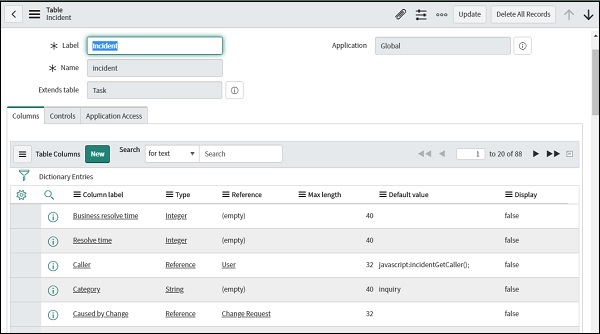
Lets explore the incident table. Once, we click the desired table, we can find all the columns in the table, column type (integer, string, etc.), maximum length, etc. The new column can be added to the table, using the New button.
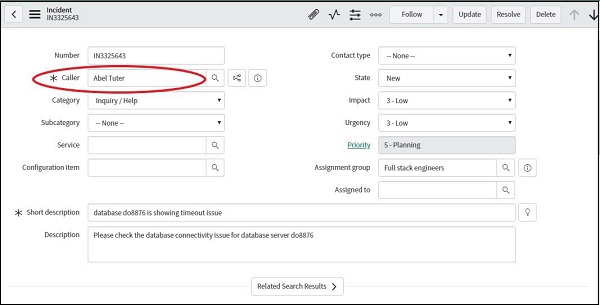
The important point to note here is that, every row in the table points to the unique record. So, for example, if an incident IN3325643 is raised in BookWorm ltd., for the full stack engineers group reporting the database connectivity issue. There will be a new row added in the incident table, which is specific for the incident record IN3325643.
To browse the data, in the table search <tablename>.list in the navigation bar (incident.list in this case).
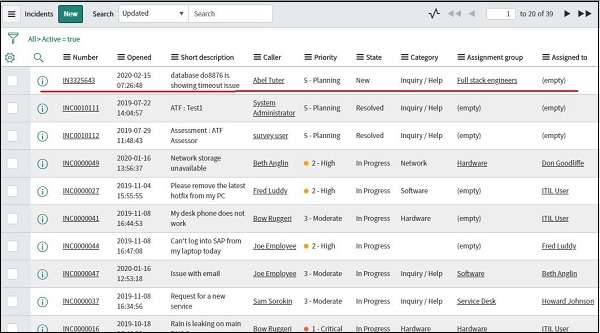
If we focus on this incident record, every column in this record represents the field having a specific value. For example, this incident record IN3325643 is having column Caller as Abel Tuter, this is one of the fields of this record. To open any record, click on the incident number from the list.
Similarly, you can explore other tables like users, problem, change, etc. We can even create a new table, for our custom applications as per the business requirements. The new table can be created from the Table module → New button in the top section of the content frame.