- Python Falcon - Home
- Python Falcon - Introduction
- Python Falcon - Environment Setup
- Python Falcon - WSGI vs ASGI
- Python Falcon - Hello World(WSGI)
- Python Falcon - Waitress
- Python Falcon - ASGI
- Python Falcon - Uvicorn
- Python Falcon - API Testing Tools
- Request & Response
- Python Falcon - Resource Class
- Python Falcon - App Class
- Python Falcon - Routing
- Falcon - Suffixed Responders
- Python Falcon - Inspect Module
- Python Falcon - Jinja2 Template
- Python Falcon - Cookies
- Python Falcon - Status Codes
- Python Falcon - Error Handling
- Python Falcon - Hooks
- Python Falcon - Middleware
- Python Falcon - CORS
- Python Falcon - Websocket
- Python Falcon - Sqlalchemy Models
- Python Falcon - Testing
- Python Falcon - Deployment
- Python Falcon Useful Resources
- Python Falcon - Quick Guide
- Python Falcon - Useful Resources
- Python Falcon - Discussion
Python Falcon - SQLAlchemy Models
To demonstrate how the Falcon's responder functions (on_post(), on_get(), on_put() and on_delete()), we had done CRUD (which stands for Create, Retrieve, Update and Delete) operations on an in-memory database in the form of a Python list of dictionary objects. Instead, we can use any relational database (such as MySQL, Oracle etc.) to perform store, retrieve, update and delete operations.
Instead of using a DB-API compliant database driver, we shall use SQLAlchemy as an interface between Python code and a database (we are going to use SQLite database as Python has in-built support for it). SQLAlchemy is a popular SQL toolkit and Object Relational Mapper.
Object Relational Mapping is a programming technique for converting data between incompatible type systems in object-oriented programming languages. Usually, the type system used in an Object Oriented language like Python contains non-scalar types. However, data types in most of the database products such as Oracle, MySQL, etc., are of primitive types such as integers and strings.
In an ORM system, each class maps to a table in the underlying database. Instead of writing tedious database interfacing code yourself, an ORM takes care of these issues for you while you can focus on programming the logics of the system.
In order to use SQLALchemy, we need to first install the library using PIP installer.
pip install sqlalchemy
SQLAlchemy is designed to operate with a DBAPI implementation built for a particular database. It uses dialect system to communicate with various types of DBAPI implementations and databases. All dialects require that an appropriate DBAPI driver is installed.
The following are the dialects included −
Firebird
Microsoft SQL Server
MySQL
Oracle
PostgreSQL
SQLite
Sybase
Database Engine
Since we are going to use SQLite database, we need to create a database engine for our database called test.db. Import create_engine() function from sqlalchemy module.
from sqlalchemy import create_engine
from sqlalchemy.dialects.sqlite import *
SQLALCHEMY_DATABASE_URL = "sqlite:///./test.db"
engine = create_engine(SQLALCHEMY_DATABASE_URL, connect_args =
{"check_same_thread": False})
In order to interact with the database, we need to obtain its handle. A session object is the handle to database. Session class is defined using sessionmaker() a configurable session factory method which is bound to the engine object.
from sqlalchemy.orm import sessionmaker, Session
session = sessionmaker(autocommit=False, autoflush=False, bind=engine)
Next, we need a declarative base class that stores a catalog of classes and mapped tables in the Declarative system.
from sqlalchemy.ext.declarative import declarative_base
Base = declarative_base()
Model class
Students, a subclass of Base is mapped to a students table in the database. Attributes in the Books class correspond to the data types of the columns in the target table. Note that the id attribute corresponds to the primary key in the book table.
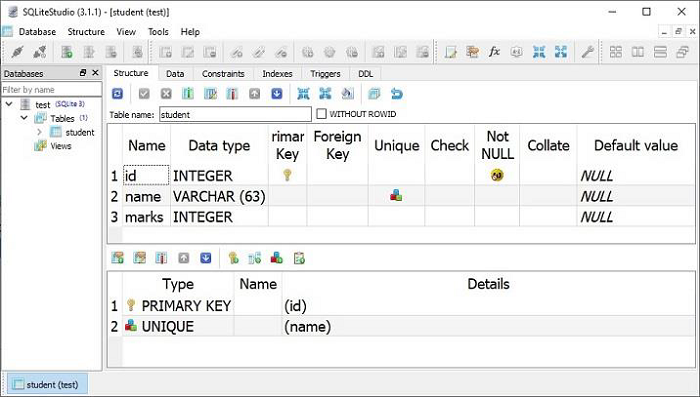
class Students(Base):
   __tablename__ = 'student'
   id = Column(Integer, primary_key=True, nullable=False)
   name = Column(String(63), unique=True)
   marks = Column(Integer)
Base.metadata.create_all(bind=engine)
The create_all() method creates the corresponding tables in the database. It can be confirmed by using a SQLite Visual tool such as SQLiteStudio.
We now need to declare a StudentResource class in which the HTTP responder methods are defined to perform CRUD operations on students table. The object of this class is associated to routes as shown in the following snippet −
import falcon
import json
from waitress import serve
class StudentResource:
   def on_get(self, req, resp):
      pass
   def on_post(self, req, resp):
      pass
   def on_put_student(self, req, resp, id):
      pass
   def on_delete_student(self, req, resp, id):
      pass
app = falcon.App()
app.add_route("/students", StudentResource())
app.add_route("/students/{id:int}", StudentResource(), suffix='student')
on_post()
Rest of the code is just similar to in-memory CRUD operations, with the difference being the operation functions interact with the database through SQLalchemy interface.
The on_post() responder method first constructs an object of Students class from the request parameters and adds it the Students model. Since this model is mapped to the students table in the database, corresponding row is added. The on_post() method is as follows −
def on_post(self, req, resp):
   data = json.load(req.bounded_stream)
   student=Students(id=data['id'], name=data['name'], marks=data['marks'])
   session.add(student)
   session.commit()
   resp.text = "Student added successfully."
   resp.status = falcon.HTTP_OK
   resp.content_type = falcon.MEDIA_TEXT
As mentioned earlier, the on_post() responder is invoked when a POST request is received. We shall use Postman app to pass the POST request.
Start Postman, select POST method and pass the values (id=1, name="Manan" and marks=760 as the body parameters. The request is processed successfully and a row is added to the students table.
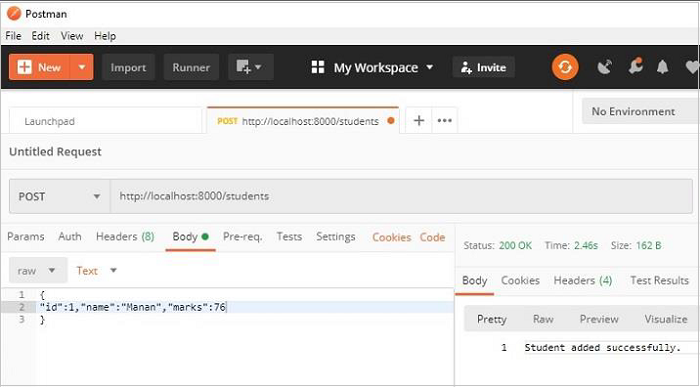
Go ahead and send multiple POST requests to add records.
on_get()
This responder is meant to retrieve all the objects in the Students model. query() method on Session object retrieves the objects.
rows = session.query(Students).all()
Since the default response of Falcon responder is in JSON format, we have to convert the result of above query in a list of dict objects.
data=[]
for row in rows:
   data.append({"id":row.id, "name":row.name, "marks":row.marks})
In the StudentResource class, let us add the on_get() method that performs this operation and sends its JSON response as follows −
def on_get(self, req, resp):
   rows = session.query(Students).all()
   data=[]
   for row in rows:
      data.append({"id":row.id, "name":row.name, "marks":row.marks})
      resp.text = json.dumps(data)
      resp.status = falcon.HTTP_OK
      resp.content_type = falcon.MEDIA_JSON
The GET request operation can be tested in the Postman app. The /students URL will result in displaying JSON response showing data of all objects in the students model.
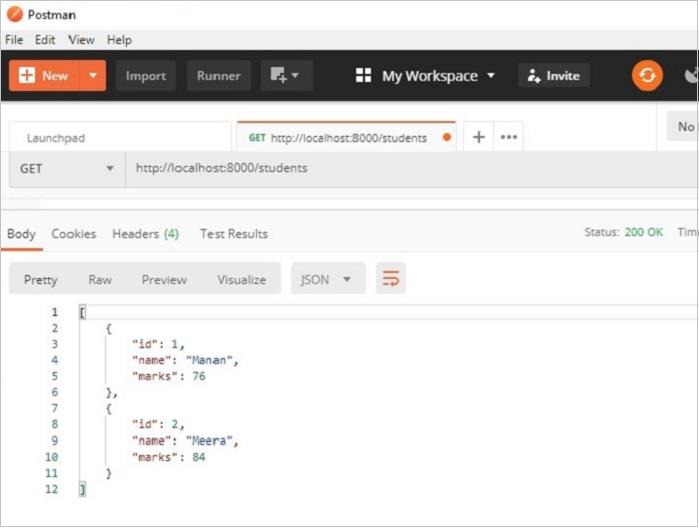
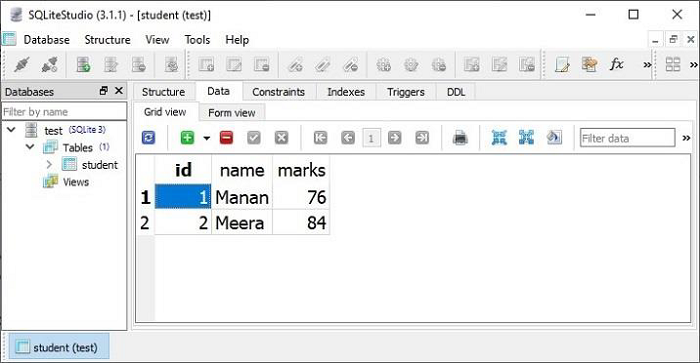
The two records shown in the result pane of Postman app can also be verified in the data view of SQLiteStudio.
on_put()
The on_put() responder performs the UPDATE operation. It responds to the URL /students/id. To fetch the object with given id from the Students model, we apply the filter to the query result, and update the values of its attributes with the data received from the client.
student = session.query(Students).filter(Students.id == id).first()
The on_put() method's code is as follows −
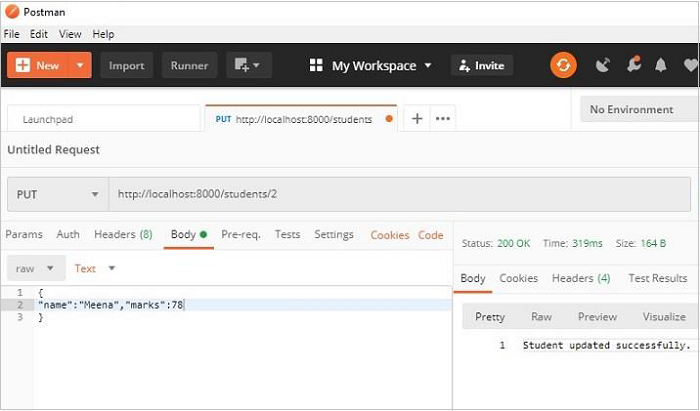
def on_put_student(self, req, resp, id):
   student = session.query(Students).filter(Students.id == id).first()
   data = json.load(req.bounded_stream)
   student.name=data['name']
   student.marks=data['marks']
   session.commit()
   resp.text = "Student updated successfully."
   resp.status = falcon.HTTP_OK
   resp.content_type = falcon.MEDIA_TEXT
Let us update the object with id=2 in the Students model with the help of Postman and change the name and marks. Note that the values are passed as body parameters.
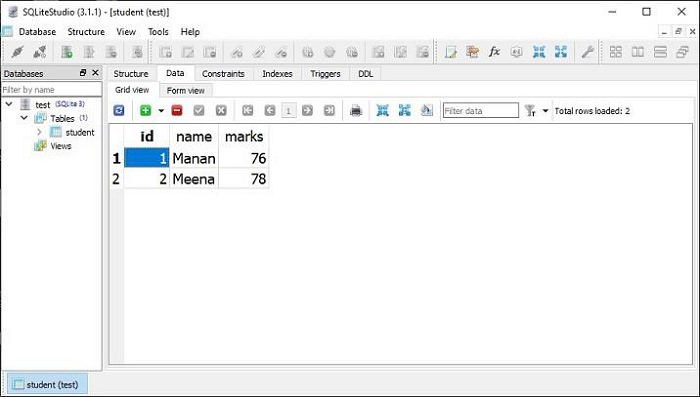
The data view in SQLiteStudio shows that the modifications have been effected.
on_delete()
Lastly, the DELETE operation is easy. We need to fetch the object of the given id and call the delete() method.
def on_delete_student(self, req, resp, id):
try:
session.query(Students).filter(Students.id == id).delete()
session.commit()
except Exception as e:
raise Exception(e)
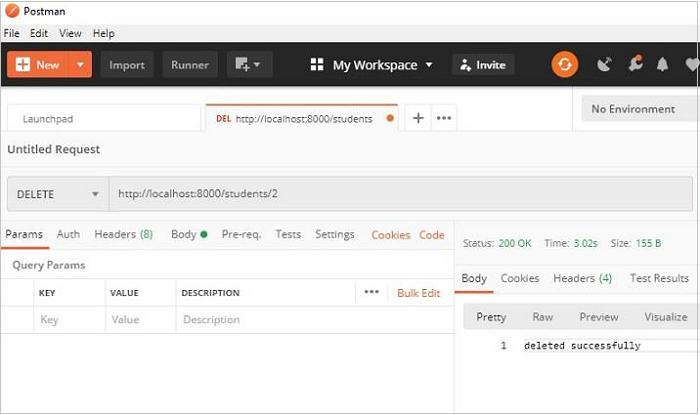
resp.text = "deleted successfully"
resp.status = falcon.HTTP_OK
resp.content_type = falcon.MEDIA_TEXT
As a test of the on_delete() responder, let us delete the object with id=2 with the help of Postman as shown below −