- PySpark - Home
- PySpark - Introduction
- PySpark - Environment Setup
- PySpark - SparkContext
- PySpark - RDD
- PySpark - Broadcast & Accumulator
- PySpark - SparkConf
- PySpark - SparkFiles
- PySpark - StorageLevel
- PySpark - MLlib
- PySpark - Serializers
PySpark - Quick Guide
PySpark Introduction
In this chapter, we will get ourselves acquainted with what Apache Spark is and how was PySpark developed.
Spark Overview
Apache Spark is a lightning fast real-time processing framework. It does in-memory computations to analyze data in real-time. It came into picture as Apache Hadoop MapReduce was performing batch processing only and lacked a real-time processing feature. Hence, Apache Spark was introduced as it can perform stream processing in real-time and can also take care of batch processing.
Apart from real-time and batch processing, Apache Spark supports interactive queries and iterative algorithms also. Apache Spark has its own cluster manager, where it can host its application. It leverages Apache Hadoop for both storage and processing. It uses HDFS (Hadoop Distributed File system) for storage and it can run Spark applications on YARN as well.
PySpark Overview
Apache Spark is written in Scala programming language. To support Python with Spark, Apache Spark Community released a tool, PySpark. Using PySpark, you can work with RDDs in Python programming language also. It is because of a library called Py4j that they are able to achieve this.
PySpark offers PySpark Shell which links the Python API to the spark core and initializes the Spark context. Majority of data scientists and analytics experts today use Python because of its rich library set. Integrating Python with Spark is a boon to them.
PySpark - Environment Setup
In this chapter, we will understand the environment setup of PySpark.
Note − This is considering that you have Java and Scala installed on your computer.
Let us now download and set up PySpark with the following steps.
Step 1 − Go to the official Apache Spark download page and download the latest version of Apache Spark available there. In this tutorial, we are using spark-2.1.0-bin-hadoop2.7.
Step 2 − Now, extract the downloaded Spark tar file. By default, it will get downloaded in Downloads directory.
# tar -xvf Downloads/spark-2.1.0-bin-hadoop2.7.tgz
It will create a directory spark-2.1.0-bin-hadoop2.7. Before starting PySpark, you need to set the following environments to set the Spark path and the Py4j path.
export SPARK_HOME = /home/hadoop/spark-2.1.0-bin-hadoop2.7
export PATH = $PATH:/home/hadoop/spark-2.1.0-bin-hadoop2.7/bin
export PYTHONPATH = $SPARK_HOME/python:$SPARK_HOME/python/lib/py4j-0.10.4-src.zip:$PYTHONPATH
export PATH = $SPARK_HOME/python:$PATH
Or, to set the above environments globally, put them in the .bashrc file. Then run the following command for the environments to work.
# source .bashrc
Now that we have all the environments set, let us go to Spark directory and invoke PySpark shell by running the following command −
# ./bin/pyspark
This will start your PySpark shell.
Python 2.7.12 (default, Nov 19 2016, 06:48:10)
[GCC 5.4.0 20160609] on linux2
Type "help", "copyright", "credits" or "license" for more information.
Welcome to
      ____              __
     / __/__  ___ _____/ /__
    _\ \/ _ \/ _ `/ __/  '_/
   /__ / .__/\_,_/_/ /_/\_\   version 2.1.0
      /_/
Using Python version 2.7.12 (default, Nov 19 2016 06:48:10)
SparkSession available as 'spark'.
<<<
PySpark - SparkContext
SparkContext is the entry point to any spark functionality. When we run any Spark application, a driver program starts, which has the main function and your SparkContext gets initiated here. The driver program then runs the operations inside the executors on worker nodes.
SparkContext uses Py4J to launch a JVM and creates a JavaSparkContext. By default, PySpark has SparkContext available as sc, so creating a new SparkContext won't work.

The following code block has the details of a PySpark class and the parameters, which a SparkContext can take.
class pyspark.SparkContext (
   master = None,
   appName = None,
   sparkHome = None,
   pyFiles = None,
   environment = None,
   batchSize = 0,
   serializer = PickleSerializer(),
   conf = None,
   gateway = None,
   jsc = None,
   profiler_cls = <class 'pyspark.profiler.BasicProfiler'>
)
Parameters
Following are the parameters of a SparkContext.
Master − It is the URL of the cluster it connects to.
appName − Name of your job.
sparkHome − Spark installation directory.
pyFiles − The .zip or .py files to send to the cluster and add to the PYTHONPATH.
Environment − Worker nodes environment variables.
batchSize − The number of Python objects represented as a single Java object. Set 1 to disable batching, 0 to automatically choose the batch size based on object sizes, or -1 to use an unlimited batch size.
Serializer − RDD serializer.
Conf − An object of L{SparkConf} to set all the Spark properties.
Gateway − Use an existing gateway and JVM, otherwise initializing a new JVM.
JSC − The JavaSparkContext instance.
profiler_cls − A class of custom Profiler used to do profiling (the default is pyspark.profiler.BasicProfiler).
Among the above parameters, master and appname are mostly used. The first two lines of any PySpark program looks as shown below −
from pyspark import SparkContext
sc = SparkContext("local", "First App")
SparkContext Example PySpark Shell
Now that you know enough about SparkContext, let us run a simple example on PySpark shell. In this example, we will be counting the number of lines with character 'a' or 'b' in the README.md file. So, let us say if there are 5 lines in a file and 3 lines have the character 'a', then the output will be → Line with a: 3. Same will be done for character b.
Note − We are not creating any SparkContext object in the following example because by default, Spark automatically creates the SparkContext object named sc, when PySpark shell starts. In case you try to create another SparkContext object, you will get the following error "ValueError: Cannot run multiple SparkContexts at once".
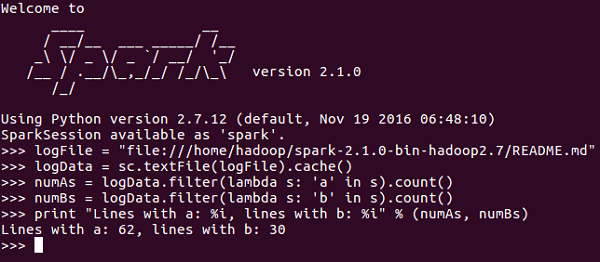
<<< logFile = "file:///home/hadoop/spark-2.1.0-bin-hadoop2.7/README.md"
<<< logData = sc.textFile(logFile).cache()
<<< numAs = logData.filter(lambda s: 'a' in s).count()
<<< numBs = logData.filter(lambda s: 'b' in s).count()
<<< print "Lines with a: %i, lines with b: %i" % (numAs, numBs)
Lines with a: 62, lines with b: 30
SparkContext Example - Python Program
Let us run the same example using a Python program. Create a Python file called firstapp.py and enter the following code in that file.
----------------------------------------firstapp.py---------------------------------------
from pyspark import SparkContext
logFile = "file:///home/hadoop/spark-2.1.0-bin-hadoop2.7/README.md"
sc = SparkContext("local", "first app")
logData = sc.textFile(logFile).cache()
numAs = logData.filter(lambda s: 'a' in s).count()
numBs = logData.filter(lambda s: 'b' in s).count()
print "Lines with a: %i, lines with b: %i" % (numAs, numBs)
----------------------------------------firstapp.py---------------------------------------
Then we will execute the following command in the terminal to run this Python file. We will get the same output as above.
$SPARK_HOME/bin/spark-submit firstapp.py
Output: Lines with a: 62, lines with b: 30
PySpark - RDD
Now that we have installed and configured PySpark on our system, we can program in Python on Apache Spark. However before doing so, let us understand a fundamental concept in Spark - RDD.
RDD stands for Resilient Distributed Dataset, these are the elements that run and operate on multiple nodes to do parallel processing on a cluster. RDDs are immutable elements, which means once you create an RDD you cannot change it. RDDs are fault tolerant as well, hence in case of any failure, they recover automatically. You can apply multiple operations on these RDDs to achieve a certain task.
To apply operations on these RDD's, there are two ways −
- Transformation and
- Action
Let us understand these two ways in detail.
Transformation − These are the operations, which are applied on a RDD to create a new RDD. Filter, groupBy and map are the examples of transformations.
Action − These are the operations that are applied on RDD, which instructs Spark to perform computation and send the result back to the driver.
To apply any operation in PySpark, we need to create a PySpark RDD first. The following code block has the detail of a PySpark RDD Class −
class pyspark.RDD (
   jrdd,
   ctx,
   jrdd_deserializer = AutoBatchedSerializer(PickleSerializer())
)
Let us see how to run a few basic operations using PySpark. The following code in a Python file creates RDD words, which stores a set of words mentioned.
words = sc.parallelize (
   ["scala",
   "java",
   "hadoop",
   "spark",
   "akka",
   "spark vs hadoop",
   "pyspark",
   "pyspark and spark"]
)
We will now run a few operations on words.
count()
Number of elements in the RDD is returned.
----------------------------------------count.py---------------------------------------
from pyspark import SparkContext
sc = SparkContext("local", "count app")
words = sc.parallelize (
   ["scala",
   "java",
   "hadoop",
   "spark",
   "akka",
   "spark vs hadoop",
   "pyspark",
   "pyspark and spark"]
)
counts = words.count()
print "Number of elements in RDD -> %i" % (counts)
----------------------------------------count.py---------------------------------------
Command − The command for count() is −
$SPARK_HOME/bin/spark-submit count.py
Output − The output for the above command is −
Number of elements in RDD → 8
collect()
All the elements in the RDD are returned.
----------------------------------------collect.py---------------------------------------
from pyspark import SparkContext
sc = SparkContext("local", "Collect app")
words = sc.parallelize (
   ["scala",
   "java",
   "hadoop",
   "spark",
   "akka",
   "spark vs hadoop",
   "pyspark",
   "pyspark and spark"]
)
coll = words.collect()
print "Elements in RDD -> %s" % (coll)
----------------------------------------collect.py---------------------------------------
Command − The command for collect() is −
$SPARK_HOME/bin/spark-submit collect.py
Output − The output for the above command is −
Elements in RDD -> [
   'scala',
   'java',
   'hadoop',
   'spark',
   'akka',
   'spark vs hadoop',
   'pyspark',
   'pyspark and spark'
]
foreach(f)
Returns only those elements which meet the condition of the function inside foreach. In the following example, we call a print function in foreach, which prints all the elements in the RDD.
----------------------------------------foreach.py---------------------------------------
from pyspark import SparkContext
sc = SparkContext("local", "ForEach app")
words = sc.parallelize (
   ["scala",
   "java",
   "hadoop",
   "spark",
   "akka",
   "spark vs hadoop",
   "pyspark",
   "pyspark and spark"]
)
def f(x): print(x)
fore = words.foreach(f)
----------------------------------------foreach.py---------------------------------------
Command − The command for foreach(f) is −
$SPARK_HOME/bin/spark-submit foreach.py
Output − The output for the above command is −
scala
java
hadoop
spark
akka
spark vs hadoop
pyspark
pyspark and spark
filter(f)
A new RDD is returned containing the elements, which satisfies the function inside the filter. In the following example, we filter out the strings containing ''spark".
----------------------------------------filter.py---------------------------------------
from pyspark import SparkContext
sc = SparkContext("local", "Filter app")
words = sc.parallelize (
   ["scala",
   "java",
   "hadoop",
   "spark",
   "akka",
   "spark vs hadoop",
   "pyspark",
   "pyspark and spark"]
)
words_filter = words.filter(lambda x: 'spark' in x)
filtered = words_filter.collect()
print "Fitered RDD -> %s" % (filtered)
----------------------------------------filter.py----------------------------------------
Command − The command for filter(f) is −
$SPARK_HOME/bin/spark-submit filter.py
Output − The output for the above command is −
Fitered RDD -> [
   'spark',
   'spark vs hadoop',
   'pyspark',
   'pyspark and spark'
]
map(f, preservesPartitioning = False)
A new RDD is returned by applying a function to each element in the RDD. In the following example, we form a key value pair and map every string with a value of 1.
----------------------------------------map.py---------------------------------------
from pyspark import SparkContext
sc = SparkContext("local", "Map app")
words = sc.parallelize (
   ["scala",
   "java",
   "hadoop",
   "spark",
   "akka",
   "spark vs hadoop",
   "pyspark",
   "pyspark and spark"]
)
words_map = words.map(lambda x: (x, 1))
mapping = words_map.collect()
print "Key value pair -> %s" % (mapping)
----------------------------------------map.py---------------------------------------
Command − The command for map(f, preservesPartitioning=False) is −
$SPARK_HOME/bin/spark-submit map.py
Output − The output of the above command is −
Key value pair -> [
   ('scala', 1),
   ('java', 1),
   ('hadoop', 1),
   ('spark', 1),
   ('akka', 1),
   ('spark vs hadoop', 1),
   ('pyspark', 1),
   ('pyspark and spark', 1)
]
reduce(f)
After performing the specified commutative and associative binary operation, the element in the RDD is returned. In the following example, we are importing add package from the operator and applying it on num to carry out a simple addition operation.
----------------------------------------reduce.py---------------------------------------
from pyspark import SparkContext
from operator import add
sc = SparkContext("local", "Reduce app")
nums = sc.parallelize([1, 2, 3, 4, 5])
adding = nums.reduce(add)
print "Adding all the elements -> %i" % (adding)
----------------------------------------reduce.py---------------------------------------
Command − The command for reduce(f) is −
$SPARK_HOME/bin/spark-submit reduce.py
Output − The output of the above command is −
Adding all the elements -> 15
join(other, numPartitions = None)
It returns RDD with a pair of elements with the matching keys and all the values for that particular key. In the following example, there are two pair of elements in two different RDDs. After joining these two RDDs, we get an RDD with elements having matching keys and their values.
----------------------------------------join.py---------------------------------------
from pyspark import SparkContext
sc = SparkContext("local", "Join app")
x = sc.parallelize([("spark", 1), ("hadoop", 4)])
y = sc.parallelize([("spark", 2), ("hadoop", 5)])
joined = x.join(y)
final = joined.collect()
print "Join RDD -> %s" % (final)
----------------------------------------join.py---------------------------------------
Command − The command for join(other, numPartitions = None) is −
$SPARK_HOME/bin/spark-submit join.py
Output − The output for the above command is −
Join RDD -> [
   ('spark', (1, 2)),
   ('hadoop', (4, 5))
]
cache()
Persist this RDD with the default storage level (MEMORY_ONLY). You can also check if the RDD is cached or not.
----------------------------------------cache.py---------------------------------------
from pyspark import SparkContext
sc = SparkContext("local", "Cache app")
words = sc.parallelize (
   ["scala",
   "java",
   "hadoop",
   "spark",
   "akka",
   "spark vs hadoop",
   "pyspark",
   "pyspark and spark"]
)
words.cache()
caching = words.persist().is_cached
print "Words got chached > %s" % (caching)
----------------------------------------cache.py---------------------------------------
Command − The command for cache() is −
$SPARK_HOME/bin/spark-submit cache.py
Output − The output for the above program is −
Words got cached -> True
These were some of the most important operations that are done on PySpark RDD.
PySpark - Broadcast & Accumulator
For parallel processing, Apache Spark uses shared variables. A copy of shared variable goes on each node of the cluster when the driver sends a task to the executor on the cluster, so that it can be used for performing tasks.
There are two types of shared variables supported by Apache Spark −
- Broadcast
- Accumulator
Let us understand them in detail.
Broadcast
Broadcast variables are used to save the copy of data across all nodes. This variable is cached on all the machines and not sent on machines with tasks. The following code block has the details of a Broadcast class for PySpark.
class pyspark.Broadcast (
   sc = None,
   value = None,
   pickle_registry = None,
   path = None
)
The following example shows how to use a Broadcast variable. A Broadcast variable has an attribute called value, which stores the data and is used to return a broadcasted value.
----------------------------------------broadcast.py--------------------------------------
from pyspark import SparkContext
sc = SparkContext("local", "Broadcast app")
words_new = sc.broadcast(["scala", "java", "hadoop", "spark", "akka"])
data = words_new.value
print "Stored data -> %s" % (data)
elem = words_new.value[2]
print "Printing a particular element in RDD -> %s" % (elem)
----------------------------------------broadcast.py--------------------------------------
Command − The command for a broadcast variable is as follows −
$SPARK_HOME/bin/spark-submit broadcast.py
Output − The output for the following command is given below.
Stored data -> [
   'scala',
   'java',
   'hadoop',
   'spark',
   'akka'
]
Printing a particular element in RDD -> hadoop
Accumulator
Accumulator variables are used for aggregating the information through associative and commutative operations. For example, you can use an accumulator for a sum operation or counters (in MapReduce). The following code block has the details of an Accumulator class for PySpark.
class pyspark.Accumulator(aid, value, accum_param)
The following example shows how to use an Accumulator variable. An Accumulator variable has an attribute called value that is similar to what a broadcast variable has. It stores the data and is used to return the accumulator's value, but usable only in a driver program.
In this example, an accumulator variable is used by multiple workers and returns an accumulated value.
----------------------------------------accumulator.py------------------------------------
from pyspark import SparkContext
sc = SparkContext("local", "Accumulator app")
num = sc.accumulator(10)
def f(x):
   global num
   num+=x
rdd = sc.parallelize([20,30,40,50])
rdd.foreach(f)
final = num.value
print "Accumulated value is -> %i" % (final)
----------------------------------------accumulator.py------------------------------------
Command − The command for an accumulator variable is as follows −
$SPARK_HOME/bin/spark-submit accumulator.py
Output − The output for the above command is given below.
Accumulated value is -> 150
PySpark - SparkConf
To run a Spark application on the local/cluster, you need to set a few configurations and parameters, this is what SparkConf helps with. It provides configurations to run a Spark application. The following code block has the details of a SparkConf class for PySpark.
class pyspark.SparkConf (
   loadDefaults = True,
   _jvm = None,
   _jconf = None
)
Initially, we will create a SparkConf object with SparkConf(), which will load the values from spark.* Java system properties as well. Now you can set different parameters using the SparkConf object and their parameters will take priority over the system properties.
In a SparkConf class, there are setter methods, which support chaining. For example, you can write conf.setAppName(PySpark App).setMaster(local). Once we pass a SparkConf object to Apache Spark, it cannot be modified by any user.
Following are some of the most commonly used attributes of SparkConf −
set(key, value) − To set a configuration property.
setMaster(value) − To set the master URL.
setAppName(value) − To set an application name.
get(key, defaultValue=None) − To get a configuration value of a key.
setSparkHome(value) − To set Spark installation path on worker nodes.
Let us consider the following example of using SparkConf in a PySpark program. In this example, we are setting the spark application name as PySpark App and setting the master URL for a spark application to → spark://master:7077.
The following code block has the lines, when they get added in the Python file, it sets the basic configurations for running a PySpark application.
---------------------------------------------------------------------------------------
from pyspark import SparkConf, SparkContext
conf = SparkConf().setAppName("PySpark App").setMaster("spark://master:7077")
sc = SparkContext(conf=conf)
---------------------------------------------------------------------------------------
PySpark - SparkFiles
In Apache Spark, you can upload your files using sc.addFile (sc is your default SparkContext) and get the path on a worker using SparkFiles.get. Thus, SparkFiles resolve the paths to files added through SparkContext.addFile().
SparkFiles contain the following classmethods −
- get(filename)
- getrootdirectory()
Let us understand them in detail.
get(filename)
It specifies the path of the file that is added through SparkContext.addFile().
getrootdirectory()
It specifies the path to the root directory, which contains the file that is added through the SparkContext.addFile().
----------------------------------------sparkfile.py------------------------------------
from pyspark import SparkContext
from pyspark import SparkFiles
finddistance = "/home/hadoop/examples_pyspark/finddistance.R"
finddistancename = "finddistance.R"
sc = SparkContext("local", "SparkFile App")
sc.addFile(finddistance)
print "Absolute Path -> %s" % SparkFiles.get(finddistancename)
----------------------------------------sparkfile.py------------------------------------
Command − The command is as follows −
$SPARK_HOME/bin/spark-submit sparkfiles.py
Output − The output for the above command is −
Absolute Path ->
   /tmp/spark-f1170149-af01-4620-9805-f61c85fecee4/userFiles-641dfd0f-240b-4264-a650-4e06e7a57839/finddistance.R
PySpark - StorageLevel
StorageLevel decides how RDD should be stored. In Apache Spark, StorageLevel decides whether RDD should be stored in the memory or should it be stored over the disk, or both. It also decides whether to serialize RDD and whether to replicate RDD partitions.
The following code block has the class definition of a StorageLevel −
class pyspark.StorageLevel(useDisk, useMemory, useOffHeap, deserialized, replication = 1)
Now, to decide the storage of RDD, there are different storage levels, which are given below −
DISK_ONLY = StorageLevel(True, False, False, False, 1)
DISK_ONLY_2 = StorageLevel(True, False, False, False, 2)
MEMORY_AND_DISK = StorageLevel(True, True, False, False, 1)
MEMORY_AND_DISK_2 = StorageLevel(True, True, False, False, 2)
MEMORY_AND_DISK_SER = StorageLevel(True, True, False, False, 1)
MEMORY_AND_DISK_SER_2 = StorageLevel(True, True, False, False, 2)
MEMORY_ONLY = StorageLevel(False, True, False, False, 1)
MEMORY_ONLY_2 = StorageLevel(False, True, False, False, 2)
MEMORY_ONLY_SER = StorageLevel(False, True, False, False, 1)
MEMORY_ONLY_SER_2 = StorageLevel(False, True, False, False, 2)
OFF_HEAP = StorageLevel(True, True, True, False, 1)
Let us consider the following example of StorageLevel, where we use the storage level MEMORY_AND_DISK_2, which means RDD partitions will have replication of 2.
------------------------------------storagelevel.py-------------------------------------
from pyspark import SparkContext
import pyspark
sc = SparkContext (
   "local",
   "storagelevel app"
)
rdd1 = sc.parallelize([1,2])
rdd1.persist( pyspark.StorageLevel.MEMORY_AND_DISK_2 )
rdd1.getStorageLevel()
print(rdd1.getStorageLevel())
------------------------------------storagelevel.py-------------------------------------
Command − The command is as follows −
$SPARK_HOME/bin/spark-submit storagelevel.py
Output − The output for the above command is given below −
Disk Memory Serialized 2x Replicated
PySpark - MLlib
Apache Spark offers a Machine Learning API called MLlib. PySpark has this machine learning API in Python as well. It supports different kind of algorithms, which are mentioned below −
mllib.classification − The spark.mllib package supports various methods for binary classification, multiclass classification and regression analysis. Some of the most popular algorithms in classification are Random Forest, Naive Bayes, Decision Tree, etc.
mllib.clustering − Clustering is an unsupervised learning problem, whereby you aim to group subsets of entities with one another based on some notion of similarity.
mllib.fpm − Frequent pattern matching is mining frequent items, itemsets, subsequences or other substructures that are usually among the first steps to analyze a large-scale dataset. This has been an active research topic in data mining for years.
mllib.linalg − MLlib utilities for linear algebra.
mllib.recommendation − Collaborative filtering is commonly used for recommender systems. These techniques aim to fill in the missing entries of a user item association matrix.
spark.mllib − It currently supports model-based collaborative filtering, in which users and products are described by a small set of latent factors that can be used to predict missing entries. spark.mllib uses the Alternating Least Squares (ALS) algorithm to learn these latent factors.
mllib.regression − Linear regression belongs to the family of regression algorithms. The goal of regression is to find relationships and dependencies between variables. The interface for working with linear regression models and model summaries is similar to the logistic regression case.
There are other algorithms, classes and functions also as a part of the mllib package. As of now, let us understand a demonstration on pyspark.mllib.
The following example is of collaborative filtering using ALS algorithm to build the recommendation model and evaluate it on training data.
Dataset used − test.data
1,1,5.0
1,2,1.0
1,3,5.0
1,4,1.0
2,1,5.0
2,2,1.0
2,3,5.0
2,4,1.0
3,1,1.0
3,2,5.0
3,3,1.0
3,4,5.0
4,1,1.0
4,2,5.0
4,3,1.0
4,4,5.0
--------------------------------------recommend.py----------------------------------------
from __future__ import print_function
from pyspark import SparkContext
from pyspark.mllib.recommendation import ALS, MatrixFactorizationModel, Rating
if __name__ == "__main__":
   sc = SparkContext(appName="Pspark mllib Example")
   data = sc.textFile("test.data")
   ratings = data.map(lambda l: l.split(','))\
      .map(lambda l: Rating(int(l[0]), int(l[1]), float(l[2])))

   # Build the recommendation model using Alternating Least Squares
   rank = 10
   numIterations = 10
   model = ALS.train(ratings, rank, numIterations)

   # Evaluate the model on training data
   testdata = ratings.map(lambda p: (p[0], p[1]))
   predictions = model.predictAll(testdata).map(lambda r: ((r[0], r[1]), r[2]))
   ratesAndPreds = ratings.map(lambda r: ((r[0], r[1]), r[2])).join(predictions)
   MSE = ratesAndPreds.map(lambda r: (r[1][0] - r[1][1])**2).mean()
   print("Mean Squared Error = " + str(MSE))

   # Save and load model
   model.save(sc, "target/tmp/myCollaborativeFilter")
   sameModel = MatrixFactorizationModel.load(sc, "target/tmp/myCollaborativeFilter")
--------------------------------------recommend.py----------------------------------------
Command − The command will be as follows −
$SPARK_HOME/bin/spark-submit recommend.py
Output − The output of the above command will be −
Mean Squared Error = 1.20536041839e-05
PySpark - Serializers
Serialization is used for performance tuning on Apache Spark. All data that is sent over the network or written to the disk or persisted in the memory should be serialized. Serialization plays an important role in costly operations.
PySpark supports custom serializers for performance tuning. The following two serializers are supported by PySpark −
MarshalSerializer
Serializes objects using Pythons Marshal Serializer. This serializer is faster than PickleSerializer, but supports fewer datatypes.
class pyspark.MarshalSerializer
PickleSerializer
Serializes objects using Pythons Pickle Serializer. This serializer supports nearly any Python object, but may not be as fast as more specialized serializers.
class pyspark.PickleSerializer
Let us see an example on PySpark serialization. Here, we serialize the data using MarshalSerializer.
--------------------------------------serializing.py-------------------------------------
from pyspark.context import SparkContext
from pyspark.serializers import MarshalSerializer
sc = SparkContext("local", "serialization app", serializer = MarshalSerializer())
print(sc.parallelize(list(range(1000))).map(lambda x: 2 * x).take(10))
sc.stop()
--------------------------------------serializing.py-------------------------------------
Command − The command is as follows −
$SPARK_HOME/bin/spark-submit serializing.py
Output − The output of the above command is −
[0, 2, 4, 6, 8, 10, 12, 14, 16, 18]