- Nagios - Home
- Nagios - Overview
- Nagios - Architecture
- Nagios - Products
- Nagios - Installation
- Nagios - Configuration
- Nagios - Features
- Nagios - Applications
- Nagios - Hosts and Services
- Nagios - Commands
- Nagios - Checks and States
- Nagios - Ports and Protocols
- Nagios - Add-ons/Plugins
- Nagios - NRPE
- Nagios - V Shell
- Nagios - Case Study
- Nagios Useful Resources
- Nagios - Quick Guide
- Nagios - Useful Resources
- Nagios - Discussion
Nagios - Installation
In this chapter, the steps to setup Nagios on Ubuntu are discussed in detail.
Before you install Nagios, some packages such as Apache, PHP, building packages etc., are required to be present on your Ubuntu system. Hence, let us install them first.
Step 1 − Run the following command to install pre-required packages −
sudo apt-get install wget build-essential apache2 php apache2-mod-php7.0 php-gd
libgd-dev sendmail unzip
Step 2 − Next, create user and group for Nagios and add them to Apache www-data user.
sudo useradd nagios
sudo groupadd nagcmd
sudo usermod -a -G nagcmd nagios
sudo usermod -a -G nagios,nagcmd www-data
Step 3 − Download the latest Nagios package.
wget https://assets.nagios.com/downloads/nagioscore/releases/nagios-
4.4.3.tar.gz
Step 4 − Extract the tarball file.
tar -xzf nagios-4.4.3.tar.gz
cd nagios-4.4.3/
Step 5 − Run the following command to compile Nagios from source.
./configure --with-nagios-group=nagios --with-command-group=nagcmd
Step 6 − Run the following command to build Nagios files.
make all
Step 7 − Run the command shown below to install all the Nagios files.
sudo make install
Step 8 − Run the following commands to install init and external command configuration files.
sudo make install-commandmode
sudo make install-init
sudo make install-config
sudo /usr/bin/install -c -m 644 sample-config/httpd.conf /etc/apache2/sitesavailable/
nagios.conf
Step 9 − Now copy the event handler directory to Nagios directory.
sudo cp -R contrib/eventhandlers/ /usr/local/nagios/libexec/
sudo chown -R nagios:nagios /usr/local/nagios/libexec/eventhandlers
Step 10 − Download and extract Nagios plugins.
cd
wget https://nagios-plugins.org/download/nagiosplugins-
2.2.1.tar.gz
tar -xzf nagios-plugins*.tar.gz
cd nagios-plugins-2.2.1/
Step 11 − Install Nagios plugins using the below command.
./configure --with-nagios-user=nagios --with-nagios-group=nagios --with-openssl
make
sudo make install
Step 12 − Now edit the Nagios configuration file and uncomment line number 51 → cfg_dir=/usr/local/nagios/etc/servers
sudo gedit /usr/local/nagios/etc/nagios.cfg
Step 13 − Now, create a server directory.
sudo mkdir -p /usr/local/nagios/etc/servers
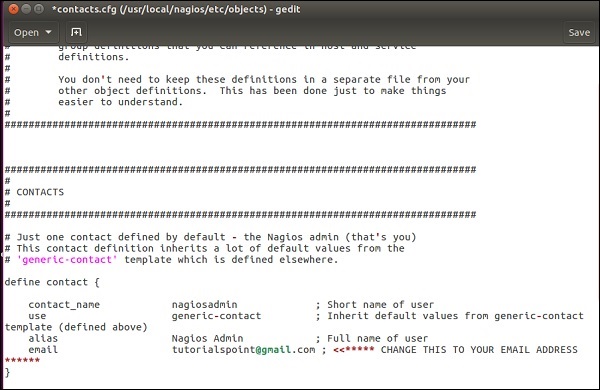
Step 14 − Edit contacts configuration file.
sudo gedit /usr/local/nagios/etc/objects/contacts.cfg
Step 15 − Now enable the Apache modules and configure a user nagiosadmin.
sudo a2enmod rewrite
sudo a2enmod cgi
sudo htpasswd -c /usr/local/nagios/etc/htpasswd.users nagiosadmin
sudo ln -s /etc/apache2/sites-available/nagios.conf /etc/apache2/sites-enabled/
Step 16 − Now, restart Apache and Nagios.
service apache2 restart
service nagios start
cd /etc/init.d/
sudo cp /etc/init.d/skeleton /etc/init.d/Nagios
Step 17 − Edit the Nagios file.
sudo gedit /etc/init.d/Nagios
DESC = "Nagios"
NAME = nagios
DAEMON = /usr/local/nagios/bin/$NAME
DAEMON_ARGS = "-d /usr/local/nagios/etc/nagios.cfg"
PIDFILE = /usr/local/nagios/var/$NAME.lock
Step 18 − Make the Nagios file executable and start Nagios.
sudo chmod +x /etc/init.d/nagios
service apache2 restart
service nagios start
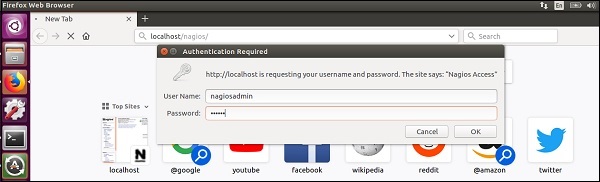
Step 19 − Now go to your browser and open url → http://localhost/nagios. Now login to Nagios with username nagiosadmin and use the password which you had set earlier. The login screen of Nagios is as shown in the screenshot given below −
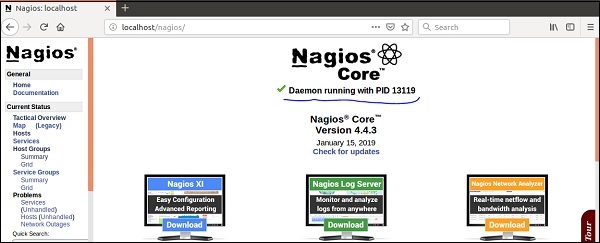
If you have followed all the steps correctly, you Nagios web interface will show up. You can find the Nagios dashboard as shown below −