- Microsoft Flow - Home
- Microsoft Flow - Introduction
- Microsoft Flow - Getting Started
- Microsoft Flow - Creating a Flow from Blank
- Microsoft Flow - Creating a Flow from Template
- Microsoft Flow - Mobile
- Microsoft Flow - Flow Management
- Microsoft Flow - Conclusion
- Microsoft Flow Useful Resources
- Microsoft Flow - Quick Guide
- Microsoft Flow - Useful Resources
- Microsoft Flow - Discussion
Microsoft Flow - Quick Guide
Microsoft Flow - Introduction
Todays world is full of collaboration. More often than not, people find themselves working together alongside certain policies or processes. Quality work needs a good hand-holding as well as hand-offs! This is why many organizations and governments have different steps to accomplish a particular operation or activity.
Background of Workflows
If we look at Wikipedias definition of workflow −
A workflow consists of an orchestrated and repeatable pattern of activity, enabled by the systematic organization of resources into processes that transform materials, provide services, or process information.
Simply put, workflows are the way people get work done, consisting of steps that require completion in a sequential way. With the exception of first step, each step in the workflow has a specific step before and after it.
Sometimes it is best to look at an example than to get immersed into concepts. For coming across this article, you must have done a few steps
- Open your default browser
- Search for Microsoft Flow
- Click on this article from TutorialsPoint
This is the way you have (knowing or unknowingly) created a workflow to reach the article. Let us take another example of applying for a leave at your organization.
- Employee sends a leave request.
- Employees manager approves the leave request and updates the HR department.
- HR department updates the leave data and informs the finance department.
- After written instructions from HR department, finance department deducts leave balance and pay from paycheck (if applicable).
In this way, workflows are all around us. The rapid advancements in technology have made it immensely important to define and follow certain workflows for an efficient operation of the respective function or department.
While one may argue that the workflows existed since ancient times, the scope of this tutorial is broad in the sense of different workflows that we use to accomplish our day-to-day activities using software. Many times you will find yourself juggling between different software to accomplish a simple task of paying the bills and maintaining an expense sheet for it.
Need of Automating Workflows
According to a research, inefficient workflows can cost up to 30% of your companys revenue.
It makes sense to automate some of the processes.
Programming a process to run on its own eliminates the need for a human operator, saving company time, money and frustration.
Let us consider an example of leave request from previous section. We said that the employee will request for a leave from manager. He/she will use the email software on his computer. The manager, once approved, will send the leave update to HR department. There will be a HR Management Software (HRMS) to update the leave data on the fly.
Finance department, once it gets updates from HR department, will update their accounting software so that the consolidated data will be sent to the banking software if there are any deductions in the monthly paycheck.
With a simple workflow as Leave request, we can see at least 3 software in picture. Imagine an employee count in the likes of 1000. How cumbersome it will be to manage this workflow on a day-to-day basis? In such cases, it makes sense to automate certain workflows which will be numerously repetitive in nature!
At an organization, almost every department can benefit from workflow automation. Let us consider a couple of examples.
Marketing
Certain repetitive tasks such as sending emails, posting messages on social media can get automated with workflow automation. Your entire social media calendar can get scheduled using some automation software.
Human Resources
Further to the example discussed above, instead of having to enter new hires information manually, addresses, employees tax details can be automatically fed to the respective inputs by using HR automation workflows.
Consider if youre working late from home due to a meeting and you know that in advance using your Microsoft Outlook calendar, how efficient will it be, if your colleagues will get to know via email that youll be leaving early to take care of it? And this too, without you doing any manual email sending activity whatsoever!
Possibilities with Microsoft Flow
One of the newest editions to Microsoft Business Suite, Microsoft Flow is a versatile tool which can be used to integrate various cloud based apps and services. Say goodbye to those repetitive and time-consuming business tasks -- without the requirement of being a techie or developer!
Using Microsoft flow, one can take the processes that use one or several applications and create automated workflows. It is an online service that allows you to connect various apps and services. There are some Microsoft apps and services as well as some non-Microsoft services.
If you have data being shared between applications, instead of entering it twice, you can automate it with Microsoft Flow.
Consider a very real scenario where you are a brand/celebrity on Facebook or twitter. Imagine that there is a negative post which is going viral. You can very easily respond to these negative posts and manage perception on social media using a template flow.
If you are the user of two different services like Outlook Calendar and Gmail Calendar, you can use Microsoft Flow to add in your Outlook calendar events to your Gmail calendar.
In these ways, Microsoft Flow improves efficiency and productivity to the fullest.
Microsoft Flow - Getting Started
This chapter will get you started with Microsoft Flow by illustrating basic steps required to log into Microsoft Flow and then will provide a walkthrough in the interface. Concluding part will provide an insight into the types of flows.
Logging in to Microsoft Flow
Whether you are Microsoft Business Suite (Office 365, etc.) user or not, Microsoft Flow will be available to you once you have a Microsoft account. So, before diving into the next steps, please make sure that you have a valid Microsoft account.
To start with enter https://login.microsoftonline.com/organizations/oauth2/v2.0 in your browser address bar. You will be able to see below screen.
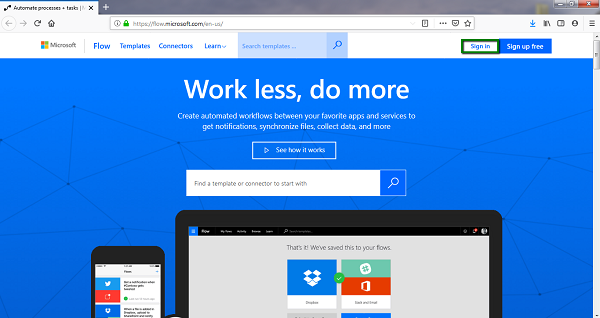
As highlighted in green rectangle in the above picture, click Sign In to continue. Below screen will be displayed.
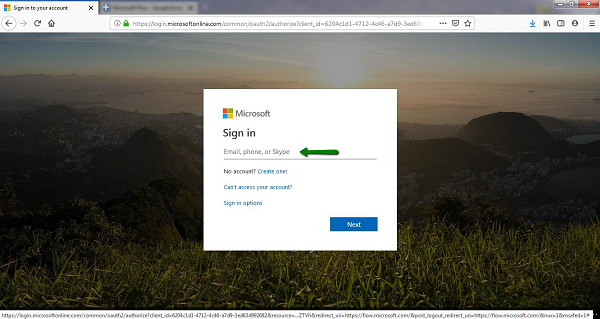
In the text area, enter your Microsoft email address and password to log in to Microsoft Flow.
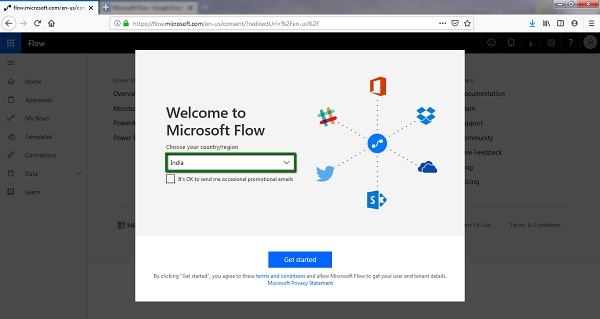
Below screen will be displayed welcoming you to Microsoft Flow. Select your country/region and click Get Started.
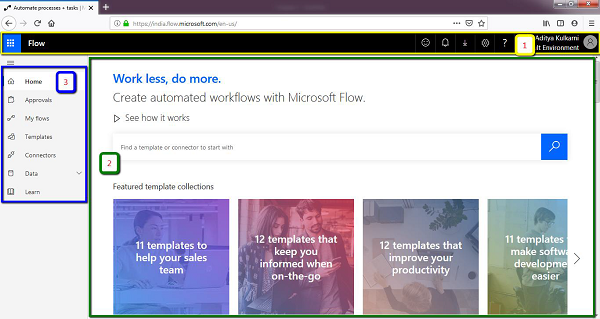
After taking few seconds, Microsoft Flow interface will be shown as below.

Let us look at the interface of Microsoft Flow.
Walkthrough in the interface
When you log in to Microsoft Flow, the interface is divided into three sections −
- Top panel
- Page body
- Navigation panel
Refer to the below screenshot for the specific layout.
Top panel
The top panel consists of controls to provide notifications related to any flow, modify the settings related to the flows or connections you have created, a form to submit your feedback to Microsoft Flow and finally shortcut to the other Microsoft applications.
Page Body
Based on the option youve selected from the left navigation panel, page body will show up relevant features/content.
For instance, now that youre logged in and viewing the Home page, the page body area will be showing ideas to create your own flow, available template flows and links to Flow mobile apps on Android, iOS and Microsoft app stores.
Navigation Panel
While we will dig deep into them separately, navigation panel is present to the left side of the screen to enable switching over from one particular screen to the other. For instance, if you wish to review available flows before you create your own -- you can switch from My Flows to Templates.
In the navigation panel, you will be able to see below options −
- Home
- Approvals*
- My flows
- Templates
- Connectors
- Data
- Entities*
- Connections
- Custom Connectors*
- Gateways*
- Learn
*(available only for Microsoft work or school accounts)
What is the difference between Microsoft work (or school) accounts and Personal accounts?
When it comes to enterprise organizations, it makes sense to subscribe for a bouquet of services than to create individual accounts.
At Microsoft, there are two types of accounts −
- Personal -- which you might have created so that you can get started with Microsoft Flow
- Work or school -- provided to the organizations or schools with 20 or more individuals. These accounts come with a plethora of other data intensive services like Microsoft PowerApps, PowerBI, etc.
Home
In the following section, we will discuss about features of Home menu.
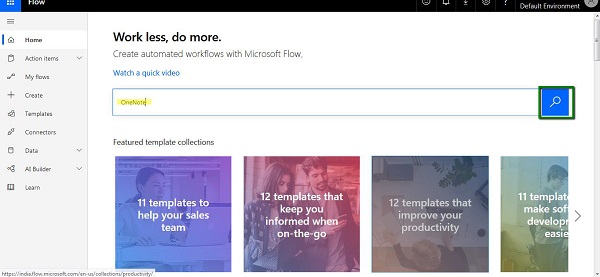
Search bar
In the Home section, you will find the features ready to get you started with Microsoft Flow. For example, there is a search section where you can find the required template or connector to start your flow.
Try typing the following text in the search bar and click the magnifier button in blue.
OneNote
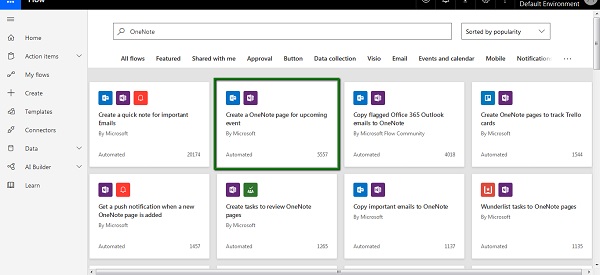
This will show below search result −
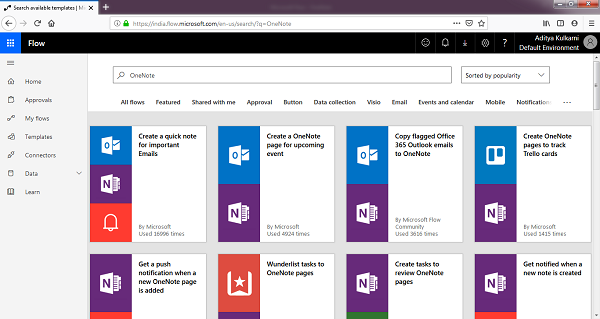
As it is evident, the search result presented you with all the template flows available for your use.
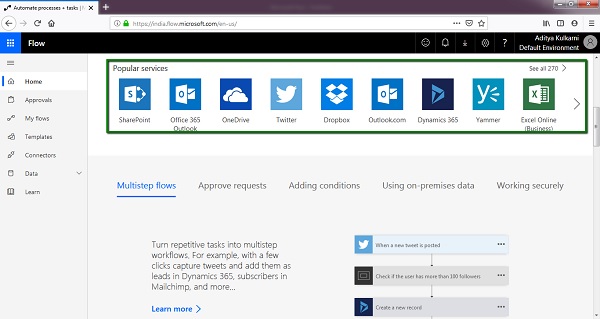
Go back to the Home section, by using the navigation panel on the left.
As you scroll down, you will find popular services that you can use in your flows.
My Flows
This section is available to keep track of all your created, completed and draft flows. Suppose you start working on a particular flow, and you want to complete it at a later stage, you can use this section.
Also, if youd like to look at examples from the flows you created earlier, this section will prove very handy.
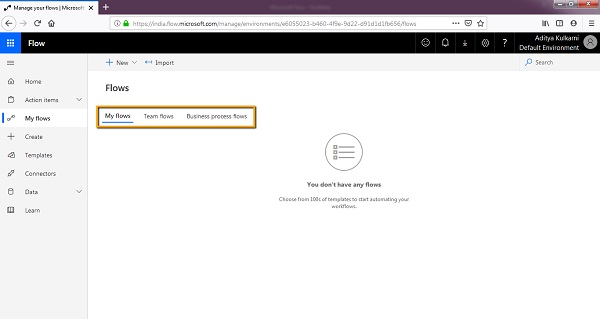
The My Flows section is sub-divided into three screens.
- My Flows
- Team Flows*
- Business Process Flows*
*(available only for Microsoft work or school accounts)

As highlighted, you can browse through all the tabs and reach the desired/required flow for revision or reuse.
The screen shown above mentions that You dont have any flows. This is because there is no flow created with our account.
As we progress and create flows during this tutorial, this section will be our frequently visited section.
Templates
Templates section is the one place for all kinds of flow. If youre looking for an inspiration or a ready to go flow, you can start with Templates section.
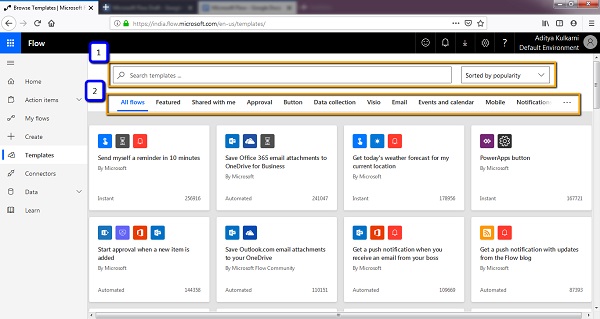
The screen above gives a glimpse at Template section. We were able to see some templates available at the home screen as well, if youd like to discover more, you can come to Templates section and get started!
As highlighted, the screen has two controls −
- Search templates feature
- Templates arranged in a tabbed structure
Search templates feature
The search functionality works like any other search feature, additionally, you can sort the search results by
- Popularity
- Name
- Published time
Templates in tabbed structure
The tabs are organized according to the application of flow. Flows are available to set the reminder or get a notification on your desktop whenever you receive an email. If youd like to do the flows related to the Emails, you can directly go Email tab and check out the available flows.
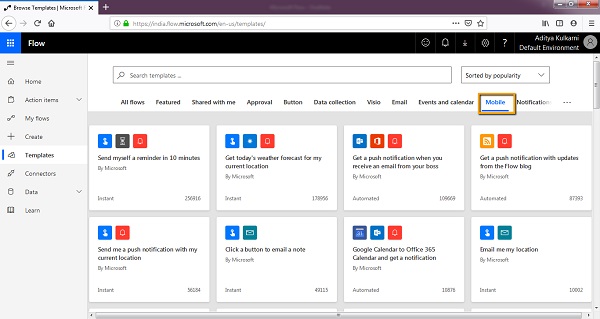
For instance, if you select Mobile, you will see below results.
Connectors
Connectors are nothing but services which you can use with Microsoft Flow. There are around 220 services (and counting), which can be seen under this section.
Connectors form the core of Microsoft Flow.
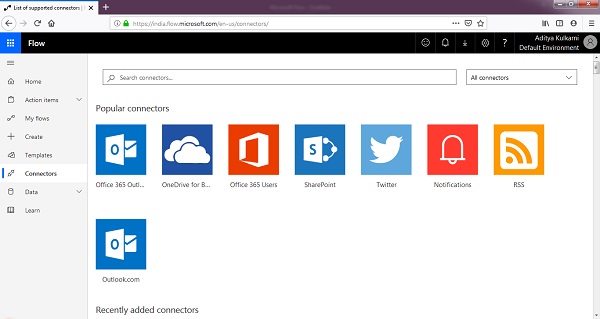
As shown above some popular connectors include −
- SharePoint
- Office 365
- Outlook.com
If you scroll down you can see all the connectors with Microsoft Flow. Primarily, there are below connector types in Microsoft Flow as shown below −
- Standard Connectors
- Premium Connectors
- Custom Connectors
Standard Connectors
You can look at Standard Connectors as services which are available to use out-of-the-box. The list will include services right from Microsoft Excel (a spreadsheet software) to Todoist (a task management application).
In short, Standard connectors come with their pre-defined capabilities of extracting data from the respective services.
Premium Connectors
Premium connectors are usually the paid/business tools, which may or may not be sufficient for personal use. These connectors require work or school account. One example could be Eventbrite, where you get to post events in your area and invite people to it.
If youd like to extract data from Eventbrite event, then it needs a connection with an organization level account.
Custom Connectors
Custom connectors exist to provide the most flexibility and power to the Microsoft Flow user. Consider that there are Application Programming Interfaces (APIs) available from a particular service or application, which youd like to utilize. The Custom Connectors will provide a connection to these APIs from Microsoft Flow.
For the scope of this tutorial, we will look at Standard Connectors only.
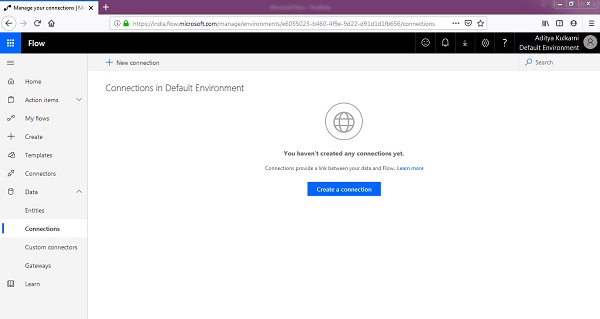
Data Connections
If you are creating connectors which involve fetching/updating records from a data-intensive application/services, then the connections made to these application/services will be shown up under this section.
The connections will be used if you are using Powerapps.com majorly in your applications. One good example will be updating SQL table from application. In such scenario, the connection will be updated/shown in the section.
Learn
When you click Learn, youll be redirected to Microsofts official documentation of Microsoft Flow.
Types of Flows
There are different types of flow, they can be manual or automatic −
- Automated
- Instant
- Scheduled
Automated Flow
This flow is in a way dependent on another trigger or action. So, when that particular event occurs, this flow starts. It could be a date change or receiving an email.
Instant Flow
Microsoft Flow provides a button or input from Microsoft PowerApps to trigger a specific flow. These are categorized as Instant Flows.
Scheduled Flow
As per the time and date youve set, this flow is triggered. This can be a recurring flow as well.
Microsoft Flow - Creating a Flow from Blank
This chapter will take you through the basic elements of a flow and hence make you comfortable with creating a flow.
Before we get started into the elements on Flow, make sure you have logged in and looking at My Flows section.
Click New button at the top, you will be presented with the below options.
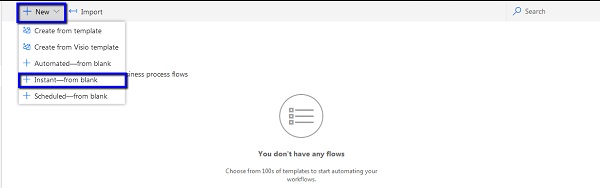
Click Instant - from blank, below screen/wizard will be shown up where you will get to see different Triggers.
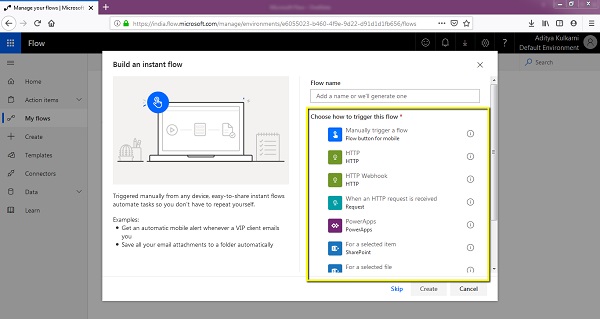
Trigger
In Microsoft Flow, a Trigger acts as a starting point for the flow to be built. This is the step where you specify the action which will initiate the flow. It could be selecting a file from a SharePoint list or as simple as clicking a button in Web and mobile.
For the purpose of this tutorial, let us name our Flow as My First Flow. Select Manually trigger a flow from the choices of triggering this flow.
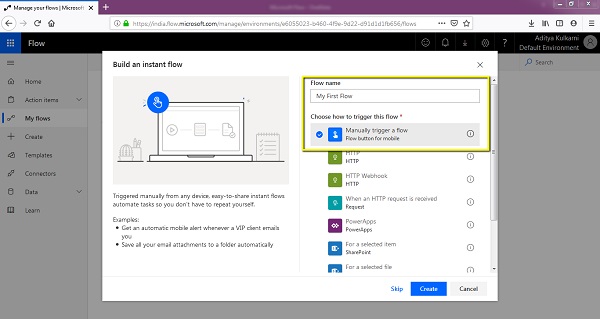
Click Create to move to the next step. You will be able to see below screen.
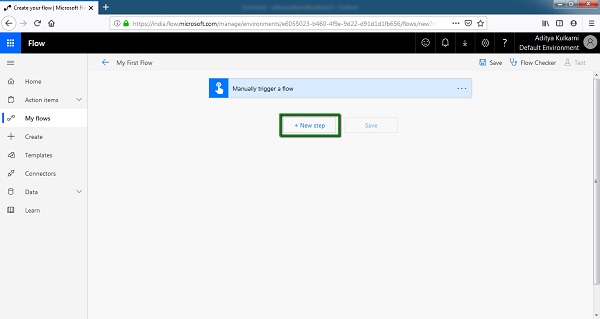
As highlighted above, now we will be adding a step. This step will be the Action as a result of Trigger we created above. When clicked on New Step button, youll be able to see below section.
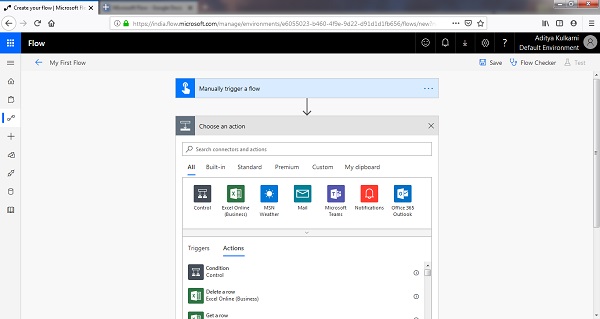
One can easily select an action from the above list. In the proceeding chapters, we will get into the actual details of an Action.
As you can see, there are various categories of Actions −
- Built-in
- Standard
- Premium
- Custom
As required, you can select one from the actions above. You can take some time to understand each tab and respective options.
Steps
A collection of actions makes for the Steps.
For instance, when selected Send Email under Gmail from Actions, one can see Gmail action as shown below.
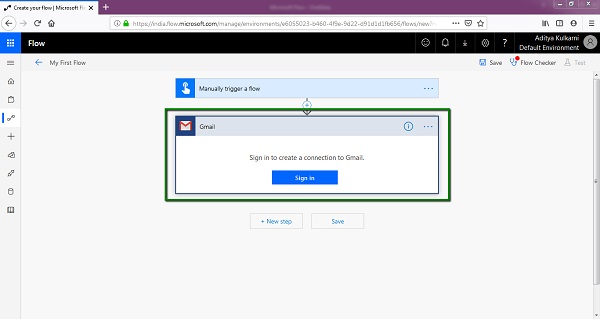
If you keep on adding multiple actions under this particular action, you will then have created Steps for your flow.
Let us add our Gmail address and get the connection established. After you have signed up with your Gmail account and provided necessary permissions, you should see below screen.
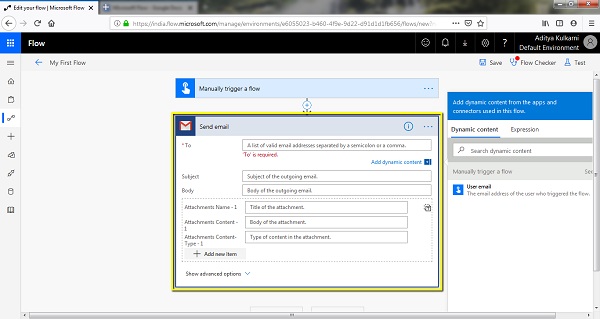
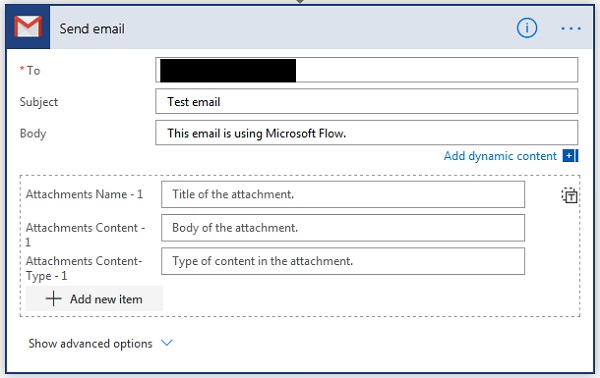
In the highlighted section above, we will add some details. I am going to send an email to myself with below subject and Email body.
Subject − Test Email
Body − This email is using Microsoft Flow.
Let us ignore the attachment part for now.
Click Save button to capture your progress till now.
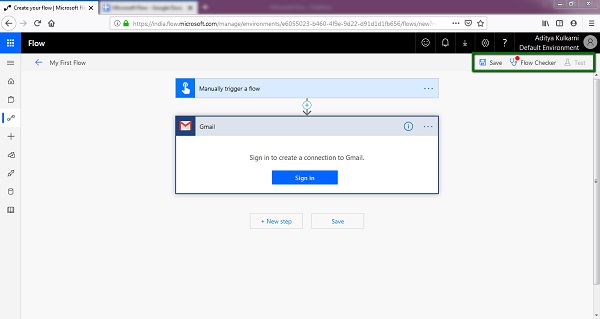
Testing a Flow
If you observe the interface after you have added the trigger (and not signed in to Gmail), you will be able to see three buttons at the top right section of screen.
The Flow Checker will get activated at the appropriate times. This is useful when checking whether your flow is accurate or not. If you click on the Flow Checker in above state, you will be able to see below screen −
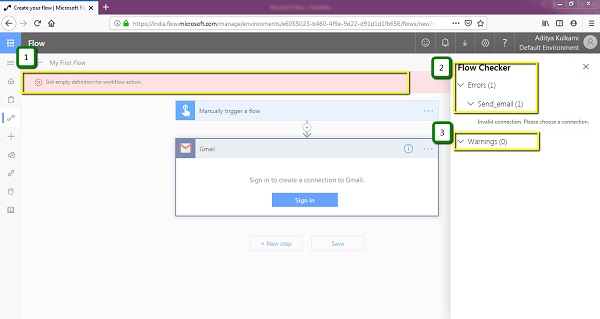
- If you look at the instruction indicated by point 1, it says Got empty definition for workflow action.
- While these statements are best comprehended by a Power User of Microsoft Flow, some of the messages can be understood by a normal/beginner user as well.
- Necessarily, Flow Checker communicates what is missing in your flow created.
- In our case, we didnt Sign In to Gmail account, so that is being raised as an Error.
- At the right side of the screen, you can see the Send_email error under the Errors section.
- In this way, we can check the errors in our flow and hence test our Flow even before running it.
Test button
- Click the test button to see how the Flow executes.
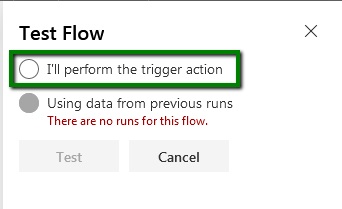
- When you click on the Test button, a hover will appear from the right side of screen.
- Select I will perform the trigger action button and Click Test.
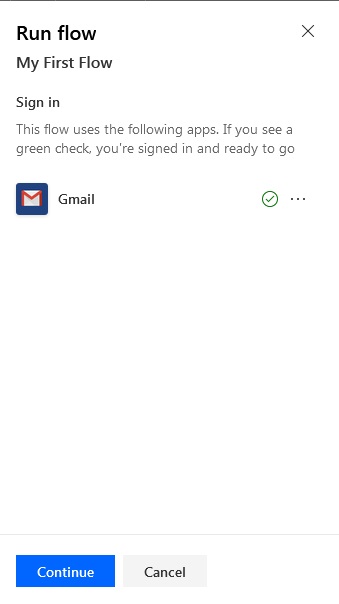
- You will be presented with the above screen talking about the status of the apps in use. We are currently using Gmail, so it is showing its sign in status as green check mark.
- Click Continue.
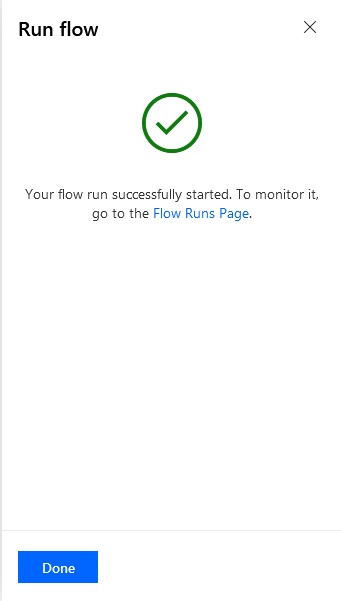
- On the next screen, click Run Flow. Success screen will show up as below.
- This is how one can create a simple flow from scratch. In Chapter 6, we will look at Flow Runs Page in detail.
This will provide you two options for performing a trigger action.
Microsoft Flow - Creating a Flow from Template
In this chapter, we will look at some of the easy-to-use template flows. Template flows eliminate the hassle of putting in complex logic and coming with a flow logic by itself.
Create OneNote page for a future event.
From the Flow home screen, locate the search bar and type in OneNote, click Search.
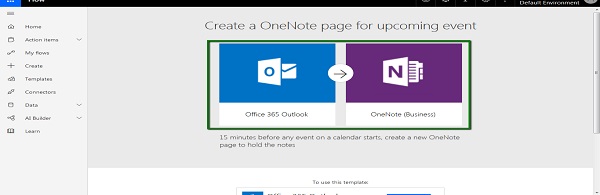
In the search result displayed, select Create OneNote page for upcoming event.
The next screen will show up the apps or services which are going to be used by this template flow −
If you scroll down a bit, you will see the permissions required by each of the apps/services.
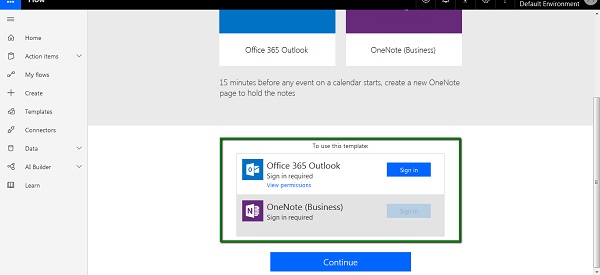
Proceed forth by providing the required credentials and click Continue. If you have valid accounts and credentials, the highlighted box (in green) above will convert to the below box.
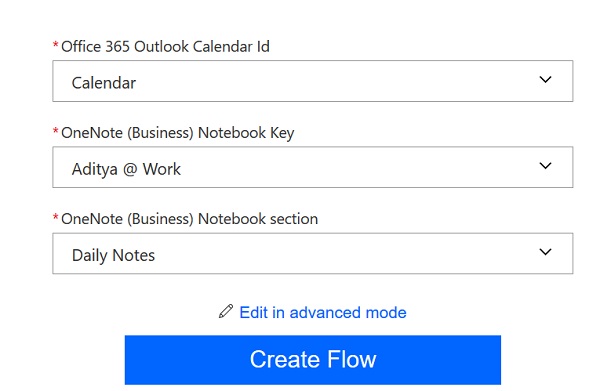
So, according to above screen, when you will have any new event in the calendar Id Calendar, the OneNote notebook mentioned in above screenshot will get accessed. The Notebook section Daily Notes will get created with a new note to hold the notes from that event.
When you click Create Flow, below summary will be displayed.
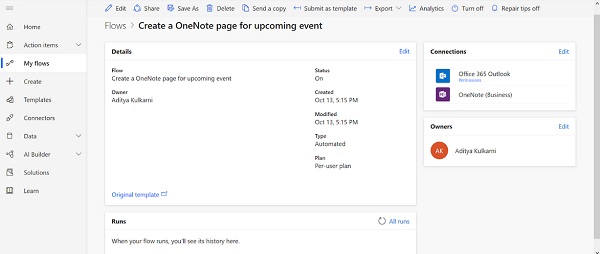
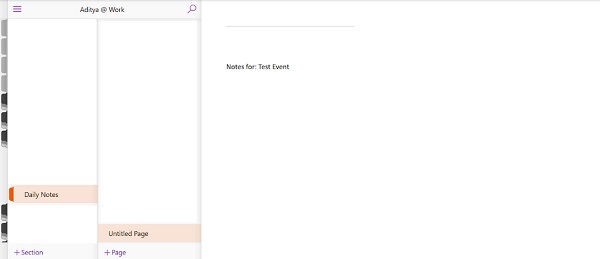
Also, heres a sample of new OneNote page (blank) as created by this flow.
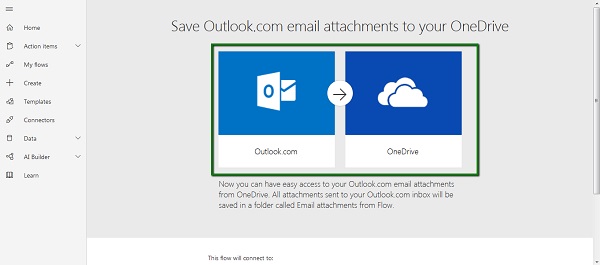
- Save email attachment to OneDrive
- Go to the home screen again to use the Search bar.
- In the search bar, type OneDrive.
The following results will show up −
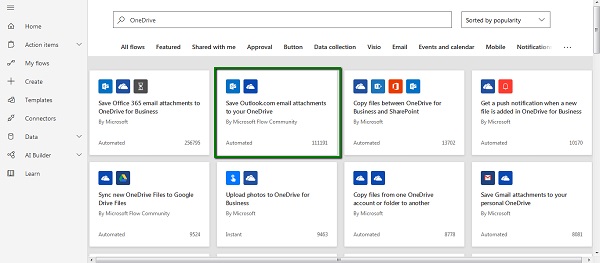
- As highlighted, select the template -- Save Outlook.com email attachments to your OneDrive section.
- The next screen will show the apps or services in use and the corresponding permissions required by them.
Below screen shows the account details for each of the above apps/services.
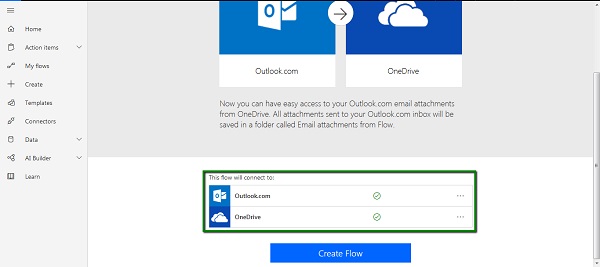
- Please make sure that you enter your credentials and for both of them, a green check mark is displayed as highlighted above.
- Click Create Flow
A flow summary will be displayed as below −
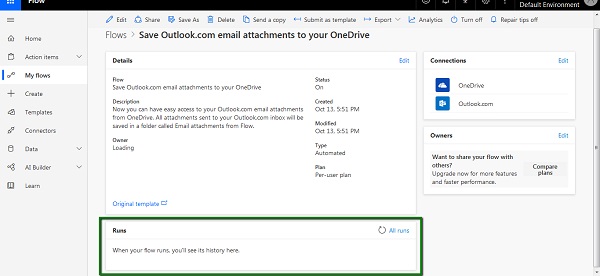
As highlighted above click refresh button under Runs section. If you have any attachment sent to your outlook.com email address, then it will directly be sent to OneDrive.
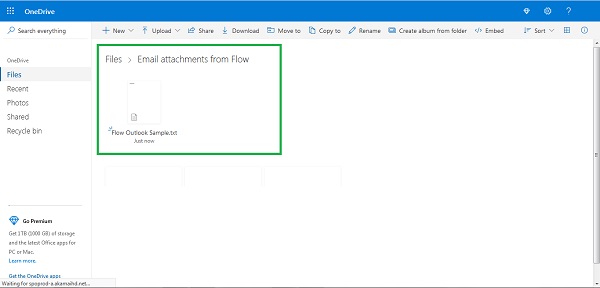
I sent an email to my Outlook.com account with an attachment and it was displayed in my OneDrive account as below.
- Import tweets with Microsoft Flow.
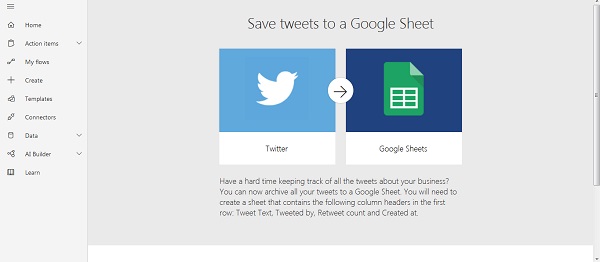
- When it comes to using Twitter, sometimes it makes sense to save all the tweets in a local file in order to do sentiment analysis, etc.
- Now, for this example, we are going to save tweets to a Google Sheet.
- So, you will need an account at Twitter as well as Google.
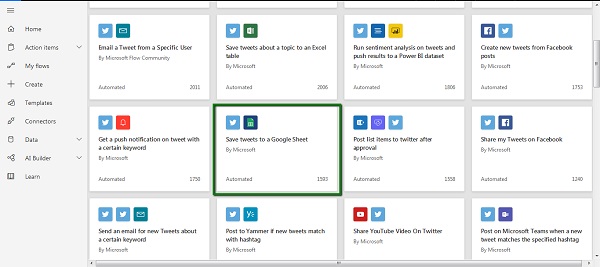
- In the search bar on the home screen, enter Twitter. Scroll down to select the template as highlighted below.
As always, the next screen will show the apps or services required by this flow and the corresponding permissions.
When it comes to permissions, make sure you add both the accounts and see the green checkmark as shown in below screenshot.
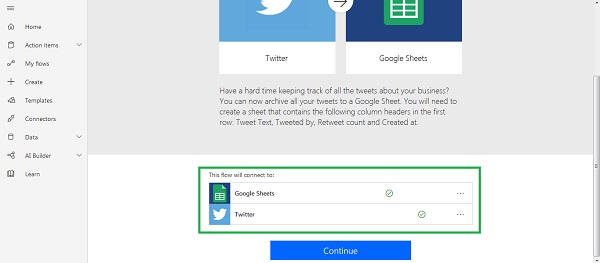
- Click Continue.
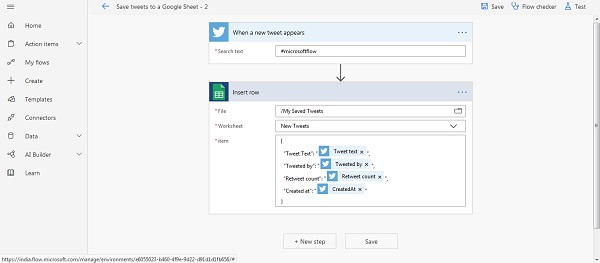
- Now comes the part of filterization. If youd like a particular hash tag to be copied, then specify it on this screen.
- Also, it will be required to specify a file and worksheet to save your tweets to.
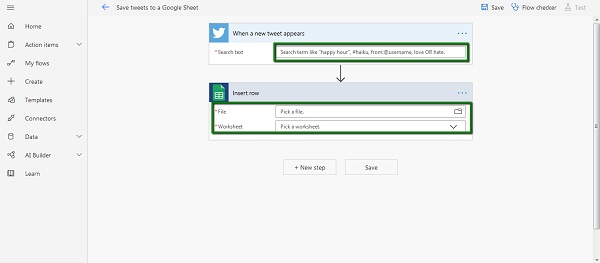
For the purpose of this example, I am entering #microsoftflow as the Search text.
I have already created a sheet with my Google Sheets account, which has a default worksheet, which I will specify in the sections provided above.
Important to Note − When you provide the file and worksheet name, below pop up will show up. Pay careful attention to the instructions. You need to add columns.
Follow the steps and click Save button. The next step will be to provide the rows in Google Sheet.
- Click Save.
- Click Back button to go back to the summary screen for this flow.
Whenever a new tweet is posted with above criteria, the tweets will be transferred to the Google Sheet you have specified.
Microsoft Flow - Mobile
This chapter will walk you through the mobile app of Microsoft Flow. While there are many ways in which a flow can be created from a mobile app, we will take an example of receiving a push notification when an email is received.
Get the Microsoft Flow Mobile App
For the purpose of this tutorial, we will be using Microsoft Flow iOS app. Download the Microsoft Flow app from the App Store. The app is available for Android as well, you can find it on Google Play Store.
With mobile app, the complete power of Microsoft Flow is available at your fingertips. If you would like to update an excel sheet with a tap of a button, you can do so using this app.
Once downloaded, launch the app. After the splash screen as shown below, you will need to configure app permissions.
For our tutorial, we have notification permission as the most important one. Tap allow.
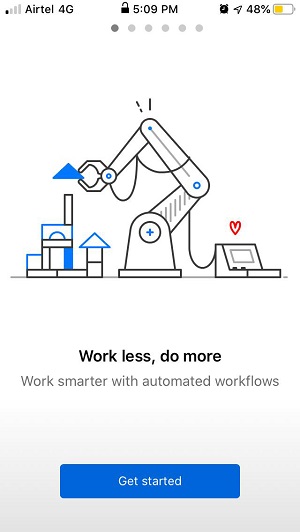
As shown below, Microsoft Flow will launch with this home screen. You can swipe to the right to know more about the mobile app.
On the next screen, youll get to see the accounts currently in your phone. You can go ahead and sign in with a different account or use the existing one.
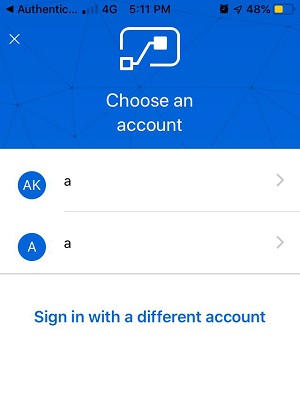
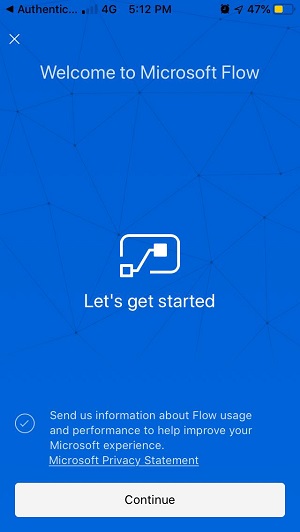
As a confirmation, you will be asked for a password before you are signed in. Once you have provided your password, below screen will get you started with Microsoft Flow. Tap continue.
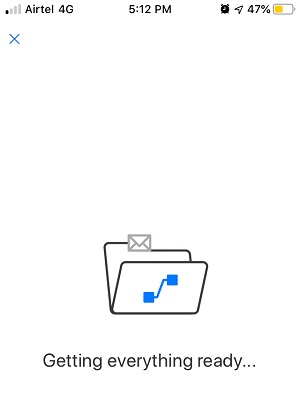
A loading indicator will pop up as shown below −
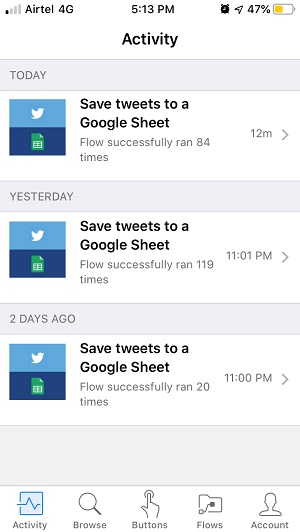
Then, you will get to see the flows we created previously.
Now let us look at the interface real quick.
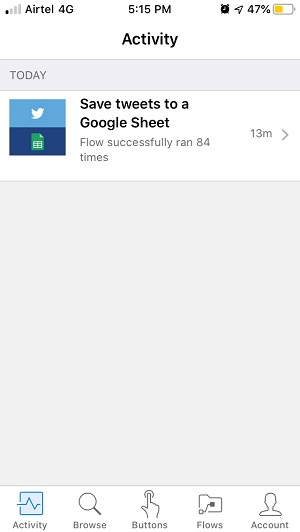
Activity screen
This shows the recent activity by you, you may have created/modified some flow. It will also show the description of how many times the flow was run and provide you a chance to edit it.
Browse screen
This screen will have all the flows that you can create. This will be similar to the home screen in the web layout, but along with that -- you will have option to create mobile flows as well.
Mobile flows will execute within your mobile device. Also, if you are using buttons in your flows on the web, then you will get a chance to trigger them from mobile as well.

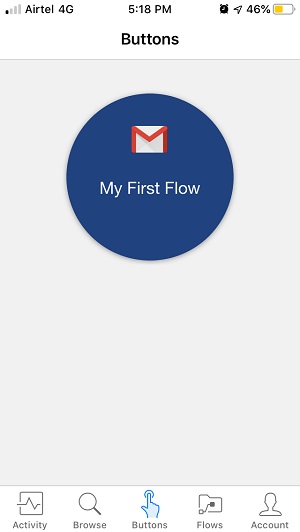
Buttons screen
Under buttons, the flows with button as trigger action, will be shown. You can already see the My First Flow as created in the previous chapter.
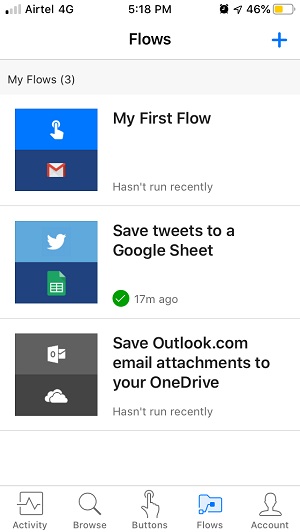
Flows
This section is similar to My Flows in web layout. This is the one stop location for all your created flows till date. You can see all the flows that we created from the previous chapters appearing here.
Account
This screen is used for account management purposes. You can log out from the current account or choose to review the privacy policy from this screen.

Create a flow from mobile
To see an example in action, let us create a flow which triggers a reminder after every 10 minutes. We To see an example in action, let us create a flow which triggers a reminder after every 10 minutes. We are going to use existing template to create this flow.
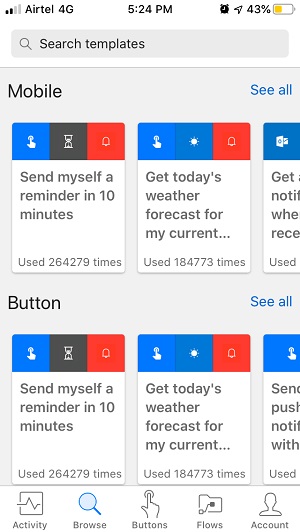
Scroll down from the Browse screen to see Mobile flows. From the mobile flows choose the first one with Send myself a reminder every 10 minutes.
The below description will pop up on the screen −
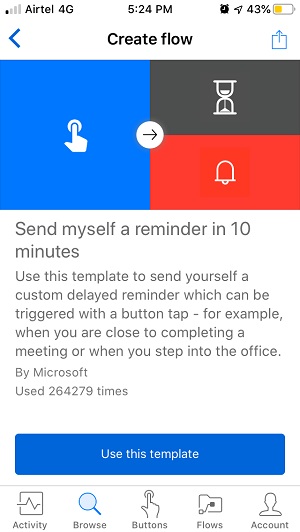
Tap Use this template. The app will take some time to show the below screen −
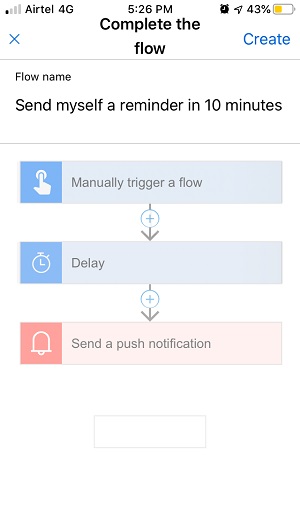
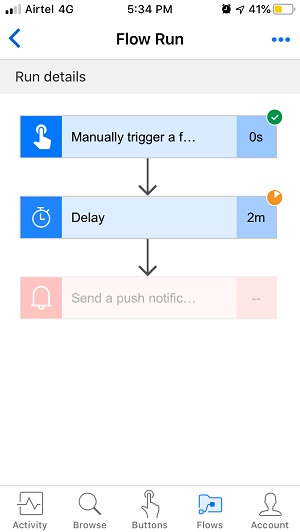
As you can see, there are three components of this flow as follows −
- Manually trigger a flow
- Delay
- Send a push notification
You may tap on each of the steps to know/configure the flow you would like.
Click Create at the right top of the screen.
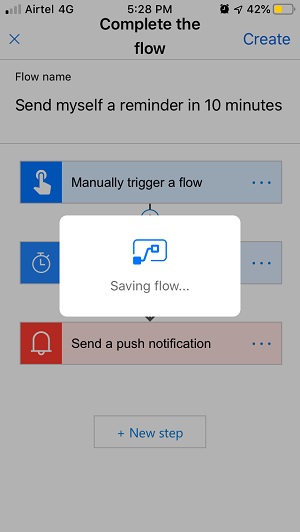
This will take few seconds and display below success message.
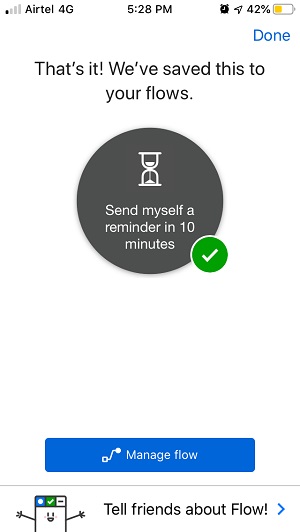
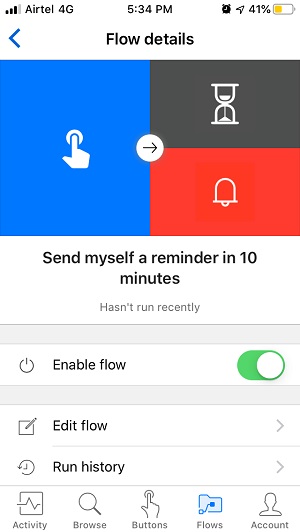
Go to the Flows section to see this newly created flow.
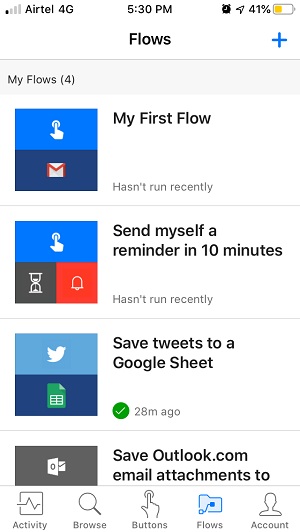
Come back to Buttons screen, you will see a new button as created by this flow.
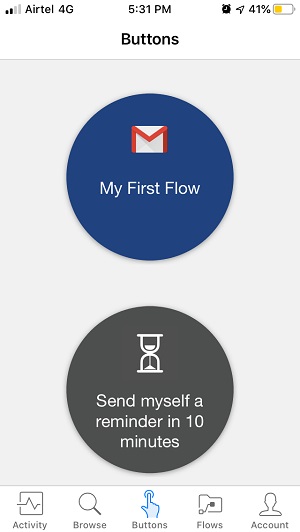
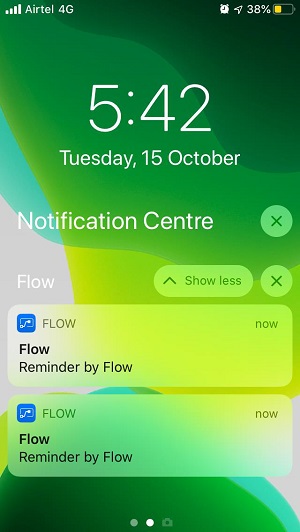
Tap the new Send myself a reminder in 10 minutes flow. The flow will start and youll be able to see progress under Flows section under Run History of this flow.
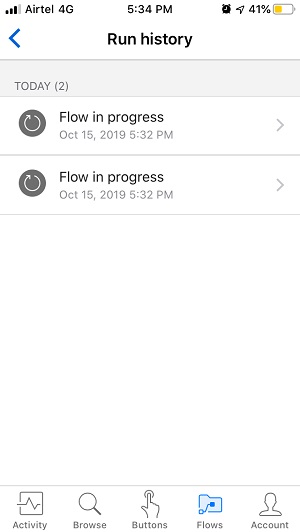
Once the flow is run, we will be able to see notification as shown below −
Receive push notification when you receive an email.
To receive a push notification, we will use an existing template, which uses your Gmail account. The flow works such that, when you receive an email, you will get a push notification from Microsoft Flow.
Go to Browse Screen.
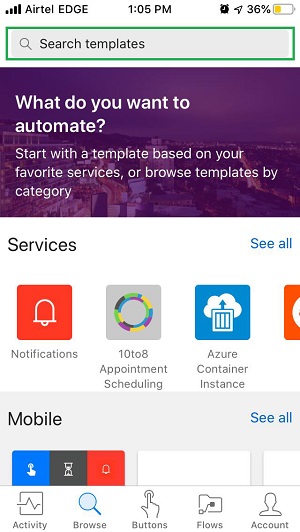
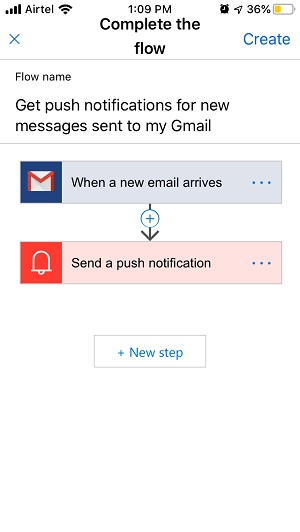
Under Search Templates, type Gmail. Select Get push notifications for new messages sent to my Gmail.
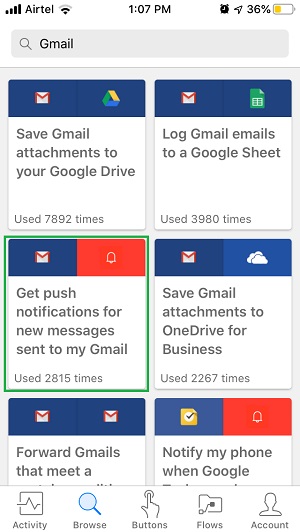
Description of this flow will show up as shown below −
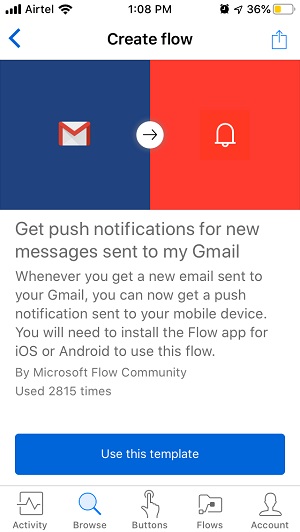
Tap Use this template button. You will see the higher level steps in the flow.
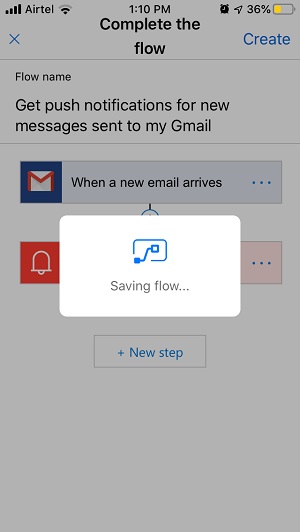
Tap Create button in the top right corner of the screen. You will see the loading screen as below:
A success message will be displayed as below.
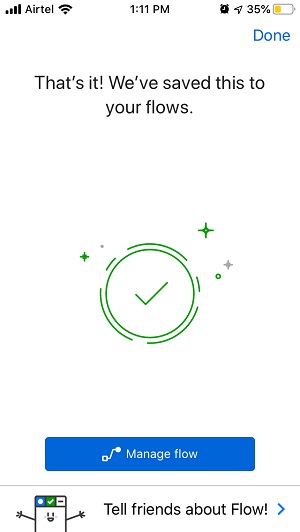
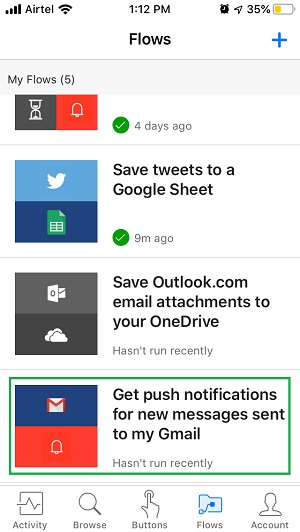
Tap Done button in the top right corner of the screen. Navigate to Flows section from the bottom shortcut bar and confirm the presence of the new flow.
You might be wondering why the Flow has not asked you for any kind of credentials. This is the beauty of having all accounts in one place.
In the previous chapters, we used Gmail account to configure in given flow. That same account is being used for this flow as well. Also, your mobile app takes the account configurations from the mobile settings. So, this additional step is bypassed.
If you havent got the account configured, an appropriate message will be shown.
Now, create a dummy test email and see the notification coming in as below.
Microsoft Flow - Flow Management
When you have created a particular flow and if you would like to modify its options, Microsoft Flow provides certain flexibilities. This chapter will take you through some of these options. Along with that, we will look at the mechanisms to look at the flow history and corresponding analytics.
Flow Options
Suppose you have created a flow, as mentioned in previous chapters, the flow will be available under My Flows in web interface. You can access the Flow options corresponding to each flow you have created.

Hover on to any of the flows and click the three dots as they appear. For instance, when pointed on the reminder flow, I am able to see three dots as below.
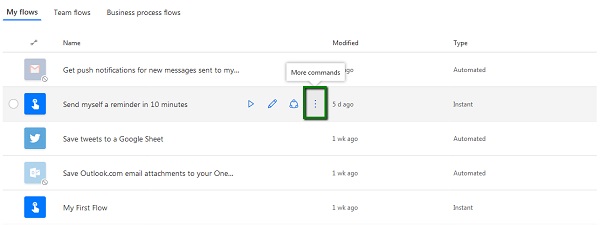
Click on the three dots and you will be able to see below options.
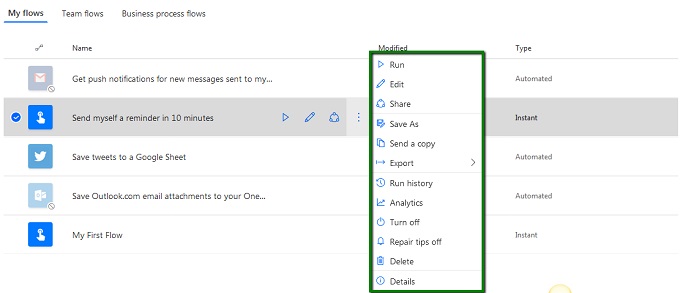
We will go through each of them one by one.
Run
- If the flow is not running currently, you will be Run it using this option.
- A shortcut to this option is available in the form of Play button when you hover over any flow.
Edit
- When you click Edit, the corresponding flow is available for you to configure.
- This shows the steps that are currently in the flow and an option to Add/Remove/Edit any step.
Share
- This option requires that you have a Work/School account.
- Using this option, you should be able to share the flow you have created across the organization.
Save As
- This works as per any other Save As functionality, which creates a replica of the flow you have highlighted.
Send a Copy
- This option requires that you have a Work/School account.
- Using this option, you should be able to Send the copy of the flow to any other person in your organization.
Export
- Using this option, you can export your flow in either of the below formats
- Package (.zip)
- Logic Apps Template (.json)
Run History
- You can look at the history of all the runs associated with this flow.
- This will give you a categorized view of all the runs so far.
Analytics
- This option requires that you have a Work/School account.
- You can connect your flow to other tools such as Microsoft PowerBI to get better analytics related to the selected flow.
Turn Off
- This option turns off the flow (if running).
Repair Tips Off
- Every now and then, Microsoft Flow proactively send the tips related to improving your Flow.
- You can turn those tips off by clicking this option.
Delete
- This will delete the flow from My Flows section, you wont be able to recover the deleted flows.
Details
- When clicked on this option, all the relevant details about this flow are displayed.
- It shows details as follows −
- Status
- Run History
- Connections in use
- Owners
- Created and Modified Date
That is all from Flow Options section, we will look at the Flow History in the next section.
Flow History
When you have created a particular flow, it makes sense to know about the usage of the flow and the details related to its last run. These details are particularly useful if the flow is Scheduled or Automated.
To access Flow History, click on Flow Options and select Run History.
For instance, we created a flow in previous section, which was called My First Flow. Let us look at its Run History.

As shown above details such as Start time, Duration and Status are shown under the Run History.
Flow Analytics
This feature is available for Work or School account only.
Using this option, you can get to know how many times your flow was run during the course of the past month or so. It also talks about how many times the flow was succeeded and how many times the flow failed. Finally, it plots a trend graph for the course of past duration.
Microsoft Flow - Conclusion
While we made an attempt to get into various different areas of Microsoft Flow and also considered the mobile app, this is just the beginning!
The next steps include: Button Flow and Scheduled Flows.
Using Microsoft Flow, many of the power users have started automating their work. This may include triggering a particular email/content from the button flow configured on Mobile app or even scheduling a flow to send a periodic email with updated data.
You can also try these flow by setting the trigger according to a schedule as we have seen in Chapter 3.
For example, let us send a Hello World email on each Monday. To do so, click Create from the left panel and select Scheduled Flow.
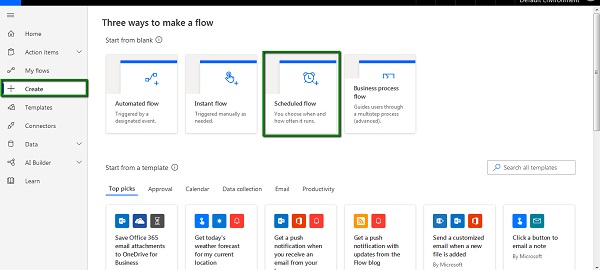
As shown below, configure the Scheduled Flow as below.
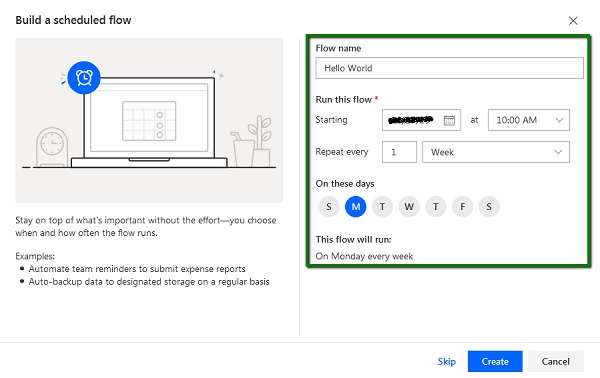
Under the starting date, you may configure the date as you like. Click Create once you have configured the flow.
As a result, a flow with Recurrence as the first step will be created.
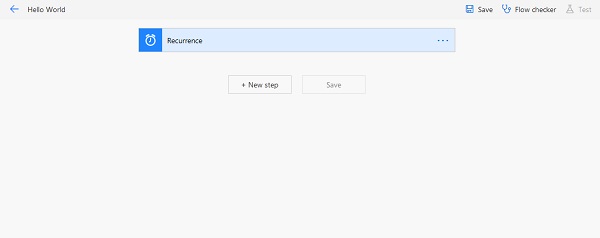
Click New Step and enter Gmail under the search bar for connectors and triggers. It will look as follows −
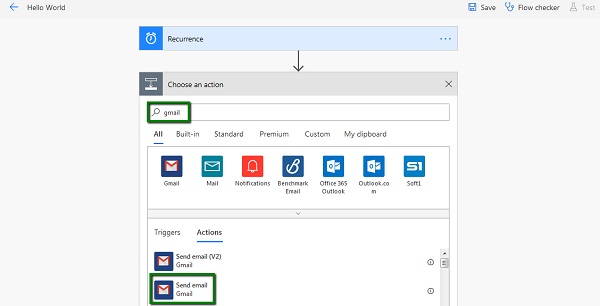
Select Send email as the action. As a result, below screen will be shown. Enter your respective details to receive an email with subject Hello World and body content as shown below.
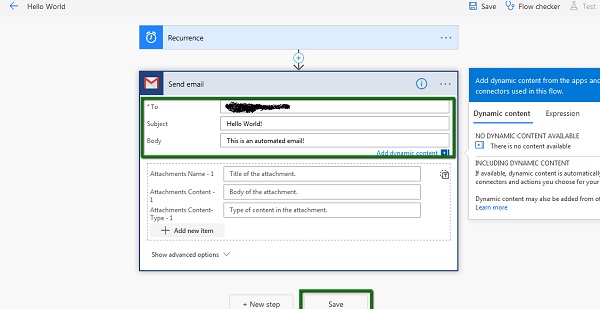
Click Save to complete your Scheduled flow.
As a result, every Monday, you will receive an email to the specified email address accordingly.
Summary
With advanced technologies taking over our day to day life, it is more than useful to have your repetitive tasks automated. Especially with tools such as Microsoft Flow, you get the flexibility of connecting multiple applications in order to complete a given task with or without your attention.
This tutorial provided a glimpse of possibilities with Microsoft Flow, provided used in a planned manner, Microsoft Flow is bound to cut the time in half for some periodic tasks. If you have an organization-wide task, involving approvals from different team members, the Premium account for Microsoft Flow can be put to great use!
Happy Automating!