- Kivy - Home
- Kivy Basics
- Kivy - Getting Started
- Kivy - Installation
- Kivy - Architecture
- Kivy - File Syntax
- Kivy - Applications
- Kivy - Hello World
- Kivy - App Life Cycle
- Kivy - Events
- Kivy - Properties
- Kivy - Inputs
- Kivy - Behaviors
- Kivy Buttons
- Kivy - Buttons
- Kivy - Button Events
- Kivy - Button Colors
- Kivy - Button Size
- Kivy - Button Position
- Kivy - Round Buttons
- Kivy - Disabled Buttons
- Kivy - Image Button
- Kivy Widgets
- Kivy - Widgets
- Kivy - Label
- Kivy - Text Input
- Kivy - Canvas
- Kivy - Line
- Kivy - Checkbox
- Kivy - Dropdown List
- Kivy - Windows
- Kivy - ScrollView
- Kivy - Carousel
- Kivy - Slider
- Kivy - Images
- Kivy - Popup
- Kivy - Switch
- Kivy - Spinner
- Kivy - Splitter
- Kivy - Progress Bar
- Kivy - Bubble
- Kivy - Tabbed Panel
- Kivy - Scatter
- Kivy - Accordion
- Kivy - File Chooser
- Kivy - Color Picker
- Kivy - Code Input
- Kivy - Modal View
- Kivy - Toggle Button
- Kivy - Camera
- Kivy - Tree View
- Kivy - reStructuredText
- Kivy - Action Bar
- Kivy - Video Player
- Kivy - Stencil View
- Kivy - VKeyboard
- Kivy - Touch Ripple
- Kivy - Audio
- Kivy - Videos
- Kivy - Spelling
- Kivy - Effects
- Kivy - Input Recorder
- Kivy - OpenGL
- Kivy - Text
- Kivy - Text Markup
- Kivy - Settings
- Kivy Layouts
- Kivy - Layouts
- Kivy - Float Layout
- Kivy - Grid Layouts
- Kivy - Box Layouts
- Kivy - Stack Layout
- Kivy - Anchor Layout
- Kivy - Relative Layout
- Kivy - Page Layout
- Kivy - Recycle Layout
- Kivy - Layouts in Layouts
- Kivy Advanced Concepts
- Kivy - Configuration Object
- Kivy - Atlas
- Kivy - Data Loader
- Kivy - Cache Manager
- Kivy - Console
- Kivy - Animation
- Kivy - Multistroke
- Kivy - Clock
- Kivy - SVGs
- Kivy - UrlRequest
- Kivy - Clipboard
- Kivy - Factory
- Kivy - Gesture
- Kivy - Language
- Kivy - Graphics
- Kivy - Drawing
- Kivy - Packaging
- Kivy - Garden
- Kivy - Storage
- Kivy - Vector
- Kivy - Utils
- Kivy - Inspector
- Kivy - Tools
- Kivy - Logger
- Kivy - Framebuffer
- Kivy Applications and Projects
- Kivy - Drawing App
- Kivy - Calculator App
- Kivy - Stopwatch App
- Kivy - Camera Handling
- Kivy - Image Viewer
- Kivy - Bezier
- Kivy - Canvas Stress
- Kivy - Circle Drawing
- Kivy - Widget Animation
- Kivy - Miscellaneous
- Kivy Useful Resources
- Kivy - Quick Guide
- Kivy - Useful Resources
- Kivy - Discussion
Kivy - Hello World
Let us start with building a simple "Hello World" application using Kivy. Follow the steps given below −
To develop a Kivy application, you need to import the App class from the "kivy.app" module.
from kivy.app import App
An object of the class that uses App as its base, represents the application. To design the interface, override the build() method, which returns a root widget. For now let us put a pass statement in the build() method.
class HelloApp(App):
   def build(self):
      pass
Next, instantiate the above "HelloApp" class −
app = HelloApp()
The run() method of App class starts an infinite event loop. It displays a blank application window that currently doesn't have any widget.
app.run()
Now let us add a non-editable label with "Hello World" caption to the root widget. For this, we have to import the Label class from the "kivy.uix.label" module. Change the build() method as shown in the following program.
Hello World in Python Kivy
Here is the complete code to print "Hello World" in Kivy −
Example
from kivy.app import App
from kivy.uix.label import Label

class HelloApp(App):
   def build(self):
   l1 = Label(text="Hello World", font_size=50)
   return l1

app = HelloApp()
app.run()
The Label object can be configured with many properties. Here, we are just setting the text and font_size properties.
Run the above code (hello.py) from the command line −
python hello.py
Kivy generates some more log text in the terminal
[INFO ] [Factory] 190 symbols loaded
[INFO ] [Image ] Providers: img_tex, img_dds, img_sdl2, img_pil (img_ffpyplayer ignored)
[INFO ] [Text ] Provider: sdl2
[INFO ] [Window ] Provider: sdl2
[INFO ] [GL ] Using the "OpenGL" graphics system
[INFO ] [GL ] GLEW initialization succeeded
[INFO ] [GL ] Backend used <glew>
[INFO ] [GL ] OpenGL version <b'4.6.0 - Build 31.0.101.3959'>
[INFO ] [GL ] OpenGL vendor <b'Intel'>
[INFO ] [GL ] OpenGL renderer <b'Intel(R) Iris(R) Xe Graphics'>
[INFO ] [GL ] OpenGL parsed version: 4, 6
[INFO ] [GL ] Shading version <b'4.60 - Build 31.0.101.3959'>
[INFO ] [GL ] Texture max size <16384>
[INFO ] [GL ] Texture max units <32>
[INFO ] [Window ] auto add sdl2 input provider
[INFO ] [Window ] virtual keyboard not allowed, single mode, not docked
[INFO ] [Base ] Start application main loop
[INFO ] [GL ] NPOT texture support is available
When you run this application, you get the default Kivy application window with a label having "Hello World" text on it.

You can press the "X" button to close the window and stop the running application.
Layouts in Kivy
In the above program, we have used only one widget, i.e., Label, in the root tree of the application. If we want to place more than one widgets, we need to add them in a Layout and then return the Layout object from the build() method. Kivy supports various types of layouts such as BoxLayout, FlowLayout, AnchorLayout and more.
Let us design the interface such that two Labels are added in a vertical BoxLayout object. The labels are added one below the other. The build() method of the HelloApp class will be changed accordingly.
Example
from kivy.app import App
from kivy.uix.label import Label
from kivy.uix.boxlayout import BoxLayout
class HelloApp(App):
def build(self):
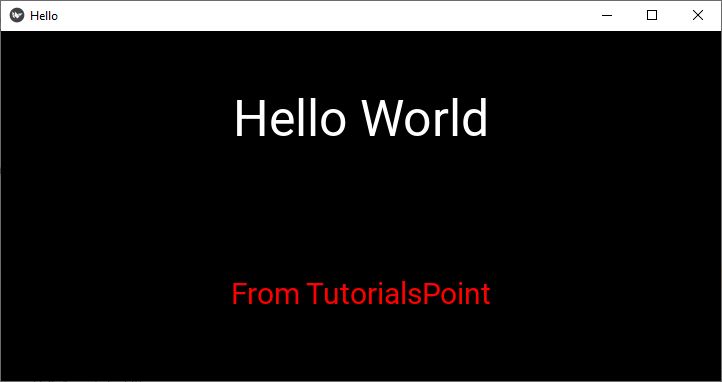
lo = BoxLayout(orientation='vertical')
l1 = Label(text="Hello World", font_size=50)
l2 = Label(text = "From TutorialsPoint",
font_size=30,
color = (1,0,0,1))
lo.add_widget(l1)
lo.add_widget(l2)
return lo
app = HelloApp()
app.run()
Output
Run the above program to obtain the following output −