- JIRA - Home
- JIRA - Overview
- JIRA - Project
- JIRA - Issues
- JIRA - Workflow
- JIRA - Installation
- JIRA - Free Trials Setup
- JIRA - Login
- JIRA - Dashboard
- JIRA - Issue Types
- JIRA - Screens
- JIRA - Issue Creation
- JIRA - Clone an Issue
- JIRA - Create a Subtask
- JIRA - Convert Issue To Subtask
- JIRA - Convert Subtask to Issue
- JIRA - Create Issue using CSV
- JIRA - Edit an Issue
- JIRA - Email an Issue
- JIRA - Label an Issue
- JIRA - Linking Issues
- JIRA - Move an Issue
- JIRA - View/Change History
- JIRA - Watch and Vote on Issue
- JIRA - Search
- JIRA - Advanced Search
- JIRA - Reports
- JIRA - Workload Pie Chart
- JIRA - Created vs Resolved Issues
- JIRA - Burndown Chart
JIRA - Move an Issue
JIRA has a feature to move an issue from one project to another project. Let us understand with the following steps, how a user can do it.
Steps to Follow
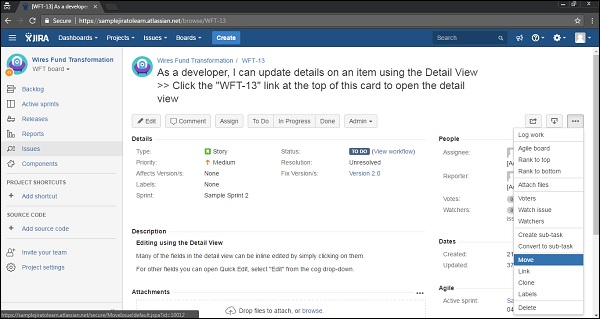
Go to the View Issue page that needs to move into another project. Select More → Move. The following screenshot shows how to access Move feature −
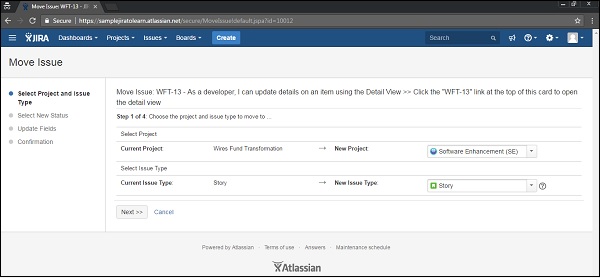
In the first step of the Move Issue wizard, select the new project where the issue will move, and if required/desired, change the issue type. Click on Next to continue.
The following screenshot shows Select Project and Issues step to move −
If there is a need to change the status of the issue, the user can go to Select Status page. Select the new status for the issue and click on the Next button to continue.
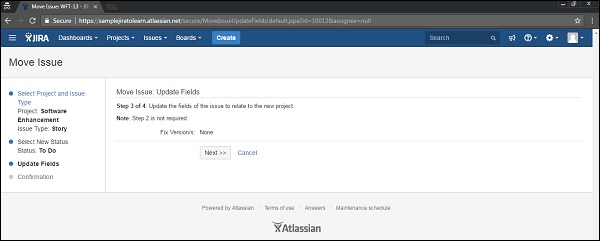
If required to specify the values for any required custom fields, the Update Fields page is displayed. Specify the desired values for each field, and click on Next to continue.
The following screenshot shows the Update Fields step, if required before moving an issue.
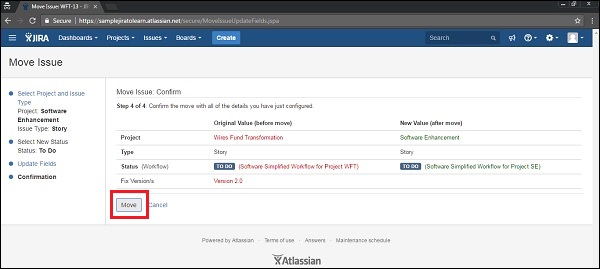
The confirmation page will display with all the changes. If a user wants to revise any of the changes, click the appropriate step in the left hand side menu to return to that page of the wizard. After that, click on the Move button to move the issue to the target project.
The following screenshot shows confirmation step to confirm details before moving −
The Issue will be moved to the target project and displayed on screen. This Issue can be further edited to make additional changes. The following screenshot shows a new project and an issue type after the successful moving an issue.
