
- JBoss Fuse – Home
- JBoss Fuse - Introduction To ESB
- What Is Fuse?
- JBoss Fuse – Apache Karaf
- JBoss Fuse – Apache Camel
- JBoss Fuse – Camel Concepts
- JBoss Fuse – Apache CXF
- JBoss Fuse – Rest Web Services
- JBoss Fuse – Apache AMQ
- JBoss Fuse – AMQ With Camel
- JBoss Fuse – Fabric
- JBoss Fuse – Child Container
- JBoss Fuse – Issues and Solutions
JBoss Fuse - Fabric
What is Fabric?
Fabric provides management and orchestration capabilities for multiple Fuse instances. Fabric allows us to control all Fuse instances connected to it from a single point. A normal Fuse container can be converted to act as a Fabric. Fabric has fabric registry in it which serves as data store that contains all information regarding containers, it manages.
Why Fabric?
Fabric has the following special abilities which makes it an ideal candidate for use in distributed environments.
- Monitoring the state of all containers in the fabric.
- Starting and stopping remote containers.
- Provisions remote container to run a particular application.
- Upgrading applications and rolling out patches in the live system.
- Starting and provisioning with new containers quickly for example to cope with increased load on the system.

Fabric Setup
Creating Fabric
Normal Fuse container can be converted to Fabric by using the following command
fabric: create --clean --zookeeper-password myZooPass
Connecting other container to Fabric −
fabric:join --zookeeper-password myZooPass <fabric_host>:2181 Cont1
Note − Please replace <fabric_host> with actual host name on which fabric is running.
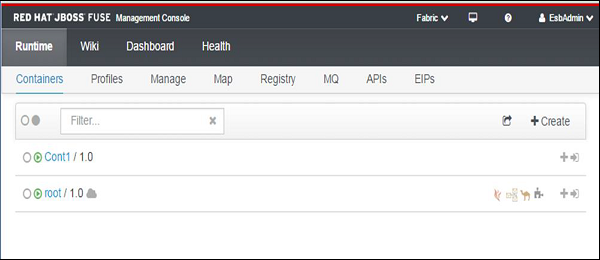
When you login to the Fuse Management Console from your browser using localhost:8181, you should be able to see two containers as shown in the following screenshot. The Fabric container is indicated by a small cloud symbol in front of it.
Profiles
A Profile contains the following information −
- Bundles to be installed
- Features to be installed
- Configurations to be applied
A Profile provides a way in fabric environment to install same set of bundles, features and configuration on multiple servers.
If the same profile is applied to multiple containers and we do changes to that profile from any container similar changes will be deployed automatically to the remaining containers to which it is applied.
Creating Profiles
Login in to FMC localhost:8181
Runtime → Manage
In the left hand side under Profile menu click on +

Enter the name you want to give to the profile and click create.
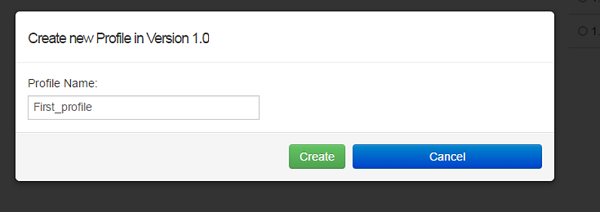
After this, the profile should be created.
Applying Profile to Container
Runtime → Containers → root (select the container you want)
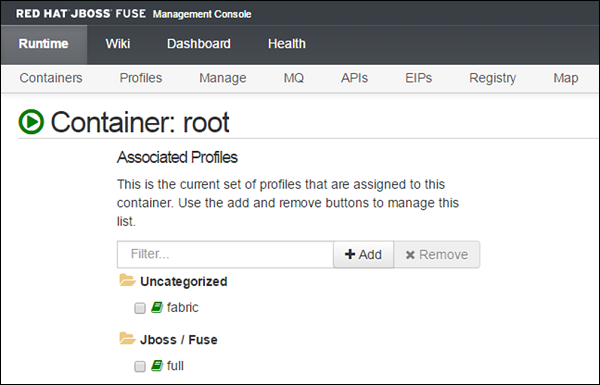
Click Add which will lead to a pop-up box. Search for the profile you want and then again click Add.
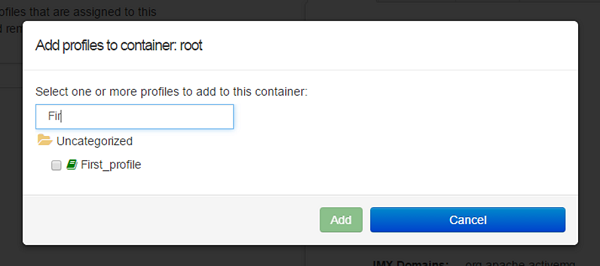
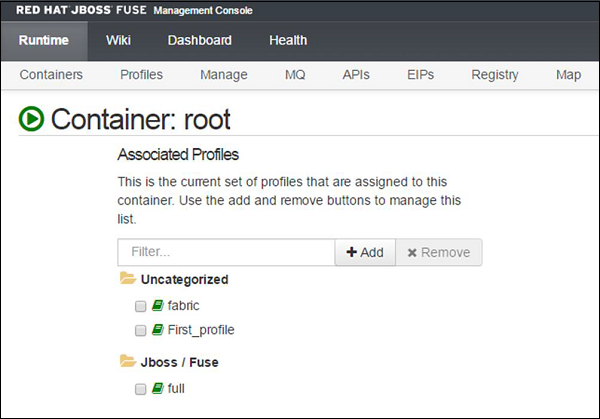
The profile should be shown in the list as shown in the following screenshot.
Deploying a Bundle
To deploy a bundle, use the following path −
Runtime → Containers → root (select the container you want) → First_profile (select profile)
Click the Bundles tab. Set the bundle path in the following format and then click +.
mvn:group.id/artifact.id/version
For example: mvn:com.tutorialpoint.app/camel-firt-app/1.0-SNAPSHOT


A bundle will be added to the profile and will be deployed on all the containers to which the profile is assigned.
Un-deploying a Bundle
To un-deploy a bundle, use the following path −
Runtime → Containers → root (select container you want) → First_profile (select profile)
Click the Bundles tab and search for the bundle that you want to delete and then click on X. The Bundle will be deleted from all the containers to which the profile is applied.
