- BabylonJS - Home
- BabylonJS - Introduction
- BabylonJS - Environment Setup
- BabylonJS - Overview
- BabylonJS - Basic Elements
- BabylonJS - Materials
- BabylonJS - Animations
- BabylonJS - Cameras
- BabylonJS - Lights
- BabylonJS - Parametric Shapes
- BabylonJS - Mesh
- VectorPosition and Rotation
- BabylonJS - Decals
- BabylonJS - Curve3
- BabylonJS - Dynamic Texture
- BabylonJS - Parallax Mapping
- BabylonJS - Lens Flares
- BabylonJS - Create ScreenShot
- BabylonJS - Reflection Probes
- Standard Rendering Pipeline
- BabylonJS - ShaderMaterial
- BabylonJS - Bones and Skeletons
- BabylonJS - Physics Engine
- BabylonJS - Playing Sounds & Music
BabylonJS - Basic Elements
Babylon.js is a popular framework to help build 3D games for developers. It has built-in functions to implement 3D functionalities. Let us build a simple demo using Babylon.js and understand the basic functionalities required to get started.
We will first create a demo which contains the basic elements of Babylon.js. In addition, we will also learn the various functionalities of Babylon.js.
Sample Demo 1
In this section, we will learn how to create a demo containing the basic elements of BabylonJS.
<!doctype html>
<html>
   <head>
      <meta charset = "utf-8">
      <title> Babylon.JS : Demo2</title>
      <script src = "babylon.js"></script>
      <style>
         canvas { width: 100%; height: 100%;}
      </style>
   </head>

   <body>
      <canvas id = "renderCanvas"></canvas>
      <script type = "text/javascript">
         var canvas = document.getElementById("renderCanvas");
         var engine = new BABYLON.Engine(canvas, true);
         var createScene  = function() {
            var scene = new BABYLON.Scene(engine);
            scene.clearColor = new BABYLON.Color3(1, 0.8, 0.8);

            var camera = new BABYLON.ArcRotateCamera("Camera", 1, 0.8, 10, new BABYLON.Vector3(0, 0, 0), scene);
            scene.activeCamera.attachControl(canvas);

            var light0 = new BABYLON.PointLight("Omni", new BABYLON.Vector3(0, 0, 10), scene);

            var origin = BABYLON.Mesh.CreateSphere("origin", 10, 1.0, scene);

            var torus = BABYLON.Mesh.CreateTorus("torus", 5, 1, 10, scene, false);

            var box = BABYLON.Mesh.CreateBox("box", 3.0, scene);
            box.position = new BABYLON.Vector3(-5, 0, 0);

            var cylinder = BABYLON.Mesh.CreateCylinder("cylinder", 3, 3, 3, 6, 1, scene, false);

            cylinder.position = new BABYLON.Vector3(5, 0, 0);
            return scene;
         };
         var scene = createScene();
         engine.runRenderLoop(function() {
            scene.render();
         });
      </script>
   </body>
</html>
To run BabylonJS, we need modern browsers with WEBGL support. The latest browsers -Internet Explorer 11+, Firefox 4+, Google Chrome 9+, Opera 15+, etc. does have WEBGL support and the demos can be executed on the same platforms to see the output. Create a directory to store the files for babylonjs. Fetch the latest BabylonJSscripts file from BabylonJS site. All the demo links in this tutorial are tested with babylonjs version 3.3.
Step 1
Create a simple html page and include the Babylon.js file.
Create a canvas tag which is used to render contents by BabylonJSinside the body tag as shown below.
Add css to the canvas to occupy the full width and height of the screen.
<!doctype html>
<html>
   <head>
      <meta charset = "utf-8">
      <title>MDN Games: Babylon.js demo - shapes</title>
      <script src = "babylon.js"></script>

      <style>
         canvas {width: 100%; height: 100%;}
      </style>
   </head>
   <body>
      <canvas id = "renderCanvas"></canvas>
   </body>
</html>
Step 2
Let us now start with the BabylonJScode for rendering contents on the canvas.
<!doctype html>
<html>
   <head>
      <meta charset = "utf-8">
      <title>MDN Games: Babylon.js demo - shapes</title>
      <script src = "babylon.js"></script>
      <style>
         canvas {width: 100%; height: 100%;}
      </style>
   </head>
   <body>
      <canvas id = "renderCanvas"></canvas>
      <script type = "text/javascript">
         var canvas = document.getElementById("renderCanvas");
         var engine = new BABYLON.Engine(canvas, true);
      </script>
   </body>
</html>
Now, add the script tag to the html structure and store the canvas reference in variable canvas.
To get started with Babylon.js, create an engine instance and pass the canvas reference to render on it.
<script type = "text/javascript">
   var canvas = document.getElementById("renderCanvas");
   var engine = new BABYLON.Engine(canvas, true);
</script>
The BABYLON global object contains all the Babylon.js functions available in the engine.
Step 3
In this step, we will first create a scene.
A scene is where all the contents will be displayed. We will create the different types of objects and add the same to the scene to make it visible on the screen. To create scene, add the following code to the already created html structure. At present, we will append to the already created code as a continuation to the above html structure.
var createScene  = function() {
   var scene = new BABYLON.Scene(engine);
   scene.clearColor = new BABYLON.Color3(1, 0.8, 0.8);
};
var scene = createScene();
The final html file will look as follows −
<!doctype html>
<html>
   <head>
      <meta charset = "utf-8">
      <title>MDN Games: Babylon.js demo - shapes</title>
      <script src = "babylon.js"></script>
      <style>
         canvas {width: 100%; height: 100%;}
      </style>
   </head>

   <body>
      <canvas id = "renderCanvas"></canvas>
      <script type = "text/javascript">
         var canvas = document.getElementById("renderCanvas");
         var engine = new BABYLON.Engine(canvas, true);

         var createScene  = function() {
            var scene = new BABYLON.Scene(engine);
            scene.clearColor = new BABYLON.Color3(0, 1, 0);
            return scene;
         };
         var scene = createScene();
      </script>
   </body>
</html>
In the above example, the CreateScene function is defined and the var scene = createScene () is calling the function.
The CreateScene function has the scene created inside it and the next line adds color to the scene, which is done using BABYLON.Color3(1, 0.8, 0.8) and the color over here is pink.
var scene = new BABYLON.Scene(engine);
scene.clearColor = new BABYLON.Color3(1, 0.8, 0.8);
Executing the above demo link in the browser will not display anything right now on the browser screen. There is one more step to be added to the code which is called the engine.runRenderLoop as in step 4.
Step 4
To make the scene actually visible on the screen, we need to render it using engine.runRenderLoop call. Let us now see how this is done.
Rendering Loop
engine.runRenderLoop(function() {
   scene.render();
});
The Engine.runRenderLoop function calls scene.render, which will render the scene and make it visible to the user. The final .html will look as follows −
<!doctype html>
<html>
   <head>
      <meta charset = "utf-8">
      <title>BabylonJs - Basic Element-Creating Scene</title>
      <script src = "babylon.js"></script>
      <style>
         canvas {width: 100%; height: 100%;}
      </style>
   </head>

   <body>
      <canvas id = "renderCanvas"></canvas>
      <script type = "text/javascript">
         var canvas = document.getElementById("renderCanvas");
         var engine = new BABYLON.Engine(canvas, true);
         var createScene  = function() {
            var scene = new BABYLON.Scene(engine);
            scene.clearColor = new BABYLON.Color3(1, 0.8, 0.8);
            return scene;
         };
         var scene = createScene();
         engine.runRenderLoop(function() {
            scene.render();
         });
      </script>
   </body>
</html>
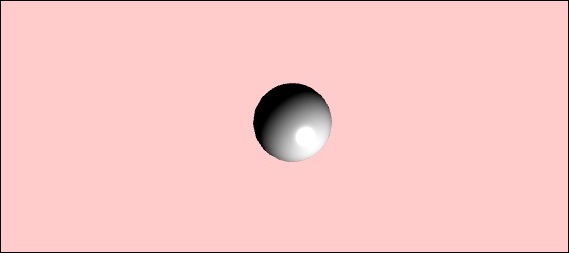
Save the above file as basicscene.html and check the output in the browser. The screen that is shown is in pink color as shown below −

Step 5
Now that we have the scene, we have to add camera to it.
Adding Camera and Light
The code given below adds camera to the scene. There are many types of camera that can be used on Babylon.
ArcRotateCamera is a camera that rotates around the target. It can be controlled with mouse, cursor or touch events. The parameters required are name, alpha, beta, radius, target, and scene. Let us discuss the details of the camera in a subsequent section.
var camera = new BABYLON.ArcRotateCamera("Camera", 1, 0.8, 10, new BABYLON.Vector3(0, 0, 0), scene);
Now, we need to understand how to add light.
Lights are used to produce the diffuse and specular color received by each pixel. There are many types of lights. We will learn about the different types of lights in the lights section.
Here I am using the PointLight on the scene. The PointLight is emitted in every direction like theSun. The parameters are name, position and the scene to be used on.
To add light, execute the following code −
var light0 = new BABYLON.PointLight("Omni", new BABYLON.Vector3(0, 0, 10), scene);
Step 6
Let us now see how to add shapes.
Adding of shapes
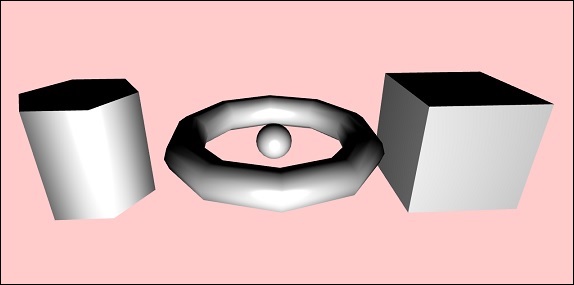
The demo shared above has 4 shapes added to it.
- Sphere
- Torus
- Box
- Cylinder
To add sphere, execute the following code −
var origin = BABYLON.Mesh.CreateSphere("origin", 10, 1.0, scene);
Once the sphere is added, the code looks as follows −
<!doctype html>
<html>
   <head>
      <meta charset="utf-8">
      <title>MDN Games: Babylon.js demo - shapes</title>
      <script src = "babylon.js"></script>
      <style>
         html,body,canvas { margin: 0; padding: 0; width: 100%; height: 100%; font-size: 0; }
      </style>
   </head>

   <body>
      <canvas id = "renderCanvas"></canvas>
      <script type = "text/javascript">
         var canvas = document.getElementById("renderCanvas");
         var engine = new BABYLON.Engine(canvas, true);

         var createScene  = function() {
            var scene = new BABYLON.Scene(engine);
            scene.clearColor = new BABYLON.Color3(1, 0.8, 0.8);
            var camera = new BABYLON.ArcRotateCamera("Camera", 1, 0.8, 10, new BABYLON.Vector3(0, 0, 0), scene);
            var light0 = new BABYLON.PointLight("Omni", new BABYLON.Vector3(0, 0, 10), scene);
            var origin = BABYLON.Mesh.CreateSphere("origin", 10, 1.0, scene);
            scene.activeCamera.attachControl(canvas);
            return scene;
         };
         var scene = createScene();
         engine.runRenderLoop(function() {
            scene.render();
         });
      </script>
   </body>
</html>
Output
The above code generates the following output −
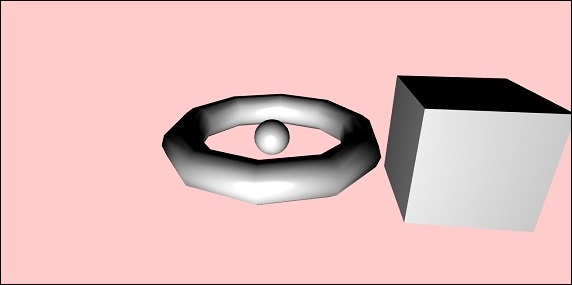
Let us now add the other shapes the Torus and the Box. Execute the following code to add the Torus shape.
var torus = BABYLON.Mesh.CreateTorus("torus", 5, 1, 10, scene, false);
var box = BABYLON.Mesh.CreateBox("box", 3.0, scene);
box.position = new BABYLON.Vector3(-5, 0, 0);
We will add a position to the box. BABYLON.Vector3(-5, 0, 0) takes the x,y and z direction.
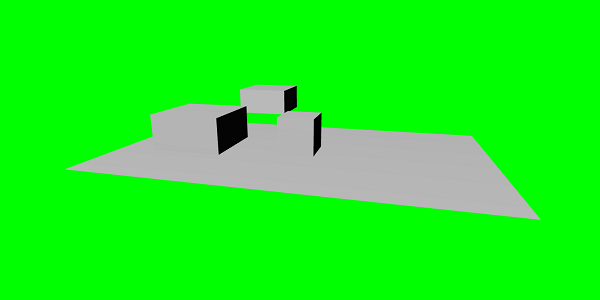
Upon execution, the above code generates the following output −
Let us now add the final shape which is shown in the screenshot above - the cylinder.
var cylinder = BABYLON.Mesh.CreateCylinder("cylinder", 3, 3, 3, 6, 1, scene, false);
cylinder.position = new BABYLON.Vector3(5, 0, 0);
The position is added to the cylinder which is x direction 5. The final code is as shown below −
<!doctype html>
<html>
   <head>
      <meta charset = "utf-8">
      <title> Babylon.JS : Demo2</title>
      <script src = "babylon.js"></script>
      <style>
         canvas { width: 100%; height: 100%;}
      </style>
   </head>

   <body>
      <canvas id = "renderCanvas"></canvas>
      <script type = "text/javascript">
         var canvas = document.getElementById("renderCanvas");
         var engine = new BABYLON.Engine(canvas, true);
         var createScene  = function() {
            var scene = new BABYLON.Scene(engine);
            scene.clearColor = new BABYLON.Color3(1, 0.8, 0.8);

            var camera = new BABYLON.ArcRotateCamera("Camera", 1, 0.8, 10, new BABYLON.Vector3(0, 0, 0), scene);
            scene.activeCamera.attachControl(canvas);

            var light0 = new BABYLON.PointLight("Omni", new BABYLON.Vector3(0, 0, 10), scene);

            var origin = BABYLON.Mesh.CreateSphere("origin", 10, 1.0, scene);

            var torus = BABYLON.Mesh.CreateTorus("torus", 5, 1, 10, scene, false);

            var box = BABYLON.Mesh.CreateBox("box", 3.0, scene);
            box.position = new BABYLON.Vector3(-5, 0, 0);

            var cylinder = BABYLON.Mesh.CreateCylinder("cylinder", 3, 3, 3, 6, 1, scene, false);
            cylinder.position = new BABYLON.Vector3(5, 0, 0);
            return scene;
         };
         var scene = createScene();
         engine.runRenderLoop(function() {
            scene.render();
         });
      </script>
   </body>
</html>
Output
Upon execution, the above code will generate the following output −

The shapes will move as per the direction you move the cursor; the same is done using the attach control of the camera to the scene.
scene.activeCamera.attachControl(canvas);
Let us now discuss each shape in detail.
Here is the summary of all the shapes and the syntax −
| Sr.No | Shape | Syntax |
|---|---|---|
| 1 | Box | var box = BABYLON.Mesh.CreateBox( "box", 6.0, scene, false, BABYLON.Mesh.DEFAULTSIDE); |
| 2 | Sphere | var sphere = BABYLON.Mesh.CreateSphere( "sphere", 10.0, 10.0, scene, false, BABYLON.Mesh.DEFAULTSIDE); |
| 3 | Plane | var plane = BABYLON.Mesh.CreatePlane( "plane", 10.0, scene, false, BABYLON.Mesh.DEFAULTSIDE); |
| 4 | Disc | var disc = BABYLON.Mesh.CreateDisc( "disc", 5, 30, scene, false, BABYLON.Mesh.DEFAULTSIDE); |
| 5 | Cylinder | var cylinder = BABYLON.Mesh.CreateCylinder( "cylinder", 3, 3, 3, 6, 1, scene, false, BABYLON.Mesh.DEFAULTSIDE); |
| 6 | Torus | var torus = BABYLON.Mesh.CreateTorus( "torus", 5, 1, 10, scene, false, BABYLON.Mesh.DEFAULTSIDE); |
| 7 | Knot | var knot = BABYLON.Mesh.CreateTorusKnot( "knot", 2, 0.5, 128, 64, 2, 3, scene, false, BABYLON.Mesh.DEFAULTSIDE); |
| 8 | Line Mesh |
var lines = BABYLON.Mesh.CreateLines("lines", [
   new BABYLON.Vector3(-10, 0, 0),
   new BABYLON.Vector3(10, 0, 0),
   new BABYLON.Vector3(0, 0, -10),
   new BABYLON.Vector3(0, 0, 10)
], scene);
|
| 9 | Dashes Lines | var dashedlines = BABYLON.Mesh.CreateDashedLines( "dashedLines", [v1, v2, ... vn], dashSize, gapSize, dashNb, scene); |
| 10 | Ribbon | var ribbon = BABYLON.Mesh.CreateRibbon( "ribbon", [path1, path2, ..., pathn], false, false, 0, scene, false, BABYLON.Mesh.DEFAULTSIDE); |
| 11 | Tube | var tube = BABYLON.Mesh.CreateTube( "tube", [V1, V2, ..., Vn], radius, tesselation, radiusFunction, cap, scene, false, BABYLON.Mesh.DEFAULTSIDE); |
| 12 | Ground | var ground = BABYLON.Mesh.CreateGround( "ground", 6, 6, 2, scene); |
| 13 | Ground From HeightMap | var ground = BABYLON.Mesh.CreateGroundFromHeightMap( "ground", "heightmap.jpg", 200, 200, 250, 0, 10, scene, false, successCallback); |
| 14 | Tiled Ground |
var precision = {"w" : 2, "h" : 2};
var subdivisions = {'h' : 8, 'w' : 8};
var tiledGround = BABYLON.Mesh.CreateTiledGround(
   "Tiled Ground", -3, -3, 3, 3,
   subdivisions, precision, scene, false);
|
Basic Element - Position, Rotation and Scaling
In this section, we will learn how to position, rotate or scale the elements which we added so far.
We have created box, sphere, cylinder, knot, etc. Now, we will see how to position, scale and rotate the shapes.
| Sr.No. | Element & Description |
|---|---|
| 1 |
Position
With position change, the mesh will be changed from one position to another. |
| 2 |
Rotation
With rotation, the mesh will be rotated around the mesh. |
| 3 |
Scaling
The scaling of mesh can be done with respect to x, y or z axis. |
Basic Element - Parenting
With Parenting, we will create a parent-child relationship between the meshes and see how they behave. So whatever transformations you apply to the parent, the same will also be applied to the child. Let us now understand the same with the demo shown below.
Demo
<!doctype html>
<html>
   <head>
      <meta charset = "utf-8">
      <title>BabylonJs - Basic Element-Creating Scene</title>
      <script src = "babylon.js"></script>
      <style>
         canvas {width: 100%; height: 100%;}
      </style>
   </head>

   <body>
      <canvas id = "renderCanvas"></canvas>
      <script type = "text/javascript">
         var canvas = document.getElementById("renderCanvas");
         var engine = new BABYLON.Engine(canvas, true);
         var createScene  = function() {
            var scene = new BABYLON.Scene(engine);
            scene.clearColor = new BABYLON.Color3(0, 1, 0);

            var camera = new BABYLON.ArcRotateCamera("Camera", 1, 0.8, 10, new BABYLON.Vector3(0, 0, 0), scene);
            scene.activeCamera.attachControl(canvas);

            var light = new BABYLON.PointLight("Omni", new BABYLON.Vector3(0, 100, 100), scene);

            var boxa = BABYLON.Mesh.CreateBox("BoxA", 1.0, scene);
            boxa.position = new BABYLON.Vector3(0,0.5,0);

            var boxb = BABYLON.Mesh.CreateBox("BoxB", 1.0, scene);
            boxb.position = new BABYLON.Vector3(3,0.5,0);
            boxb.scaling = new BABYLON.Vector3(2,1,2);

            var boxc = BABYLON.Mesh.CreateBox("BoxC", 1.0, scene);
            boxc.parent = boxb;
            boxc.position.z = -3;

            var ground = BABYLON.Mesh.CreateGround("ground1", 10, 6, 2, scene);
            ground.position = new BABYLON.Vector3(0,0,0);
            return scene;
         };
         var scene = createScene();
         engine.runRenderLoop(function() {
            scene.render();
         });
      </script>
   </body>
</html>
Output
Explanation
We have created 3 boxes in the above mesh. In the demo, boxb scaling is applied and it is assigned as a parent to boxc which also scales since its parent boxb and the same is scaled. You can play around with the demo to see how the parent-child link works.
To make a mesh, you have to use the parent of another mesh −
child.parent = parentmesh;
Basic Element - Environment
Let us now discuss the scene environment in this section. We will talk about the scene background color, ambientcolor, skyboxes, fog mode, etc. on a scene.
We have seen the scene background color is demos which we have created so far.
Scene background-color
Let us now see how the scene background color works.
Syntax
Following is the syntax for the scene background color −
scene.clearColor = new BABYLON.Color3(0.5, 0.8, 0.5);
or
scene.clearColor = BABYLON.Color3.Blue();
The above property will change the background color of the scene.
Scene Ambient color
Let us now see how the scene ambient color works.
Syntax
Following is the syntax for the scene ambient color −
scene.ambientColor = new BABYLON.Color3(0.3, 0.3, 0.3);
AmbientColor is used along with the StandardMaterial ambient color and texture. If there is no ambientColor for the scene the StandardMaterial.ambientColor and StandardMaterial.ambientTexture has no effect. The StandardMaterial ambientColor/ambientTexture will become active once the ambientColor for scene is applied. By default, scene is given scene.ambientColor and set to Color3 (0, 0, 0), which means no ambientColor.
Scene Fog mode
We will now understand how the Scene Fog Mode works.
Syntax
Following is the syntax for the Scene Fog Mode.
scene.fogMode = BABYLON.Scene.FOGMODE_EXP;
The following list of the available fog modes −
BABYLON.Scene.FOGMODE_NONE − default one, fog is deactivated.
BABYLON.Scene.FOGMODE_EXP − the fog density follows an exponential function.
BABYLON.Scene.FOGMODE_EXP2 − same as above but faster.
BABYLON.Scene.FOGMODE_LINEAR − the fog density follows a linear function.
If the fog mode EXP or EXP2 is defined, then you can define the density on it as follows −
scene.fogDensity = 0.01;
If the fog mode is LINEAR, then you can define where the fog starts and ends as follows −
scene.fogStart = 20.0;
scene.fogEnd = 60.0;
To give color to the fog, execute the following code −
scene.fogColor = new BABYLON.Color3(0.9, 0.9, 0.85);
Skybox
Skybox is a way of creating background in games which makes the scene looks realistic. It is more of a wrapper around your screen which covers with the texture being used for the material. Choose your images properly to make it look realistic for the scene that you want to create. To create skybox, you have to create a box and apply material to it. We will discuss the different material in detail in a subsequent chapter.
Now, we will see how to create a skybox using box and material.
var skybox = BABYLON.Mesh.CreateBox("skyBox", 100.0, scene);
We will create a box of size 100 so that it covers the entire scene. We will start by giving material to the box which is done as follows −
var skyboxMaterial = new BABYLON.StandardMaterial("skyBox", scene);
To this material, we will assign the properties.
skyboxMaterial.reflectionTexture = new BABYLON.CubeTexture("images/cubetexture/skybox", scene);
We have to use reflection texture which is basically used to create a mirror like material. The reflection texture property uses CubeTexture which takes image as an input. Since the cube has 6 faces, the image required for skybox has to be 6, i.e., internally it has to be stored as skybox_nx, skybox_ny, skybox_nz, skybox_px, skybox_py, skybox_pz. The images used for skybox are pasted below; they are faces of the cube on all six sides. When you apply a texture to the shape, it gives the details of the image used and makes the scene look realistic. We made use of the co-ordinates mode as SKYBOX_MODE as shown below −
skyboxMaterial.reflectionTexture.coordinatesMode = BABYLON.Texture.SKYBOX_MODE;
There are other properties used for material like backfaceCulling, diffuseColor, specularColor, disableLighting, etc. The properties are explained in detail in the material section.
In the demo, we will show an environment scene created using skybox, a sphere rotating in the scene and a plane moving around. Fog is applied to the scene, which you will notice when you rotate.
Demo Showing Environment Scene
<!doctype html>
<html>
   <head>
      <meta charset = "utf-8">
      <title> Babylon.JS : Demo</title>
      <script src = "babylon.js"></script>
      <style>
         canvas { width: 100%; height: 100%;}
      </style>
   </head>

   <body>
      <canvas id = "renderCanvas"></canvas>
      <script type = "text/javascript">
         var canvas = document.getElementById("renderCanvas");
         var engine = new BABYLON.Engine(canvas, true);
         var createScene  = function() {
            var scene = new BABYLON.Scene(engine);
            var light = new BABYLON.PointLight("Omni",
            new BABYLON.Vector3(10, 50, 50), scene);

            var camera = new BABYLON.ArcRotateCamera("Camera", 0.4, 1.2, 20, new BABYLON.Vector3(-10, 0, 0), scene);
            camera.attachControl(canvas, true);

            var material1 = new BABYLON.StandardMaterial("mat1", scene);
            material1.diffuseTexture = new BABYLON.Texture("images/tsphere.jpg", scene);

            var sphere = BABYLON.Mesh.CreateSphere("red", 32, 2, scene);
            sphere.setPivotMatrix(BABYLON.Matrix.Translation(2, 0, 0));
            sphere.material = material1;

            // Fog
            scene.fogMode = BABYLON.Scene.FOGMODE_EXP;
            scene.fogColor = new BABYLON.Color3(0.9, 0.9, 0.85);
            scene.fogDensity = 0.01;

            //skybox
            var skybox = BABYLON.Mesh.CreateBox("skyBox", 100.0, scene);

            var skyboxMaterial = new BABYLON.StandardMaterial("skyBox", scene);
            skyboxMaterial.backFaceCulling = false;

            skyboxMaterial.reflectionTexture = new BABYLON.CubeTexture("images/cubetexture/skybox", scene);
            skyboxMaterial.reflectionTexture.coordinatesMode = BABYLON.Texture.SKYBOX_MODE;

            skyboxMaterial.diffuseColor = new BABYLON.Color3(0, 0, 0);

            skyboxMaterial.specularColor = new BABYLON.Color3(0, 0, 0);

            skyboxMaterial.disableLighting = true;
            skybox.material = skyboxMaterial;


            var spriteManagerPlayer = new BABYLON.SpriteManager("playerManager", "images/plane.png", 8, 1000, scene);

            var plane = new BABYLON.Sprite("plane", spriteManagerPlayer);
            plane.position.x = -2;
            plane.position.y = 2;
            plane.position.z = 0;


            var alpha = 0;
            var x = 2;
            var y = 0;
            scene.registerBeforeRender(function () {
               scene.fogDensity = Math.cos(alpha) / 10;
               alpha += 0.02;
               sphere.rotation.y += 0.01;
               y += 0.05;
               if (x > 50) {
                  x = -2;
               }
               plane.position.x = -x;
               x += 0.02;
            });
            return scene;
         };
         var scene = createScene();
         engine.runRenderLoop(function() {
            scene.render();
         });
      </script>
   </body>
</html>
Output
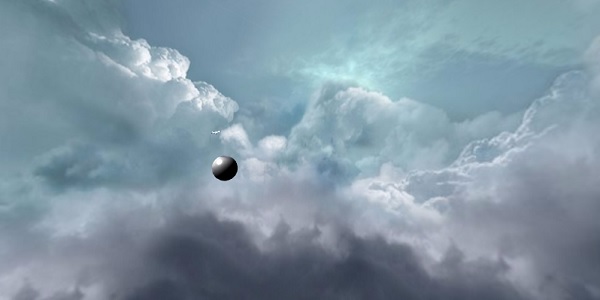
Explanation
In the above example, we used the following code for fog −
scene.fogMode = BABYLON.Scene.FOGMODE_EXP;
scene.fogColor = new BABYLON.Color3(0.9, 0.9, 0.85);
scene.fogDensity = 0.01;
scene.fogMode = BABYLON.Scene.FOGMODE_EXP − Here, the fog density follows an exponential function.
scene.registerBeforeRender = With this, the fog density changes as follows −
var alpha = 0;
scene.registerBeforeRender(function () {
   scene.fogDensity = Math.cos(alpha) / 10;
   alpha += 0.02;
});
The value of alpha keeps incrementing by 0.02 as it goes in a loop as in the above function.
Here, we have added a plane sprite image and changed its position with the scene.registerBeforeRender function as follows −
var alpha = 0;
var x = 2;
var y = 0;
scene.registerBeforeRender(function () {
   scene.fogDensity = Math.cos(alpha) / 10;
   alpha += 0.02;
   sphere.rotation.y += 0.01;
   y += 0.05;
   if (x > 50) {
      x = -2;
   }
   plane.position.x = -x;
   x += 0.02;
});
return scene;
};s
We will change the x axis of the plane and reset it when it reaches more than 50.
Also, the sphere is rotated along the y axis. This is shown in the above example.The value is changed using sphere.rotation.y.
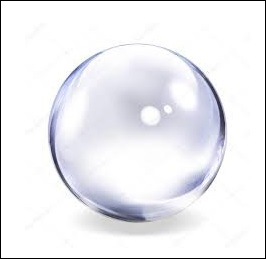
The texture used for sphere is − images/tshphere.jpg. The images are stored in images/ folder locally and also pasted below for reference. You can download any image of your choice and use in the demo link.
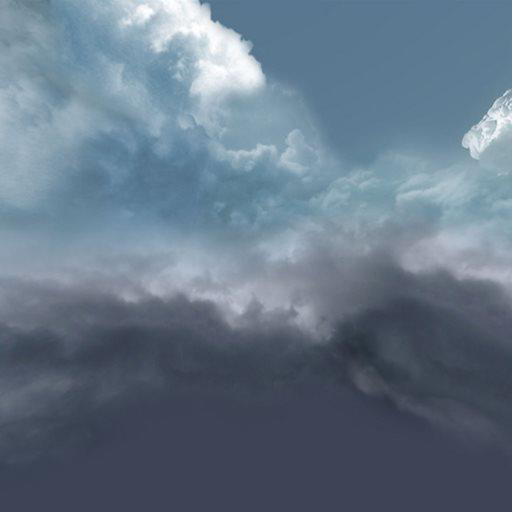
We need six images for a cube. The images are stored locally in images/cubetexture/ folder. You can download any image of your choice, but when you save it save them as nameoftheimage_nx, nameoftheimage_ny, nameoftheimage_nz,nameoftheimage_px, nameoftheimage_py, nameoftheimage_pz. Please note the images chosen should be in a sequence so that the background looks realistic like the one shown for skybox.
The images used for making a skybox are as follows − images/cubetexture/skybox
skybox_nx
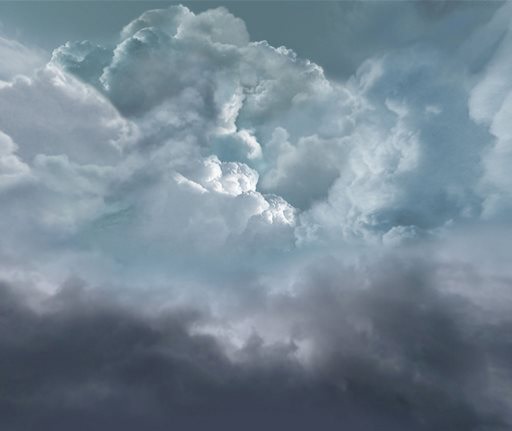
skybox_ny

skybox_nz
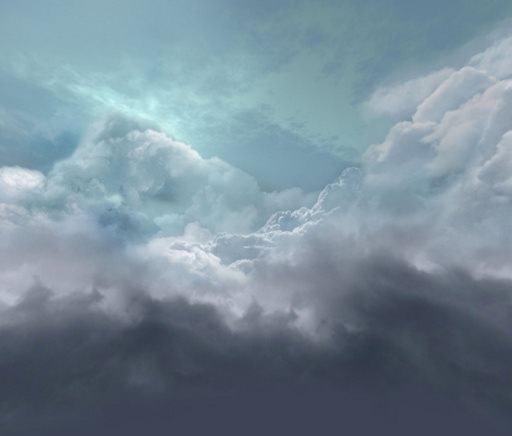
skybox_px
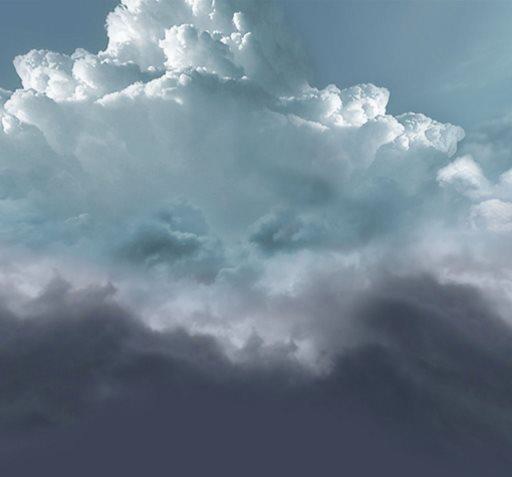
skybox_py
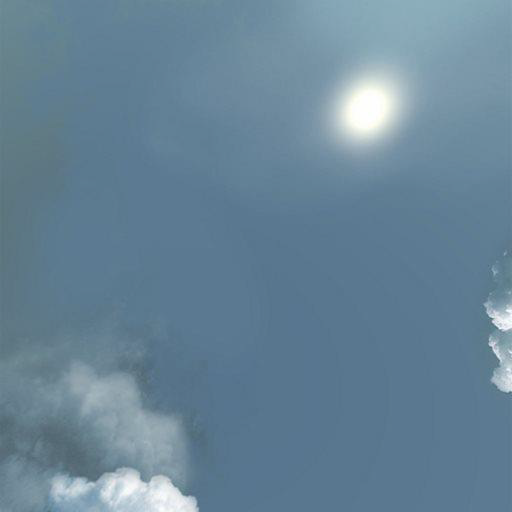
skybox_pz