- Windows Server 2012 - Home
- Overview
- Installation
- Server Roles
- PowerShell
- Remote Management
- Windows Firewall
- Remote Desktop Management
- Resource Monitor
- Active Directory
- DC Accounts
- File System
- Group Managed Service Accounts
- Group Policy Overview
- DHCP Role
- DNS Role
- Primary Zones
- Manage Records
- IIS Overview
- IIS Security
- Hyper-V
- Advanced Configuration
- Configure WSUS Role
- WSUS Policies & Tuning
- Sharing of Files
- File Manager
- Print Server
- Easy Printing
- Configure Print Drivers
- Network Services
- Backup Management
Windows Server 2012 - Network Services
Windows has many network services too and you might already be knowing that it can become a router or a VPN Server too. Let us see how to use the Windows server 2012 as a router by installing the Remote Access role to it.
PS − Server should have 2 network cards One inside the LAN and the other facing the internet.
To add the Remote Access role, we should follow the steps given below.
Step 1 − Go to, Server Manager → Manage → Add Roles and Features → Next → Check Role-based or feature-based installation → Check Select a server from the server pool → Next.
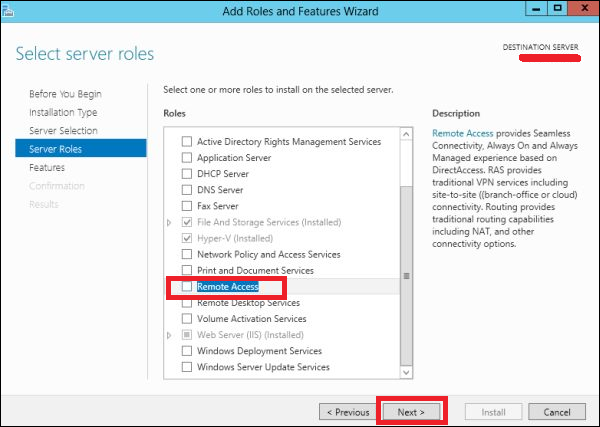
Once all of it is done, then at the list of the roles find Remote Access and check it → A pop-up window will open.
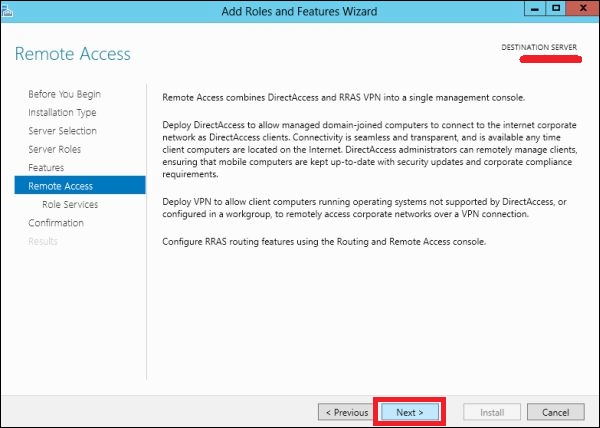
Step 2 − Click Add Features → Next.

Step 3 − Click Next.
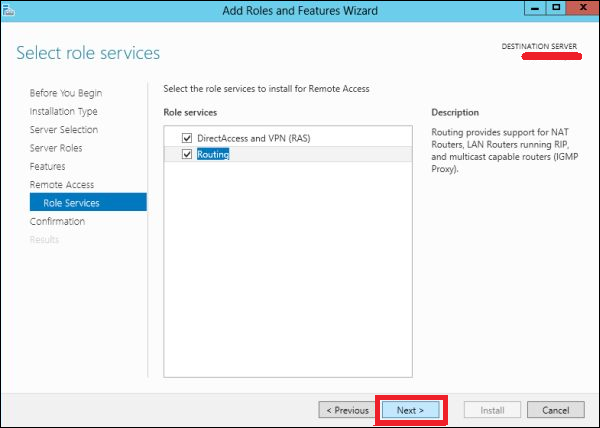
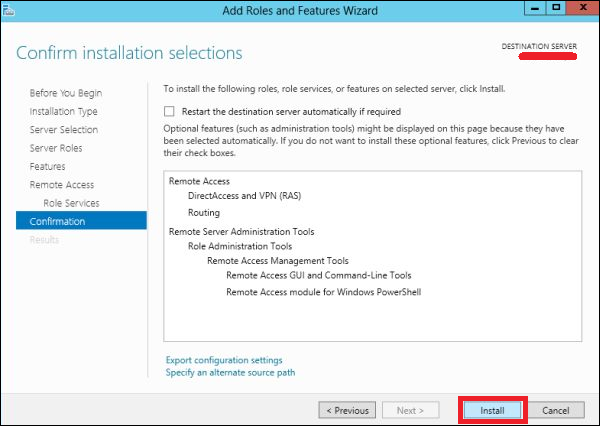
Step 4 − Check on the DirectAccess and VPN(RAS) and Routing check boxes.
Step 5 − Click Install and wait for it to be installed completely.
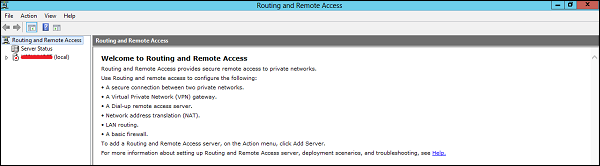
After the installation is done, let us now see the setup of the router. For this, we need to follow the steps given below.
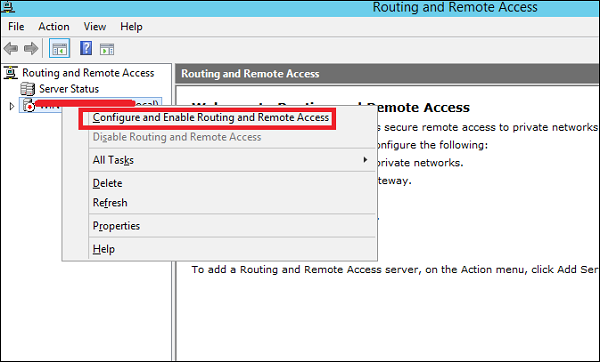
Step 1 − Go to, Server Manager → Tools → Routing and Remote Access.
Step 2 − Right click → and then again click on Configure and Enable Routing and Remote Access as shown in the following screenshot.
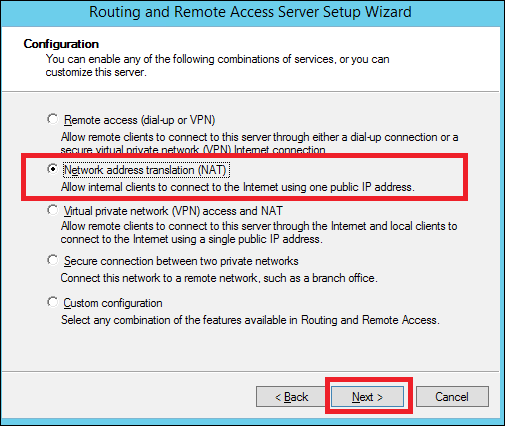
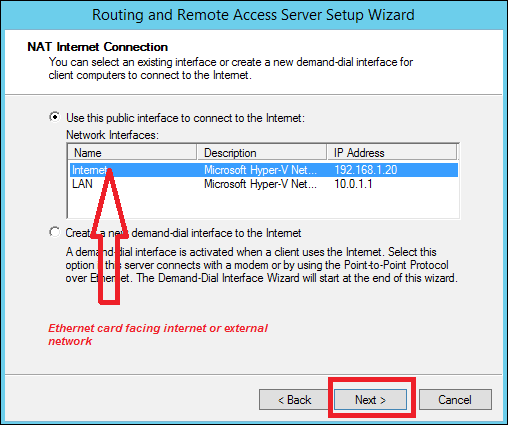
Step 3 − Select the Network address translation (NAT) option → Next.
Step 4 − Now choose your Ethernet card that will be facing your internet site as shown in the following image and then → Next.
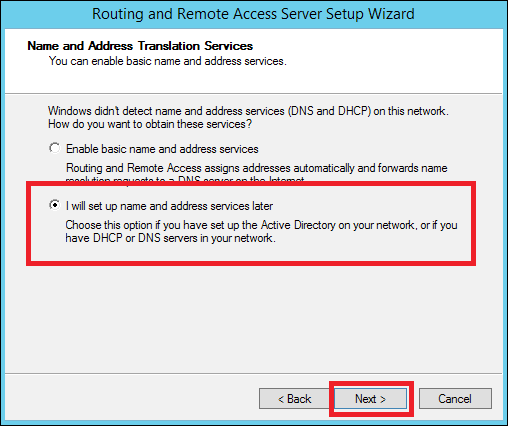
Step 5 − Choose I will set up name and address services later as we have already set up the DHCP and DNS and then → Next.
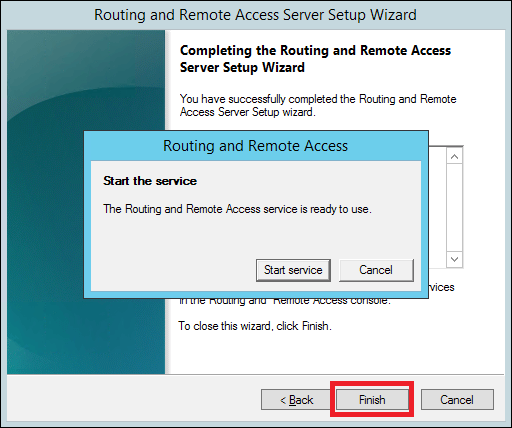
Step 6 − Click the Finish button.
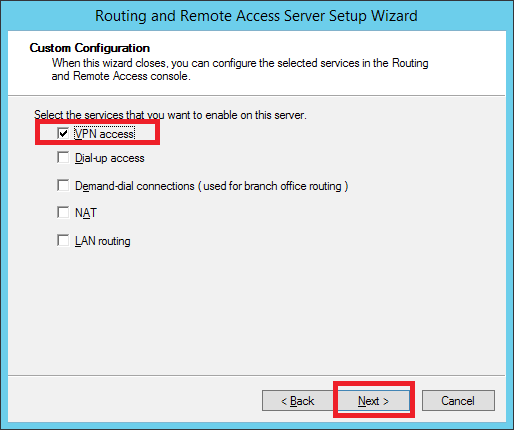
Now let us see how to make the VPN Setup to allow the employees to connect from home. To do this, we must follow the steps given below.
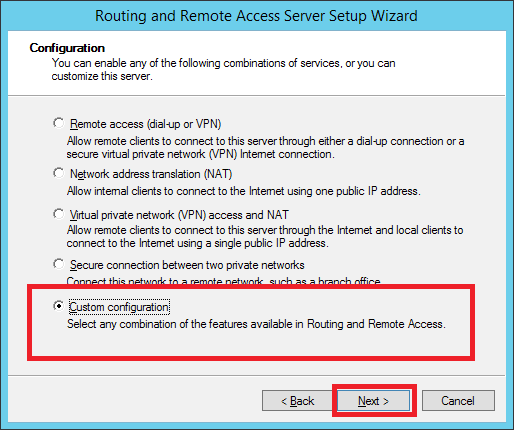
Step 1 − Go to, Server Manager → Tools → Routing and Remote Access → Right click → and then again click on Configure and Enable Routing and Remote Access → Custom Configuration and then → Next.
Step 2 − VPN Access and then → Next.
Step 3 − Click the Finish button.