- Virtualization 2.0 - Home
- Virtualization 2.0 - Overview
- Virtualization 2.0 - Pros and Cons
- Virtualization 2.0 - Common Uses
- Virtualization 2.0 - Hardware
- Virtualization 2.0 - Microsoft HyperV
- VMware Workstation Player
- Virtualization 2.0 - VirtualBox
- Virtualization 2.0 - Openstack
- Preparing the Infrastructure
- Virtualization 2.0 - Troubleshooting
- Backing Up, Restoring & Migrating VM
VMware Workstation Player
In this chapter, we will understand how to install the VMware Workstation Player and its usages.
Installing VMware Workstation Player
VMware workstation player is a hosted hypervisor, so you have to have a pre-installed OS before continuing to install it.
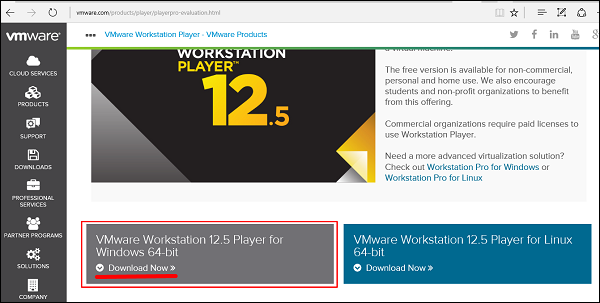
VMware workstation player is free version and available for non-commercial, personal and home use. They also encourage students and non-profit organizations to benefit from this offering. To download the VMware workstation player, you can click on the following link https://www.vmware.com/products/desktop-hypervisor/workstation-and-fusion. To install the VMware workstation player, follow the steps given below.
Step 1 − Click on Download Now as shown in the screenshot below.
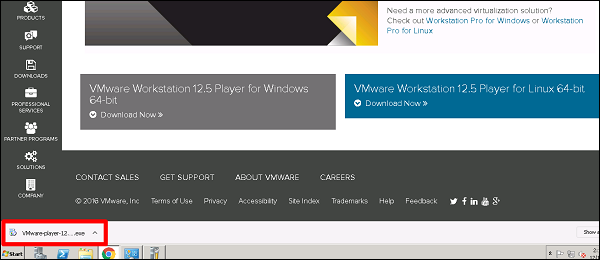
Step 2 − You will see that a file has been downloaded → double click on it.
Step 3 − A Table will pop-up initializing the installation of VMware → Click Next.

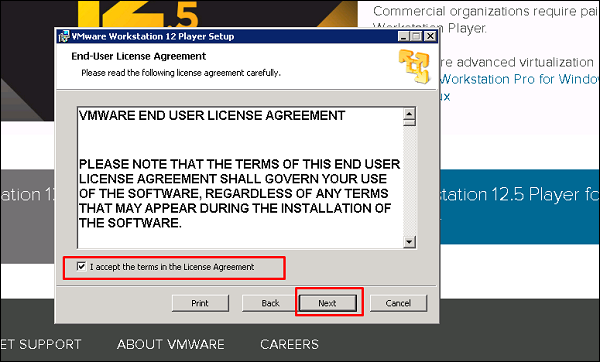
Step 4 − Check the box I accept the terms in the license agreement → Click on Next.
Step 5 − Once again, click on the Next button.
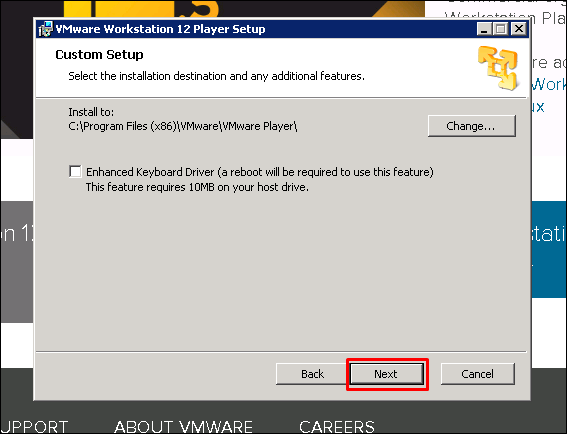
Step 6 − Leave the default values and click on Next.
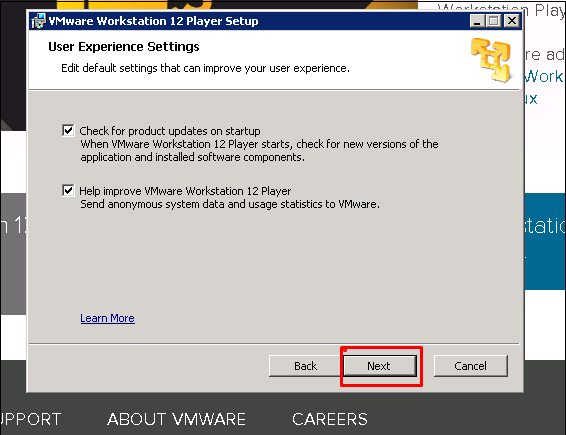
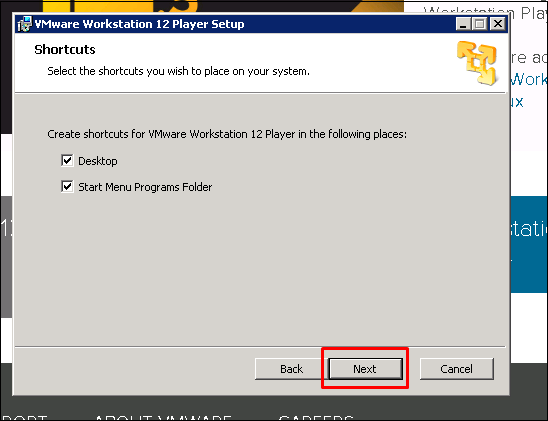
Step 7 − Once again, click on Next.
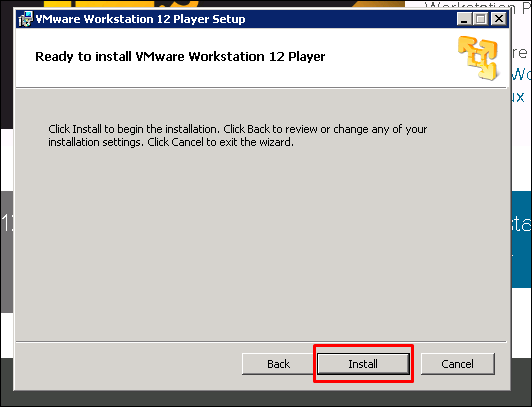
Step 8 − Click on Install.
Step 9 − An icon will be created on the desktop. Click on it and a table will popup, where you have two possibilities: If you want to use it as a non-commercial version, just enter your email address. If you want to use it as a commercial version, check the second option and enter your serial key.
Creating a VM with VMware Workstation
To create a virtual machine, we have to follow the steps given below.
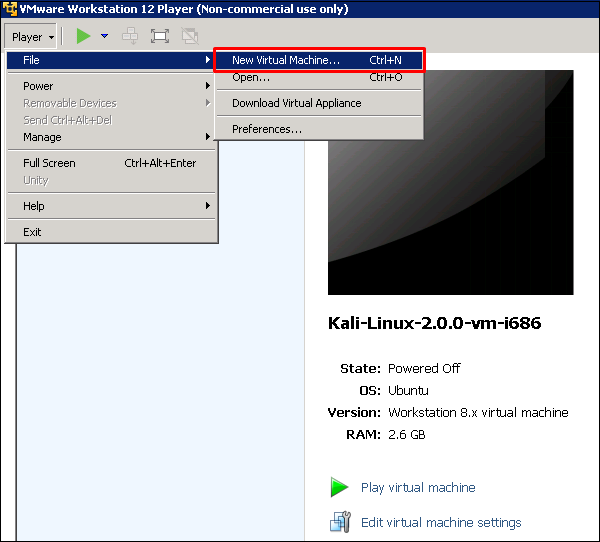
Step 1 − Click on Player → File → New Virtual Machine.
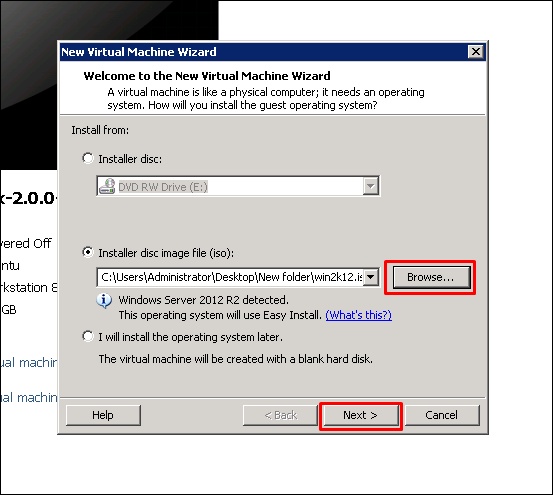
Step 2 − A table will pop-up requesting you to find a Boot disk, Boot Image or to install OS at a later stage.
We will choose the second option and click on Browse. Then we have to click on the ISO image, which we want to install. Once all this is done, click on Next.
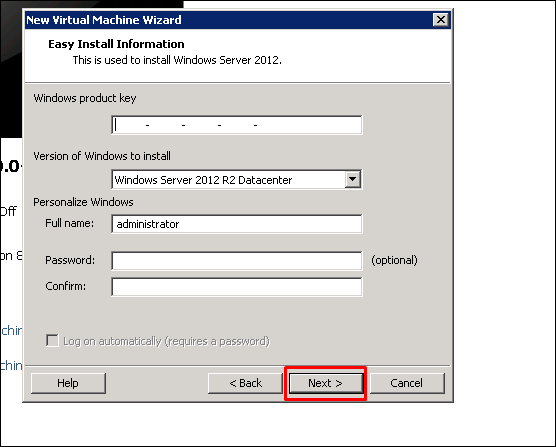
Step 3 − As I am installing windows server 2012, it will pop-up a table requesting to enter the serial key → click directly on Next, if you want to activate the noncommercial version for Windows.
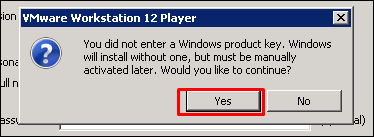
Step 4 − After the above step is complete, a dialogue box opens. Click Yes.
Step 5 − Click Next.
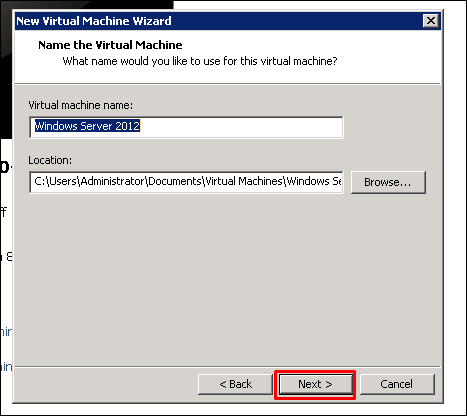
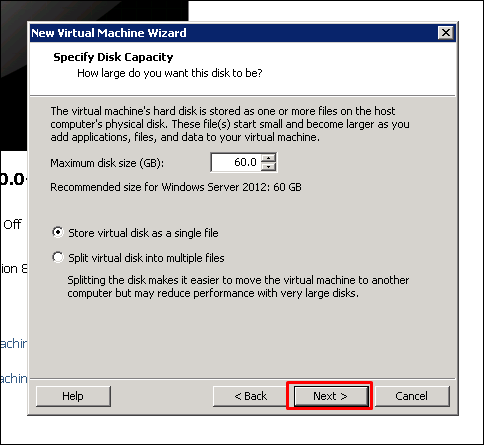
Step 6 − In the Maximum size disk box, enter the value of your virtual Hard disk, which in our case is 60GB. Then click on Next.
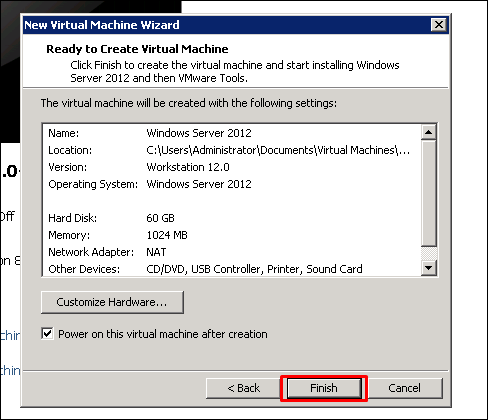
Step 7 − Click on Finish.
Setting up Networking with VMware Workstation
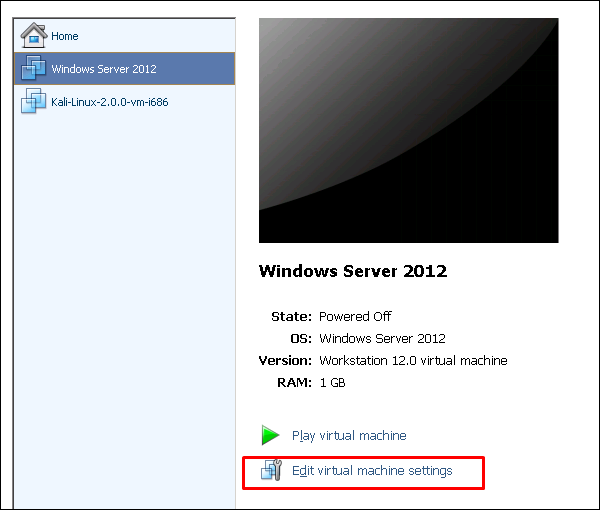
To set up the networking modes of a virtual machine in a VMware Workstation, we have to click on the Edit virtual machine settings.
A table will be opened with the settings of networking and on the left hand side panel of this table click on Network Adaptor.
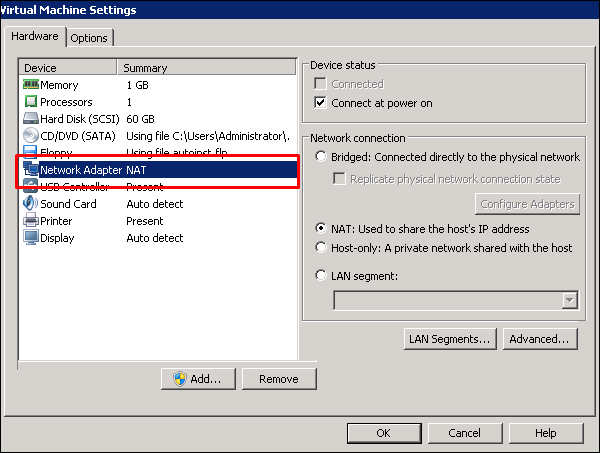
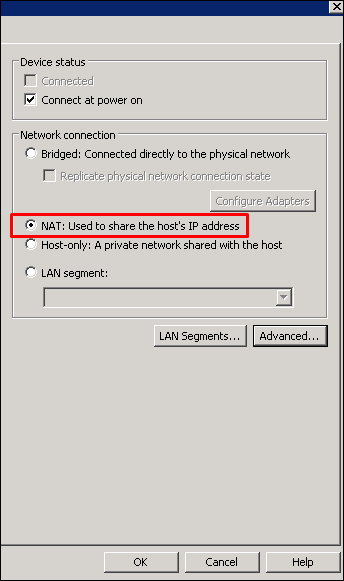
On the left of this table, you can see the networking modes as shown in the following screnshots.
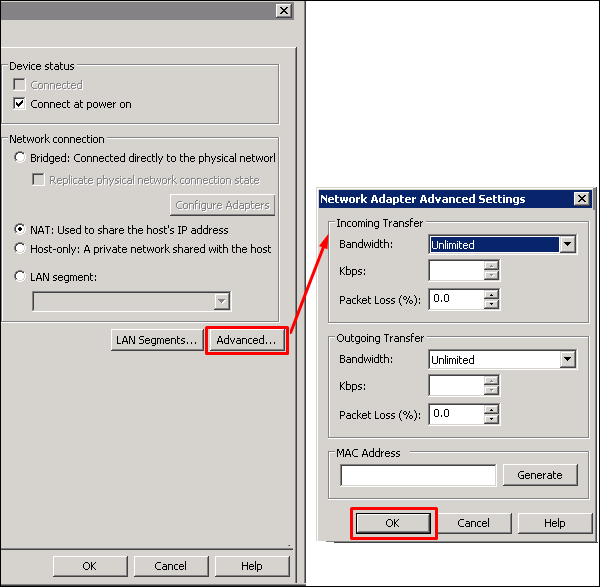
If we want to limit the bandwidth usage of a virtual machine, click on Advance and set the incoming and outgoing bandwidths.
Allocating Processors & Memory to a VM using VMware Workstation
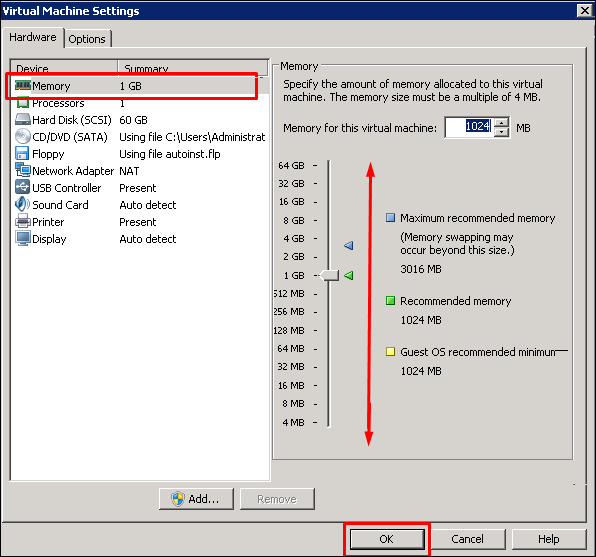
To allocate memory to a virtual machine in a VMware Workstation, we have to click on Edit virtual machine settings. A table will be opened and we will have to click on Memory.
On the left hand side panel, we have to enter the amount of memory manually or by moving the arrow up and down as shown in the following screenshot.
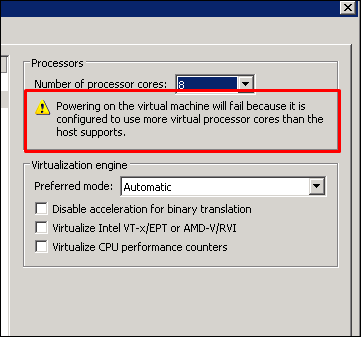
If you click on Processors. On the left hand side panel, we have to enter the amount of vCPU as shown in the screenshot below.
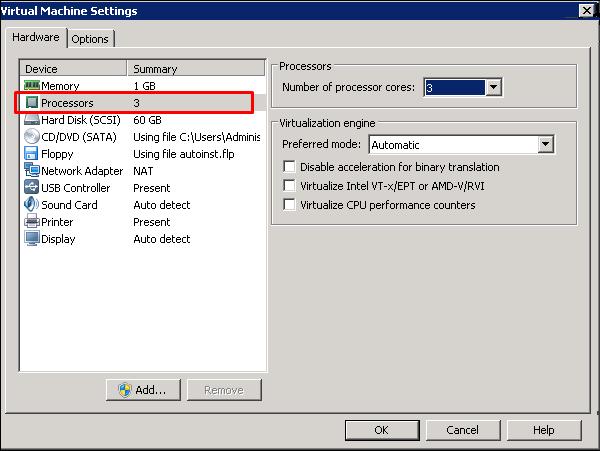
Note − If you put more vCPU-s than what the host supports, it will fail to power on the VM.
Duplicating a VM Using VMware Workstation
To create duplicates of VM machines, we have to use the VMware Workstation Commercial Version.
Let us see how to do it in practice by following the steps given below.
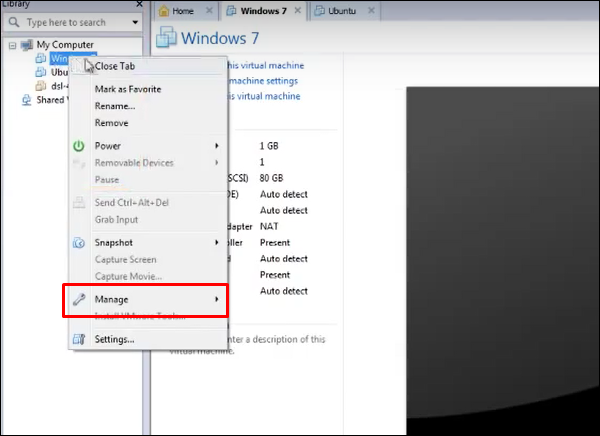
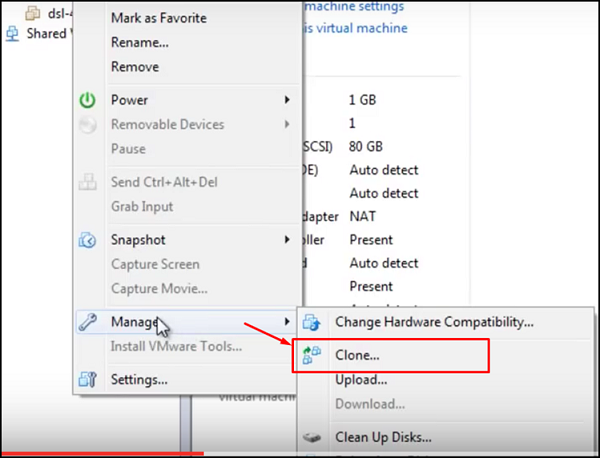
Step 1 − Open the VMware managing console and right click on a VM that you want to duplicate. Click on Manage.
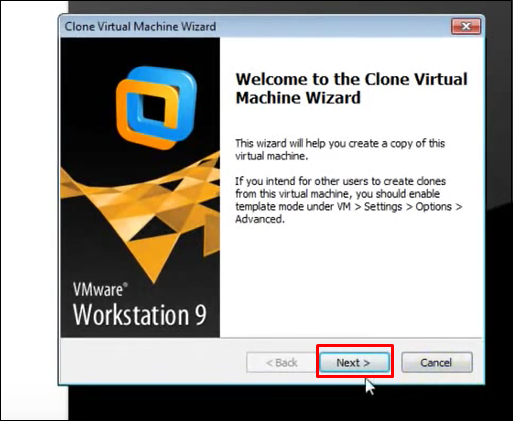
Step 2 − Click on Clone and a wizard will be open.
Step 3 − Click on Next.
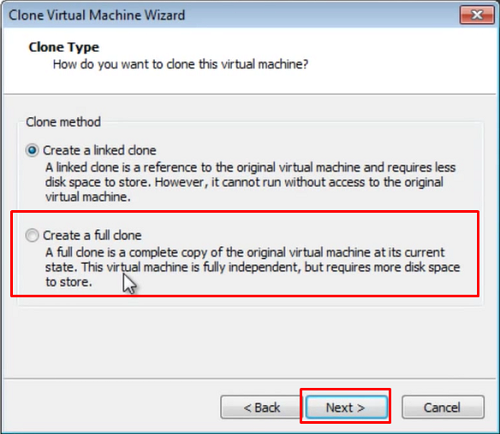
Step 4 − Click on Create a Full Clone and Next.
Step 5 − Put a name for the clone that will be created and Finish.
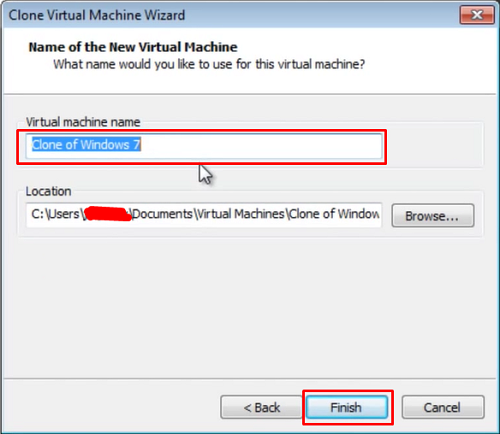
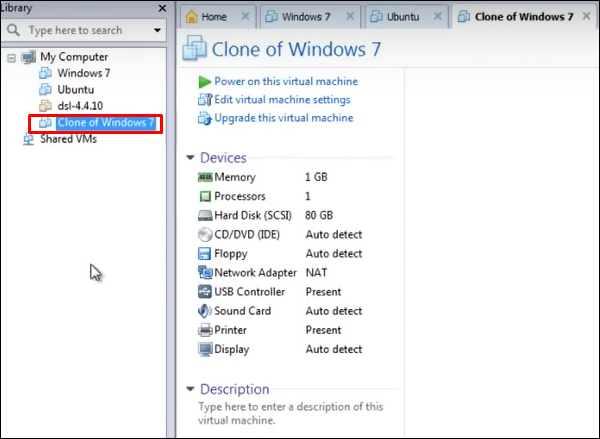
The following screenshots describe the process of cloning.
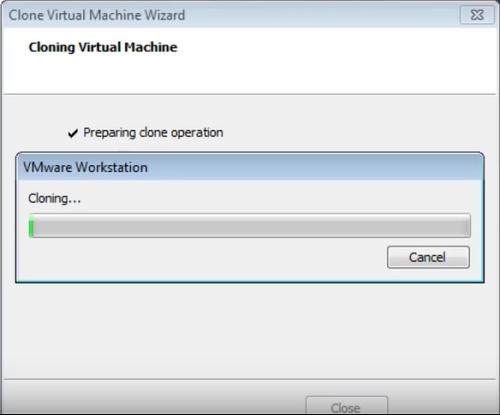
Once the cloning process is complete, the following window will open.