Socket.IO - Quick Guide
Socket.IO - Overview
Socket.IO is a JavaScript library for real-time web applications. It enables real-time, bi-directional communication between web clients and servers. It has two parts − a client-side library that runs in the browser, and a server-side library for node.js. Both components have an identical API.
Real-time Applications
A real-time application (RTA) is an application that functions within a period that the user senses as immediate or current.
Some examples of real-time applications are −
Instant messengers − Chat apps like Whatsapp, Facebook Messenger, etc. You need not refresh your app/website to receive new messages.
Push Notifications − When someone tags you in a picture on Facebook, you receive a notification instantly.
Collaboration Applications − Apps like google docs, which allow multiple people to update same documents simultaneously and apply changes to all people's instances.
Online Gaming − Games like Counter Strike, Call of Duty, etc., are also some examples of real-time applications.
Why Socket.IO?
Writing a real-time application with popular web applications stacks like LAMP (PHP) has traditionally been very hard. It involves polling the server for changes, keeping track of timestamps, and it is a lot slower than it should be.
Sockets have traditionally been the solution around which most real-time systems are architected, providing a bi-directional communication channel between a client and a server. This means that the server can push messages to clients. Whenever an event occurs, the idea is that the server will get it and push it to the concerned connected clients.
Socket.IO is quite popular, it is used by Microsoft Office, Yammer, Zendesk, Trello,. and numerous other organizations to build robust real-time systems. It one of the most powerful JavaScript frameworks on GitHub, and most depended-upon NPM (Node Package Manager) module. Socket.IO also has a huge community, which means finding help is quite easy.
ExpressJS
We will be using express to build the web server that Socket.IO will work with. Any other node-server-side framework or even node HTTP server can be used. However, ExpressJS makes it easy to define routes and other things. To read more about express and get a basic idea about it, head to ExpressJS tutorial.
Socket.IO - Environment
To get started with developing using the Socket.IO, you need to have Node and npm (node package manager) installed. If you do not have these, head over to Node setup to install node on your local system. Confirm that node and npm are installed by running the following commands in your terminal.
node --version
npm --version
You should get an output similar to −
v14.17.0
6.14.13Open your terminal and enter the following in your terminal to create a new folder and enter the following commands −
$ mkdir test-project
$ cd test-proect
$ npm init
It will ask you some questions; answer them in the following way −
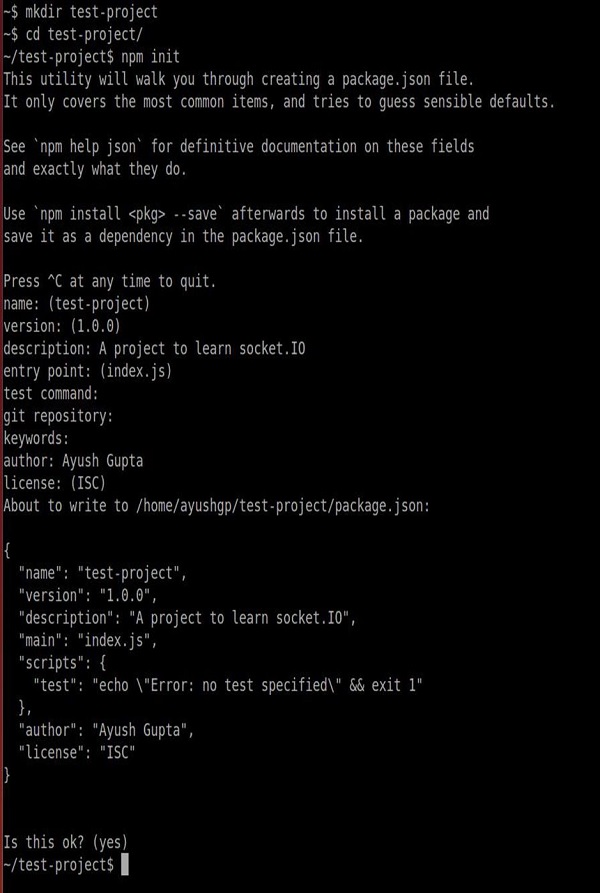
This will create a 'package.json node.js' configuration file. Now we need to install Express and Socket.IO. To install these and save them to package.json file, enter the following command in your terminal, into the project directory −
npm install --save express socket.io
One final thing is that we should keep restarting the server. When we make changes, we will need a tool called nodemon. To install nodemon, open your terminal and enter the following command −
npm install -g nodemon
Whenever you need to start the server, instead of using the node app.js use, nodemon app.js. This will ensure that you do not need to restart the server whenever you change a file. It speeds up the development process.
Now, we have our development environment set up. Let us now get started with developing real-time applications with Socket.IO.
Socket.IO - Hello world
In the following chapter we will discuss the basic example using Socket.IO library along with ExpressJS.
Example
First of all, create a file called app.js and enter the following code to set up an express application −
var app = require('express')();
var http = require('http').Server(app);

app.get('/', function(req, res){
   res.sendFile('E:/test/index.html');
});

http.listen(3000, function(){
   console.log('listening on *:3000');
});
We will need an index.html file to serve, create a new file called index.html and enter the following code in it −
<!DOCTYPE html>
<html>
   <head><title>Hello world</title></head>
   <body>Hello world</body>
</html>
To test if this works, go to the terminal and run this app using the following command −
nodemon app.js
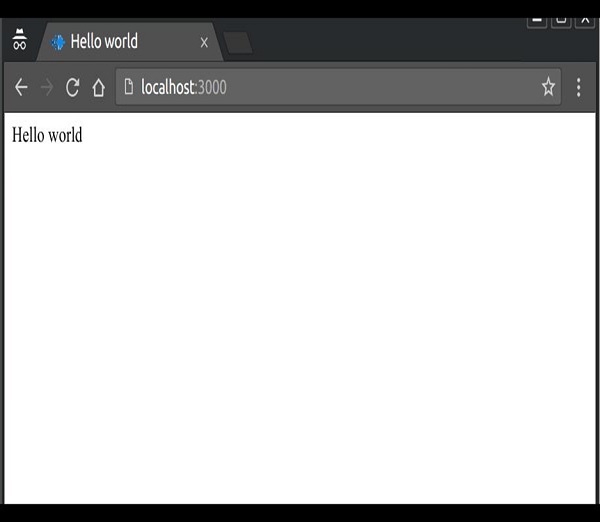
This will run the server on localhost:3000. Go to the browser and enter localhost:3000 to check this. If everything goes well a message saying "Hello World" is printed on the page.
Following is another example (this require Socket.IO), it will log "A user connected", every time a user goes to this page and "A user disconnected", every time someone navigates away/closes this page.
var app = require('express')();
var http = require('http').Server(app);
var io = require('socket.io')(http);

app.get('/', function(req, res){ res.sendFile('E:/test/index.html');
});

//Whenever someone connects this gets executed
io.on('connection', function(socket){
   console.log('A user connected');

   //Whenever someone disconnects this piece of code executed
   socket.on('disconnect', function () {
      console.log('A user disconnected');
   });
});
http.listen(3000, function(){
   console.log('listening on *:3000');
});
The require('socket.io')(http) creates a new socket.io instance attached to the http server. The io.on event handler handles connection, disconnection, etc., events in it, using the socket object.
We have set up our server to log messages on connections and disconnections. We now have to include the client script and initialize the socket object there, so that clients can establish connections when required. The script is served by our io server at '/socket.io/socket.io.js'.
After completing the above procedure, the index.html file will look as follows −
<!DOCTYPE html>
<html>
   <head><title>Hello world</title></head>
   <script src="/socket.io/socket.io.js"></script>
   <script>
      var socket = io();
   </script>
   <body>Hello world</body>
</html>
If you go to localhost:3000 now (make sure your server is running), you will get Hello World printed in your browser. Now check your server console logs, it will show the following message −
A user connected
If you refresh your browser, it will disconnect the socket connection and recreate. You can see the following on your console logs −
A user connected
A user disconnected
A user connected
Socket.IO - Event Handling
Sockets work based on events. There are some reserved events, which can be accessed using the socket object on the server side.
These are −
- Connect
- Message
- Disconnect
- Reconnect
- Ping
- Join and
- Leave.
The client-side socket object also provides us with some reserved events, which are −
- Connect
- Connect_error
- Connect_timeout
- Reconnect, etc.
Now, let us see an example to handle events using SocketIO library.
Example 1
In the Hello World example, we used the connection and disconnection events to
log when a user connected and left. Now we will be using the message event to
pass message from the server to the client. To do this, modify the io.on
('connection', function(socket)) as shown below var app =
require('express')();
var http = require('http').Server(app);
var io = require('socket.io')(http);

app.get('/', function(req, res){
   res.sendFile('E:/test/index.html');
});

io.on('connection', function(socket){
   console.log('A user connected');

   // Send a message after a timeout of 4seconds
   setTimeout(function(){
      socket.send('Sent a message 4seconds after connection!');
   }, 4000);
   socket.on('disconnect', function () {
      console.log('A user disconnected');
   });
});
http.listen(3000, function(){
   console.log('listening on *:3000');
});
This will send an event called message(built in) to our client, four seconds after the client connects. The send function on socket object associates the 'message' event.
Now, we need to handle this event on our client side, to do so, replace the contents of the index.html page with the following −
<!DOCTYPE html>
<html>
   <head><title>Hello world</title></head>
   <script src="/socket.io/socket.io.js"></script>
   <script>
      var socket = io();
      socket.on('message', function(data){document.write(data)});
   </script>
   <body>Hello world</body>
</html>
We are now handling the 'message' event on the client. When you go to the page in your browser now, you will be presented with the following screenshot.
After 4 seconds pass and the server sends the message event, our client will handle it and produce the following output −
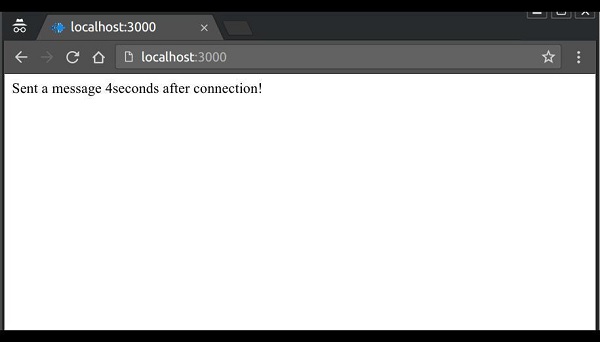
Note − We sent a string of text here; we can also send an object in any event.
Message was a built-in event provided by the API, but is of not much use in a real application, as we need to be able to differentiate between events.
To allow this, Socket.IO provides us the ability to create custom events. You can create and fire custom events using the socket.emit function. Following code emits an event called testerEvent −
var app = require('express')();
var http = require('http').Server(app);
var io = require('socket.io')(http);

app.get('/', function(req, res){
   res.sendFile('E:/test/index.html');
});

io.on('connection', function(socket){
   console.log('A user connected');
   // Send a message when
   setTimeout(function(){
      // Sending an object when emmiting an event
      socket.emit('testerEvent', { description: 'A custom event named testerEvent!'});
   }, 4000);
   socket.on('disconnect', function () {
      console.log('A user disconnected');
   });
});
http.listen(3000, function(){
   console.log('listening on localhost:3000');
});
To handle this custom event on client we need a listener that listens for the event testerEvent. The following code handles this event on the client −
<!DOCTYPE html>
<html>
   <head><title>Hello world</title></head>
   <script src="/socket.io/socket.io.js"></script>
   <script>
      var socket = io();
      socket.on('testerEvent', function(data){document.write(data.description)});
   </script>
   <body>Hello world</body>
</html>
This will work in the same way as our previous example, with the event being testerEvent in this case. When you open your browser and go to localhost:3000, you'l be greeted with −
Hello world
After four seconds, this event will be fired and the browser will have the text changed to −
A custom event named testerEvent!
Example 2
We can also emit events from the client. To emit an event from your client, use the emit function on the socket object.
<!DOCTYPE html>
<html>
   <head><title>Hello world</title></head>
   <script src="/socket.io/socket.io.js"></script>
   <script>
      var socket = io();
      socket.emit('clientEvent', 'Sent an event from the client!');
   </script>
   <body>Hello world</body>
</html>
To handle these events, use the on function on the socket object on your server.
var app = require('express')();
var http = require('http').Server(app);
var io = require('socket.io')(http);

app.get('/', function(req, res){
   res.sendFile('E:/test/index.html');
});
io.on('connection', function(socket){
   socket.on('clientEvent', function(data){
      console.log(data);
   });
});

http.listen(3000, function(){
   console.log('listening on localhost:3000');
});
So, now if we go to localhost:3000, we will get a custom event called clientEvent fired. This event will be handled on the server by logging −
Sent an event from the client!
Socket.IO - Broadcasting
Broadcasting means sending a message to all connected clients. Broadcasting can be done at multiple levels. We can send the message to all the connected clients, to clients on a namespace and clients in a particular room. To broadcast an event to all the clients, we can use the io.sockets.emit method.
Note − This will emit the event to ALL the connected clients (event the socket that might have fired this event).
In this example, we will broadcast the number of connected clients to all the users. Update the app.js file to incorporate the following −
var app = require('express')();
var http = require('http').Server(app);
var io = require('socket.io')(http);

app.get('/', function(req, res){
   res.sendFile('E:/test/index.html');
});

var clients = 0;

io.on('connection', function(socket){
   clients++;
   io.sockets.emit('broadcast',{ description: clients + ' clients connected!'});
   socket.on('disconnect', function () {
      clients--;
      io.sockets.emit('broadcast',{ description: clients + ' clients connected!'});
   });
});

http.listen(3000, function(){
   console.log('listening on localhost:3000');
});
On the client side, we just need to handle the broadcast event −
<!DOCTYPE html>
<html>
   <head><title>Hello world</title></head>
   <script src="/socket.io/socket.io.js"></script>
   <script>
      var socket = io();
      socket.on('broadcast',function(data){
         document.body.innerHTML = '';
         document.write(data.description);
      });
   </script>
   <body>Hello world</body>
</html>
If you connect four clients, you will get the following result −
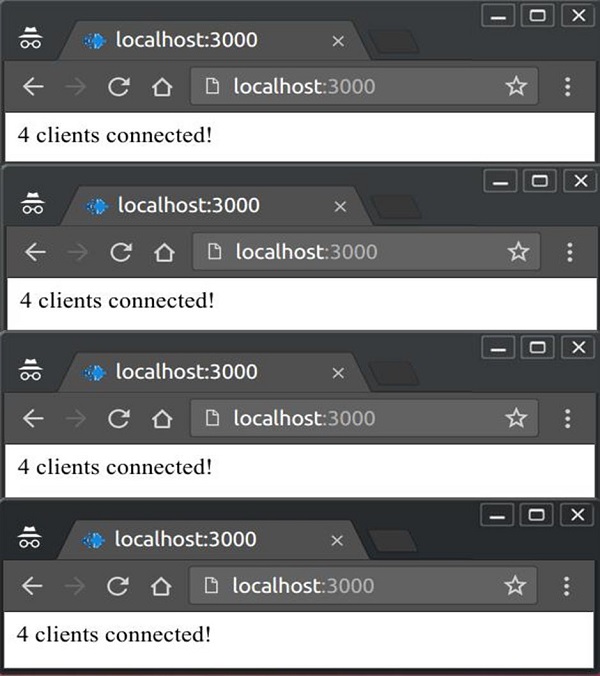
This was to send an event to everyone. Now, if we want to send an event to everyone, but the client that caused it (in the previous example, it was caused by new clients on connecting), we can use the socket.broadcast.emit.
Let us send the new user a welcome message and update the other clients about him/her joining. So, in your app.js file, on connection of client send him a welcome message and broadcast connected client number to all others.
var app = require('express')();
var http = require('http').Server(app);
var io = require('socket.io')(http);

app.get('/', function(req, res){
   res.sendFile('E:/test/index.html');
});
var clients = 0;

io.on('connection', function(socket){
   clients++;
   socket.emit('newclientconnect',{ description: 'Hey, welcome!'});
   socket.broadcast.emit('newclientconnect',{ description: clients + ' clients connected!'})
   socket.on('disconnect', function () {
      clients--;
      socket.broadcast.emit('newclientconnect',{ description: clients + ' clients connected!'})
   });
});
http.listen(3000, function(){
   console.log('listening on localhost:3000');
});
And your html to handle this event −
<!DOCTYPE html>
<html>
   <head><title>Hello world</title></head>
   <script src="/socket.io/socket.io.js"></script>
   <script>
      var socket = io();
      socket.on('newclientconnect',function(data){
               document.body.innerHTML = '';
               document.write(data.description);
      });
   </script>
   <body>Hello world</body>
</html>
Now, the newest client gets a welcome message and others get how many clients are connected currently to the server.
Socket.IO - Namespaces
Socket.IO allows you to "namespace" your sockets, which essentially means assigning different endpoints or paths. This is a useful feature to minimize the number of resources (TCP connections) and at the same time separate concerns within your application by introducing separation between communication channels. Multiple namespaces actually share the same WebSockets connection thus saving us socket ports on the server.
Namespaces are created on the server side. However, they are joined by clients by sending a request to the server.
Default Namespaces
The root namespace '/' is the default namespace, which is joined by clients if a namespace is not specified by the client while connecting to the server. All connections to the server using the socket-object client side are made to the default namespace. For example −
var socket = io();
This will connect the client to the default namespace. All events on this namespace connection will be handled by the io object on the server. All the previous examples were utilizing default namespaces to communicate with the server and back.
Custom Namespaces
We can create our own custom namespaces. To set up a custom namespace, we can call the 'of' function on the server side −
var app = require('express')();
var http = require('http').Server(app);
var io = require('socket.io')(http);

app.get('/', function(req, res){
   res.sendFile('E:/test/index.html');});

var nsp = io.of('/my-namespace');
nsp.on('connection', function(socket){
   console.log('someone connected');
   nsp.emit('hi', 'Hello everyone!');
});
http.listen(3000, function(){
   console.log('listening on localhost:3000');
});
Now, to connect a client to this namespace, you need to provide the namespace as an argument to the io constructor call to create a connection and a socket object on client side.
For example, to connect to the above namespace, use the following HTML −
<!DOCTYPE html>
<html>
   <head><title>Hello world</title></head>
   <script src="/socket.io/socket.io.js"></script>
   <script>
      var socket = io('/my-namespace');
      socket.on('hi',function(data){
         document.body.innerHTML = '';
         document.write(data);
      });
   </script>
   <body></body>
 </html>
Every time someone connects to this namespace, they will receive a 'hi' event displaying the message "Hello everyone!".
Socket.IO - Rooms
Within each namespace, you can also define arbitrary channels that sockets can join and leave. These channels are called rooms. Rooms are used to further-separate concerns. Rooms also share the same socket connection like namespaces. One thing to keep in mind while using rooms is that they can only be joined on the server side.
Joining Rooms
You can call the join method on the socket to subscribe the socket to a given channel/room. For example, let us create rooms called 'room-<room-number>' and join some clients. As soon as this room is full, create another room and join clients there.
Note − We are currently doing this on the default namespace, i.e. '/'. You can also implement this in custom namespaces in the same fashion.
var app = require('express')();
var http = require('http').Server(app);
var io = require('socket.io')(http);
app.get('/', function(req, res){
   res.sendfile('index.html');
});
var roomno = 1;
io.on('connection', function(socket){
   socket.join("room-"+roomno);
   //Send this event to everyone in the room.
   io.sockets.in("room-"+roomno).emit('connectToRoom', "You are in room no. "+roomno);
})
http.listen(3000, function(){
   console.log('listening on localhost:3000');
});
Just handle this connectToRoom event on the client.
<!DOCTYPE html>
<html>
   <head><title>Hello world</title></head>
   <script src="/socket.io/socket.io.js"></script>
   <script>
      var socket = io();
      socket.on('connectToRoom',function(data){
         document.body.innerHTML = '';
         document.write(data);
      });
   </script>
   <body></body>
</html>
Now if you connect three clients, the first two will get the following message −
You are in room no. 1
Leaving a Room
To leave a room, you need to call the leave function just as you called the join function on the socket.
For example − To leave room 'room-1',
socket.leave("room-"+roomno);
Socket.IO - Error Handling
We have worked on local servers until now, which will almost never give us errors related to connections, timeouts, etc. However, in real life production environments, handling such errors are of utmost importance. Therefore, we will now discuss how we can handle connection errors on the client side.
The client API provides us with following built in events −
Connect − When the client successfully connects.
Connecting − When the client is in the process of connecting.
Disconnect − When the client is disconnected.
Connect_failed − When the connection to the server fails.
Error − An error event is sent from the server.
Message − When the server sends a message using the send function.
Reconnect − When reconnection to the server is successful.
Reconnecting − When the client is in the process of connecting.
Reconnect_failed − When the reconnection attempt fails.
To handle errors, we can handle these events using the out-socket object that we created on our client.
For example If we have a connection that fails, we can use the following code to connect to the server again −
socket.on('connect_failed', function() {
   document.write("Sorry, there seems to be an issue with the connection!");
})
Socket.IO - Logging & Debugging
Socket.IO uses a very famous debugging module developed by ExpresJS's main author, called debug. Earlier Socket.IO used to log everything to the console making it quite difficult to debug the problem. After the v1.0 release, you can specify what you want to log.
Server-side
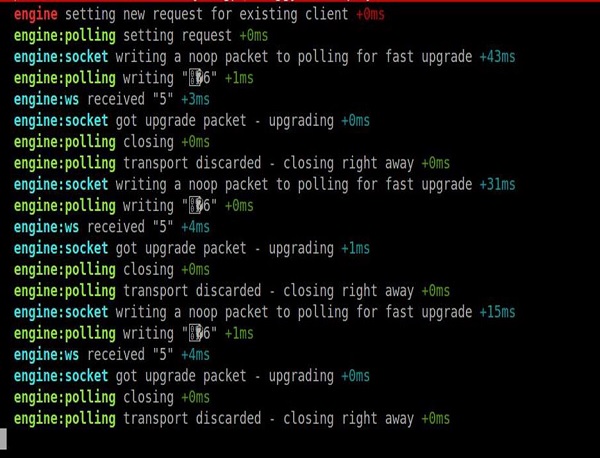
The best way to see what information is available is to use the * −
DEBUG=* node app.js
This will colorize and output everything that happens to your server console. For example, we can consider the following screenshot.
Client-side
Paste this to console, click enter and refresh your page. This will again output everything related to Socket.io to your console.
localStorage.debug = '*';
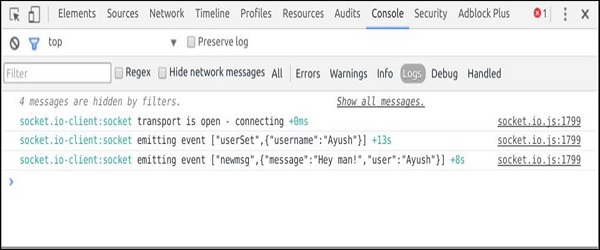
You can limit the output to get the debug info with incoming data from the socket using the following command.
localStorage.debug = 'socket.io-client:socket';
You can see the result like the following screenshot, if you use the second statement to log the info −
There is a very good blog post related to socket.io debugging here.
Socket.IO - Internals
In this chapter, we will discuss regarding Fallbacks, Connection using Socket.IO, Events and Messages.
Fallbacks
Socket.IO has a lot of underlying transport mechanisms, which deal with various constraints arising due to cross browser issues, WebSocket implementations, firewalls, port blocking, etc.
Though W3C has a defined specification for WebSocket API, it is still lacking in implementation. Socket.IO provides us with fallback mechanisms, which can deal with such issues. If we develop apps using the native API, we have to implement the fallbacks ourselves. Socket.IO covers a large list of fallbacks in the following order −
- WebSockets
- FlashSocket
- XHR long polling
- XHR multipart streaming
- XHR polling
- JSONP polling
- iframes
Connection using Socket.IO
The Socket.IO connection begins with the handshake. This makes the handshake a special part of the protocol. Apart from the handshake, all the other events and messages in the protocol are transferred over the socket.
Socket.IO is intended for use with web applications, and therefore it is assumed that these applications will always be able to use HTTP. It is because of this reasoning that the Socket.IO handshake takes place over HTTP using a POST request on the handshake URI (passed to the connect method).
Events and Messages
WebSocket native API only sends messages across. Socket.IO provides an addition layer over these messages, which allows us to create events and again helps us develop apps easily by separating the different types of messages sent.
The native API sends messages only in plain text. This is also taken care of by Socket.IO. It handles the serialization and deserialization of data for us.
We have an official client API for the web. For other clients such as native mobile phones, other application clients also we can use Socket.IO using the following steps.
Step 1 − A connection needs to be established using the same connection protocol discussed above.
Step 2 − The messages need to be in the same format as specified by Socket.IO. This format enables Socket.IO to determine the type of the message and the data sent in the message and some metadata useful for operation.
The message format is −
[type] : [id ('+')] : [endpoint] (: [data]
The parameters in the above command are explained below −
Type is a single digit integer, specifying what type message it is.
ID is message ID, an incremental integer used for acknowledgements.
Endpoint is the socket endpoint that the message is intended to be delivered to...
Data is the associated data to be delivered to the socket. In case of messages, it is treated as plain text, for other events, it is treated as JSON.
In the next chapter, we will write a chat application in Socket.IO.
Socket.IO - Chat Application
Now that we are well acquainted with Socket.IO, let us write a chat application, which we can use to chat on different chat rooms. We will allow users to choose a username and allow them to chat using them. So first, let us set up our HTML file to request for a username −
<!DOCTYPE html>
<html>
   <head><title>Hello world</title></head>
   <script src="/socket.io/socket.io.js"></script>
   <script>
      var socket = io();
   </script>
   <body>
      <input type="text" name="name" value="" placeholder="Enter your name!">
      <button type="button" name="button">Let me chat!</button>
   </body>
</html>
Now that we have set up our HTML to request for a username, let us create the server to accept connections from the client. We will allow people to send their chosen usernames using the setUsername event. If a user exists, we will respond by a userExists event, else using a userSet event.
var app = require('express')();
var http = require('http').Server(app);
var io = require('socket.io')(http);

app.get('/', function(req, res){
   res.sendFile('E:/test/index.html');});
users = [];
io.on('connection', function(socket){
   console.log('A user connected');
   socket.on('setUsername', function(data){
      if(users.indexOf(data) > -1){
         users.push(data);
         socket.emit('userSet', {username: data});
      } else {
         socket.emit('userExists', data + ' username is taken! Try some other username.');
     }
   })
});
http.listen(3000, function(){
   console.log('listening on localhost:3000');
});
We need to send the username to the server when people click on the button. If user exists, we show an error message; else, we show a messaging screen −
<!DOCTYPE html>
<html>
   <head><title>Hello world</title></head>
   <script src="/socket.io/socket.io.js"></script>
   <script>
      var socket = io();
      function setUsername(){
         socket.emit('setUsername', document.getElementById('name').value);
      };
      var user;
      socket.on('userExists', function(data){
         document.getElementById('error-container').innerHTML = data;
      });
      socket.on('userSet', function(data){
         user = data.username;
         document.body.innerHTML = '<input type="text" id="message">\
         <button type="button" name="button" onclick="sendMessage()">Send</button>\
         <div id="message-container"></div>';
      });
      function sendMessage(){
         var msg = document.getElementById('message').value;
         if(msg){
            socket.emit('msg', {message: msg, user: user});
         }
      }
      socket.on('newmsg', function(data){
         if(user){
            document.getElementById('message-container').innerHTML +='<div><b>' + data.user + '</b>: ' + data.message + '</div>'
         }
      })
   </script>
   <body>
      <div id="error-container"></div>
      <input id="name" type="text" name="name" value="" placeholder="Enter your name!">
      <button type="button" name="button" onclick="setUsername()">Let me chat!</button>
      </body>
   </html>
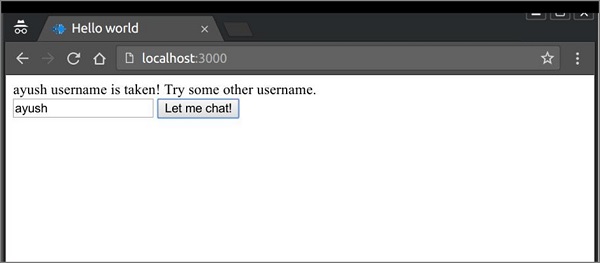
Now if you connect two clients with same username, it will give you an error as shown in the screenshot below −
Once you have provided an acceptable username, you will be taken to a screen with a message box and a button to send messages. Now, we have to handle and direct the messages to the connected client. For that, modify your app.js file to include the following changes −
var app = require('express')();
var http = require('http').Server(app);
var io = require('socket.io')(http);

app.get('/', function(req, res){
   res.sendFile('E:/test/index.html');});
users = [];
io.on('connection', function(socket){
   console.log('A user connected');
   socket.on('setUsername', function(data){
      console.log(data);
      if(users.indexOf(data) > -1){
         socket.emit('userExists', data + ' username is taken! Try some other username.');
      } else {
         users.push(data);
         socket.emit('userSet', {username: data});
      }
   });
   socket.on('msg', function(data){
      //Send message to everyone
      io.sockets.emit('newmsg', data);
   })
});
http.listen(3000, function(){
   console.log('listening on localhost:3000');
});
Now connect any number of clients to your server, provide them a username and start chatting! In the following example, we have connected two clients with names Ayush and Harshit and sent some messages from both the clients −
