
- SAP UI5 - Home
- SAP UI5 - Overview
- SAP UI5 - Architecture
- SAP UI5 - Key Components
- SAP UI5 - Control Libraries
- SAP UI5 - Development Kit
- SAP UI5 - MVC Concept
- SAP UI5 - Views
- SAP UI5 - Developer Studio
- SAP UI5 - Creating a UI5 Project
- SAP UI5 - Controls
- SAP UI5 - Data binding
- SAP UI5 - Design Patterns
- SAP UI5 - Modularization
- SAP UI5 - Localization
- SAP UI5 - Notepad Controls
- SAP UI5 - Extending Applications
- SAP UI5 - Theming
- SAP UI5 - Mobile
- Creating a Project in Web IDE
SAP UI5 - Creating a Project in Web IDE
In this chapter, we will learn how to create a project in Web IDE. Lets go step by step.
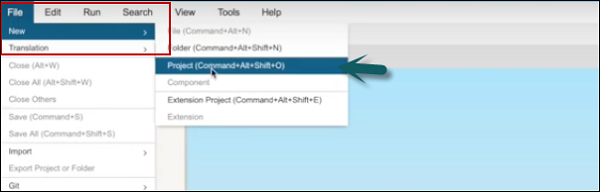
Step 1 − To start a new project, go to File → New → Project
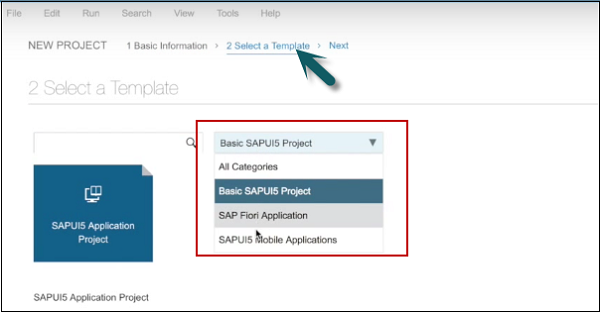
Step 2 − Enter the name of the project. In the next window, select the template.
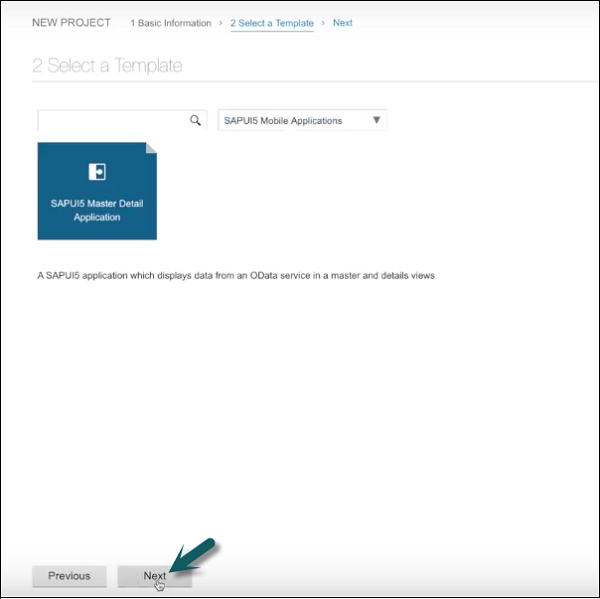
Step 3 − Select template SAPUI5 Mobile Applications → Next
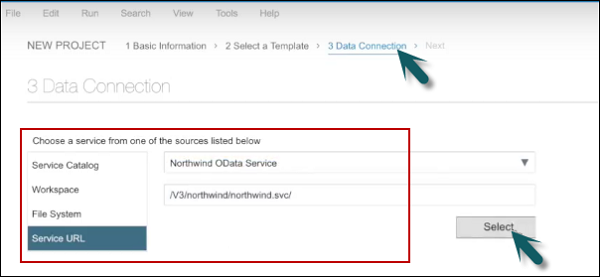
Step 4 − The next step is to select the data connection. Select service URL → Select
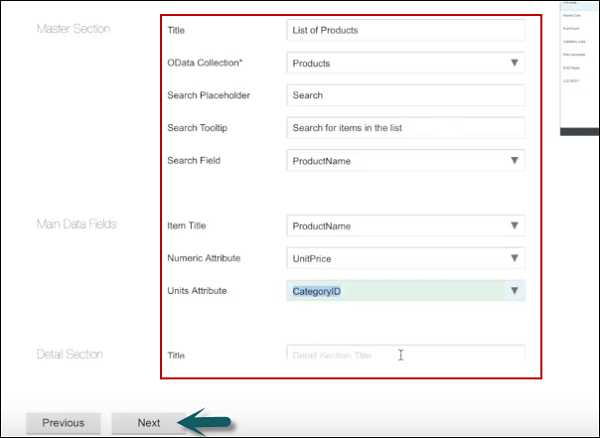
Step 5 − In the next step, you have to perform template customization.
Step 6 − On clicking Next, you will see the Finish button.
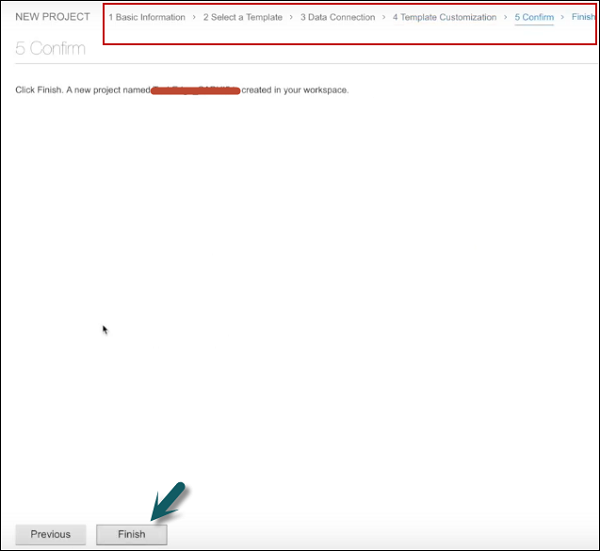
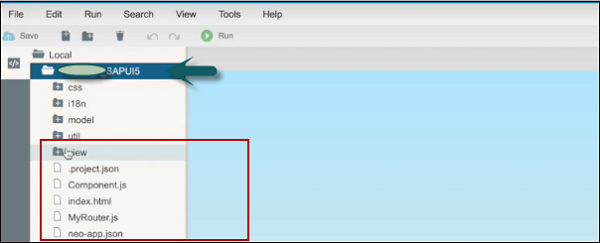
Once you click Finish, you can see a new project created that has default structure of UI application. It contains the view, model, and name of the project.
Advertisements