- SAP PI - Home
- SAP PI - Introduction
- SAP PI - Installation Options
- SAP PI - Netweaver PI Architecture
- SAP PI - UI Tools
- SAP PI - Home Page
- SAP PI - System Landscape Directory
- SAP PI - Communication
- SAP PI - Securing Objects
- SAP PI - Creating Objects
- SAP PI - Modeling Scenarios
- SAP PI - Design Objects
- SAP PI - Display Design Objects
- SAP PI - Integration Scenarios
- SAP PI - File to File Scenario
- SAP PI - Creating Service Interface
- SAP PI - Creating Message Mapping
- Creating Operation Mapping
- Creating a Communication Channel
- Creating Integrated Configuration
- SAP PI - Connectivity
- SAP PI - ccBPM Overview
- SAP PI - ccBPM Configuration
- Monitoring Integration Processes
- SAP PI - Web Services
SAP PI - Creating Integrated Configuration
Let us now understand how to create Integrated Configuration.
Perform the following steps −
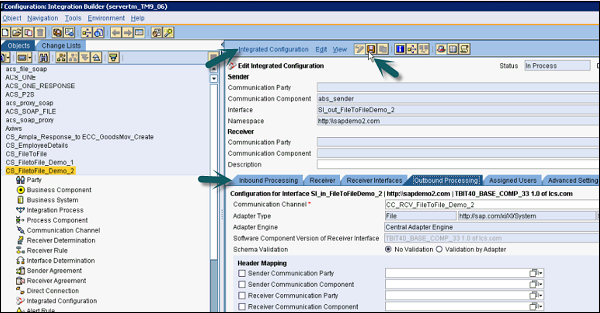
Step 1 − Go to Object → New → Under Collaboration Agreement → Integrated Configuration
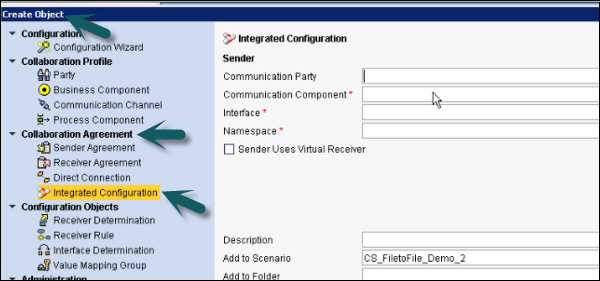
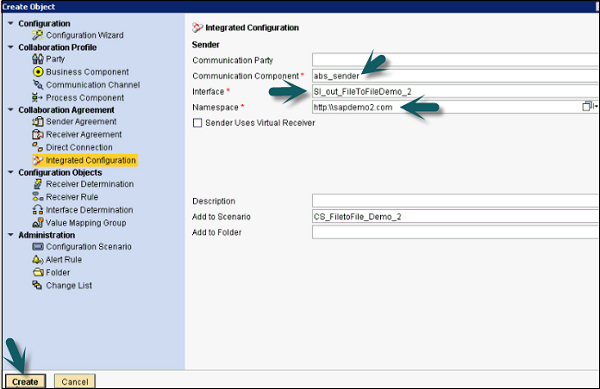
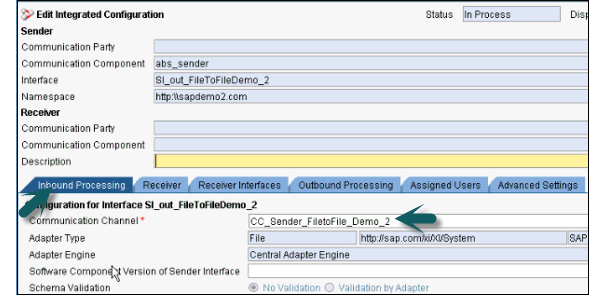
Step 2 − In communication component, enter the sender component used earlier.
Interface will be the same Service Interface name as for the outbound process created in ESR in the previous steps.
Namespace will be the same Namespace as created in ESR in the previous steps.
Click Create button.
Step 3 − In Inbound Processing tab, select the communication channel as created for the Sender.
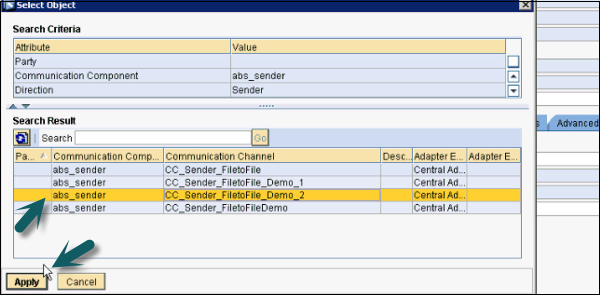
Step 4 − In the Receiver tab, select the communication receiver as shown in the following screenshot −

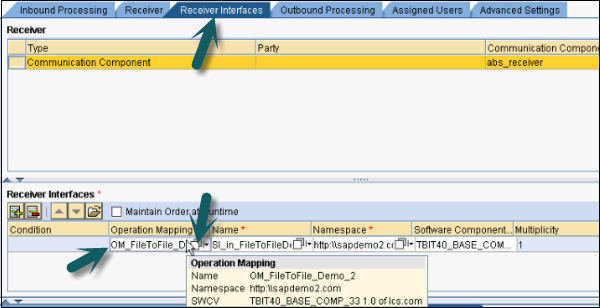
Step 5 − Go to the Receiver Interfaces tab, select Operation Mapping. Click Search and select the Operation Mapping as shown in the following screenshot. Operation Mapping will be created the same way as in the previous steps.
Step 6 − Go to Outbound Processing tab and select the Receiver Communication channel.

Step 7 − Once you are done with the above mentioned setting, click Save and Activate at the top.
Step 8 − Put the sample.xml file to the outbound folder. You can get a sample xml file from Message Mapping in ESR. Go to ESR → Message Mapping → Test.

Step 9 − This sample file doesnt have any data. Create abc.xml file and paste sample xml to that file. You have to add some data to this xml file as shown in the following screenshot.
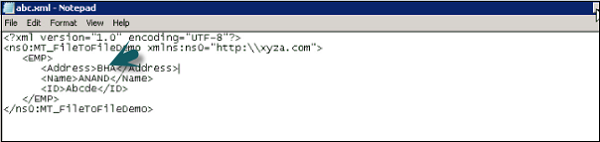
Step 10 − Place this file in the Send folder as mentioned in the directory and file scheme at the time of configuration.

Step 11 − Go to the Receiver folder and you can see xml file with the data inside it.

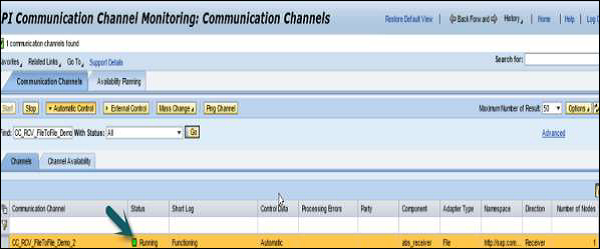
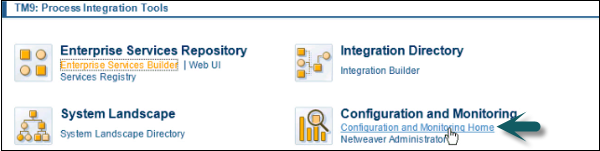
Step 12 − To monitor Adapter Engine → Communication Channel Monitor, go to configuration and monitoring home.
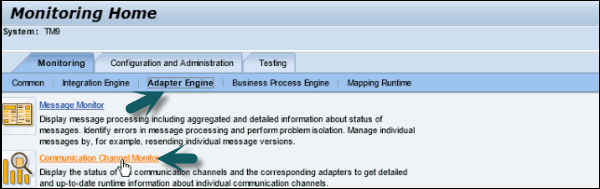
Step 13 − Go to Adapter Engine → Communication Channel Monitor.
Step 14 − Copy the communication channel 
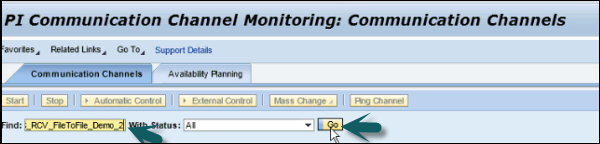
Step 15 − You can check the status of file to file scenario. If it is running properly, you will see a green icon under status.