Django Framework
In this chapter, we will discuss about Django Framework in detail.
Django is an MVT web framework that is used to build web applications. The huge Django web-framework comes with so many batteries included that developers often get amazed as to how everything manages to work together. The principle behind adding so many batteries is to have common web functionalities in the framework itself instead of adding latter as a separate library.
One of the main reasons behind the popularity of Django framework is the huge Django community. The community is so huge that a separate website was devoted to it where developers from all corners developed third-party packages including authentication, authorization, full-fledged Django powered CMS systems, e-commerce add-ons and so on. There is a high probability that what you are trying to develop is already developed by somebody and you just need to pull that into your project.
Why should you use Django?
Django is designed in such a way that encourages developers to develop websites fast, clean and with practical design. Djangos practical approach to getting things done is where it stands out from the crowd.
If youre planning to build a highly customizable app, such as social media website, Django is one of the best frameworks to consider. Django strength lies in its interaction between users or its ability to share different types of media. One of the great advantage of django is its ability to utilize large community-based support which gives you highly customizable third-party ready to use plugins in your applications.
Below are the top ten reasons to choose Django for web development −
Python
Python is arguably one of the easiest programming languages to learn because of its simple language constructs, flow structure and easy syntax. It is versatile and runs websites, desktop applications and mobile applications embedded in many devices and is used in other applications as a popular scripting language.
Batteries Included
Django comes with common libraries which are essential to build common functionalities like URL routing, authentication, an object-relational mapper (ORM), a templating system and db-schema migrations.
Built-in admin
Django has an in-built administration interface which lets you handle your models, user/ group permissions and to manage users. With model interface in place, there is no need for a separate database administration program for all but advanced database functions.
Doesnt get in your way
Creating a Django application adds no boilerplate and no unnecessary functions. Theres no mandatory imports, third-party libraries and no XML configuration files.
Scalable
Django is based on MVC design pattern. It means that all the entities like db (database), back-end and front-end code are individual entity. Django allows us to separate code from the static media including pictures, files, CSS and JavaScript that make up your site.
Django supports a full list of third-party libraries for web servers, caching, performance management, clustering and balancing. One of the advantages Django provides is the support for major email and messaging applications and services like ReST and OAuth.
Battle tested
Django was first open-sourced in 2005. After 12 years of growth, Django now not only runs news publishing websites but also runs all or part of major global enterprise like Pinterest, Instagram, Disqus, Bitbucket, EventBrite and Zapier. This makes it a robust and reliable web framework to work with.
Huge package support
Because of its large community support and huge developers network, there is a high possibility that whatever you intend to do might have been done before. Large international community of developers contribute to the community by releasing their projects as open-source packages.
One such repository of these projects is Django Package site. Currently, Django packages list over 3400 plus reusable Django apps, sites and tools to use in our Django projects.
Actively developed
One of the biggest risks associated with open source project is its sustainability. We cannot be sure if it lasts long.
There is no such risk with Django as it is 12 years old. Its consistent releases, newer/better versions and active community is growing every-day with a large core team of voluntary contributors who maintains and improve the code base every-day.
Stable releases
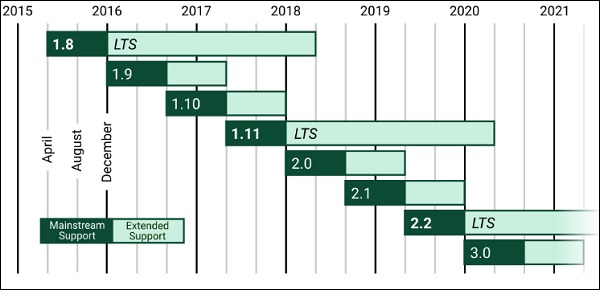
Open-source software projects like Django are, in many cases, actively developed and more secure than competing proprietary software as many developers are developing and testing it every day. However, the drawback of an open-source software project is the absence of a stable codebase to commercially viable development.
In Django, we have Long Term Support (LTS) versions of the software and a defined release process as shown in the below image −
First Class Documentation
From the very first release, Django developers made sure that there must be proper comprehensive documents available and the tutorials are easily understand.
Whos Using Django?
Because of the Djangos unique strength, there are multiple popular websites which are built with Python on top of the Django framework. Below are some of the major sites which are fully or partially built based on Django.
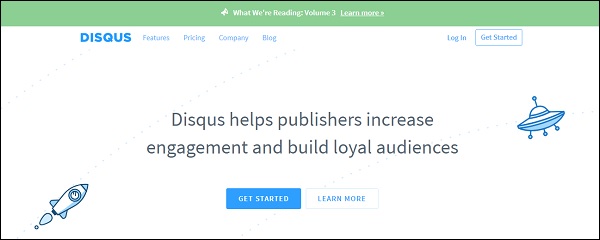
Disqus
It is one of the most preferred blog comment-hosting sites globally. It is easy to integrate with most popular CMS (content management systems) like WordPress and many others through Disqus. Handling a user-base of over 50 million, Django is able to satisfy the site owners to reach out to their communities.
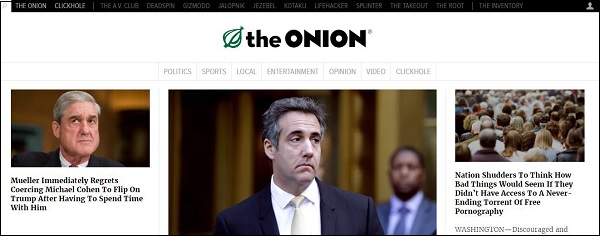
The Onion
The Onion website which provide an online venue for their satirical newspaper, Django provides the framework for it.
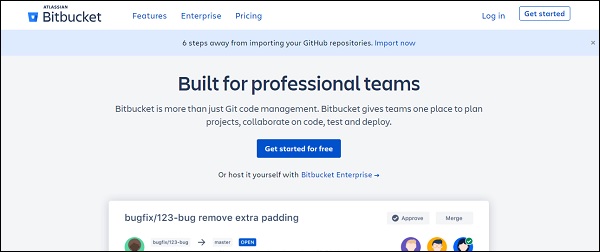
Bitbucket
Bitbucket is like GitHub, a version control repository hosting service. The only difference between Bitbucket and GitHub is that Bitbucket hosts mercurial repositories whereas GitHub hosts git repositories. As millions of users are associated with Bitbucket, and all the services which bitbucket provides (like create a repo, push your code, add collaborators, commits, pull request, etc.) has to be stable. Django is responsible for running the bitbucket site.
Instagram is a social networking app built especially for those who love to share photos and videos to all their friends. Currently there are a lot of celebrities on Instagram so as to stay closer to their fans. Django framework is running the Instagram too.

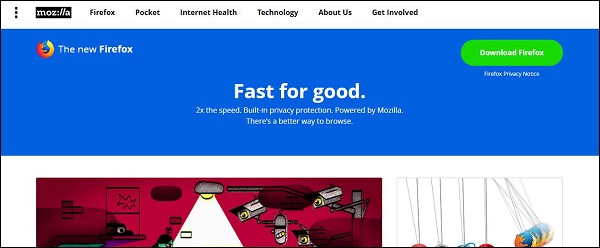
Mozilla Firefox
Second most widely used browser in the world after Google Chrome is the Mozilla browser. Now the help page of Mozilla is built with Django framework.
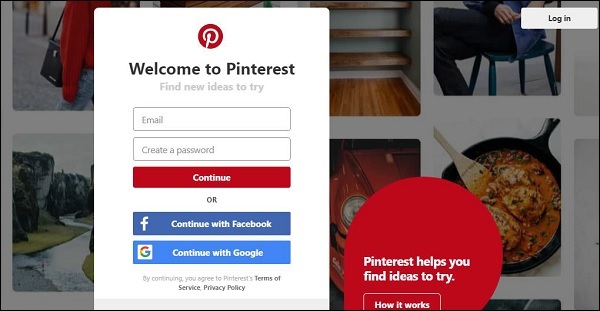
Millions of users around the globe discover their new ideas and inspiration from Pinterest. Pinterest is using the Django framework (done modification as per their requirement) to run it.
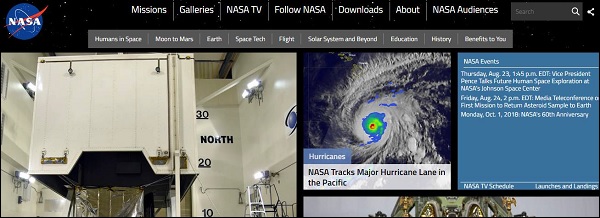
NASA
The National Aeronautics and Space Administrations official website is a place for millions of users to visit and check out the news, images, videos and podcasts provided by the premiere agency. Django develops some specific parts of official NASA website.
The Washington Post
If theres one influential newspaper in the world, it is certainly the Washington Post. The Washington Posts website is a hugely popular online news source to accompany their daily paper. Its huge amount of views and traffic has been easily handled by Django web framework.
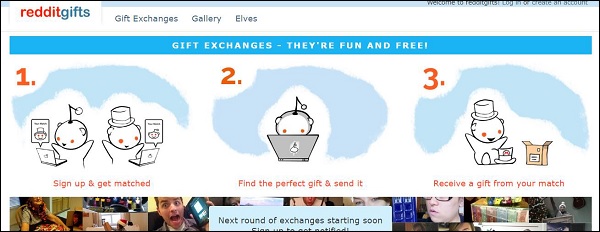
Reddit Gifts
The massively popular Reddit website has launched an online, anonymous gift exchange and meetup platform called Reddit Gifts. The site connects users from around the world and facilitates gifts exchange between them. The Django web framework powers its functionalities.
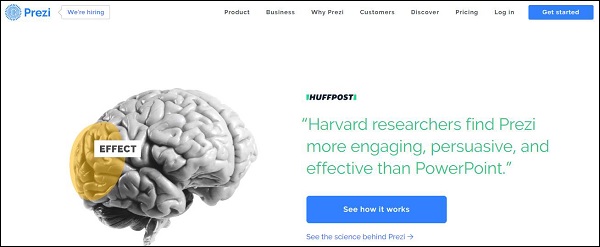
Prezi
Prezi is a cloud based alternative to Microsoft PowerPoint built on the Django framework. The site provides a virtual canvas that can be manipulated and zoomed in and out. This provides the entire view of the presentation rather than individual slides.
Installing and Creating a Django project and app
Before installing Django, we have to make sure that Python is installed. Assuming you are using virtualenv, a simple pip install django should suffice.
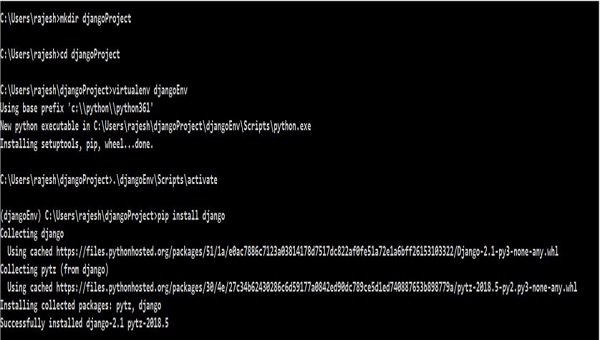
Installing virtual environment and Django
Below is the process to install virtual environment and Django in your windows environment −
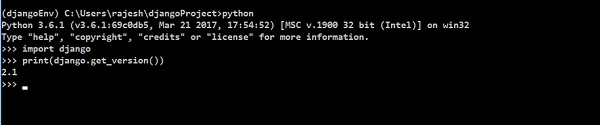
To verify if the Django is installed properly, type the code given below −
Creating Django Project
Once the installation is completed, we need to create a Django project.
Running the below command in your windows machine will create the following django project −
django-admin startproject my_project_name

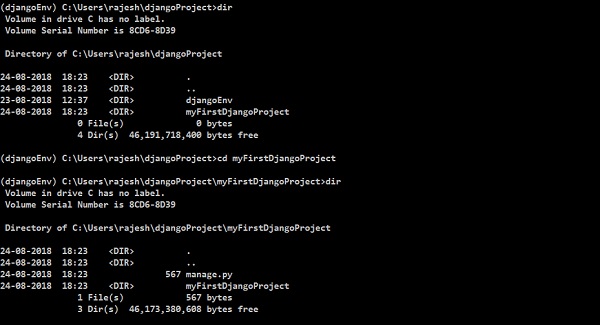
Typing dir will show one new file and one new directory as shown above.
manage.py − manage.py is a command-line-executable Python file which is just a wrapper around django-admin. It helps us manage our project which is implied in its name as well.
With this, it created a directory called, myFirstDjangoProject inside myFirstDjangoProject which represents the configuration root for our project. Let us explore much deeper into it.
Configuring Django
By calling the myFirstDjangoProject directory configuration root, we mean this directory holds the files necessary for generally configuring our Django project. Pretty much everything outside this directory will be focused solely on the business logic associated with the projects models, views, routes, etc. All points that connect the project together will lead here.

__init__.py − This is empty and changes the directory into an importable Python package.
settings.py − As the name suggest, it is the place where most configuration items will be set.
urls.py − The URLs are set with urls.py. With this, we dont have to explicitly write every URL for the project in this file. However, we have to tell Django about where the URLs have been declared (i.e., we need to link other URL in urls.py).
Wsgi.py − This is to help application in production and is similar to other applications like Flask, Tornado, Pyramid which exposes some app object.
Setting the settings
Taking a look inside settings.py will reveal its considerable size and these are just the defaults. Other things that we need to take care are the static files, database, media files, cloud integration or other dozens of ways that a Django project can be configured. Lets understand some points mentioned in the settings.py file −
BASE_DIR − This is helpful for locating files. Inside the setting.py file, BASE_DIR parameter sets the absolute path to the base directory.
SECRET_KEY − It is used for making hashes. In general, we used secret_key for cookies, sessions, csrf protection and auth tokens.
DEBUG − We can set it to project running either in development or production mode.
ALLOWED_HOSTS − We provide the list of hostnames through which our application is being served. In development mode, it is optional to set; however, in production machine, we need to set our Django project.
INSTALLED_APPS − It is the list of Django apps that are currently installed and running in our Django project. In-built Django provides six installed apps as follows −
'django.contrib.admin'
'django.contrib.auth'
django.contrib.
django.contrib.sessions
django.contrib.messages
django.contrib.staticfiles
MIDDLEWARE − It helps our Django project to run. Its a python class that hooks into django request/response processing.
TEMPLATES − It defines how the document should be displayed in the frontend. Django templates are used for producing any text-based format.
WSGI_APPLICATION − Any server we set up has to know where the WSGI file is. In case youre using an external server, it will look in its own settings. By default, it points to objects in wsgi.py.
DATABASES − It sets to the databases our Django project is currently accessing. It is mandatory to set default database. In case we set the database of our choice, we need to mention few things related to database like - HOST, USER, PASSWORD, PORT, database NAME, and appropriate ENGINE.
STATIC_URL − It is the URL to use when referring to static files located in STATIC_ROOT. By default, its None.
However, we may need to add a path for static files. Go down to the end of the file, and just underneath the STATIC_URL entry, add a new one called STATIC_ROOT as shown below −
myFirstDjangoProject/settings.py
STATIC_URL = '/static/'
STATIC_ROOT = os.path.join(BASE_DIR, static)
Setting up a Database
Theres a lot of different database software that can store date for your site. Well use the default one, sqlite3.
This is already set up in the below given part of your myFirstDjangoProject/settings.py −
DATABASES = {
   'default': {
      'ENGINE': 'django.db.backends.sqlite3',
      'NAME': os.path.join(BASE_DIR, 'db.sqlite3'),
   }
}
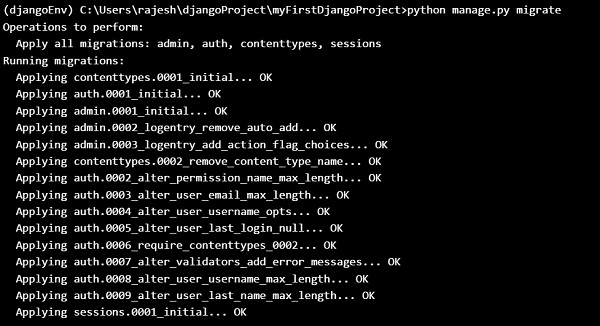
To create a database for our blog, lets run the following in the console − python manage.py migrate (we need to be in the myFirstDjangoProject directory that contains the manage.py file.
You will get the following output if everything goes well −
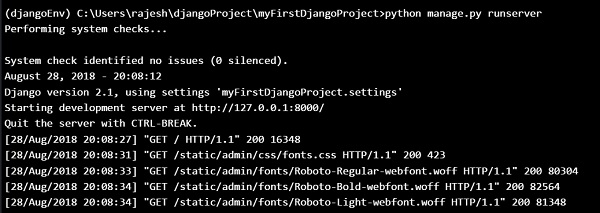
Starting the Web Server
You need to be in the directory that contains the manage.py file. In the console, we can start the web server by running python manage.py runserver as follows −
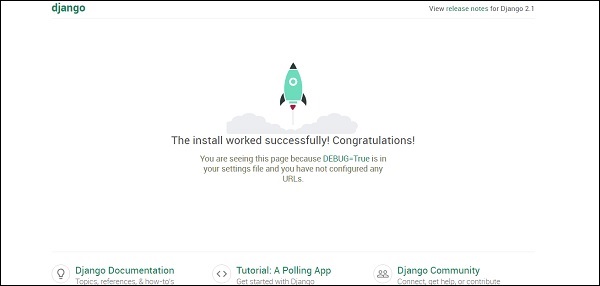
Now all you need to do is check that your website is running. Open your browser (Firefox, Chrome, Safari, Internet Explorer or whatever you use) and enter this address −
http://127.0.0.1:8000/
or
http://localhost:8000/ # As our webserver is running in our local machine only.
Congratulations! Youve just created your first website and run it using a web server!
While the web server is running, you wont see a new command-line prompt to enter additional commands. The terminal will accept next text but will not execute new commands. This is because the web server continuously runs in order to listen to incoming requests.
Django Models
We are trying to create a Django model that will store all the posts in our blog. But to make sure it works, we need to learn about objects.
Objects
Objects is a collection of properties and actions. Let us understand this with an example. Suppose we want to model a cat, we will create an object called Cat that has properties such as color, age, mood (good/bad/sleepy) and owner.
Then the Cat has some actions: purr, scratch or feed.
Cat
--------
color
age
mood
owner
purr()
scratch()
feed(cat_food)
CatFood
--------
taste
So basically we are trying to describe real things in code with properties (called object properties) and actions (called methods).
As we are building a blog, we need some text content and a title. It is also necessary to have the authors name, date of creation and also the date of publication.
So our blog will have the following objects −
Post
--------
title
text
author
created_date
published_date
Also we need to have some method that publishes that post. As we are now aware of what an object is, we can create a Django model for our blog post.
A model is a special kind of object in Django and is saved in the database. We will store our data in SQLite database.
Creating an application
To keep everything clear, we will create a separate application inside our project. Below, well try to create a blog web application by running below mentioned simple command.
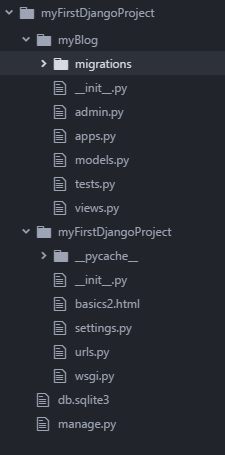
Now we will notice that a new myBlog directory is created and it contains a number of files now. The directories and files in our project should be as following −
After creating an application, we also need to tell Django to use it. We do that in the file myFirstDjangoProject/settings.py.
INSTALLED_APPS = [
   'django.contrib.admin',
   'django.contrib.auth',
   'django.contrib.contenttypes',
   'django.contrib.sessions',
   'django.contrib.messages',
   'django.contrib.staticfiles',
   'myBlog',
]
Creating a blog post model
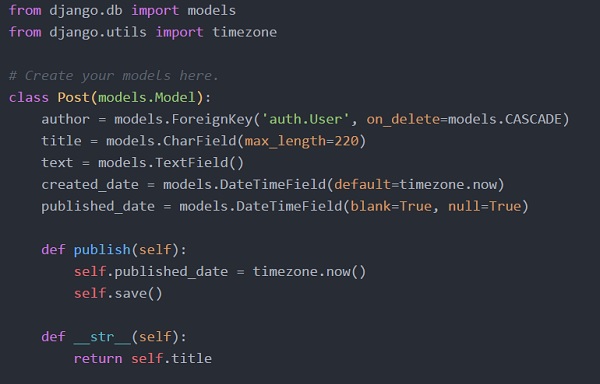
In the myBlog/models.py file, we define all objects called Models this is a place in which we will define our blog post.
Lets open myBlog/models.py, remove everything from it, and write code as follows −
Firstly, we import some functionalities from other files by calling from or import. So with this, instead of copying and pasting the same things in every file, we can include some parts with from and import.
class Post(models.Model) − This line defines our model (it is an object).
class is a special keyword that indicates that we are defining an object.
Post is the name of our model. Always start a class name with an uppercase letter.
models.Model means that the Post is a Django Model, so Django knows that it should be saved in the database.
Now let us discuss about the properties we defined above: title, text, created_date, published_date and author. To do that, we need to define the type of each field.
models.CharField − This is how you define text with a limited number of characters.
Models.TextField − This is for long text without a limit.
Models.DateTimeField − This is for date and time.
Models.ForeignKey − This is a link to another model.
We define a function/method with def and publish is the name of the method.
Methods often return something. Here when we call __str__(), we will get a text (string) with a Post title.
Creating tables for models in your database
The final step is to add a new model to our database. First, we have to let Django understand that we have made some changes in our model. Let us do the same in our console window with command python manage.py make migrations myBlog as shown below −

Then, Django prepares a migration file that we now have to apply to our database. In our console we can type: python manage.py migrate myBlog and the output should be as follows −

Our Post model is now in our database.
Django Admin
To add, edit and delete the posts weve just modelled, we are using Django admin.
So let us open the myBlog/admin.py file and put below contents in this −
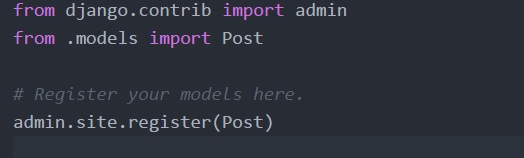
Firstly, we import (include) the Post model defined in the previous chapter. To make our model visible on the admin page, we need to register the model with admin.site.register (Post).
To login to an admin site, you need to create a superuser a user account that has control over everything on the site. So stop the webserver and type in command line python manage.py createsuperuser, and press enter.

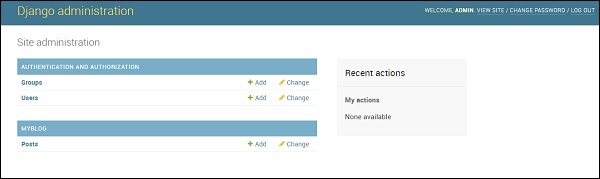
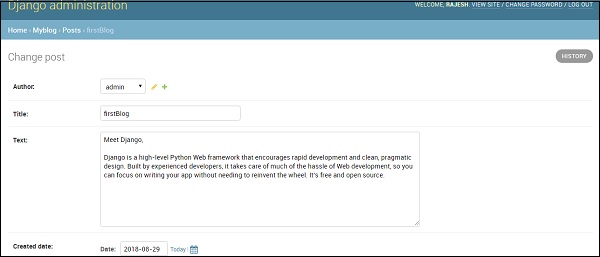
Ok, so its time to look at our Post model. Remember to run python manage.py run server in console to run the web server. Go to your browser and type the address https://127.0.0.1:8000/admin/. Log in with the credentials we have just chosen. Then you should see the Django admin dashboard as below −
Go to Posts and experiment a little with it. You can add many blog posts, and contents from anywhere. Your blog will look something like this −
This is just an overview of Django and we are able to create a blog with just a few lines of code.