- Pycharm - Home
- Pycharm - Introduction
- Pycharm - Installation
- Pycharm - Understanding Basics
- Pycharm - Keymaps
- Pycharm - Shortcuts
- Pycharm - Omni
- Pycharm - Macros
- Pycharm - Micros
- Pycharm - Improving & Writing Code
- Pycharm - Console
- Pycharm - Interpreters
- Pycharm - Debugging & Breakpoints
- Pycharm - Integration of Version Control
- Pycharm - HTML & CSS Integration
- Pycharm - JavaScript Support
- Pycharm - Tips
- Pycharm - Database Tools
- Pycharm - Exporting Data
- Pycharm - Web Frameworks
- Pycharm - Django
- Pycharm - Pyramid
- Pycharm - Flask
PyCharm Resources
PyCharm - Database Tools
PyCharm supports interface support with various types of databases. Once a user grants access to the created database, it provides schema diagram of the database with SQL writing tools which provide code completion. In this chapter, we will focus on MySQL database connectivity which will involve following steps.
Adding a Data Source
It is important to keep a note that PyCharm supports a wide variety of database connectivity.
Step 1
Open the database tool window View -> Tool Windows -> Database> and open the dialog called Data Sources and Dialog.
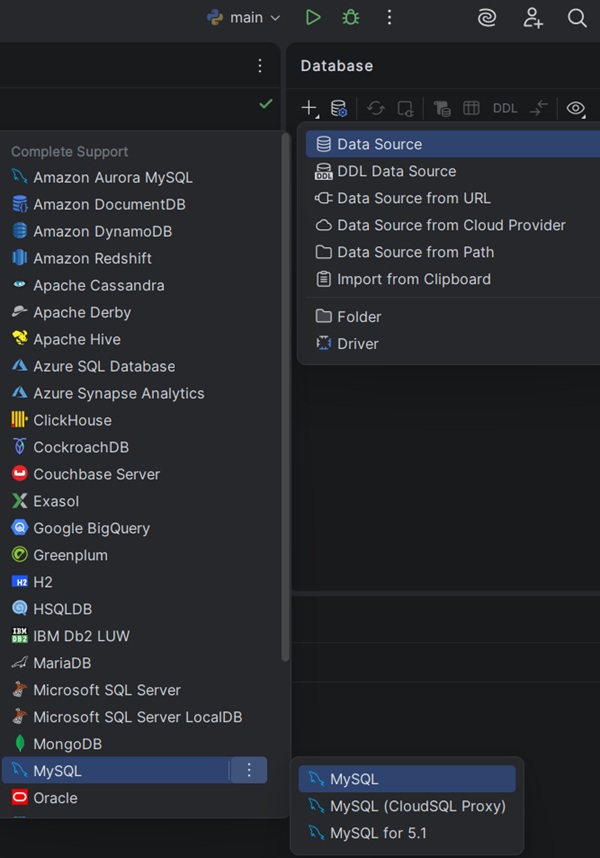
Now, select MySQL database for adding a new data source.
Step 2
User should download the missing driver files to get proper connectivity with MySQL database.

Step 3
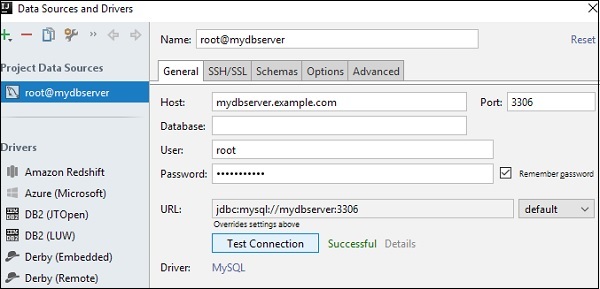
Now, specify the configuration settings for connectivity to be achieved.
Host − If you database server is on a different computer, replace localhost with the IP address of the server host, e.g. 172.20.240.163.
Port − The default MySQL server port is 3306. If your server uses a different port, specify that port.
User and Password − These are the required credentials.
Step 4
Always make sure that database connectivity is successful through Test Connection feature.
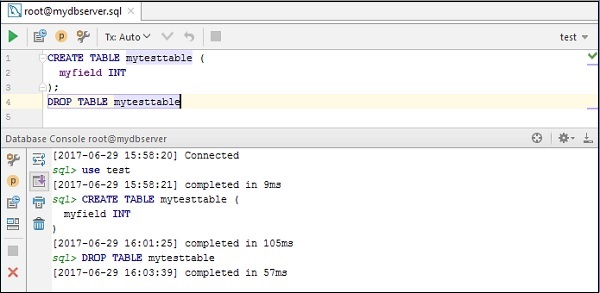
Testing the connection also involves creating test table through query and executing them. Once the execution is successful, you can drop the database.