- PDFBox - Home
- PDFBox - Overview
- PDFBox - Environment
- PDFBox - Creating a PDF Document
- PDFBox - Adding Pages
- PDFBox - Loading a Document
- PDFBox - Removing Pages
- PDFBox - Document Properties
- PDFBox - Adding Text
- PDFBox - Adding Multiple Lines
- PDFBox - Reading Text
- PDFBox - Inserting Image
- Encrypting a PDF Document
- JavaScript in PDF Document
- PDFBox - Splitting a PDF Document
- Merging Multiple PDF Documents
- PDFBox - Converting PDF To Image
- PDFBox - Adding Rectangles
PDFBox - Useful Resources
PDFBox - Quick Guide
PDFBox - Overview
The Portable Document Format (PDF) is a file format that helps to present data in a manner that is independent of Application software, hardware, and operating systems.
Each PDF file holds description of a fixed-layout flat document, including the text, fonts, graphics, and other information needed to display it.
There are several libraries available to create and manipulate PDF documents through programs, such as −
Adobe PDF Library − This library provides API in languages such as C++, .NET and Java and using this we can edit, view print and extract text from PDF documents.
Formatting Objects Processor − Open-source print formatter driven by XSL Formatting Objects and an output independent formatter. The primary output target is PDF.
iText − This library provides API in languages such as Java, C#, and other .NET languages and using this library we can create and manipulate PDF, RTF and HTML documents.
JasperReports − This is a Java reporting tool which generates reports in PDF document including Microsoft Excel, RTF, ODT, comma-separated values and XML files.
What is a PDFBox
Apache PDFBox is an open-source Java library that supports the development and conversion of PDF documents. Using this library, you can develop Java programs that create, convert and manipulate PDF documents.
In addition to this, PDFBox also includes a command line utility for performing various operations over PDF using the available Jar file.
Features of PDFBox
Following are the notable features of PDFBox −
Extract Text − Using PDFBox, you can extract Unicode text from PDF files.
Split & Merge − Using PDFBox, you can divide a single PDF file into multiple files, and merge them back as a single file.
Fill Forms − Using PDFBox, you can fill the form data in a document.
Print − Using PDFBox, you can print a PDF file using the standard Java printing API.
Save as Image − Using PDFBox, you can save PDFs as image files, such as PNG or JPEG.
Create PDFs − Using PDFBox, you can create a new PDF file by creating Java programs and, you can also include images and fonts.
Signing− Using PDFBox, you can add digital signatures to the PDF files.
Applications of PDFBox
The following are the applications of PDFBox −
Apache Nutch − Apache Nutch is an open-source web-search software. It builds on Apache Lucene, adding web-specifics, such as a crawler, a link-graph database, parsers for HTML and other document formats, etc.
Apache Tika − Apache Tika is a toolkit for detecting and extracting metadata and structured text content from various documents using existing parser libraries.
Components of PDFBox
The following are the four main components of PDFBox −
PDFBox − This is the main part of the PDFBox. This contains the classes and interfaces related to content extraction and manipulation.
FontBox − This contains the classes and interfaces related to font, and using these classes we can modify the font of the text of the PDF document.
XmpBox − This contains the classes and interfaces that handle XMP metadata.
Preflight − This component is used to verify the PDF files against the PDF/A-1b standard.
PDFBox - Environment Setup
PDFBox is a Java based library, so the very first requirement is to have JDK installed on your machine.
Setup Java Development Kit (JDK)
You can download the latest version of SDK from Oracle's Java site − Java SE Downloads. You will find instructions for installing JDK in downloaded files, follow the given instructions to install and configure the setup. Finally set PATH and JAVA_HOME environment variables to refer to the directory that contains java and javac, typically java_install_dir/bin and java_install_dir respectively.
If you are running Windows and have installed the JDK in C:\jdk-24, you would have to put the following line in your C:\autoexec.bat file.
set PATH=C:\jdk-24;%PATH%
set JAVA_HOME=C:\jdk-24
Alternatively, on Windows NT/2000/XP, you will have to right-click on My Computer, select Properties → Advanced → Environment Variables. Then, you will have to update the PATH value and click the OK button.
On Unix (Solaris, Linux, etc.), if the SDK is installed in /usr/local/jdk-24 and you use the C shell, you will have to put the following into your .cshrc file.
setenv PATH /usr/local/jdk-24/bin:$PATH
setenv JAVA_HOME /usr/local/jdk-24
Alternatively, if you use an Integrated Development Environment (IDE) like Borland JBuilder, Eclipse, IntelliJ IDEA, or Sun ONE Studio, you will have to compile and run a simple program to confirm that the IDE knows where you have installed Java. Otherwise, you will have to carry out a proper setup as given in the document of the IDE.
Install PDFBox library along with dependencies
Download following jars from PDFBox @ MVNRepository and use them in your classpath.
pdfbox-3.0.5.jar
Make sure you set your CLASSPATH variable on this directory properly otherwise you will face a problem while running your application.
Setup Eclipse IDE
All the examples in this tutorial have been written using Eclipse IDE. So we would suggest you should have the latest version of Eclipse installed on your machine.
To install Eclipse IDE, download the latest Eclipse binaries from www.eclipse.org/downloads. Once you download the installation, unpack the binary distribution into a convenient location. For example, in C:\eclipse on Windows, or /usr/local/eclipse on Linux/Unix and finally set PATH variable appropriately.
Eclipse can be started by executing the following commands on Windows machine, or you can simply double-click on eclipse.exe
%C:\eclipse\eclipse.exe
Eclipse can be started by executing the following commands on Unix (Solaris, Linux, etc.) machine −
$/usr/local/eclipse/eclipse
After a successful startup, if everything is fine then it should display the following result −
Create a Maven Project
C:\MVN>mvn archetype:generate
-DgroupId=com.tutorialspoint.pdfbox
-DartifactId=pdfbox
-DarchetypeArtifactId=maven-archetype-quickstart
-DinteractiveMode=false
It will create a maven project. Now update the pom.xml file as follows −
<project xmlns="http://maven.apache.org/POM/4.0.0"
   xmlns:xsi="http://www.w3.org/2001/XMLSchema-instance"
   xsi:schemaLocation="http://maven.apache.org/POM/4.0.0 https://maven.apache.org/xsd/maven-4.0.0.xsd">
   <modelVersion>4.0.0</modelVersion>
   <groupId>com.tutorialspoint.pdfbox</groupId>
   <artifactId>pdfbox</artifactId>
   <version>0.0.1-SNAPSHOT</version>
   <name>PDFBox</name>
   <dependencies>
      <dependency>
         <groupId>org.apache.pdfbox</groupId>
         <artifactId>pdfbox</artifactId>
         <version>3.0.5</version>
      </dependency>
   </dependencies>
   <build>
      <plugins>
         <plugin>
            <groupId>org.apache.maven.plugins</groupId>
            <artifactId>maven-compiler-plugin</artifactId>
            <version>3.8.1</version>
            <configuration>
               <source>24</source>
               <target>24</target>
            </configuration>
         </plugin>
      </plugins>
   </build>
</project>
Run the following command to update maven dependencies and build project.
mvn package
Once command is successful. Import the maven based project in Eclipse as a maven project. Rest Eclipse will handle.
PDFBox - Creating a PDF Document
Let us now understand how to create a PDF document using the PDFBox library.
Creating an Empty PDF Document
You can create an empty PDF Document by instantiating the PDDocument class. You can save the document in your desired location using the Save() method.
Following are the steps to create an empty PDF document.
Step 1: Creating an Empty Document
The PDDocument class that belongs to the package org.apache.pdfbox.pdmodel, is an In-memory representation of the PDFDocument. Therefore, by instantiating this class, you can create an empty PDFDocument as shown in the following code block.
PDDocument document = new PDDocument();
Step 2: Saving the Document
After creating the document, you need to save this document in the desired path, you can do so using the Save() method of the PDDocument class. This method accepts a string value, representing the path where you want to store the document, as a parameter. Following is the prototype of the save() method of the PDDocument class.
document.save("Path");
Step 3: Closing the Document
When your task is completed, at the end, you need to close the PDDocument object using the close () method. Following is the prototype of the close() method of PDDocument class.
document.close();
Example - Creating a PDF Document
This example demonstrates the creation of a PDF Document. Here, we will create a Java program to generate a PDF document named my_doc.pdf and save it in the path D:/Projects/PDFBox/PdfBox_Examples/. Save this code in a file with name PDFBoxDemo.java.
PDFBoxDemo.java
package com.tutorialspoint.pdfbox;

import java.io.IOException;
import org.apache.pdfbox.pdmodel.PDDocument;

public class PDFBoxDemo {

   public static void main (String args[]) throws IOException {

      // Creating PDF document object
      PDDocument document = new PDDocument();

      // Saving the document
      document.save("D:/Projects/PDFBox/PdfBox_Examples/my_doc.pdf");

      System.out.println("PDF created");

      // Closing the document
      document.close();
   }
}
Output
Compile and run the code to verify the following output −
PDF created
If you verify the specified path, you can find the created PDF document as shown below −
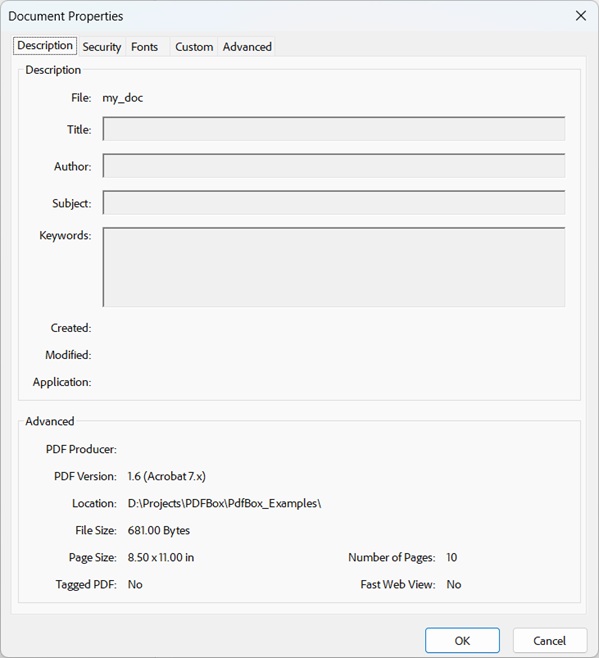
Since this is an empty document, if you try to open this document, this gives you a prompt displaying an error message as shown in the following screenshot.

PDFBox - Adding Pages
In the previous chapter PDFBox - Creating a PDF Document, we have seen how to create a PDF document. After creating a PDF document, you need to add pages to it. Let us now understand how to add pages in a PDF document.
Adding Pages to a PDF Document
You can create an empty page by instantiating the PDPage class and add it to the PDF document using the addPage() method of the PDDocument class.
Following are the steps to create an empty document and add pages to it.
Step 1: Creating an Empty Document
Create an empty PDF document by instantiating the PDDocument class as shown below.
PDDocument document = new PDDocument();
Step 2: Creating a Blank Page
The PDPage class represents a page in the PDF document therefore, you can create an empty page by instantiating this class as shown in the following code block.
PDPage my_page = new PDPage();
Step 3: Adding Page to the Document
You can add a page to the PDF document using the addPage() method of the PDDocument class. To this method you need to pass the PDPage object as a parameter.
Therefore, add the blank page created in the previous step to the PDDocument object as shown in the following code block.
document.addPage(my_page);
In this way you can add as many pages as you want to a PDF document.
Step 4: Saving the Document
After adding all the pages, save the PDF document using the save() method of the PDDocument class as shown in the following code block.
document.save("Path");
Step 5: Closing the Document
Finally close the document using the close() method of the PDDocument class as shown below.
document.close();
Example - Adding pages to a PDF Document
This example demonstrates how to create a PDF Document and add pages to it. Here we will create a PDF Document named my_doc.pdf and further add 10 blank pages to it, and save it in the path D:/Projects/PDFBox/PdfBox_Examples/. Save this code in a file with name PDFBoxDemo.java.
PDFBoxDemo.java
package com.tutorialspoint.pdfbox;

import java.io.IOException;

import org.apache.pdfbox.pdmodel.PDDocument;
import org.apache.pdfbox.pdmodel.PDPage;

public class PDFBoxDemo {

   public static void main(String args[]) throws IOException {

      //Creating PDF document object
      PDDocument document = new PDDocument();

      for (int i=0; i<10; i++) {
         //Creating a blank page
         PDPage blankPage = new PDPage();

         //Adding the blank page to the document
         document.addPage( blankPage );
      }

      //Saving the document
      document.save("D:/Projects/PDFBox/PdfBox_Examples/my_doc.pdf");
      System.out.println("PDF created");

      //Closing the document
      document.close();

   }
}
Output
Compile and run the code to verify the following output −
PDF created
If you verify the specified path, you can find the created PDF document as shown in the following screenshot.
PDFBox - Loading a Document
In the previous examples, you have seen how to create a new document and add pages to it. This chapter teaches you how to load a PDF document that already exists in your system, and perform some operations on it.
Loading an Existing PDF Document
The load() method of the PDDocument class is used to load an existing PDF document. Follow the steps given below to load an existing PDF document.
Step 1: Loading an Existing PDF Document
Load an existing PDF document using the static method loadPDF() of the Loader class. This method accepts a RandomAccessReadBufferedFile object as a parameter, since this is a static method you can invoke it using class name as shown below.
// Loading an existing document
PDDocument document = Loader.loadPDF(
   new RandomAccessReadBufferedFile("D:/Projects/PDFBox/PdfBox_Examples/sample.pdf"));
Step 2: Perform the Required Operations
Perform the required operations such as adding pages adding text, adding images to the loaded document.
Step 3: Saving the Document
After adding all the pages, save the PDF document using the save() method of the PDDocument class as shown in the following code block.
document.save("Path");
Step 4: Closing the Document
Finally close the document using the close() method of the PDDocument class as shown below.
document.close();
Example - Loading existing document
Suppose we have a PDF document which contains a single page, in the path, D:/Projects/PDFBox/PdfBox_Examples as shown in the following screenshot.
This example demonstrates how to load an existing PDF Document. Here, we will load the PDF document sample.pdf shown above, add a page to it, and save it in the same path with the same name.
Step 1 − Save this code in a file with name PDFBoxDemo.java.
PDFBoxDemo.java
package com.tutorialspoint.pdfbox;

import java.io.IOException;

import org.apache.pdfbox.Loader;
import org.apache.pdfbox.io.RandomAccessReadBufferedFile;
import org.apache.pdfbox.pdmodel.PDDocument;
import org.apache.pdfbox.pdmodel.PDPage;

public class PDFBoxDemo {

   public static void main(String args[]) throws IOException {

      // Loading an existing document
      PDDocument document = Loader.loadPDF(
         new RandomAccessReadBufferedFile("D:/Projects/PDFBox/PdfBox_Examples/sample.pdf"));

      System.out.println("PDF loaded");

      //Adding a blank page to the document
      document.addPage(new PDPage());

      //Saving the document
      document.save("D:/Projects/PDFBox/PdfBox_Examples/sample.pdf");

      //Closing the document
      document.close();
   }
}
Output
Compile and run the code to verify the following output −
PDF loaded
If you verify the specified path, you can find an additional page added to the specified PDF document as shown below.
PDFBox - Removing Pages
Let us now learn how to remove pages from a PDF document.
Removing Pages from an Existing Document
You can remove a page from an existing PDF document using the removePage() method of the PDDocument class.
Step 1: Loading an Existing PDF Document
Load an existing PDF document using the static method loadPDF() of the Loader class. This method accepts a RandomAccessReadBufferedFile object as a parameter, since this is a static method you can invoke it using class name as shown below.
// Loading an existing document
PDDocument document = Loader.loadPDF(
   new RandomAccessReadBufferedFile("D:/Projects/PDFBox/PdfBox_Examples/sample.pdf"));
Step 2: Listing the Number of Pages
You can list the number of pages that exists in the PDF document using the getNumberOfPages() method as shown below.
int noOfPages= document.getNumberOfPages();
System.out.println(noOfPages);
Step 3: Removing the Page
You can remove a page from the PDF document using the removePage() method of the PDDocument class. To this method, you need to pass the index of the page that is to be deleted.
While specifying the index for the pages in a PDF document, keep in mind that indexing of these pages starts from zero, i.e., if you want to delete the 1st page then the index value needs to be 0.
document.removePage(2);
Step 4: Saving the Document
After removing the page, save the PDF document using the save() method of the PDDocument class as shown in the following code block.
document.save("Path");
Step 5: Closing the Document
Finally, close the document using the close() method of the PDDocument class as shown below.
document.close();
Example - Removing Pages from a PDF Document
Suppose, we have a PDF document with name sample.pdf and it contains three empty pages as shown below.
This example demonstrates how to remove pages from an existing PDF document. Here, we will load the above specified PDF document named sample.pdf, remove a page from it, and save it in the path D:/Projects/PDFBox/PdfBox_Examples/sample.pdf. Save this code in a file with name PDFBoxDemo.java.
package com.tutorialspoint.pdfbox;

import java.io.IOException;

import org.apache.pdfbox.Loader;
import org.apache.pdfbox.io.RandomAccessReadBufferedFile;
import org.apache.pdfbox.pdmodel.PDDocument;
import org.apache.pdfbox.pdmodel.PDPage;

public class PDFBoxDemo {

   public static void main(String args[]) throws IOException {

      // Loading an existing document
      PDDocument document = Loader.loadPDF(
         new RandomAccessReadBufferedFile("D:/Projects/PDFBox/PdfBox_Examples/sample.pdf"));

      // Listing the number of existing pages
      int noOfPages= document.getNumberOfPages();
      System.out.println(noOfPages);

      // Removing the pages
      document.removePage(2);

      System.out.println("page removed");

      // Saving the document
      document.save("D:/Projects/PDFBox/PdfBox_Examples/sample.pdf");

      // Closing the document
      document.close();
   }
}
Output
Compile and run the code to verify the following output −
3
page removed
If you verify the specified path, you can find that the required page was deleted and only two pages remained in the document as shown below.
PDFBox - Document Properties
Like other files, a PDF document also has document properties. These properties are key-value pairs. Each property gives particular information about the document.
Properties of PDF Document
Following are the properties of a PDF document −
| S.No. | Property & Description |
|---|---|
| 1 |
File This property holds the name of the file. |
| 2 |
Title Using this property, you can set the title for the document. |
| 3 |
Author Using this property, you can set the name of the author for the document. |
| 4 |
Subject Using this property, you can specify the subject of the PDF document. |
| 5 |
Keywords Using this property, you can list the keywords with which we can search the document. |
| 6 |
Created Using this property, you can set the date created for the document. |
| 7 |
Modified Using this property, you can set the date modified for the document. |
| 8 |
Application Using this property, you can set the Application of the document. |
Following is a screenshot of the document properties table of a PDF document.
Setting the Document Properties
PDFBox provides you a class named PDDocumentInformation. This class has a set of setter and getter methods.
The setter methods of this class are used to set values to various properties of a document and getter methods which are used to retrieve these values.
Following are the setter methods of the PDDocumentInformation class.
| S.No. | Method & Description |
|---|---|
| 1 |
setAuthor(String author) This method is used to set the value for the property of the PDF document named Author. |
| 2 |
setTitle(String title) This method is used to set the value for the property of the PDF document named Title. |
| 3 |
setCreator(String creator) This method is used to set the value for the property of the PDF document named Creator. |
| 4 |
setSubject(String subject) This method is used to set the value for the property of the PDF document named Subject. |
| 5 |
setCreationDate(Calendar date) This method is used to set the value for the property of the PDF document named CreationDate. |
| 6 |
setModificationDate(Calendar date) This method is used to set the value for the property of the PDF document named ModificationDate. |
| 7 |
setKeywords(String keywords list) This method is used to set the value for the property of the PDF document named Keywords. |
Example - Adding Properties to PDF Document
PDFBox provides a class called PDDocumentInformation and this class provides various methods. These methods can set various properties to the document and retrieve them.
This example demonstrates how to add properties such as Author, Title, Date, and Subject to a PDF document. Here, we will create a PDF document named doc_attributes.pdf, add various attributes to it, and save it in the path D:/Projects/PDFBox/PdfBox_Examples/. Save this code in a file with name PDFBoxDemo.java.
PDFBoxDemo.java
package com.tutorialspoint.pdfbox;

import java.io.IOException;
import java.util.Calendar;
import java.util.GregorianCalendar;

import org.apache.pdfbox.pdmodel.PDDocument;
import org.apache.pdfbox.pdmodel.PDDocumentInformation;
import org.apache.pdfbox.pdmodel.PDPage;

public class PDFBoxDemo {
   public static void main(String args[]) throws IOException {

      //Creating PDF document object
      PDDocument document = new PDDocument();

      //Creating a blank page
      PDPage blankPage = new PDPage();

      //Adding the blank page to the document
      document.addPage( blankPage );

      //Creating the PDDocumentInformation object
      PDDocumentInformation pdd = document.getDocumentInformation();

      //Setting the author of the document
      pdd.setAuthor("Tutorialspoint");

      // Setting the title of the document
      pdd.setTitle("Sample document");

      //Setting the creator of the document
      pdd.setCreator("PDF Examples");

      //Setting the subject of the document
      pdd.setSubject("Example document");

      //Setting the created date of the document
      Calendar date = new GregorianCalendar();
      pdd.setCreationDate(date);
      //Setting the modified date of the document
      pdd.setModificationDate(date);

      //Setting keywords for the document
      pdd.setKeywords("sample, first example, my pdf");

      //Saving the document
      document.save("D:/Projects/PDFBox/PdfBox_Examples/doc_attributes.pdf");

      System.out.println("Properties added successfully ");

      //Closing the document
      document.close();

   }
}
Output
Compile and run the code. Upon execution, the above program adds all the specified attributes to the document displaying the following message.
Properties added successfully
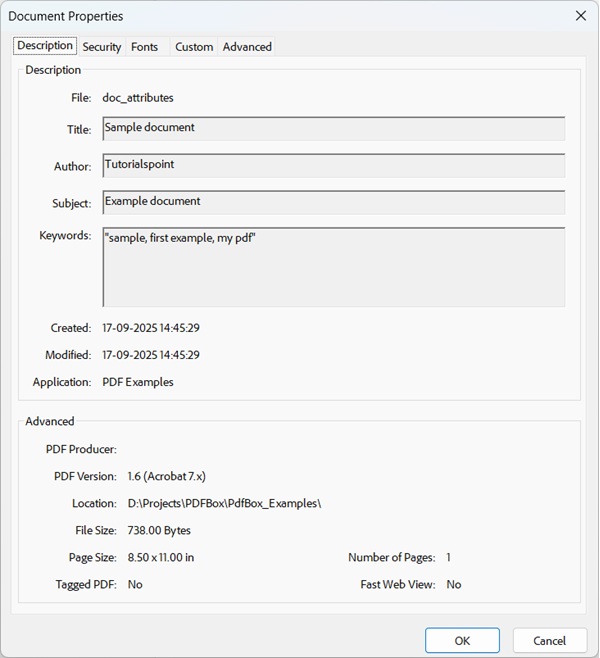
Now, if you visit the given path you can find the PDF created in it. Right click on the document and select the document properties option as shown below.
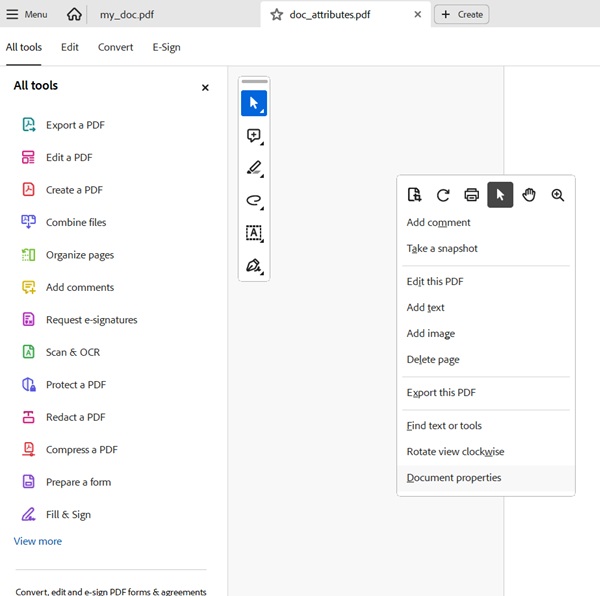
This will give you the document properties window and here you can observe all the properties of the document were set to specified values.
Retrieving the Document Properties
You can retrieve the properties of a document using the getter methods provided by the PDDocumentInformation class.
Following are the getter methods of the PDDocumentInformation class.
| S.No. | Method & Description |
|---|---|
| 1 |
getAuthor() This method is used to retrieve the value for the property of the PDF document named Author. |
| 2 |
getTitle() This method is used to retrieve the value for the property of the PDF document named Title. |
| 3 |
getCreator() This method is used to retrieve the value for the property of the PDF document named Creator. |
| 4 |
getSubject() This method is used to retrieve the value for the property of the PDF document named Subject. |
| 5 |
getCreationDate() This method is used to retrieve the value for the property of the PDF document named CreationDate. |
| 6 |
getModificationDate() This method is used to retrieve the value for the property of the PDF document named ModificationDate. |
| 7 |
getKeywords() This method is used to retrieve the value for the property of the PDF document named Keywords. |
Example
This example demonstrates how to retrieve the properties of an existing PDF document. Here, we will create a Java program and load the PDF document named doc_attributes.pdf, which is saved in the path D:/Projects/PDFBox/PdfBox_Examples/, and retrieve its properties. Save this code in a file with name PDFBoxDemo.java.
package com.tutorialspoint.pdfbox;

import java.io.IOException;
import java.text.SimpleDateFormat;
import java.util.Calendar;
import java.util.GregorianCalendar;

import org.apache.pdfbox.Loader;
import org.apache.pdfbox.io.RandomAccessReadBufferedFile;
import org.apache.pdfbox.pdmodel.PDDocument;
import org.apache.pdfbox.pdmodel.PDDocumentInformation;

public class PDFBoxDemo {
   public static void main(String args[]) throws IOException {

      // Loading an existing document
      PDDocument document = Loader.loadPDF(
         new RandomAccessReadBufferedFile("D:/Projects/PDFBox/PdfBox_Examples/doc_attributes.pdf"));
      //Getting the PDDocumentInformation object
      PDDocumentInformation pdd = document.getDocumentInformation();

      //Retrieving the info of a PDF document
      System.out.println("Author of the document is :"+ pdd.getAuthor());
      System.out.println("Title of the document is :"+ pdd.getTitle());
      System.out.println("Subject of the document is :"+ pdd.getSubject());

      System.out.println("Creator of the document is :"+ pdd.getCreator());
      System.out.println("Creation date of the document is :"+ format(pdd.getCreationDate()));
      System.out.println("Modification date of the document is :"+
         format(pdd.getModificationDate()));
      System.out.println("Keywords of the document are :"+ pdd.getKeywords());

      //Closing the document
      document.close();
   }

   public static String format(Calendar calendar) {
      SimpleDateFormat fmt = new SimpleDateFormat("dd-MMM-yyyy");
      fmt.setCalendar(calendar);
      String dateFormatted = fmt.format(calendar.getTime());
      return dateFormatted;
   }
}
Compile and run the code. Upon execution, the above program retrieves all the attributes of the document and displays them as shown below.
Author of the document is :Tutorialspoint
Title of the document is :Sample document
Subject of the document is :Example document
Creator of the document is :PDF Examples
Creation date of the document is :17-Sept-2025
Modification date of the document is :17-Sept-2025
Keywords of the document are :sample, first example, my pdf
PDFBox - Adding Text
In the previous chapter, we discussed how to add pages to a PDF document. In this chapter, we will discuss how to add text to an existing PDF document.
Adding Text to an Existing PDF Document
You can add contents to a document using the PDFBox library, this provides you a class named PDPageContentStream which contains the required methods to insert text, images, and other types of contents in a page of a PDFDocument.
Following are the steps to create an empty document and add contents to a page in it.
Loading an Existing PDF Document
The load() method of the PDDocument class is used to load an existing PDF document. Follow the steps given below to load an existing PDF document.
Step 1: Loading an Existing PDF Document
Load an existing PDF document using the static method loadPDF() of the Loader class. This method accepts a RandomAccessReadBufferedFile object as a parameter, since this is a static method you can invoke it using class name as shown below.
// Loading an existing document
PDDocument document = Loader.loadPDF(
   new RandomAccessReadBufferedFile("D:/Projects/PDFBox/PdfBox_Examples/my_doc.pdf"));
Step 2: Getting the Required Page
You can get the required page in a document using the getPage() method. Retrieve the object of the required page by passing its index to this method as shown below.
PDPage page = doc.getPage(1);
Step 3: Preparing the Content Stream
You can insert various kinds of data elements using the object of the class PDPageContentStream. You need to pass the document object and the page object to the constructor of this class therefore, instantiate this class by passing these two objects created in the previous steps as shown below.
PDPageContentStream contentStream = new PDPageContentStream(doc, page);
Step 4: Beginning the Text
While inserting text in a PDF document, you can specify the start and end points of the text using the beginText() and endText() methods of the PDPageContentStream class as shown below.
contentStream.beginText();
..
code to add text content
..
contentStream.endText();
Therefore, begin the text using the beginText() method as shown below.
contentStream.beginText();
Step 5: Setting the Position of the Text
Using the newLineAtOffset() method, you can set the position on the content stream in the page.
//Setting the position for the line
contentStream.newLineAtOffset(25, 700);
Step 6: Setting the Font
You can set the font of the text to the required style using the setFont() method of the PDPageContentStream class as shown below. To this method you need to pass the type and size of the font.
contentStream.setFont( font_type, font_size );
Step 7: Inserting the Text
You can insert the text into the page using the ShowText() method of the PDPageContentStream class as shown below. This method accepts the required text in the form of string.
contentStream.showText(text);
Step 8: Ending the Text
After inserting the text, you need to end the text using the endText() method of the PDPageContentStream class as shown below.
contentStream.endText();
Step 9: Closing the PDPageContentStream
Close the PDPageContentStream object using the close() method as shown below.
contentstream.close();
Step 10: Saving the Document
After adding the required content, save the PDF document using the save() method of the PDDocument class as shown in the following code block.
doc.save("Path");
Step 11: Closing the Document
Finally, close the document using the close() method of the PDDocument class as shown below.
doc.close();
Example - Adding Text to PDF Document
This example demonstrates how to add contents to a page in a document. Here, we will create a Java program to load the PDF document named my_doc.pdf, which is saved in the path D:/Projects/PDFBox/PdfBox_Examples/, and add some text to it. Save this code in a file with name PDFBoxDemo.java.
package com.tutorialspoint.pdfbox;

import java.io.File;
import java.io.IOException;

import org.apache.pdfbox.Loader;
import org.apache.pdfbox.io.RandomAccessReadBufferedFile;
import org.apache.pdfbox.pdmodel.PDDocument;
import org.apache.pdfbox.pdmodel.PDPage;
import org.apache.pdfbox.pdmodel.PDPageContentStream;
import org.apache.pdfbox.pdmodel.font.PDType1Font;
import org.apache.pdfbox.pdmodel.font.Standard14Fonts.FontName;

public class PDFBoxDemo {
   public static void main(String args[]) throws IOException {

      // Loading an existing document
      PDDocument document = Loader.loadPDF(
         new RandomAccessReadBufferedFile("D:/Projects/PDFBox/PdfBox_Examples/my_doc.pdf"));

      //Retrieving the pages of the document
      PDPage page = document.getPage(1);
      PDPageContentStream contentStream = new PDPageContentStream(document, page);

      //Begin the Content stream
      contentStream.beginText();

      //Setting the font to the Content stream
      contentStream.setFont(new PDType1Font(FontName.TIMES_ROMAN), 12);

      //Setting the position for the line
      contentStream.newLineAtOffset(25, 500);

      String text = "This is the sample document and we are adding content to it.";

      //Adding text in the form of string
      contentStream.showText(text);

      //Ending the content stream
      contentStream.endText();

      System.out.println("Content added");

      //Closing the content stream
      contentStream.close();

      //Saving the document
      document.save(new File("D:/Projects/PDFBox/PdfBox_Examples/new.pdf"));

      //Closing the document
      document.close();
   }
}
Output
Compile and run the code to verify the following output −
Content added
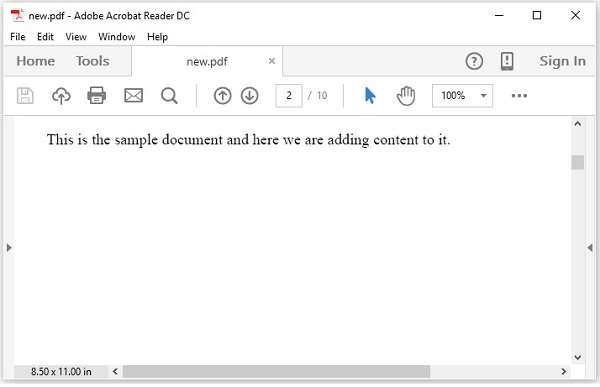
If you verify the PDF Document new.pdf in the specified path, you can observe that the given content is added to the document as shown below.
PDFBox - Adding Multiple Lines
In the example provided in the previous chapter we discussed how to add text to a page in a PDF but through this program, you can only add the text that would fit in a single line. If you try to add more content, all the text that exceeds the line space will not be displayed.
For example, if you execute the above program in the previous chapter by passing the following string only a part of it will be displayed.
String text = "This is an example of adding text to a page in the pdf document. we can
   add as many lines as we want like this using the showText() method of the
   ContentStream class";
Replace the string text of the example in the previous chapter with the above mentioned string and execute it. Upon execution, you will receive the following output.
If you observe the output carefully, you can notice that only a part of the string is displayed.
In order to add multiple lines to a PDF you need to set the leading using the setLeading() method and shift to new line using newline() method after finishing each line.
Steps
Following are the steps to create an empty document and add contents to a page in it.
Step 1: Loading an Existing Document
You can load an existing document using the load() method of the PDDocument class. Therefore, instantiate this class and load the required document as shown below.
File file = new File("Path of the document");
PDDocument doc = PDDocument.load(file);
Step 2: Getting the Required Page
You can get the required page in a document using the getPage() method. Retrieve the object of the required page by passing its index to this method as shown below.
PDPage page = doc.getPage(1);
Step 3: Preparing the Content stream
You can insert various kinds of data elements using the object of the class named PDPageContentStream. You need to pass the document object and the page object to the constructor of this class therefore, instantiate this class by passing these two objects created in the previous steps as shown below.
PDPageContentStream contentStream = new PDPageContentStream(doc, page);
Step 4: Beginning the Text
While inserting text in a PDF document, you can specify the start and end points of the text using the beginText() and endText() methods of the PDPageContentStream class as shown below.
contentStream.beginText();
..
code to add text content
..
contentStream.endText();
Therefore, begin the text using the beginText() method as shown below.
contentStream.beginText();
Step 5: Setting the Position of the Text
Using the newLineAtOffset() method, you can set the position on the content stream in the page.
//Setting the position for the line
contentStream.newLineAtOffset(25, 700);
Step 6: Setting the Font
You can set the font of the text to the required style using the setFont() method of the PDPageContentStream class as shown below to this method you need to pass the type and size of the font.
contentStream.setFont( font_type, font_size );
Step 7: Setting the Text Leading
You can set the text leading using the setLeading() method as shown below.
contentStream.setLeading(14.5f);
Step 8: Inserting Multiple Strings Using newline()
You can insert multiple strings using the ShowText() method of the PDPageContentStream class, by dividing each of them using the newline() method as shown below.
contentStream. ShowText(text1);
contentStream.newLine();
contentStream. ShowText(text2);
Step 9: Ending the Text
After inserting the text, you need to end the text using the endText() method of the PDPageContentStream class as shown below.
contentStream.endText();
Step 10: Closing the PDPageContentStream
Close the PDPageContentStream object using the close() method as shown below.
contentstream.close();
Step 11: Saving the Document
After adding the required content, save the PDF document using the save() method of the PDDocument class as shown in the following code block.
doc.save("Path");
Step 12: Closing the Document
Finally, close the document using the close() method of the PDDocument class as shown below.
doc.close();
Example - Adding Multiple Lines
This example demonstrates how to add multiple lines in a PDF using PDFBox. Save this program in a file with name PDFBoxDemo.java.
PDFBoxDemo.java
package com.tutorialspoint.pdfbox;

import java.io.File;
import java.io.IOException;

import org.apache.pdfbox.Loader;
import org.apache.pdfbox.io.RandomAccessReadBufferedFile;
import org.apache.pdfbox.pdmodel.PDDocument;
import org.apache.pdfbox.pdmodel.PDPage;
import org.apache.pdfbox.pdmodel.PDPageContentStream;
import org.apache.pdfbox.pdmodel.font.PDType1Font;
import org.apache.pdfbox.pdmodel.font.Standard14Fonts.FontName;

public class PDFBoxDemo {
   public static void main(String args[]) throws IOException {

      // Loading an existing document
      PDDocument document = Loader.loadPDF(
         new RandomAccessReadBufferedFile("D:/Projects/PDFBox/PdfBox_Examples/my_doc.pdf"));

      //Retrieving the pages of the document
      PDPage page = document.getPage(1);
      PDPageContentStream contentStream = new PDPageContentStream(document, page);

      //Begin the Content stream
      contentStream.beginText();

      //Setting the font to the Content stream
      contentStream.setFont(new PDType1Font(FontName.TIMES_ROMAN), 12);

      //Setting the leading
      contentStream.setLeading(14.5f);

      //Setting the position for the line
      contentStream.newLineAtOffset(25, 725);

      String text1 = "This is an example of adding text to a page in the pdf document. We can add as many lines";
      String text2 = "as we want like this using the ShowText()  method of the ContentStream class";

      //Adding text in the form of string
      contentStream.showText(text1);
      contentStream.newLine();
      contentStream.showText(text2);

      //Ending the content stream
      contentStream.endText();

      System.out.println("Content added");

      //Closing the content stream
      contentStream.close();

      //Saving the document
      document.save(new File("D:/Projects/PDFBox/PdfBox_Examples/new.pdf"));

      //Closing the document
      document.close();
   }
}
Output
Compile and run the code to verify the following output −
Content added
If you verify the PDF Document new.pdf in the specified path, you can observe that the given content is added to the document in multiple lines as shown below.
PDFBox - Reading Text
In the previous chapter, we have seen how to add text to an existing PDF document. In this chapter, we will discuss how to read text from an existing PDF document.
Extracting Text from an Existing PDF Document
Extracting text is one of the main features of the PDF box library. You can extract text using the getText() method of the PDFTextStripper class. This class extracts all the text from the given PDF document.
Following are the steps to extract text from an existing PDF document.
Step 1: Loading an Existing PDF Document
Load an existing PDF document using the static method loadPDF() of the Loader class. This method accepts a RandomAccessReadBufferedFile object as a parameter, since this is a static method you can invoke it using class name as shown below.
// Loading an existing document
PDDocument document = Loader.loadPDF(
   new RandomAccessReadBufferedFile("D:/Projects/PDFBox/PdfBox_Examples/sample.pdf"));
Step 2: Instantiate the PDFTextStripper Class
The PDFTextStripper class provides methods to retrieve text from a PDF document therefore, instantiate this class as shown below.
PDFTextStripper pdfStripper = new PDFTextStripper();
Step 3: Retrieving the Text
You can read/retrieve the contents of a page from the PDF document using the getText() method of the PDFTextStripper class. To this method you need to pass the document object as a parameter. This method retrieves the text in a given document and returns it in the form of a String object.
String text = pdfStripper.getText(document);
Step 4: Closing the Document
Finally, close the document using the close() method of the PDDocument class as shown below.
document.close();
Example - Reading text from a PDF Document
Suppose, we have a PDF document with some text in it as shown below.

This example demonstrates how to read text from the above mentioned PDF document. Here, we will create a Java program and load a PDF document named new.pdf, which is saved in the path D:/Projects/PDFBox/PdfBox_Examples/. Save this code in a file with name PDFBoxDemo.java.
PDFBoxDemo.java
package com.tutorialspoint.pdfbox;

import java.io.IOException;

import org.apache.pdfbox.Loader;
import org.apache.pdfbox.io.RandomAccessReadBufferedFile;
import org.apache.pdfbox.pdmodel.PDDocument;
import org.apache.pdfbox.text.PDFTextStripper;

public class PDFBoxDemo {
   public static void main(String args[]) throws IOException {

      // Loading an existing document
      PDDocument document = Loader.loadPDF(
         new RandomAccessReadBufferedFile("D:/Projects/PDFBox/PdfBox_Examples/new.pdf"));

      //Instantiate PDFTextStripper class
      PDFTextStripper pdfStripper = new PDFTextStripper();

      //Retrieving text from PDF document
      String text = pdfStripper.getText(document);
      System.out.println(text);

      //Closing the document
      document.close();
   }
}
Output
Compile and run the code to verify the following output −
This is an example of adding text to a page in the pdf document. we can add as many lines
as we want like this using the ShowText() method of the ContentStream class.
PDFBox - Inserting Image
In the previous chapter, we have seen how to extract text from an existing PDF document. In this chapter, we will discuss how to insert image to a PDF document.
Inserting Image to a PDF Document
You can insert an image into a PDF document using the createFromFile() and drawImage() methods of the classes PDImageXObject and PDPageContentStream respectively.
Following are the steps to extract text from an existing PDF document.
Step 1: Loading an Existing PDF Document
Load an existing PDF document using the static method loadPDF() of the Loader class. This method accepts a RandomAccessReadBufferedFile object as a parameter, since this is a static method you can invoke it using class name as shown below.
// Loading an existing document
PDDocument document = Loader.loadPDF(
   new RandomAccessReadBufferedFile("D:/Projects/PDFBox/PdfBox_Examples/sample.pdf"));
Step 2: Retrieving a Page
Select a page in the PDF document and retrieve its page object using the getPage() method as shown below.
PDPage page = doc.getPage(0);
Step 3: Creating PDImageXObject object
The class PDImageXObject in PDFBox library represents an image. It provides all the required methods to perform operations related to an image, such as, inserting an image, setting its height, setting its width etc.
We can create an object of this class using the method createFromFile(). To this method, we need to pass the path of the image which we want to add in the form of a string and the document object to which the image needs to be added.
PDImageXObject pdImage = PDImageXObject.createFromFile("C:/logo.png", doc);
Step 4: Preparing the Content Stream
You can insert various kinds of data elements using the object of the class named PDPageContentStream. You need to pass the document object and the page object to the constructor of this class therefore, instantiate this class by passing these two objects created in the previous steps as shown below.
PDPageContentStream contentStream = new PDPageContentStream(doc, page);
Step 5: Drawing the Image in the PDF Document
You can insert an image in the PDF document using the drawImage() method. To this method, you need to add the image object created in the above step and the required dimensions of the image (width and height) as shown below.
contentstream.drawImage(pdImage, 70, 250);
Step 6: Closing the PDPageContentStream
Close the PDPageContentStream object using the close() method as shown below.
contentstream.close();
Step 7: Saving the Document
After adding the required content, save the PDF document using the save() method of the PDDocument class as shown in the following code block.
doc.save("Path");
Step 8: Closing the Document
Finally, close the document using the close() method of the PDDocument class as shown below.
doc.close();
Example - Inserting Image into PDF Document
Suppose we have a PDF document named sample.pdf, in the path D:/Projects/PDFBox/PdfBox_Examples with empty pages as shown below.
This example demonstrates how to add image to a blank page of the above mentioned PDF document. Here, we will load the PDF document named sample.pdf and add image to it. Save this code in a file with name PDFBoxDemo.java.
PDFBoxDemo.java
package com.tutorialspoint.pdfbox;

import java.io.IOException;

import org.apache.pdfbox.Loader;
import org.apache.pdfbox.io.RandomAccessReadBufferedFile;
import org.apache.pdfbox.pdmodel.PDDocument;
import org.apache.pdfbox.pdmodel.PDPage;
import org.apache.pdfbox.pdmodel.PDPageContentStream;
import org.apache.pdfbox.pdmodel.graphics.image.PDImageXObject;

public class PDFBoxDemo {
   public static void main(String args[]) throws IOException {

      // Loading an existing document
      PDDocument document = Loader.loadPDF(
         new RandomAccessReadBufferedFile("D:/Projects/PDFBox/PdfBox_Examples/sample.pdf"));

      //Retrieving the page
      PDPage page = document.getPage(0);

      //Creating PDImageXObject object
      PDImageXObject pdImage = PDImageXObject.createFromFile("D:/Projects/PDFBox/PdfBox_Examples/logo.png",document);

      //creating the PDPageContentStream object
      PDPageContentStream contents = new PDPageContentStream(document, page);

      //Drawing the image in the PDF document
      contents.drawImage(pdImage, 70, 250);

      System.out.println("Image inserted");

      //Closing the PDPageContentStream object
      contents.close();

      //Saving the document
      document.save("D:/Projects/PDFBox/PdfBox_Examples/sample.pdf");

      //Closing the document
      document.close();
   }
}
Output
Compile and run the code to verify the following output −
Image inserted
If you verify the document sample.pdf, you can observe that an image is inserted in it as shown below.
PDFBox - Encrypting a PDF Document
In the previous chapter, we have seen how to insert an image in a PDF document. In this chapter, we will discuss how to encrypt a PDF document.
Encrypting a PDF Document
You can encrypt a PDF document using the methods provided by StandardProtectionPolicy and AccessPermission classes.
The AccessPermission class is used to protect the PDF Document by assigning access permissions to it. Using this class, you can restrict users from performing the following operations.
Print the document.
Modify the content of the document.
Copy or extract content of the document.
Add or modify annotations.
Fill in interactive form fields.
Extract text and graphics for accessibility to visually impaired people.
Assemble the document.
Print in degraded quality.
The StandardProtectionPolicy class is used to add a password based protection to a document.
Following are the steps to encrypt an existing PDF document.
Step 1: Loading an Existing PDF Document
Load an existing PDF document using the static method loadPDF() of the Loader class. This method accepts a RandomAccessReadBufferedFile object as a parameter, since this is a static method you can invoke it using class name as shown below.
// Loading an existing document
PDDocument document = Loader.loadPDF(
   new RandomAccessReadBufferedFile("D:/Projects/PDFBox/PdfBox_Examples/sample.pdf"));
Step 2: Creating Access Permission Object
Instantiate the AccessPermission class as shown below.
AccessPermission accessPermission = new AccessPermission();
Step 3: Creating StandardProtectionPolicy Object
Instantiate the StandardProtectionPolicy class by passing the owner password, user password, and the AccessPermission object as shown below.
StandardProtectionPolicy spp = new StandardProtectionPolicy("1234","1234",accessPermission);
Step 4: Setting the Length of the Encryption Key
Set the encryption key length using the setEncryptionKeyLength() method as shown below.
spp.setEncryptionKeyLength(128);
Step 5: Setting the Permissions
Set the permissions using the setPermissions() method of the StandardProtectionPolicy class. This method accepts an AccessPermission object as a parameter.
spp.setPermissions(accessPermission);
Step 6: Protecting the Document
You can protect your document using the protect() method of the PDDocument class as shown below. Pass the StandardProtectionPolicy object as a parameter to this method.
document.protect(spp);
Step 7: Saving the Document
After adding the required content save the PDF document using the save() method of the PDDocument class as shown in the following code block.
document.save("Path");
Step 8: Closing the Document
Finally, close the document using close() method of PDDocument class as shown below.
document.close();
Example - Encrypting a PDF Document
Suppose, we have a PDF document named sample.pdf, in the path D:/Projects/PDFBox/PdfBox_Examples with empty pages as shown below.
This example demonstrates how to encrypt the above mentioned PDF document. Here, we will load the PDF document named sample.pdf and encrypt it. Save this code in a file with name PDFBoxDemo.java.
PDFBoxDemo.java
package com.tutorialspoint.pdfbox;

import java.io.IOException;

import org.apache.pdfbox.Loader;
import org.apache.pdfbox.io.RandomAccessReadBufferedFile;
import org.apache.pdfbox.pdmodel.PDDocument;
import org.apache.pdfbox.pdmodel.encryption.AccessPermission;
import org.apache.pdfbox.pdmodel.encryption.StandardProtectionPolicy;

public class PDFBoxDemo {
   public static void main(String args[]) throws IOException {

      // Loading an existing document
      PDDocument document = Loader.loadPDF(
         new RandomAccessReadBufferedFile("D:/Projects/PDFBox/PdfBox_Examples/sample.pdf"));

      //Creating access permission object
      AccessPermission ap = new AccessPermission();

      //Creating StandardProtectionPolicy object
      StandardProtectionPolicy spp = new StandardProtectionPolicy("1234", "1234", ap);

      //Setting the length of the encryption key
      spp.setEncryptionKeyLength(128);

      //Setting the access permissions
      spp.setPermissions(ap);

      //Protecting the document
      document.protect(spp);

      System.out.println("Document encrypted");


      //Saving the document
      document.save("D:/Projects/PDFBox/PdfBox_Examples/sample.pdf");

      //Closing the document
      document.close();
   }
}
Output
Compile and run the code to verify the following output −
Document encrypted
If you try to open the document sample.pdf, you cannot, since it is encrypted. Instead, it prompts to type the password to open the document as shown below.
PDFBox - JavaScript in PDF Document
In the previous chapter, we have learnt how to insert image into a PDF document. In this chapter, we will discuss how to add JavaScript to a PDF document.
Adding JavaScript to a PDF Document
You can add JavaScript actions to a PDF document using the PDActionJavaScript class. This represents a JavaScript action.
Following are the steps to add JavaScript actions to an existing PDF document.
Step 1: Loading an Existing PDF Document
Load an existing PDF document using the static method loadPDF() of the Loader class. This method accepts a RandomAccessReadBufferedFile object as a parameter, since this is a static method you can invoke it using class name as shown below.
// Loading an existing document
PDDocument document = Loader.loadPDF(
   new RandomAccessReadBufferedFile("D:/Projects/PDFBox/PdfBox_Examples/sample.pdf"));
Step 2: Creating the PDActionJavaScript Object
Instantiate the PDActionJavaScript object as shown below. To the constructor of this class, pass the required JavaScript in the form of String as shown below.
String javaScript = "app.alert( {cMsg: 'this is an example', nIcon: 3,"
   + " nType: 0,cTitle: 'PDFBox Javascript example' } );";
PDActionJavaScript PDAjavascript = new PDActionJavaScript(javaScript);
Step 3: Embedding Java script in the Document
Embed the required string to the PDF document as shown below.
document.getDocumentCatalog().setOpenAction(PDAjavascript);
Step 4: Saving the Document
After adding the required content save the PDF document using the save() method of the PDDocument class as shown in the following code block.
document.save("Path");
Step 5: Closing the Document
Finally, close the document using close() method of the PDDocument class as shown below.
document.close();
Example - Inserting JavaScript in a PDF Document
Suppose, we have a PDF document named sample.pdf, in the path D:/Projects/PDFBox/PdfBox_Examples/ with empty pages as shown below.
This example demonstrates how to embed JavaScript in the above mentioned PDF document. Here, we will load the PDF document named sample.pdf and embed JavaScript in it. Save this code in a file with name PDFBoxDemo.java.
package com.tutorialspoint.pdfbox;

import java.io.IOException;

import org.apache.pdfbox.Loader;
import org.apache.pdfbox.io.RandomAccessReadBufferedFile;
import org.apache.pdfbox.pdmodel.PDDocument;
import org.apache.pdfbox.pdmodel.interactive.action.PDActionJavaScript;

public class PDFBoxDemo {
   public static void main(String args[]) throws IOException {

      // Loading an existing document
      PDDocument document = Loader.loadPDF(
         new RandomAccessReadBufferedFile("D:/Projects/PDFBox/PdfBox_Examples/my_doc.pdf"));

      String javaScript = "app.alert( {cMsg: 'this is an example', nIcon: 3,"
         + " nType: 0, cTitle: 'PDFBox Javascript example} );";

      //Creating PDActionJavaScript object
      PDActionJavaScript PDAjavascript = new PDActionJavaScript(javaScript);

      //Embedding java script
      document.getDocumentCatalog().setOpenAction(PDAjavascript);

      System.out.println("Data added to the given PDF");

      //Saving the document
      document.save("D:/Projects/PDFBox/PdfBox_Examples/new.pdf");

      //Closing the document
      document.close();
   }
}
Output
Compile and run the code to verify the following output −
Data added to the given PDF
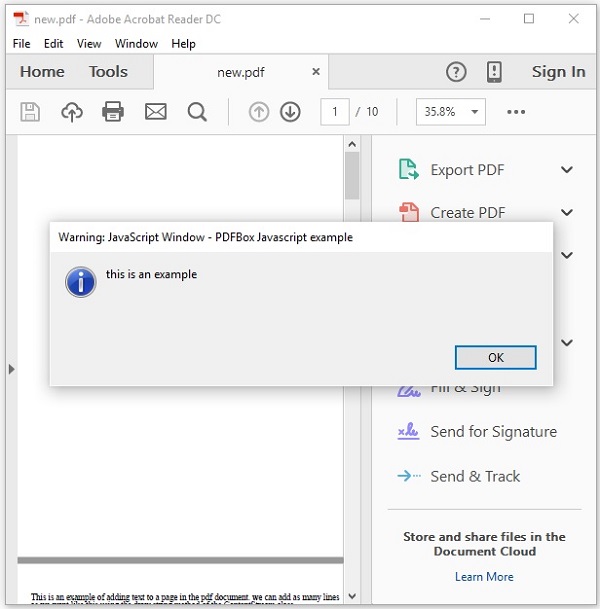
If you try to open the document new.pdf it will display an alert message as shown below.
PDFBox - Splitting a PDF Document
In the previous chapter, we have seen how to add JavaScript to a PDF document. Let us now learn how to split a given PDF document into multiple documents.
Splitting the Pages in a PDF Document
You can split the given PDF document in to multiple PDF documents using the class named Splitter. This class is used to split the given PDF document into several other documents.
Following are the steps to split an existing PDF document
Step 1: Loading an Existing PDF Document
Load an existing PDF document using the static method loadPDF() of the Loader class. This method accepts a RandomAccessReadBufferedFile object as a parameter, since this is a static method you can invoke it using class name as shown below.
// Loading an existing document
PDDocument document = Loader.loadPDF(
   new RandomAccessReadBufferedFile("D:/Projects/PDFBox/PdfBox_Examples/sample.pdf"));
Step 2: Instantiate the Splitter Class
The class named Splitter contains the methods to split the given PDF document therefore, instantiate this class as shown below.
Splitter splitter = new Splitter();
Step 3: Splitting the PDF Document
You can split the given document using the Split() method of the Splitter class this class. This method accepts an object of the PDDocument class as a parameter.
List<PDDocument> Pages = splitter.split(document);
The split() method splits each page of the given document as an individual document and returns all these in the form of a list.
Step 4: Creating an Iterator Object
In order to traverse through the list of documents you need to get an iterator object of the list acquired in the above step, you need to get the iterator object of the list using the listIterator() method as shown below.
Iterator<PDDocument> iterator = Pages.listIterator();
Step 5: Closing the Document
Finally, close the document using close() method of PDDocument class as shown below.
document.close();
Example - Splitting a PDF Document
Suppose, there is a PDF document with name sample.pdf in the path D:/Projects/PDFBox/PdfBox_Examples and this document contains two pages where one page contains image and another page contains text as shown below.

This example demonstrates how to split the above mentioned PDF document. Here, we will split the PDF document named sample.pdf into two different documents sample1.pdf and sample2.pdf. Save this code in a file with name PDFBoxDemo.java.
PDFBoxDemo.java
package com.tutorialspoint.pdfbox;

import java.io.IOException;
import java.util.Iterator;
import java.util.List;

import org.apache.pdfbox.Loader;
import org.apache.pdfbox.io.RandomAccessReadBufferedFile;
import org.apache.pdfbox.multipdf.Splitter;
import org.apache.pdfbox.pdmodel.PDDocument;

public class PDFBoxDemo {
   public static void main(String args[]) throws IOException {

      // Loading an existing document
      PDDocument document = Loader.loadPDF(
         new RandomAccessReadBufferedFile("D:/Projects/PDFBox/PdfBox_Examples/sample.pdf"));

      //Instantiating Splitter class
      Splitter splitter = new Splitter();

      //splitting the pages of a PDF document
      List<PDDocument> Pages = splitter.split(document);

      //Creating an iterator
      Iterator<PDDocument> iterator = Pages.listIterator();

      //Saving each page as an individual document
      int i = 1;
      while(iterator.hasNext()) {
         PDDocument pd = iterator.next();
         pd.save("D:/Projects/PDFBox/PdfBox_Examples/sample"+ i++ +".pdf");
      }
      System.out.println("Multiple PDFs created");
      document.close();
   }
}
Output
Compile and run the code to verify the following output −
Multiple PDFs created
If you verify the given path, you can observe that multiple PDFs were created with names sample1 and sample2 as shown below.


PDFBox - Merging Multiple PDF Documents
In the previous chapter, we have seen how to split a given PDF document into multiple documents. Let us now learn how to merge multiple PDF documents as a single document.
Merging Multiple PDF Documents
You can merge multiple PDF documents into a single PDF document using the class named PDFMergerUtility class, this class provides methods to merge two or more PDF documents in to a single PDF document.
Following are the steps to merge multiple PDF documents.
Step 1: Instantiating the PDFMergerUtility class
Instantiate the merge utility class as shown below.
PDFMergerUtility PDFmerger = new PDFMergerUtility();
Step 2: Setting the destination file
Set the destination files using the setDestinationFileName() method as shown below.
PDFmerger.setDestinationFileName("D:/Projects/PDFBox/PdfBox_Examples/merged.pdf");
Step 3: Setting the source files
Set the source files using the addSource() method as shown below.
File file = new File("path of the document")
PDFmerger.addSource(file);
Step 4: Merging the documents
Merge the documents using the mergeDocuments() method of the PDFmerger class as shown below.
PDFmerger.mergeDocuments();
Example - Merging Multiple PDF Documents
Suppose, we have two PDF documents sample1.pdf and sample2.pdf, in the path D:/Projects/PDFBox/PdfBox_Examples/ as shown below.
This example demonstrates how to merge the above PDF documents. Here, we will merge the PDF documents named sample1.pdf and sample2.pdf in to a single PDF document merged.pdf. Save this code in a file with name PDFBoxDemo.java.
PDFBoxDemo.java
package com.tutorialspoint.pdfbox;

import org.apache.pdfbox.multipdf.PDFMergerUtility;

import java.io.File;
import java.io.IOException;

public class PDFBoxDemo {
   public static void main(String[] args) throws IOException {
      File file1 = new File("D:/Projects/PDFBox/PdfBox_Examples/sample1.pdf");
      File file2 = new File("D:/Projects/PDFBox/PdfBox_Examples/sample2.pdf");

      //Instantiating PDFMergerUtility class
      PDFMergerUtility PDFmerger = new PDFMergerUtility();

      //Setting the destination file
      PDFmerger.setDestinationFileName("D:/Projects/PDFBox/PdfBox_Examples/merged.pdf");

      //adding the source files
      PDFmerger.addSource(file1);
      PDFmerger.addSource(file2);

      //Merging the two documents
      PDFmerger.mergeDocuments();
      System.out.println("Documents merged");
   }
}
Output
Compile and run the code to verify the following output −
Documents merged
If you verify the given path, you can observe that a PDF document with name merged.pdf is created and this contains the pages of both the source documents as shown below.
PDFBox - Converting PDF To Image
In the previous chapter, we have seen how to merge multiple PDF documents. In this chapter, we will understand how to extract an image from a page of a PDF document.
Generating an Image from a PDF Document
PDFBox library provides you a class named PDFRenderer which renders a PDF document into an AWT BufferedImage.
Following are the steps to generate an image from a PDF document.
Step 1: Loading an Existing PDF Document
Load an existing PDF document using the static method loadPDF() of the Loader class. This method accepts a RandomAccessReadBufferedFile object as a parameter, since this is a static method you can invoke it using class name as shown below.
// Loading an existing document
PDDocument document = Loader.loadPDF(
   new RandomAccessReadBufferedFile("D:/Projects/PDFBox/PdfBox_Examples/sample.pdf"));
Step 2: Instantiating the PDFRenderer Class
The class named PDFRenderer renders a PDF document into an AWT BufferedImage. Therefore, you need to instantiate this class as shown below. The constructor of this class accepts a document object; pass the document object created in the previous step as shown below.
PDFRenderer renderer = new PDFRenderer(document);
Step 3: Rendering Image from the PDF Document
You can render the image in a particular page using the method renderImage() of the Renderer class, to this method you need to pass the index of the page where you have the image that is to be rendered.
BufferedImage image = renderer.renderImage(0);
Step 4: Writing the Image to a File
You can write the image rendered in the previous step to a file using the write() method. To this method, you need to pass three parameters −
The rendered image object.
String representing the type of the image (jpg or png).
File object to which you need to save the extracted image.
ImageIO.write(image, "JPEG", new File("C:/PdfBox_Examples/myimage.jpg"));
Step 5: Closing the Document
Finally, close the document using the close() method of the PDDocument class as shown below.
document.close();
Example - Converting PDF to JPG Image
Suppose, we have a PDF document sample.pdf in the path C:\PdfBox_Examples\ and this contains an image in its first page as shown below.
This example demonstrates how to convert the above PDF document into an image file. Here, we will retrieve the image in the 1st page of the PDF document and save it as myimage.jpg. Save this code as PdfToImage.java
package com.tutorialspoint.pdfbox;

import java.awt.image.BufferedImage;
import java.io.File;
import java.io.IOException;

import javax.imageio.ImageIO;

import org.apache.pdfbox.Loader;
import org.apache.pdfbox.io.RandomAccessReadBufferedFile;
import org.apache.pdfbox.pdmodel.PDDocument;
import org.apache.pdfbox.rendering.PDFRenderer;

public class PDFBoxDemo {
   public static void main(String[] args) throws IOException {
      // Loading an existing document
      PDDocument document = Loader.loadPDF(
         new RandomAccessReadBufferedFile("D:/Projects/PDFBox/PdfBox_Examples/sample.pdf"));

      //Instantiating the PDFRenderer class
      PDFRenderer renderer = new PDFRenderer(document);

      //Rendering an image from the PDF document
      BufferedImage image = renderer.renderImage(0);

      //Writing the image to a file
      ImageIO.write(image, "JPEG", new File("D:/Projects/PDFBox/PdfBox_Examples/myimage.jpg"));

      System.out.println("Image created");

      //Closing the document
      document.close();
   }
}
Output
Compile and run the code to verify the following output −
Image created
If you verify the given path, you can observe that the image is generated and saved as myimage.jpg as shown below.

PDFBox - Adding Rectangles
This chapter teaches you how to create color boxes in a page of a PDF document.
Creating Boxes in a PDF Document
You can add rectangular boxes in a PDF page using the addRect() method of the PDPageContentStream class.
Following are the steps to create rectangular shapes in a page of a PDF document.
Step 1: Loading an Existing PDF Document
Load an existing PDF document using the static method loadPDF() of the Loader class. This method accepts a RandomAccessReadBufferedFile object as a parameter, since this is a static method you can invoke it using class name as shown below.
// Loading an existing document
PDDocument document = Loader.loadPDF(
   new RandomAccessReadBufferedFile("D:/Projects/PDFBox/PdfBox_Examples/sample.pdf"));
Step 2: Getting the Page Object
You need to retrieve the PDPage object of the required page where you want to add rectangles using the getPage() method of the PDDocument class. To this method you need to pass the index of the page where you want to add rectangles.
PDPage page = document.getPage(0);
Step 3: Preparing the Content Stream
You can insert various kinds of data elements using the object of the class named PDPageContentStream. You need to pass the document object and the page object to the constructor of this class therefore, instantiate this class by passing these two objects created in the previous steps as shown below.
PDPageContentStream contentStream = new PDPageContentStream(document, page);
Step 4: Setting the Non-stroking Color
You can set the non-stroking color to the rectangle using the setNonStrokingColor() method of the class PDPageContentStream. To this method, you need to pass the required color as a parameter as shown below.
contentStream.setNonStrokingColor(Color.DARK_GRAY);
Step 5: Drawing the rectangle
Draw the rectangle with required dimensions using the addRect() method. To this method, you need to pass the dimensions of the rectangle that is to be added as shown below.
contentStream.addRect(200, 650, 100, 100);
Step 6: Filling the Rectangle
The fill() method of the PDPageContentStream class fills the path between the specified dimensions with the required color as shown below.
contentStream.fill();
Step 7: Closing the Document
Finally close the document using close() method of the PDDocument class as shown below.
document.close();
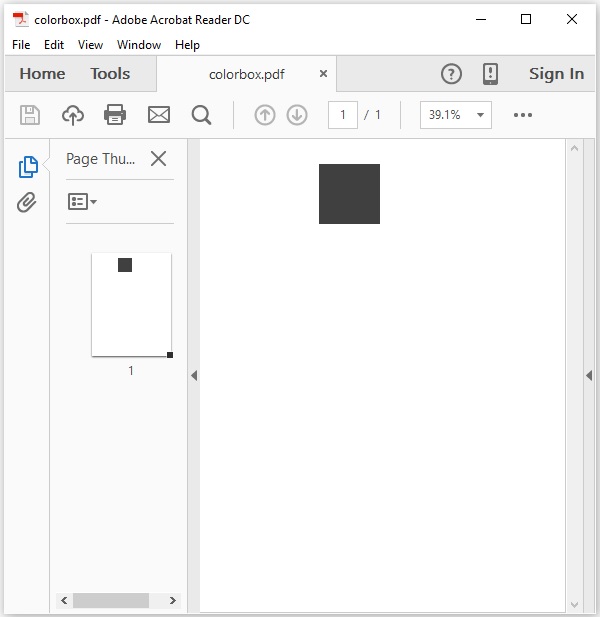
Example
Suppose we have a PDF document named blankpage.pdf in the path D:/Projects/PDFBox/PdfBox_Examples and this contains a single blank page as shown below.
This example demonstrates how to create/insert rectangles in a PDF document. Here, we will create a box in a Blank PDF. Save this code as AddRectangles.java.
package com.tutorialspoint.pdfbox;

import java.awt.Color;
import java.io.File;
import java.io.IOException;

import org.apache.pdfbox.Loader;
import org.apache.pdfbox.io.RandomAccessReadBufferedFile;
import org.apache.pdfbox.pdmodel.PDDocument;
import org.apache.pdfbox.pdmodel.PDPage;
import org.apache.pdfbox.pdmodel.PDPageContentStream;

public class PDFBoxDemo {
   public static void main(String[] args) throws IOException {
      // Loading an existing document
      PDDocument document = Loader.loadPDF(
         new RandomAccessReadBufferedFile("D:/Projects/PDFBox/PdfBox_Examples/blankpage.pdf"));

      //Retrieving a page of the PDF Document
      PDPage page = document.getPage(0);

      //Instantiating the PDPageContentStream class
      PDPageContentStream contentStream = new PDPageContentStream(document, page);

      //Setting the non stroking color
      contentStream.setNonStrokingColor(Color.DARK_GRAY);

      //Drawing a rectangle
      contentStream.addRect(200, 650, 100, 100);

      //Drawing a rectangle
      contentStream.fill();

      System.out.println("rectangle added");

      //Closing the ContentStream object
      contentStream.close();

      //Saving the document
      File file = new File("D:/Projects/PDFBox/PdfBox_Examples/colorbox.pdf");
      document.save(file);

      //Closing the document
      document.close();
   }
}
Output
Compile and run the code to verify the following output −
Rectangle created
If you verify the given path and open the saved document colorbox.pdf, you can observe that a box is inserted in it as shown below.