- MS Expression Web - Home
- MS Expression Web - Overview
- Environment Setup
- MS Expression Web - New Website
- Blank Web Page
- Webpage Layout
- MS Expression Web - HTML Layout
- Horizontal Navigation
- Vertical Navigation
- MS Expression Web - Validate Pages
- Dynamic Web Template
- MS Expression Web - Search Page
- MS Expression Web - Images
- MS Expression Web - Hyperlinks
- MS Expression Web - Video
- SQL Datasource
- MS Expression Web - MS Word
- MS Expression Web - Gridview
- MS Expression Web - Master Pages
- MS Expression Web - Data Table
- MS Expression Web - Publish
- Backup Website
- MS Expression Web - Add-Ins
Microsoft Expression Web - Gridview
The GridView control is used to display the values of a data source in a table. Each column represents a field, while each row represents a record. In this chapter, we will learn a very simple process to display data from a database on a webpage in a GridView.
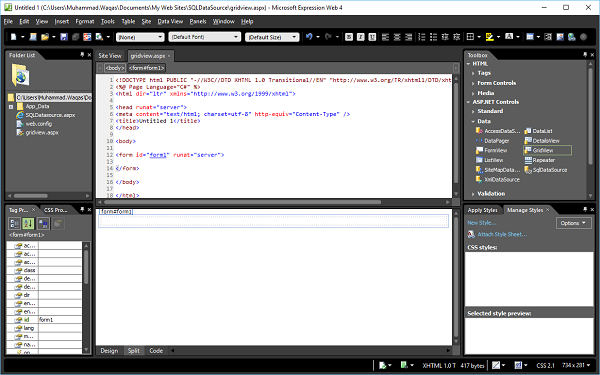
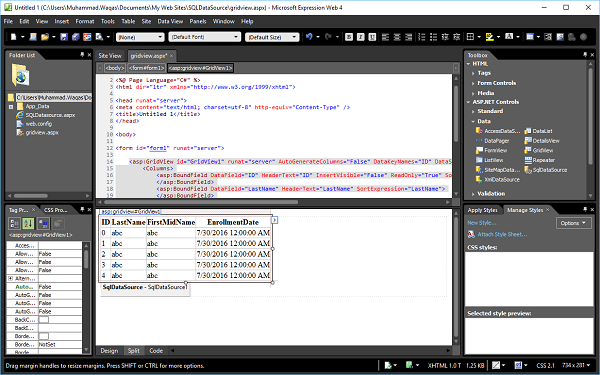
Step 1 − Lets create a new ASPX page in SQLDataSource project and call it gridview.aspx
Step 2 − In the Toolbox, you will see the ASP.NET Controls. Drag the GridView control and drop it over the form section.
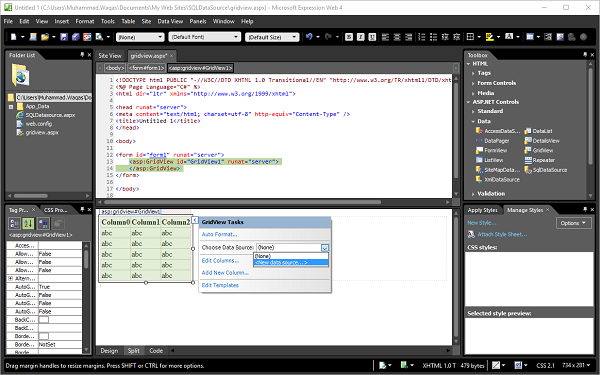
You can see that the GridView context menu is open. Now select the <New data source> from the Choose Data Source dropdown list. It will display the Data Source Configuration Wizard.
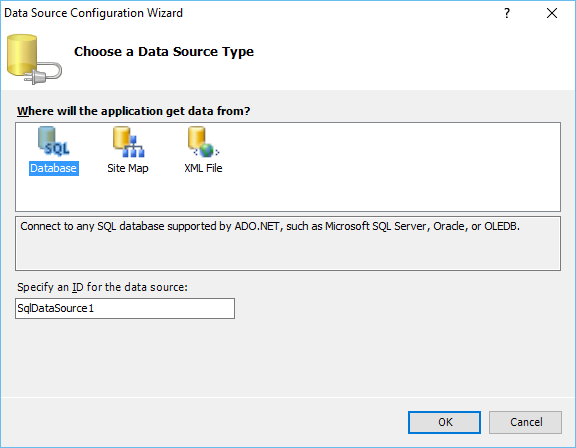
Step 3 − Select the Database as we will get the data from SQL database and specify the data source ID. Click OK.
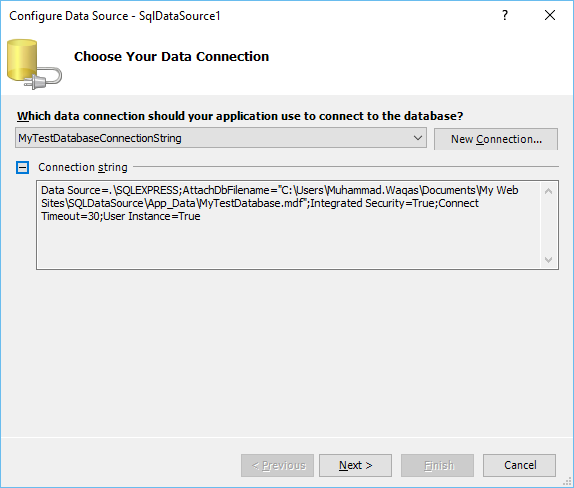
Step 4 − Select the existing connection string, which we have created in SQL DataSource chapter, as we will be using the same database in this chapter. Click Next.
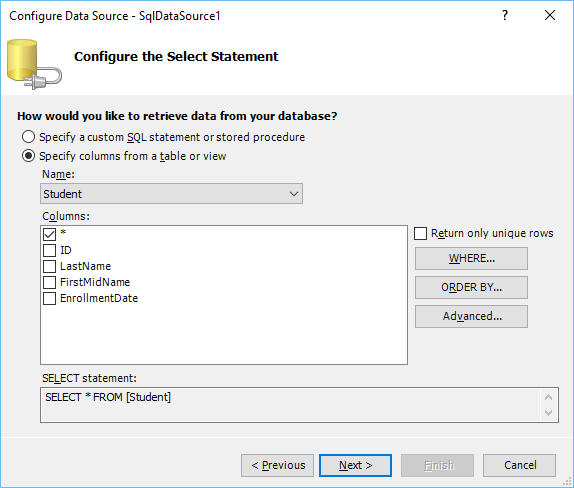
Step 5 − For the purpose of understanding, lets select the Student table and click the * checkbox which will retrieve all the columns from the student table. Click Next.
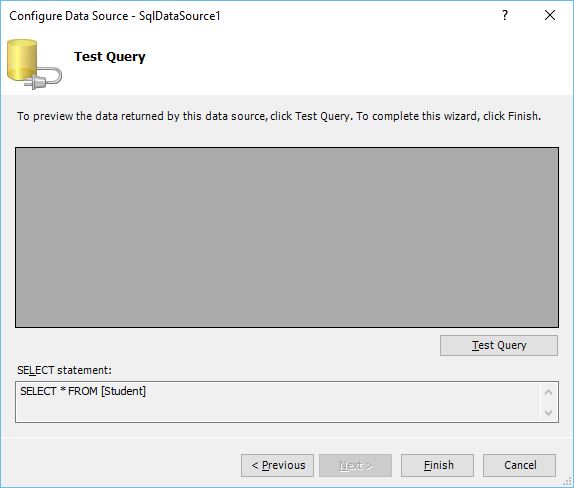
Step 6 − In the following wizard, you can test the query, so lets click the Test Query button.
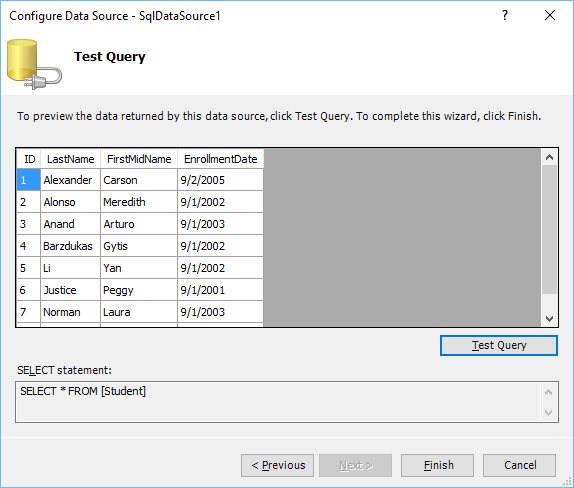
Upon clicking Next, it will display the following screen −
The Design View of gridview.aspx looks as follows −
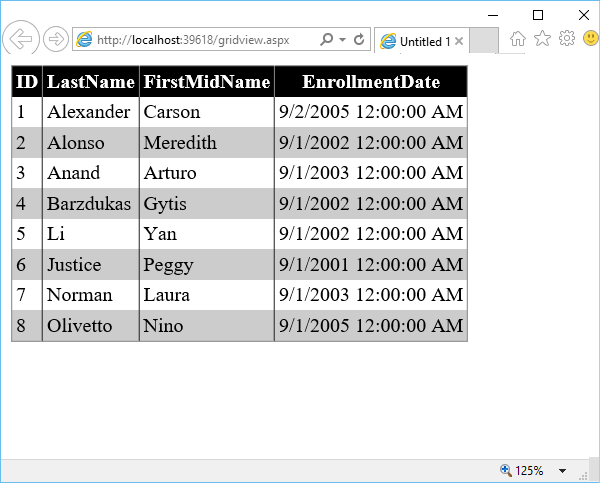
Step 7 − Let us preview the webpage in a browser. It will appear as follows −
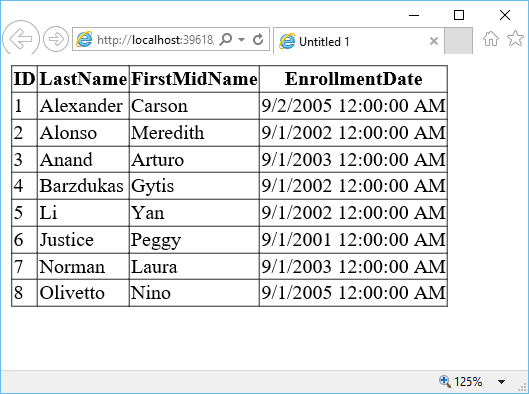
This is a simple table without any formatting.
Step 8 − You can format the GridView from the GridView Context menu.
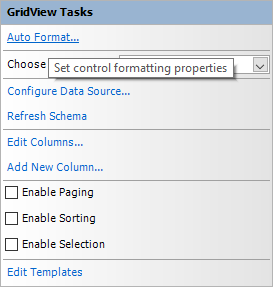
Click the Auto Format link. In the Auto Format dialog box, there are many predefined schemes. Select a scheme as per your requirement and click OK.

Lets preview the webpage in a browser again. It will look like the following screenshot.