- Malware Removal - Home
- Malware Removal - Overview
- Malware Removal - How It Works
- Malware Removal - Types
- Detection Techniques
- Preparation for Removal
- Malware Removal - Process
- Malware Removal - Protection
- Malware Removal - Removal Tools
Malware Removal - AVG Antivirus 2016
AVG is rated among the best antiviruses; it has a free version that has the following features −
Stops viruses, spyware & other malware.
Warns against unsafe web links.
Blocks dangerous email attachments.
Scans quickly & quietly.
Downloading and installing AVG Antivirus 2016
To download and install the AVG Antivirus on your system, we should follow the steps given below.
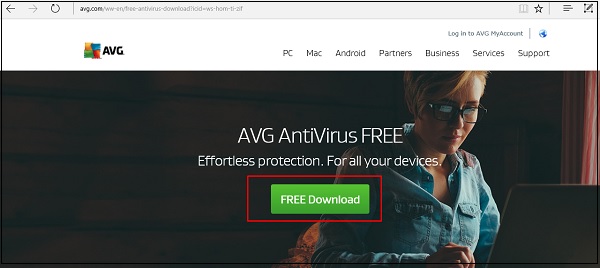
Step 1 − To download the AVG Antivirus 2016, we can click on the following link − https://www.avg.com/ww-en/free-antivirus-download?icid=ws-hom-ti-zif
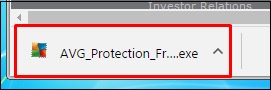
Step 2 − To begin the installation, click on the .exe file.
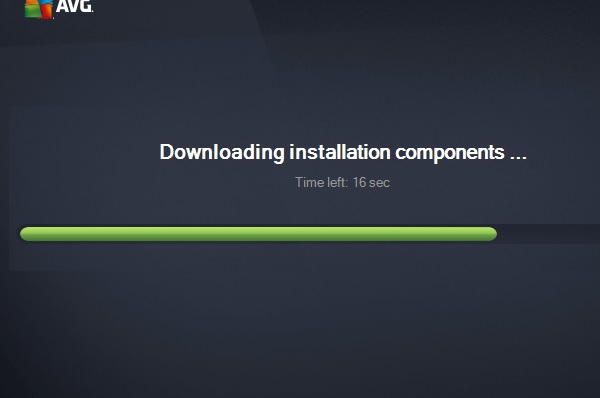
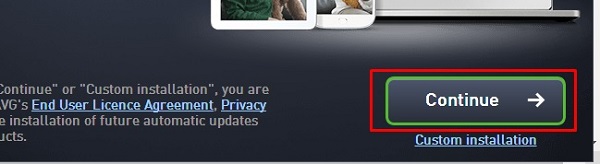
Step 3 − And the package will begin to download as shown in the following screenshot.
Step 4 − Click on Continue → Install Now.
Step 5 − After the installation is complete, the main console will open on the screen.
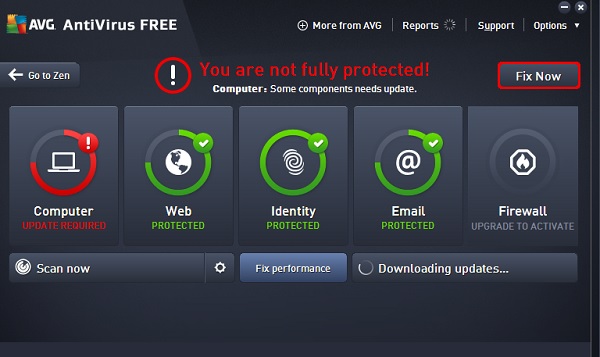
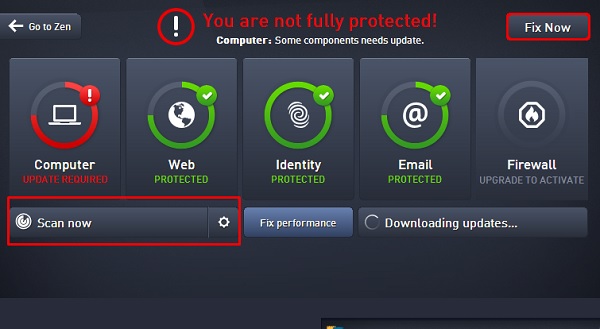
Step 6 − To do a computer scan, click on the Scan now option as shown in the screenshot below.
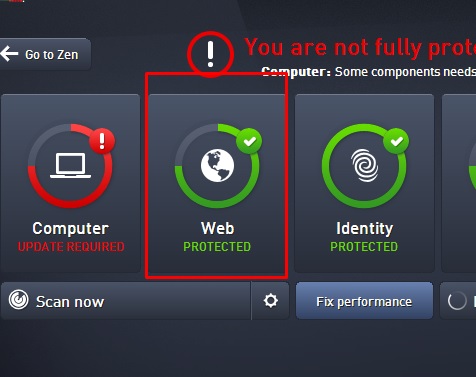
Step 7 − We have the Web option, which if, is in the status protected as shown in the following screenshot, it helps to determine, whether the URL is safe or not. It also scans the attachments and URLs coming in the emails for possible viruses.
SUPERAntiSpyware
One of the best spyware removers is SuperAntiSpyware, which has its own free version. Some of its key features are as follows −
Detects and Removes Spyware, Adware, Malware, Trojans, Dialers, Worms, KeyLoggers, HiJackers and many other types of threats.
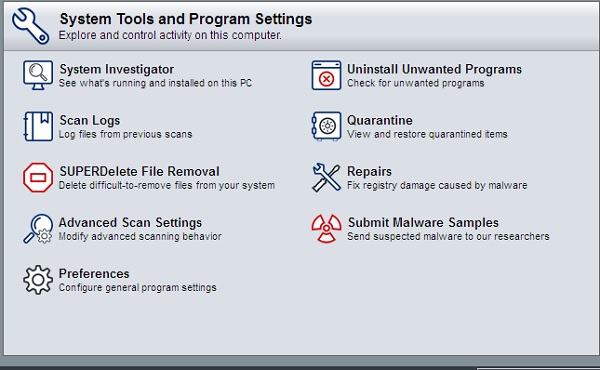
System Investigator Find out what is running on your PC! Show installed applications, browser plugins and more! Optional change highlighting lets you track modifications to your system over time.*
Real-Time Blocking of threats! Prevent potentially harmful software from installing or re-installing.
Stop unwanted pop-ups and ads caused by malware with integrated SUPERAdBlocker Technology.
Repair broken Internet Connections, Desktops, Registry Editing, Task Manager and more with our unique Repair System! Spyware applications often disable system components to prevent removal - SUPERAntiSpyware resets and restores these items in seconds!
Downloading and Installing SuperAntiSpyware
For downloading and installing SuperAntiSpyware, we should follow the steps given below
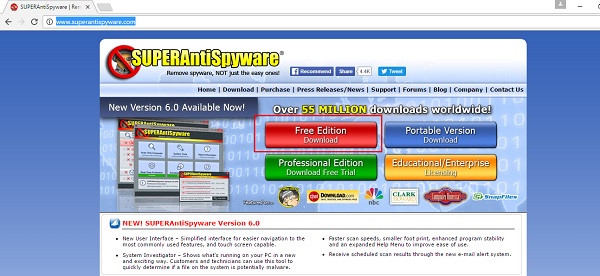
Step 1 − To download the free edition of SuperAntiSpyware, click on the following link − https://www.superantispyware.com/.
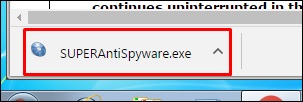
Step 2 − Once the SuperAntiSpyware is downloaded, click on the EXE package.
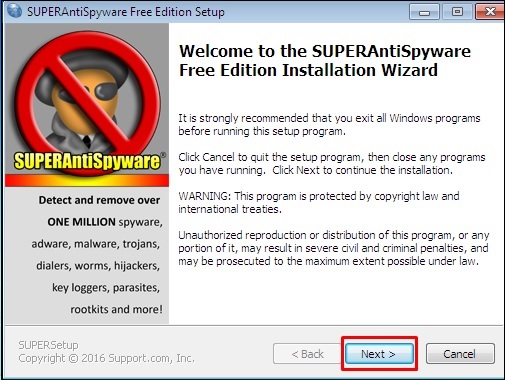
Step 3 − Click on the Next button.
Step 4 − Click in the checkbox I agree and then → Next → Next → Finish. After the installation is complete, you can see the icon on the desktop and near the Clock of the computer.
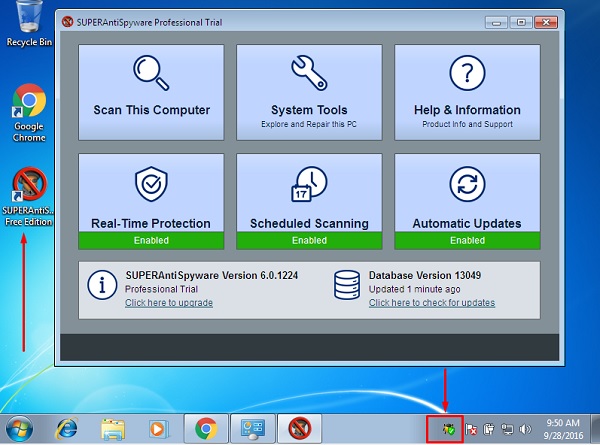
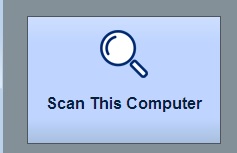
Step 5 − To scan the computer for spyware, we click on Scan This Computer.
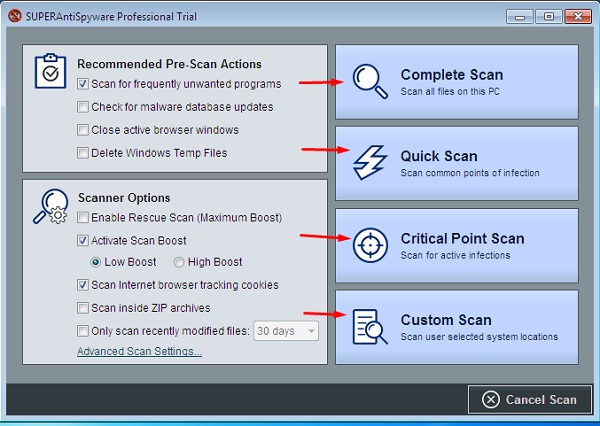
Step 6 − Select one of the options shown in the following screenshot based on your requirements.
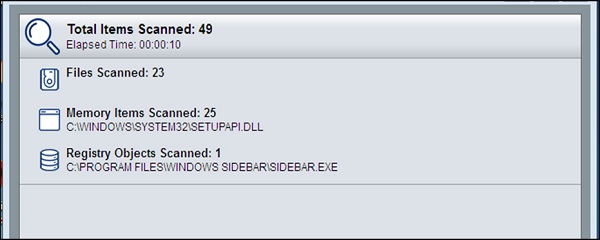
The scanning will start as shown in the following screenshot
Step 7 − If we want to repair Damaged Registries, Uninstall Programs, Investigate on Programs, click on the System Tools option.
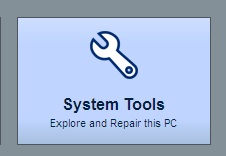
The following page will open on your screen.