- Electron - Home
- Electron - Overview
- Electron - Installation
- How Electron Works?
- Electron - Hello World
- Electron - Building UIs
- Electron - File Handling
- Electron - Native Node Libraries
- Inter Process Communication(IPC)
- Electron - System Dialogs
- Electron - Menus
- Electron - System Tray
- Electron - Notifications
- Electron - Webview
- Electron - Audio & Video Capturing
- Electron - Defining Shortcuts
- Electron - Environment Variables
- Electron - Debugging
- Electron - Packaging Apps
- Electron - Resources
Electron - Installation
To get started with developing using the Electron, you need to have Node and npm(node package manager) installed. If you do not already have these, head over to Node setup to install node on your local system. Confirm that node and npm are installed by running the following commands in your terminal.
node --version
npm --version
The above command will generate the following output −
v6.9.1
3.10.8
Whenever we create a project using npm, we need to provide a package.json file, which has all the details about our project. npm makes it easy for us to set up this file. Let us set up our development project.
Fire up your terminal/cmd, create a new folder named hello-world and open that folder using the cd command.
Now to create the package.json file using npm, use the following command.
npm init
It will ask you for the following information −
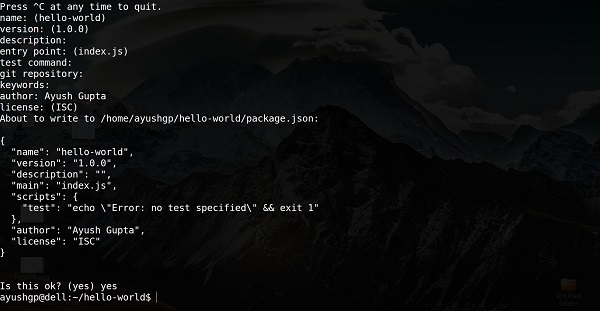
Just keep pressing Enter, and enter your name at the author name field.
Create a new folder and open it using the cd command. Now run the following command to install Electron globally.
$ npm install -g electron-prebuilt
Once it executes, you can check if Electron is installed the right way by running the following command −
$ electron --version
You should get the output −
v1.4.13
Now that we have set up Electron, let us move on to creating our first app using it.