- AWS - Cloud Computing
- AWS - Basic Architecture
- AWS - Management Console
- AWS - Console Mobile App
- AWS - Account
- Amazon Computer Services
- AWS - Elastic Compute Cloud
- AWS - Auto Scaling
- AWS - WorkSpaces
- AWS - Lambda
- Amazon Network Services
- AWS - Virtual Private Cloud
- AWS - Route 53
- AWS - Direct Connect
- Amazon Storage Services
- AWS - Amazon S3
- AWS - Elastic Block Store
- AWS - Storage Gateway
- AWS - CloudFront
- Amazon Database Services
- AWS - Relational Database Service
- AWS - DynamoDB
- AWS - Redshift
- Amazon Analytics Services
- AWS - Amazon Kinesis
- AWS - Elastic MapReduce
- AWS - Data Pipeline
- AWS - Machine Learning
- Amazon Application Services
- AWS - Simple WorkFlow Service
- AWS - WorkMail
- Amazon Web Services Resources
- AWS - Quick Guide
- AWS - Useful Resources
- AWS - Discussion
Amazon Web Services - Direct Connect
AWS Direct Connect permits to create a private network connection from our network to AWS location. It uses 802.1q VLANs, which can be partitioned into multiple virtual interfaces to access public resources using the same connection. This results in reduced network cost and increased bandwidth. Virtual interfaces can be reconfigured at any time as per the requirement.
Requirements to Use AWS Direct Connect
Our network must meet one of the following conditions to use AWS Direct Connect −
Our network should be in the AWS Direct Connect location. Visit this link to know about the available AWS Direct Connect locations https://aws.amazon.com/directconnect/.
We should be working with an AWS Direct Connect partner who is a member of the AWS Partner Network (APN). Visit this link to know the list of AWS Direct Connect partners − https://aws.amazon.com/directconnect/
Our service provider must be portable to connect to AWS Direct Connect.
Additionally, our network must meet the following necessary conditions −
Connections to AWS Direct Connect requires single mode fiber, 1000BASE-LX (1310nm) for 1 gigabit Ethernet, or 10GBASE-LR (1310nm) for 10 gigabit Ethernet. Auto Negotiation for the port must be disabled. Support for 802.1Q VLANs across these connections should be available.
Network must support Border Gateway Protocol (BGP) and BGP MD5 authentication. Optionally, we may configure Bidirectional Forwarding Detection (BFD).
How to Configure AWS Direct Connect?
Following are the steps to configure AWS Direct Connect −
Step 1 − Open the AWS Direct Connect console using this link − https://aws.amazon.com/directconnect/
step 2 − Select AWS Direct Connect region from the navigation bar.
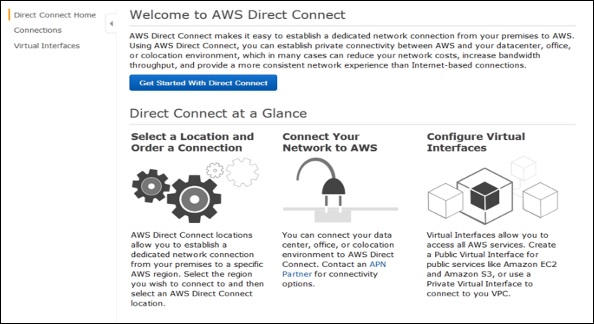
step 3 − Welcome page of AWS Direct Connect opens. Select Get Started with Direct Connect.
step 4 − Create a Connection dialog box opens up. Fill the required details and click the Create button.
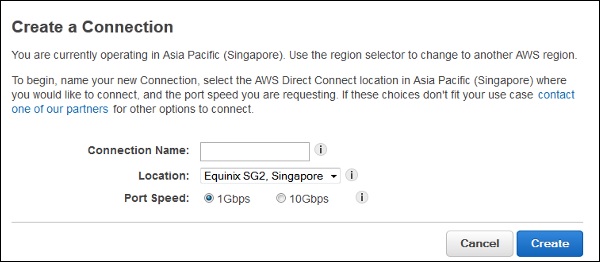
AWS will send an confirmation email within 72 hours to the authorized user.
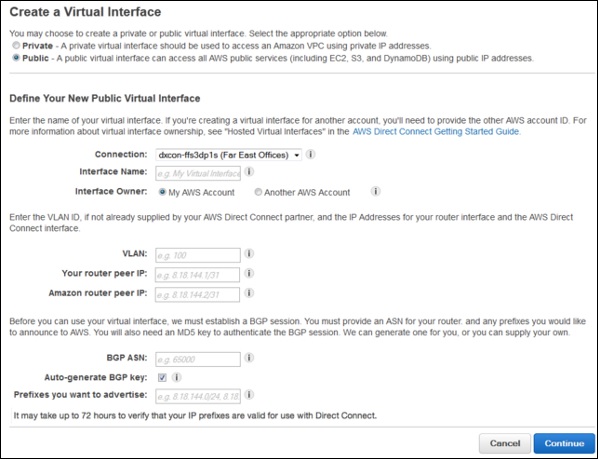
Step 5 − Create a Virtual Interface using the following steps.
Open AWS console page again.
Select Connection in the navigation bar, then select Create Virtual Interface. Fill the required details and click the Continue button.
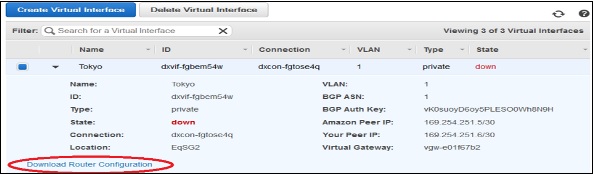
Select Download Router Configuration, then click the Download button.

Verify the Virtual Interface (optional). To verify the AWS Direct Connect connections use the following procedures.
To verify virtual interface connection to the AWS cloud − Run traceroute and verify that the AWS Direct Connect identifier is in the network trace.
To verify virtual interface connection to Amazon VPC − Use any pingable AMI and launch Amazon EC2 instance into the VPC that is attached to the virtual private gateway.
When an instance is running, get its private IP address and ping the IP address to get a response.
Features of Direct Connect
Reduces bandwidth costs − The cost gets reduced in both ways, i.e. it transfers the data to and from AWS directly. The data transferred over your dedicated connection is charged at reduced AWS Direct Connect data transfer rate rather than Internet data transfer rates.
Compatible with all AWS services − AWS Direct Connect is a network service, supports all the AWS services that are accessible over the Internet, like Amazon S3, Amazon EC2, Amazon VPC, etc.
Private connectivity to Amazon VPC − AWS Direct Connect can be used to establish a private virtual interface from our home-network to Amazon VPC directly with high bandwidth.
Elastic − AWS Direct Connect provides 1 Gbps and 10 Gbps connections, having provision to make multiple connections as per requirement.
Easy and simple − Easy to sign up on AWS Direct Connect using the AWS Management Console. Using this console, all the connections and virtual interfaces can be managed.