- LINQ - Home
- LINQ - Overview
- LINQ - Environment Setup
- LINQ - Query Operators
- LINQ - SQL
- LINQ - Objects
- LINQ - Dataset
- LINQ - XML
- LINQ - Entities
- LINQ - Lambda Expressions
- LINQ - ASP.Net
LINQ - Environment Setup
Before starting with LINQ programs, it is best to first understand the nuances of setting up a LINQ environment. LINQ needs a .NET framework, a revolutionary platform to have a diverse kind of applications. A LINQ query can be written either in C# or Visual Basic conveniently.
Microsoft offers tools for both of these languages i.e. C# and Visual Basic by means of Visual Studio. Our examples are all compiled and written in Visual Studio 2010. However, Visual Basic 2013 edition is also available for use. It is the latest version and has many similarities with Visual Studio 2012.
Getting Visual Studio 2010 Installed on Windows 7
Visual Studio can be installed either from an installation media like a DVD. Administrator credentials are required to install Visual Basic 2010 on your system successfully. It is vital to disconnect all removable USB from the system prior to installation otherwise the installation may get failed. Some of the hardware requirements essential to have for installation are the following ones.
Hardware Requirements
- 1.6 GHz or more
- 1 GB RAM
- 3 GB(Available hard-disk space)
- 5400 RPM hard-disk drive
- DirectX 9 compatible video card
- DVD-ROM drive
Installation Steps
Step 1 − First after inserting the DVD with Visual Studio 2010 Package, click on Install or run program from your media appearing in a pop-up box on the screen.
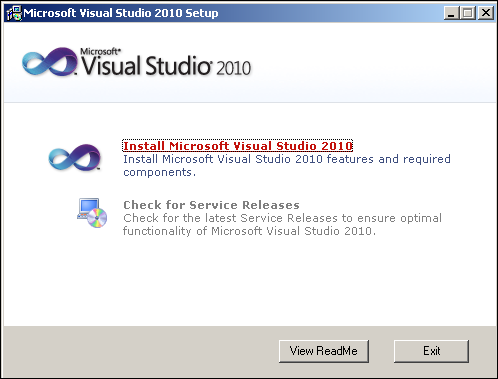
Step 2 − Now set up for Visual Studio will appear on the screen. Choose Install Microsoft Visual Studio 2010.
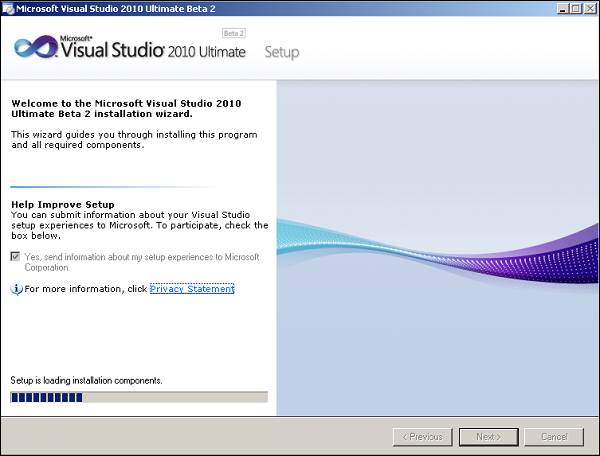
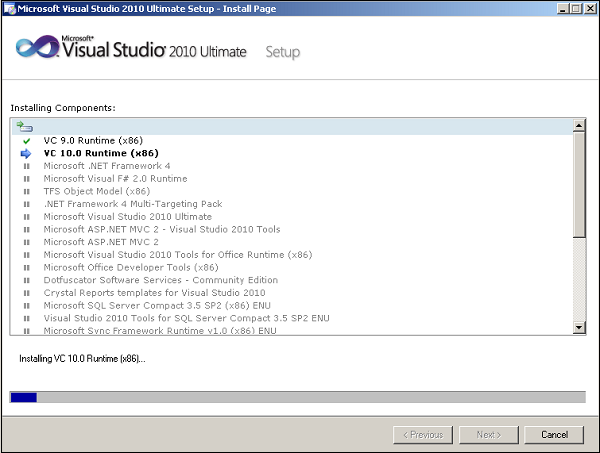
Step 3 − As soon as you will click, it the process will get initiated and a set up window will appear on your screen. After completion of loading of the installation components which will take some time, click on Next button to move to the next step.
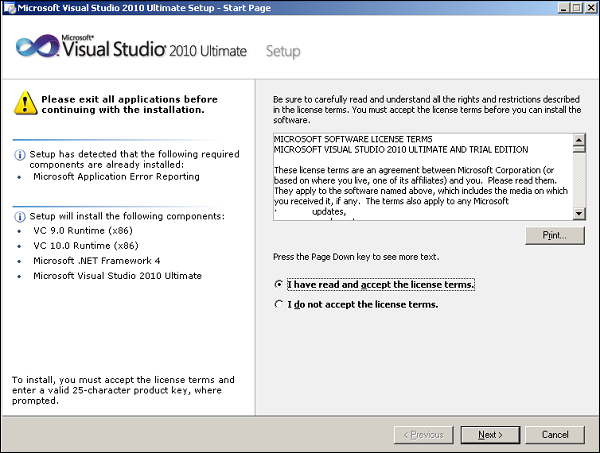
Step 4 − This is the last step of installation and a start page will appear in which simply choose "I have read and accept the license terms" and click on Next button.
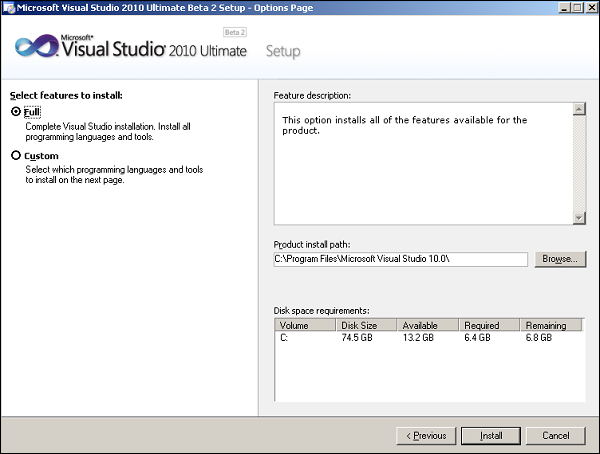
Step 5 − Now select features to install from the options page appearing on your screen. You can either choose Full or Custom option. If you have less disk space than required shown in the disk space requirements, then go for Custom.
Step 6 − When you choose Custom option, the following window will appear. Select the features that you want to install and click Update or else go to step 7. However, it is recommended not to go with the custom option as in future, you may need the features you have chosen to not have.

Step 7 − Soon a pop up window will be shown and the installation will start which may take a long time. Remember, this is for installing all the components.
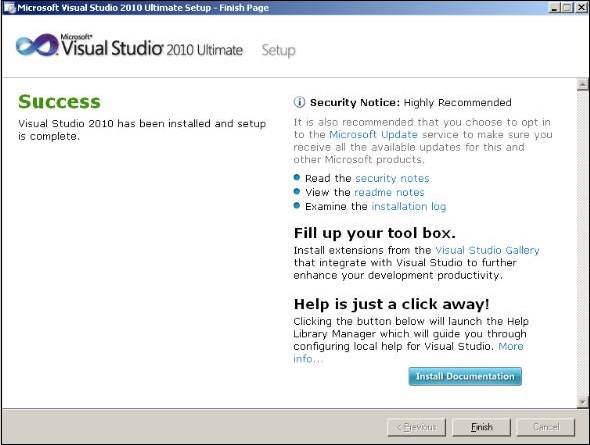
Step 8 − Finally, you will be able to view a message in a window that the installation has been completed successfully. Click Finish.
Writing C# Program using LINQ in Visual Studio 2010
Start Visual Studio 2010 Ultimate edition and choose File followed by New Project from the menu.
A new project dialog box will appear on your screen.
Now choose Visual C# as a category under installed templates and next choose Console Application template as shown in figure below.
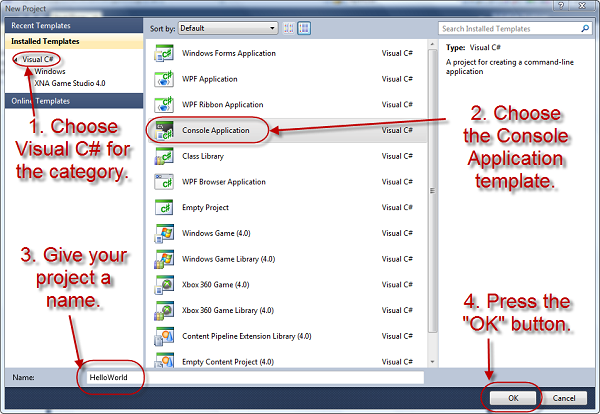
Give a name to your project in the bottom name box and press OK.
The new project will appear in the Solution Explorer in the right-hand side of a new dialog box on your screen.
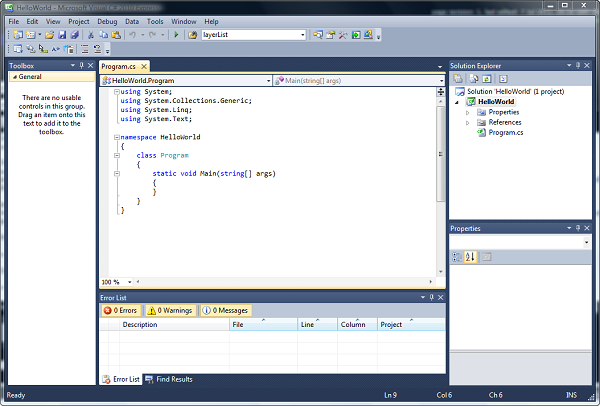
Now choose Program.cs from the Solution Explorer and you can view the code in the editor window which starts with using System.
Here you can start to code your following C# program.
using System;
using System.Collections.Generic;
using System.Linq;
using System.Text;

namespace HelloWorld {
   class Program {
      static void Main(string[] args) {

         Console.WriteLine("Hello World")
         Console.ReadKey();
      }
   }
}
Press F5 key and run your project. It is highly recommended to save the project by choosing File → Save All before running the project.
Writing VB Program using LINQ in Visual Studio 2010
Start Visual Studio 2010 Ultimate edition and choose File followed by New Project from the menu.
A new project dialog box will appear on your screen.
Now chose Visual Basic as a category under installed templates and next choose Console Application template.
Give a name to your project in the bottom name box and press OK.
You will get a screen with Module1.vb. Start writing your VB code here using LINQ.
Module Module1

   Sub Main()
      Console.WriteLine("Hello World")
      Console.ReadLine()
   End Sub

End Module
Press F5 key and run your project. It is highly recommended to save the project by choosing File → Save All before running the project.
When the above code of C# or VB is cimpiled and run, it produces the following result −
Hello World