
Article Categories
- All Categories
-
 Data Structure
-
 Networking
-
 RDBMS
RDBMS
-
 Operating System
-
 Java
Java
-
 MS Excel
-
 iOS
iOS
-
 HTML
HTML
-
 CSS
CSS
-
 Android
-
 Python
-
 C Programming
-
 C++
C++
-
 C#
C#
-
 MongoDB
-
 MySQL
MySQL
-
 Javascript
-
 PHP
PHP
-
 Economics & Finance
Springboot + JSP + Spring Security: Failed to configure a DataSource. How to configure DataSource in MySQL?
To configure a DataSource in Springboot, you can define DataSource into application.properties.
The application.properties is as follows for Springboot −
spring.datasource.username=yourUserName
spring.datasource.password=yourPassword
spring.datasource.url=yourDatabaseUrl
spring.datasource.driver-class-name=yourDriverClassName
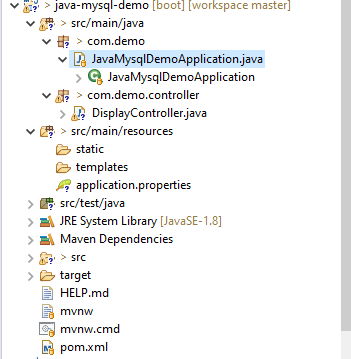
The project structure is as follows −
Example
To understand the above concept, let us create a controller class with spring boot. The Java code is as follows −
package com.demo.controller;
import java.util.List;
import javax.persistence.EntityManager;
import javax.persistence.Query;
import org.springframework.beans.factory.annotation.Autowired;
import org.springframework.web.bind.annotation.GetMapping;
import org.springframework.web.bind.annotation.RequestMapping;
import org.springframework.web.bind.annotation.RestController;
@RestController
@RequestMapping("/users")
public class DisplayController {
   @Autowired
   EntityManager entityManager;
   @GetMapping("/getdata")
   public String getAll() {
      Query data= entityManager.createNativeQuery("select first_name from demo25");
      List<String> allData= data.getResultList();
      return allData.toString();
   }
}
Example
Following is the main class of Java spring boot −
package com.demo;
import org.springframework.boot.SpringApplication;
import org.springframework.boot.autoconfigure.SpringBootApplication;
@SpringBootApplication
public class JavaMysqlDemoApplication {
   public static void main(String[] args) {
      SpringApplication.run(JavaMysqlDemoApplication.class, args);
   }
}
Here is the actual spring boot application.properties.

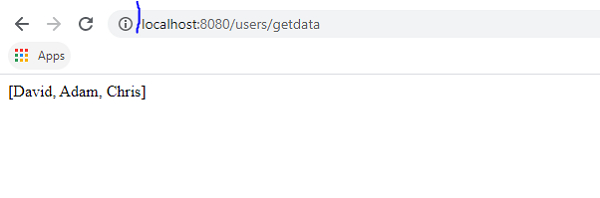
To run the above project, right click main class − use "Run As with Java Application". To get the output, you can use this URL −
http://localhost:yourPortNumber/users/getdata
This will produce the following output −
Following are the tables of above output.
Let us create a table −
mysql> create table demo25
−> (
−> first_name varchar(20)
−> );
Query OK, 0 rows affected (0.72 sec)
Insert some records into the table with the help of insert command −
mysql> insert into demo25 values('David');
Query OK, 1 row affected (0.10 sec)

mysql> insert into demo25 values('Adam');
Query OK, 1 row affected (0.13 sec)

mysql> insert into demo25 values('Chris');
Query OK, 1 row affected (0.10 sec)
Display records from the table using select statement −
mysql> select *from demo25;
This will produce the following output −
+------------+
| first_name |
+------------+
| David      |
| Adam       |
| Chris      |
+------------+
3 rows in set (0.00 sec)

207 Views
