- React - Home
- React - Introduction
- React - Roadmap
- React - Installation
- React - Features
- React - Advantages & Disadvantages
- React - Architecture
- React - Creating a React Application
- React - JSX
- React - Components
- React - Nested Components
- React - Using Newly Created Components
- React - Component Collection
- React - Styling
- React - Properties (props)
- React - Creating Components using Properties
- React - props Validation
- React - Constructor
- React - Component Life Cycle
- React - Event management
- React - Creating an Event−Aware Component
- React - Introduce Events in Expense Manager APP
- React - State Management
- React - State Management API
- React - Stateless Component
- React - State Management Using React Hooks
- React - Component Life Cycle Using React Hooks
- React - Layout Component
- React - Pagination
- React - Material UI
- React - Http Server
- React - Http client programming
- React - Form Programming
- React - Forms
- React - Controlled Component
- React - Uncontrolled Component
- React - Formik
- React - Conditional Rendering
- React - Lists
- React - Keys
- React - Routing
- React - Redux
- React - Animation
- React - Bootstrap
- React - Map
- React - Table
- React - Managing State Using Flux
- React - Testing
- React - CLI Commands
- React - Building and Deployment
- React - Example
- Hooks
- React - Introduction to Hooks
- React - Using useState
- React - Using useEffect
- React - Using useContext
- React - Using useRef
- React - Using useReducer
- React - Using useCallback
- React - Using useMemo
- React - Custom Hooks
- React Advanced
- React - Accessibility
- React - Code Splitting
- React - Context
- React - Error Boundaries
- React - Forwarding Refs
- React - Fragments
- React - Higher Order Components
- React - Integrating With Other Libraries
- React - Optimizing Performance
- React - Profiler API
- React - Portals
- React - React Without ES6 ECMAScript
- React - React Without JSX
- React - Reconciliation
- React - Refs and the DOM
- React - Render Props
- React - Static Type Checking
- React - Strict Mode
- React - Web Components
- Additional Concepts
- React - Date Picker
- React - Helmet
- React - Inline Style
- React - PropTypes
- React - BrowserRouter
- React - DOM
- React - Carousel
- React - Icons
- React - Form Components
- React - Reference API
- React Useful Resources
- React - Quick Guide
- React - Cheatsheet
- React - Axios CheatSheet
- React - Useful Resources
- React - Discussion
React - createContext() function
CreateContext is a React function that allows us to create a context for components. This function provides or receives data without having to manually send props to every level of the component tree. Context is most important when data needs to be shared throughout many components in our application.
Syntax
const MyContext = createContext(defaultVal)
Parameters
defaultVal − The defaultVal is the value we want the context to have when there is no matching context provider in the tree above the component that reads context. If we don't have a logical default value, leave it null.
Return Value
The createContext() function returns a context object. This object has two components: a Provider and a Consumer. The Provider lets components share the data, and the Consumer lets components access that shared data.
In simple terms, createContext is like creating a special room where components can put information they want to share, and other components can pick it up without a lot of hassle. It makes sharing data in a React app more organized and less complicated.
Example − Switch Between Languages
Context in React allows components to share data without passing it through props. Here's how you can create and use context with a simple example −
Create a context − In the below code we have created a LanguageContext with a default value of 'English'.
import { createContext } from 'react';
const LanguageContext = createContext('English');
Use context in components − In the below code, the LanguageContext can now be accessed by the Greeting component without receiving it as a prop.
import React, { useContext } from 'react';

function Greeting() {
   const language = useContext(LanguageContext);
   return <p>{`Hello, ${language}!`}</p>;
}
In a higher-level component, include the following context values −
App.js
In the App component, we have used LanguageContext.Provider to provide the context value, in our case it is the 'language'. This context will be passed to the Greeting component and any other components contained within it. They will automatically update when the language changes.
import React, { useState } from 'react';

function App() {
   const [language, setLanguage] = useState('English');
   return (
      <LanguageContext.Provider value={language}>
      <Greeting />
      <button onClick={() => setLanguage('Hindi')}>Switch to Hindi</button>
      </LanguageContext.Provider>
   );
}

export default App;
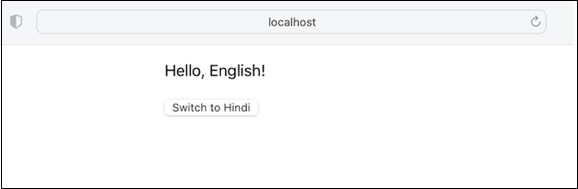
For example, if we click the "Switch to Hindi" option, the Greeting component will change to say "Hello, Hindi!"
Complete code
In this way, Context provides a clean and efficient way to communicate data in our React application without having to manually pass it down through each level of the component tree.
App.js
import React, { createContext, useContext, useState } from 'react';

// Create a LanguageContext
const LanguageContext = createContext('English');

// Create a Greeting component
function Greeting() {
   const language = useContext(LanguageContext);
   return <p>{`Hello, ${language}!`}</p>;
}

// Create the App component
function App() {
   const [language, setLanguage] = useState('English');
   return (
      <div style={{marginLeft: '500px'}}>
      <LanguageContext.Provider value={language}>
         <Greeting />
         <button onClick={() => setLanguage('Hindi')}>Switch to Hindi</button>
      </LanguageContext.Provider>
      </div>
   );
}

export default App;
Output
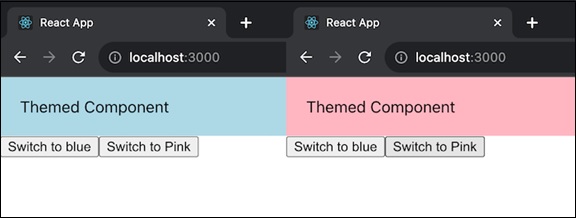
Example − Change Background Color App
This React app shows the use of the createContext, useContext, and useState hooks to create a simple theming functionality in which the background color of a component changes based on the selected color theme. The code for this app is given below −
ColorApp.js
import React, { createContext, useContext, useState } from 'react';

// Create a ColorContext
const ColorContext = createContext('lightblue');
// Create a ThemedComponent component
function ThemedComponent() {
   const color = useContext(ColorContext);
   return <div style={{ backgroundColor: color, padding: '20px' }}>Themed
   Component</div>;
}

// Create the ColorApp component
function ColorApp() {
   const [color, setColor] = useState('lightblue');
   return (
      <div>
         <ColorContext.Provider value={color}>
            <ThemedComponent />
            <button onClick={() => setColor('lightblue')}>Switch to blue</button>
            <button onClick={() => setColor('lightpink')}>Switch to Pink</button>
         </ColorContext.Provider>
      </div>
   );
}
export default ColorApp;
Output
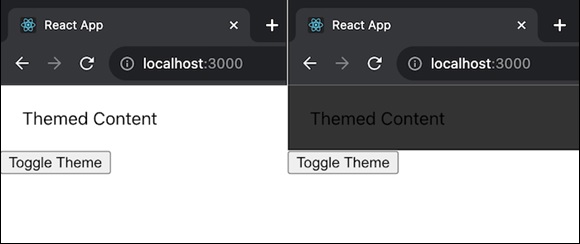
Example − Theme Switcher App
This React app shows the use of the createContext, useContext, and useState hooks to implement theme-switching functionality. The background color of a component changes between light and dark themes based on a users interaction with a button. The code is given below for this app −
ThemeSwitcherApp.js
import React, { createContext, useContext, useState } from 'react';

// Create a ThemeContext
const ThemeContext = createContext('light');

// Create a ThemedContent component
function ThemedContent() {
   const theme = useContext(ThemeContext);
   return <div style={{ background: theme === 'light' ? '#fff' : '#333', padding: '20px' }}>Themed Content</div>;
}

// Create the ThemeSwitcherApp component
function ThemeSwitcherApp() {
   const [theme, setTheme] = useState('light');
   return (
      <div>
         <ThemeContext.Provider value={theme}>
         <ThemedContent />
         <button onClick={() => setTheme(theme === 'light' ? 'dark' : 'light')}>Toggle Theme</button>
         </ThemeContext.Provider>
      </div>
   );
}

export default ThemeSwitcherApp;
Output
Summary
In this tutorial, we learned about the React function createContext, which makes it simple to create a context for components. The primary goal of createContext is to allow components to share or receive data without manually passing props through every level of the component tree. This is particularly helpful when data has to be exchanged throughout multiple components of an application.