- PySimpleGUI - Home
- PySimpleGUI - Introduction
- PySimpleGUI - Environment Setup
- PySimpleGUI - Hello World
- PySimpleGUI - Popup Windows
- PySimpleGUI - Window Class
- PySimpleGUI - Element Class
- PySimpleGUI - Events
- PySimpleGUI - Menubar
- PySimpleGUI - Matplotlib Integration
- PySimpleGUI - Working with PIL
- PySimpleGUI - Debugger
- PySimpleGUI - Settings
- PySimpleGUI Useful Resources
- PySimpleGUI - Quick Guide
- PySimpleGUI - Useful Resources
- PySimpleGUI - Discussion
PySimpleGUI - Button Element
Almost every GUI window will have at least one button. When a button element is clicked, it initiates a certain action. PySimpleGUI has some button types with predefined caption. They are defined to perform a specific task. Ohers with a user defined caption are capable of doing any required task.
The buttons with predefined caption have a shortcut name. So that a button with OK as a caption can be created in two ways −
>>> b1=psg.Button("OK")
# OR
>>> b1=psg.OK()
Other such predefined captions are −
OK
Ok
Submit
Cancel
Yes
No
Exit
Quit
Help
Save
SaveAs
Open
In PySimpleGUI, the button event is automatically enabled by default. When clicked, these predefined captions become the name of the event generated.
There are some chooser buttons in PysimpleGUI. When clicked these buttons open a dialog box to let the user choose from it.
FileBrowse
FilesBrowse
FileSaveAs
FolderBrowse
CalendarButton
ColorChooserButton
These special buttons return a string representation of selected object and that value is filled in any other element (such as Input or Multiline) on the window. This element is pointed by the target property.
The value of the target property is represented using (row, col) tuple. The default target is the element in the same row and to the left of this button, represented by (ThisRow, -1) value. ThisRow means the same row, "-1" means the element to the buttons immediate left. If a value of target is set to (None, None), then the button itself will hold the information. The value can be accessed by using the button's key.
The target property can also be the key property of target element.
FileBrowse
The FileBrowse button opens a file dialog from which a single file can be selected. In the following code, the path string of the selected file is displayed in the target Input bow in the same row.
import PySimpleGUI as psg
layout = [
   [psg.Text('Select a file',font=('Arial Bold', 20), expand_x=True, justification='center')],
   [psg.Input(enable_events=True, key='-IN-',font=('Arial Bold', 12),expand_x=True), psg.FileBrowse()]
]
window = psg.Window('FileChooser Demo', layout,
size=(715,100))
while True:
   event, values = window.read()
   if event == psg.WIN_CLOSED or event == 'Exit':
      break
window.close()
This code renders the following window −

Click on the Browse button to display the file dialog −
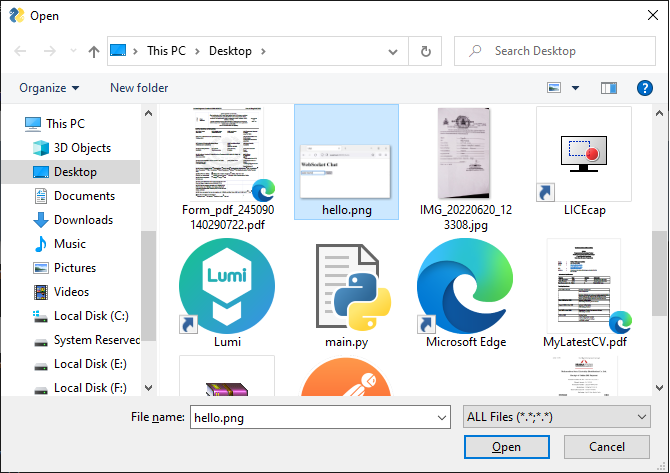
The selected file name along with its path is displayed in the Input box.

FilesBrowse
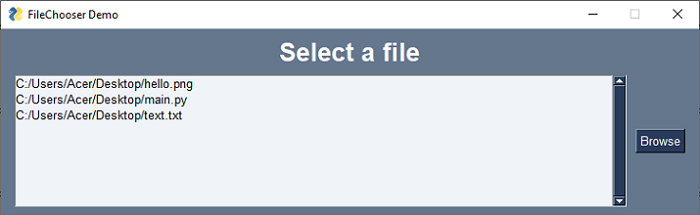
This element allows the user to select multiple files. The return string is the concatenation of files, separated by ";" character. We shall populate a list box with the selected files by the following code.
import PySimpleGUI as psg
layout = [[psg.Text('Select a file', font=('Arial Bold', 20), expand_x=True, justification='center')],
   [psg.LBox([], size=(20, 10), expand_x=True,
   expand_y=True, key='-LIST-'),
   psg.Input(visible=False, enable_events=True, key='-IN-', font=('Arial Bold', 10), expand_x=True), psg.FilesBrowse()]
 ]
window = psg.Window('FileChooser Demo', layout, size=(715, 200))
while True:
   event, values = window.read()
   if event == '-IN-':
      window['-LIST-'].Update(values['-IN-'].split(';'))
   if event == psg.WIN_CLOSED or event == 'Exit':
      break
window.close()
Here, the Input element with "-IN-" key is hidden by setting the "visible" property to False. Still, it contains the ";" separated list of selected files. The string is split at occurrence of ";" character and the list below is file with the file names.
FolderBrowse
This element works similar to the FileBrowse element. It is used to select the current folder. It may be used to set the selected folder as default for subsequent file related operations.
You can set the "initial_folder" property of this element to a folder name (along with its path) to open the folder dialog with that folder opened to start with.
import PySimpleGUI as psg
layout = [
   [psg.Text('Select a folder', font=('Arial Bold', 20),
   expand_x=True, justification='center')],
   [psg.Input(enable_events=True, key='-IN-',
   font=('Arial Bold', 12), expand_x=True),
   psg.FolderBrowse(initial_folder="c:/Python310")]
]
window = psg.Window('FolderChooser Demo', layout, size=(715,100))
while True:
   event, values = window.read()
   if event == psg.WIN_CLOSED or event == 'Exit':
      break
window.close()
A window with Browse button is displayed.

The folder dialog opens when it is clicked.
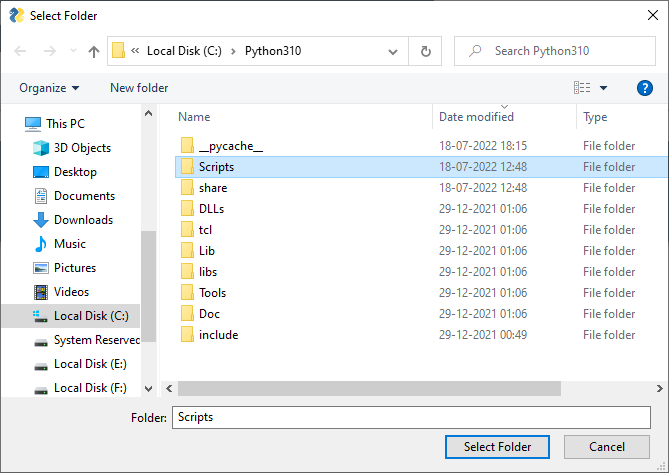
The path of the selected folder is displayed in the Input text field.

FileSaveAs
This button also opens a file dialog, but provides a save button so that information on the PySimpleGUI window can be saved by the name given by the user. The SaveAs dialog can be customized by the following properties. We can apply filter on file types to be selected, and set the initial folder for browsing action.
| Sr.No. | Property & Description |
|---|---|
| 1 | file_types Default value = (("ALL Files", "*.* *"),) |
| 2 | default_extension If no extension entered by user, add this to filename |
| 3 | initial_folder Starting path for folders and files |
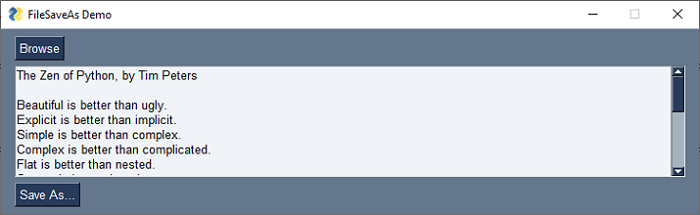
In the following example, a FileBrowse button allows you to read the contents of a file and display in a Multiline text box. Click on the SaveAS button to save the displayed text as a new file name.
import PySimpleGUI as psg
t1 = psg.Input(visible=False, enable_events=True, key='-T1-', font=('Arial Bold', 10), expand_x=True)
t2 = psg.Input(visible=False, enable_events=True, key='-T2-', font=('Arial Bold', 10), expand_x=True)
t3 = psg.Multiline("", enable_events=True, key='-INPUT-',
 expand_x=True, expand_y=True, justification='left')
layout = [[t1, psg.FilesBrowse()], [t3], [t2, psg.FileSaveAs()]]
window = psg.Window('FileSaveAs Demo', layout, size=(715, 200))
while True:
   event, values = window.read()
   if event == '-T1-':
      file = open(t1.get())
      txt = file.read()
      window['-INPUT-'].Update(value=txt)
   if event == '-T2-':
      file = open(t2.get(), "w")
      file.write(t3.get())
      file.close()
   if event == psg.WIN_CLOSED or event == 'Exit':
      break
window.close()
Select a text file. Its contents will be displayed in the textbox.
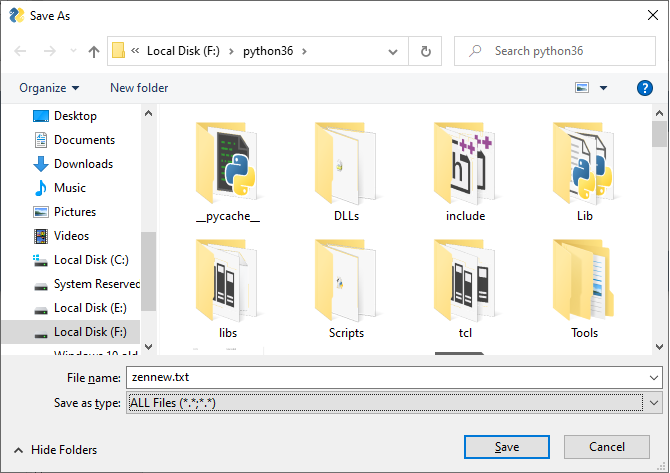
Choose the name and destination folder to save the text in a new file.
ColorChooserButton
This button brings up a color dialog. You can choose a color from the swatches, or using the slider, or setting the RGB values from the spinner. The dialog box returns the Hex string of the RGB value of the selected colour. It is displayed in the target input control, and it can be further used to change the color relate property of any element.
In the following example, the chosen color is used to update the "text_color" property of the Text element displaying Hello World string.
import PySimpleGUI as psg
layout = [[psg.Text('Hello World', font=('Arial Bold', 20),
   expand_x=True, justification='center',
   key='-T1-')],
   [psg.Input(enable_events=True, key='-IN-',
   font=('Arial Bold', 12), expand_x=True),
   psg.ColorChooserButton("Choose Color")]
 ]
window = psg.Window('Color Chooser Demo', layout, size=(715, 100))
while True:
   event, values = window.read()
   print(event, values)
   if event == '-IN-':
      window['-T1-'].update(text_color=values['-IN-'])
   if event == psg.WIN_CLOSED or event == 'Exit':
      break
window.close()
A window with ColorChooserButton with Choose Color caption appears.

Click the button to open the color dialog.
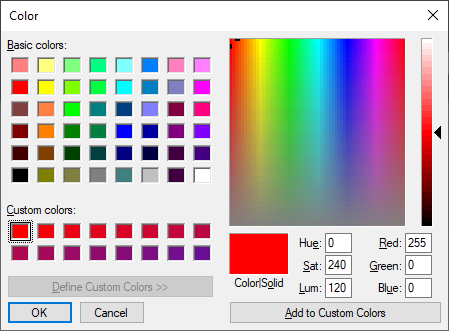
Choose the desired colour and press OK. The Hex string corresponding to it will be returned and displayed in the target Input element. The get() method of the Input element is used to fetch it and update the text_color property of Hello World text.

CalendarButton
This button shows a calendar chooser window. The target element is filled with return value as a string. Following important properties are defined in CalendarButton class −
| Sr.No. | Property & Description |
|---|---|
| 1 | button_text Text in the button |
| 2 | default_date_m_d_y Beginning date to show |
| 3 | locale Defines the locale used to get day names |
| 4 | month_names Optional list of month names to use (should be 12 items) |
| 5 | day_abbreviations Optional list of abbreviations to display as the day of week |
| 6 | title Title shown on the date chooser window |
Here is a simple example demonstrating how to use the CalendarButton −

It initially shows a Calendar Button. Click it to open the calendar dialog −
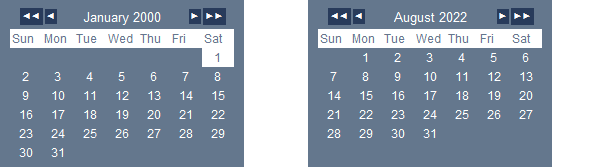
Using the selector arrows, choose the required date. It will be displayed in the window.

Image Button
Instead of a text caption, an image can be displayed on the face of a button. The button class has an "image_filename" property. Assign the name of the image to be displayed. The image should be PNG or GIF type.
The "image_filename" property of the Button object may be set to an image file that you want to display on the button.
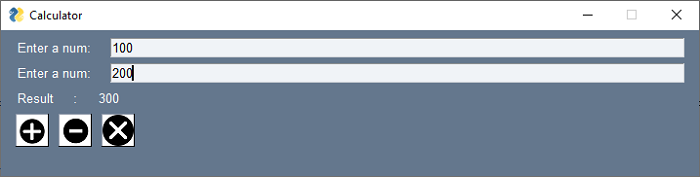
In the following example, the Add, Subtract and Exit buttons have images instead of captions. To capture their click event, their key parameter is used.
import PySimpleGUI as psg
layout = [
   [psg.Text('Enter a num: '), psg.Input(key='-FIRST-')],
   [psg.Text('Enter a num: '), psg.Input(key='-SECOND-')],
   [psg.Text('Result : '), psg.Text(key='-OUT-')],
   [psg.Button(key="Add", image_filename="plus.png"),
   psg.Button(key="Sub", image_filename="minus.png"),
   psg.Button(key="Exit", image_filename="close.png")],
]
window = psg.Window('Calculator', layout, size=(715, 200), enable_close_attempted_event=True)
while True:
   event, values = window.read()
   print(event, values)
   if event == "Add":
      result = int(values['-FIRST-']) + int(values['-SECOND-'])
   if event == "Sub":
      result = int(values['-FIRST-']) - int(values['-SECOND-'])
   window['-OUT-'].update(result)
   if event == psg.WIN_CLOSED or event == 'Exit':
      break
window.close()
Given below is the result of the above code −