
 Data Structure
 Networking
 RDBMS
RDBMS Operating System
 Java
Java MS Excel
 iOS
iOS HTML
HTML CSS
CSS Android
 Python
 C Programming
 C++
C++ C#
C# MongoDB
 MySQL
MySQL Javascript
 PHP
PHP
- Selected Reading
- UPSC IAS Exams Notes
- Developer's Best Practices
- Questions and Answers
- Effective Resume Writing
- HR Interview Questions
- Computer Glossary
- Who is Who
Installing MySQL on macOS
Let us understand how MySQL can be installed on macOS.
There is a package that is located inside a disk image (a .dmg) file which needs to be mounted on by double clicking on the icon in the Finder. The next step is to mount the image and display the contents of it.
Before installation of MySQL, the user has to ensure that all MySQL server instances have stopped running. This can be done by using the MySQL manager application, which is present on macOS server or the preference pane or by using the mysqladmin shutdown on the command line.
MySQL can be installed using the package installer. Let us see how this can be done.
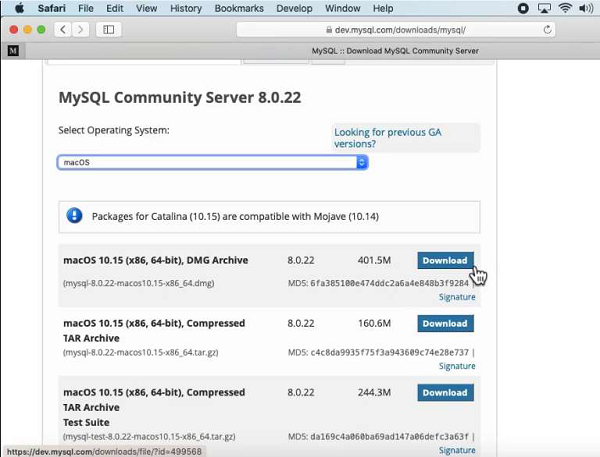
The disk image (.dmg) file (whose community version is also available) needs to be downloaded. This would contain the MySQL package installer. Refer the official website as in the below screenshot −
The MySQL installer package downloaded above and now present on the disk needs to be double−clicked.
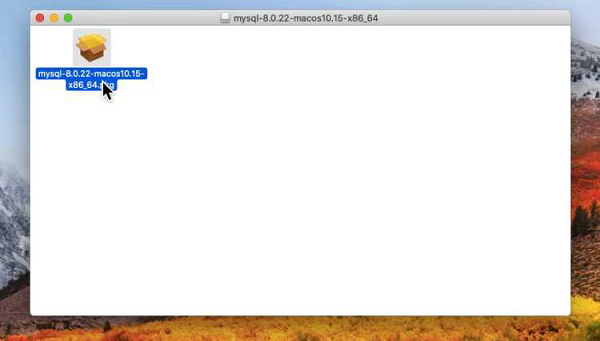
It is given a name based on the version of MySQL that has been downloaded. If the MySQL server version is 8.0.22, then the name would be mysql-8.0.22-osx-10.13-x86_64.pkg.
The initial wizard introduction screen is used to reference the MySQL server version which needs to be installed.
Click on ‘Continue’ to begin the installation of the package.
The MySQL community edition also shows a copy of the relevant GNU General Public License.
Click on ‘Continue’ and then ‘Agree’ so as to continue.
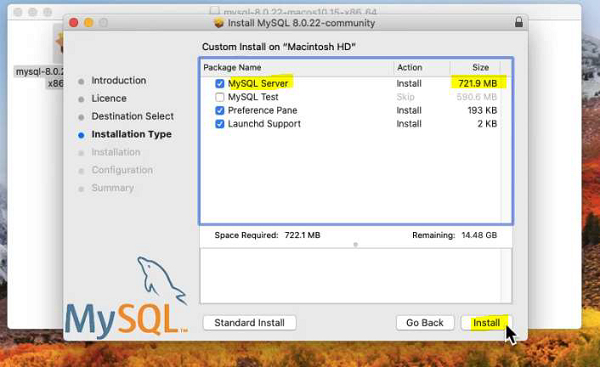
From the page on ‘Installation Type’, the user can either click on ‘Install’ to execute the installation wizard using all the defaults, or click on ‘Customize’ to alter the specific components that needs to be installed (such as MySQL server, MySQL Test, Preference Pane, Launchd Support −− all but MySQL Test are enabled by default).
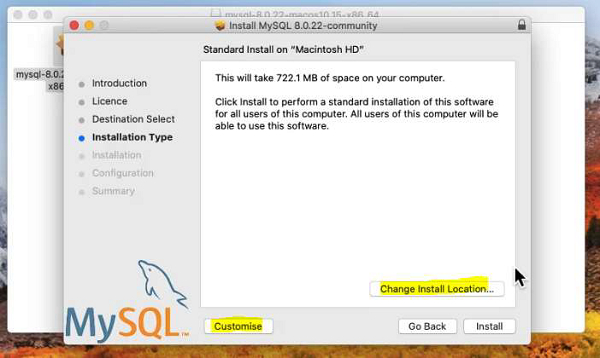
The ‘Change Install Location’ option is available, but the installation location cannot be changed.
The ‘Install’ has to be clicked on to install MySQL Server.
The installation process ends here if a current MySQL Server installation is being upgraded, otherwise the wizard's additional configuration steps for the new MySQL Server installation need to be followed.
Once MySQL Server has been successfully installed, the configuration steps need to be completed by choosing the default encryption type for passwords, as well as enable or disable the MySQL server at startup.
The default MySQL 8.0 password mechanism uses caching_sha2_password (Strong).
This step also allows the user to change it to mysql_native_password (Legacy).
When the legacy password mechanism is chosen, it alters the generated launchd file to set −−default_authentication_plugin=mysql_native_password under ProgramArguments.
Choosing strong password encryption woudln’t set −−default_authentication_plugin since the default MySQL Server value is used, that is caching_sha2_password.
A password is defined for the root user, and toggle to know whether MySQL Server should start after the configuration step is complete or not.
Summary is the final step which references a successful and complete MySQL Server installation. The wizard needs to be closed.
MySQL server is finally installed.
If the user chooses to not start MySQL during startup, then either launchctl from the command line should be used or start MySQL by clicking "Start" with the help of the MySQL preference pane.
When the package installer is used to complete the installation, the files are installed into a directory in /usr/local which matches the name of the installation version and platform.
Let us take an example to understand this: The installer file is mysql−8.0.25−osx10.15−x86_64.dmg which installs MySQL into /usr/local/mysql−8.0.25−osx10.15−x86_64/ with a symlink to /usr/local/mysql. The macOS installation process doesn’t create nor install a sample my.cnf MySQL configuration file.

610 Views
