
 Data Structure
 Networking
 RDBMS
RDBMS Operating System
 Java
Java MS Excel
 iOS
iOS HTML
HTML CSS
CSS Android
 Python
 C Programming
 C++
C++ C#
C# MongoDB
 MySQL
MySQL Javascript
 PHP
PHP
- Selected Reading
- UPSC IAS Exams Notes
- Developer's Best Practices
- Questions and Answers
- Effective Resume Writing
- HR Interview Questions
- Computer Glossary
- Who is Who
How to normalize an image in OpenCV Python?
We use the function cv2.normalize() to normalize an image in OpenCV. This function accepts the parameters- src, dst, alpha, beta, norm_type, dtype and mask. src and dst are input image and output of the same size as input, alpha is lower norm value for range normalization, beta is upper norm value for range normalization, norm_type is normalization type, dtype is data type of output and mask is optional operation mask.
Steps
To normalize an image, we could follow the steps given below ?
Import the required library. In all the following examples, the required Python library is OpenCV. Make sure you have already installed it.
Read the input image as a grayscale image using cv2.imread() method. Specify the full path of the image with the image type (i.e. png or jpg).
Apply cv2.normalize() function on the input image img. Pass the parameters src, dst, alpha, beta, norm_type, dtype and mask.
img_normalized = cv2.normalize(img, None, 0, 1.0, cv2.NORM_MINMAX, dtype=cv2.CV_32F)
Display the normalized output image.
Print the image data before and after Normalize. Try to find the difference between these two image data.
Let's understand the question with the help of some Python examples.
We will use this image as the Input File in the following examples ?

Example
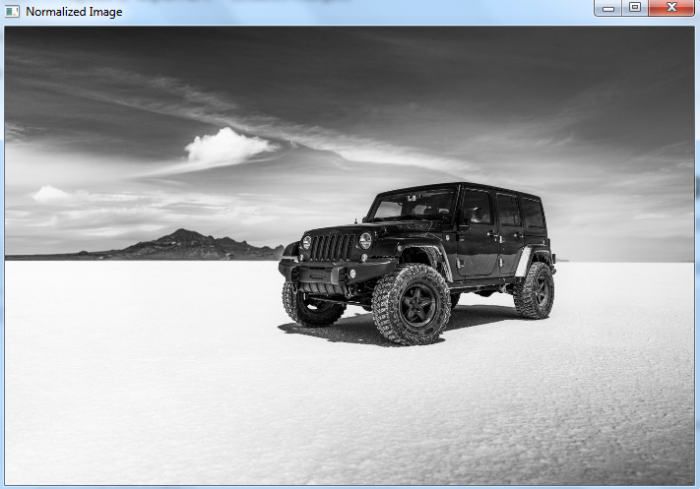
In this Python program, we normalize a color input image using min-max norm. The image pixel values are normalized to a range [0,1].
# import required library
import cv2

# read the input image in grayscale
img = cv2.imread('jeep.jpg',0)
print("Image data before Normalize:\n", img)

# Normalize the image
img_normalized = cv2.normalize(img, None, 0, 1.0,
cv2.NORM_MINMAX, dtype=cv2.CV_32F)

# visualize the normalized image
cv2.imshow('Normalized Image', img_normalized)
cv2.waitKey(0)
cv2.destroyAllWindows()
print("Image data after Normalize:\n", img_normalized)
Output
When you run the above program, it will produce the following output ?
Image data before Normalize:
[[ 37 37 37 ... 55 55 55]
[ 39 39 39 ... 57 56 56]
[ 39 39 39 ... 56 56 56]
...
[243 244 244 ... 82 85 86]
[242 245 245 ... 83 91 91]
[242 245 245 ... 86 94 93]]
Image data after Normalize:
[[0.14509805 0.14509805 0.14509805 ... 0.21568629 0.21568629 0.21568629]
[0.15294118 0.15294118 0.15294118 ... 0.22352943 0.21960786 0.21960786]
[0.15294118 0.15294118 0.15294118 ... 0.21960786 0.21960786 0.21960786]
...
[0.95294124 0.9568628 0.9568628 ... 0.32156864 0.33333334 0.3372549 ]
[0.9490197 0.9607844 0.9607844 ... 0.3254902 0.35686275 0.35686275]
[0.9490197 0.9607844 0.9607844 ... 0.3372549 0.36862746 0.3647059 ]]
And we get the following window showing the normalized image ?
Example
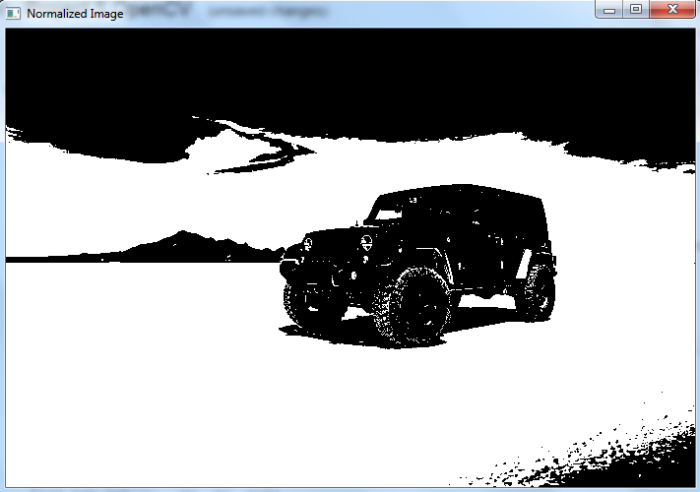
In this Python program, we normalize a binary input image using min-max norm. The image pixel values after normalization are either 0 or 1.
# import required library
import cv2

# read the input image as grayscale image
img = cv2.imread('jeep.jpg',0)
print("Image data before Normalize:\n", img)

# Apply threshold to create a binary image
ret,thresh = cv2.threshold(img,140,255,cv2.THRESH_BINARY)
print("Image data after Thresholding:\n", thresh)

# normalize the binary image
img_normalized = cv2.normalize(thresh, None, 0, 1.0,
cv2.NORM_MINMAX, dtype=cv2.CV_32F)

# visualize the normalized image
cv2.imshow('Normalized Image', img_normalized)
cv2.waitKey(0)
cv2.destroyAllWindows()
print("Image data after Normalize:\n", img_normalized)
Output
When you run the above Python program, it will produce the following output ?
Image data before Normalize:
[[ 37 37 37 ... 55 55 55]
[ 39 39 39 ... 57 56 56]
[ 39 39 39 ... 56 56 56]
...
[243 244 244 ... 82 85 86]
[242 245 245 ... 83 91 91]
[242 245 245 ... 86 94 93]]
Image data after Thresholding:
[[ 0 0 0 ... 0 0 0]
[ 0 0 0 ... 0 0 0]
[ 0 0 0 ... 0 0 0]
...
[255 255 255 ... 0 0 0]
[255 255 255 ... 0 0 0]
[255 255 255 ... 0 0 0]]
Image data after Normalize:
[[0. 0. 0. ... 0. 0. 0.]
[0. 0. 0. ... 0. 0. 0.]
[0. 0. 0. ... 0. 0. 0.]
...
[1. 1. 1. ... 0. 0. 0.]
[1. 1. 1. ... 0. 0. 0.]
[1. 1. 1. ... 0. 0. 0.]]
And we get the following window showing the normalized binary image ?

54K+ Views
