- Symfony - Home
- Symfony - Introduction
- Symfony - Installation
- Symfony - Architecture
- Symfony - Components
- Symfony - Service Container
- Symfony - Events & EventListener
- Symfony - Expression
- Symfony - Bundles
- Creating a Simple Web Application
- Symfony - Controllers
- Symfony - Routing
- Symfony - View Engine
- Symfony - Doctrine ORM
- Symfony - Forms
- Symfony - Validation
- Symfony - File Uploading
- Symfony - Ajax Control
- Cookies & Session Management
- Symfony - Internationalization
- Symfony - Logging
- Symfony - Email Management
- Symfony - Unit Testing
- Symfony - Advanced Concepts
- Symfony - REST Edition
- Symfony - CMF Edition
- Complete Working Example
Symfony - Installation
This chapter explains how to install Symfony framework on your machine. Symfony framework installation is very simple and easy. You have two methods to create applications in Symfony framework. First method is using Symfony Installer, an application to create a project in Symfony framework. Second method is composer-based installation. Lets go through each of the methods one by one in detail in the following sections.
System Requirements
Before moving to installation, you require the following system requirements.
- Web server (Any one of the following)
- WAMP (Windows)
- LAMP (Linux)
- XAMP (Multi-platform)
- MAMP (Macintosh)
- Nginx (Multi-platform)
- Microsoft IIS (Windows)
- PHP built-in development web server (Multi-platform)
- Operating System: Cross-platform
- Browser Support: IE (Internet Explorer 8+), Firefox, Google Chrome, Safari, Opera
- PHP Compatibility: PHP 5.4 or later. To get the maximum benefit, use the latest version.
We will use PHP built-in development web server for this tutorial.
Symfony Installer
Symfony Installer is used to create web applications in Symfony framework. Now, lets configure the Symfony installer using the following command.
$ sudo mkdir -p /usr/local/bin
$ sudo curl -LsS https://symfony.com/installer -o /usr/local/bin/symfony
$ sudo chmod a+x /usr/local/bin/symfony
Now, you have installed Symfony installer on your machine.
Create Your First Symfony Application
Following syntax is used to create a Symfony application in the latest version.
Syntax
symfony new app_name
Here, app_name is your new application name. You can specify any name you want.
Example
symfony new HelloWorld
After executing the above command, you will see the following response.
Downloading Symfony...

0 B/5.5 MiB


Preparing project...
  Symfony 3.2.7 was successfully installed. Now you can:
   * Change your current directory to /Users/../workspace/firstapp
   * Configure your application in app/config/parameters.yml file.
   * Run your application:
      1. Execute the php bin/console server:run command.
      2. Browse to the http://localhost:8000 URL.
   * Read the documentation at http://symfony.com/doc
This command creates a new directory called firstapp/ that contains an empty project of Symfony framework latest version.
Install Specific Version
If you need to install a specific Symfony version, use the following command.
symfony new app_name 2.8
symfony new app_name 3.1
Composer-based Installation
You can create Symfony applications using the Composer. Hopefully, you have installed the composer on your machine. If the composer is not installed, download and install it.
The following command is used to create a project using the composer.
$ composer create-project symfony/framework-standard-edition app_name
If you need to specify a specific version, you can specify in the above command.
Running the Application
Move to the project directory and run the application using the following command.
cd HelloWorld
php bin/console server:run
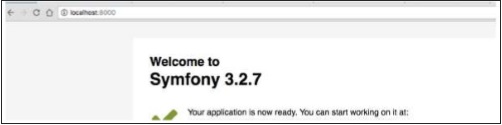
After executing the above command, open your browser and request the url http://localhost:8000/. It produces the following result.
Result